Dump and Go Freezer Meal: Meatball Casserole

It’s time for meal #4 for our Fill your Freezer in 7 days blog series!

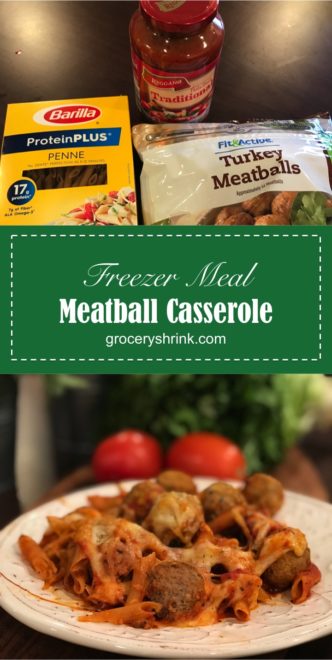
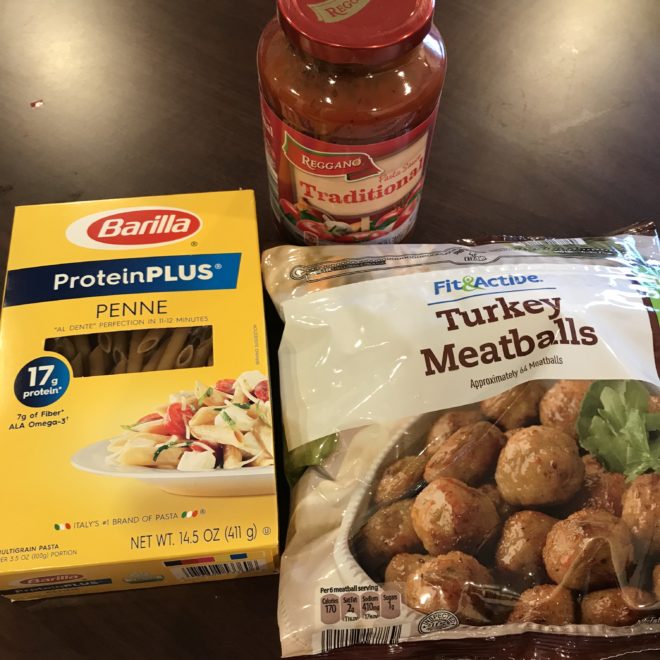
This comforting recipe can become fitness friendly with the use of Barilla Protein Plus Pasta.  It’s made with lentils, chick-peas, flax and other protein rich legumes.  Our local Wal-mart and Target both carry it and occasionally Target has coupons plus sales for great stock up prices.  If your local store doesn’t have it, Prime Pantry carries it for about the same price.

Any pasta will work in this dish, even gluten free pasta, so pick what works best for your needs.

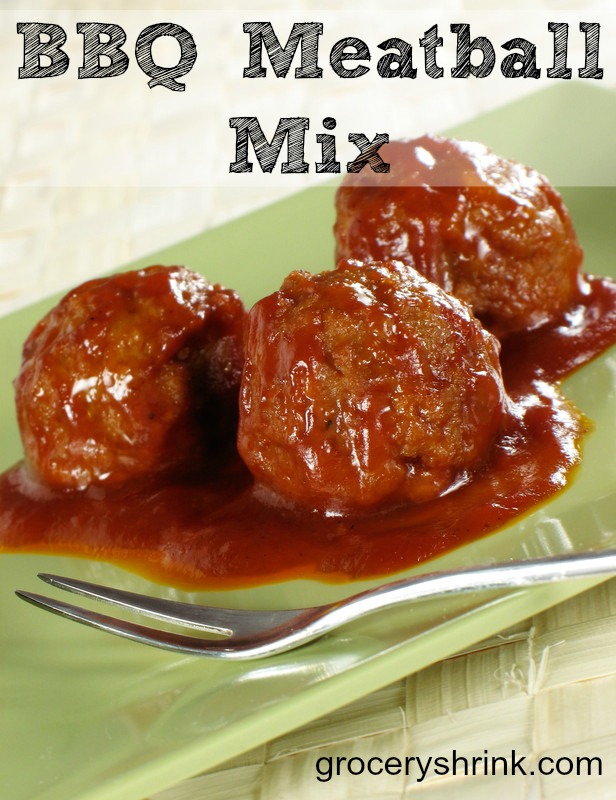
Starting with frozen meatballs makes this super fast to throw together, but I’ll include a recipe for homemade meatballs at the end, just in case you prefer to do it yourself.
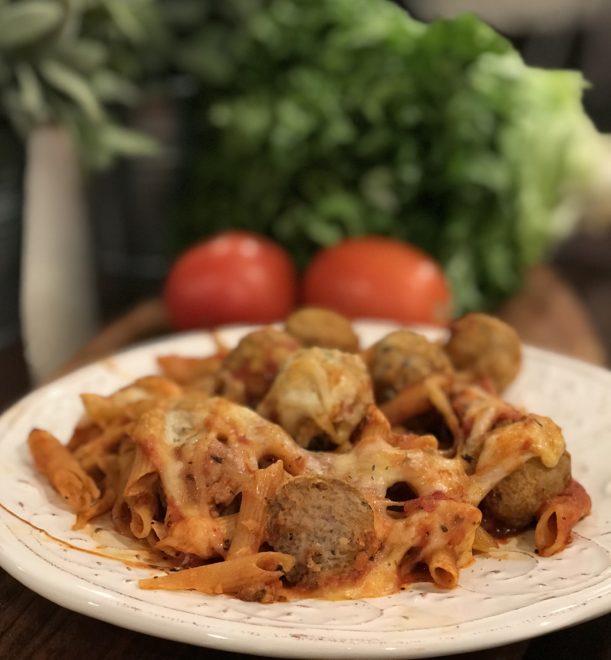
Meatball Casserole

Serves 8

1 jar, 24 oz, marinara sauce

3 cups water (just fill the empty sauce jar up and shake it up)

32 oz Turkey meatballs

14 oz bow tie or penne pasta

2 cups Mozzarella Cheese

For freezer cooking, pour the marinara, water and meatballs into a gallon baggie.  Press out air and seal.  Freeze.

For Oven Baking:  Thaw bag, pour into a baking dish with dry pasta and stir to combine.  Cover and bake at 350 degrees for 30 minutes. Top with cheese and bake uncovered for 15 minutes longer.

For Slow Cooker: Thaw bag and pour into a 4-5 quart slow cooker. Top with cheese and cook on low for 3 hours.

For Pressure Cooker: Thaw bag and pour into your instant pot.  Cook at high pressure for 5 minutes. Use quick release on the pressure.  Top with cheese and let stand a few minutes until it melts.

For Skillet: Thaw bag, Pour into a skillet.  Bring to a simmer, then cover with a lid and cook for 15 minutes.  Top with cheese and stick under the broiler until golden brown.

Homemade Meatballs

2 lbs Ground Turkey (or Beef, chicken, pork, venison, etc.)

2 eggs

1 cup Milk (Use Unsweetened Almond Milk of Dairy Free)

1 cup Italian style Bread Crumbs (Gluten Free: use Almond Meal or Gluten Free bread crumbs plus 1 tsp Italian Seasoning.)

1/4 cup parmesan cheese (Skip if Dairy Free)

2 Tbs Dried onion flakes

1 tsp salt

1/2 tsp pepper

Use a mixer to combine everything together.  Roll into 1 inch balls and place on a baking sheet with a rim.  Bake at 400 degrees for 15 minutes.


Dump and Go Slow Cooker or Pressure Cooker Quinoa Enchilada Casserole

It’s recipe 3 for our fill your freezer in 7 days challenge.  I hope beyond just giving you a few recipes, that I spark your imagination about how to adapt some of your favorite recipes for the freezer or even create some new flavors.

If you pre-dice your chicken, or used browned ground meat instead, this dish can be made in a skillet in just 20 minutes.  I love how in the slow cooker, it’s hands off until the end.  It’s truly a fix it and forget it situation.

This recipe is both fitness and family friendly.  To add calories and filling power, my growing kids serve theirs over a plate of tortilla chips, then top with sour cream and extra cheese.  I skip that part, then we all top it with shredded lettuce and chopped fresh tomatoes and salsa.

Be sure to rinse your quinoa before throwing it into your mix.  It removes the saponins that can taste bitter.  Since the grains are so small, I line my colander with a tea towel.

Dump and Go Quinoa Enchilada Casserole

1 lb boneless Chicken Breasts (If you bought it frozen, keep it frozen.  Thawing and refreezing raw meats changes the texture in an unappetizing way.)

1 Tbs taco seasoning mix

2 cans black beans, 15 oz each, drained and rinsed

1 chopped onion

1 cup dry quinoa, rinsed

1 can red enchilada sauce, 20 oz

1/2 cup water

Place all ingredients in a gallon baggie and freeze.  To cook, thaw just enough to be able to get everything out of the bag.  Pour into a slow cooker and cook on high for 3-4 hours, or on low for 6 hours. Shred the chicken with two forks and stir into the dish.  Top with shredded cheese, then replace the lid for a few minutes to allow it to melt.   Serve with a toppings bar.

To make in the pressure cooker, follow the directions above, except cook at high pressure for 10 minutes, following the manufacturers directions for pressure release before opening the lid.

Toppings suggestion:  Tortilla chips, shredded lettuce, fresh diced tomatoes, green onion, cilantro, sour cream, cheese, salsa, diced olives.

The leftovers reheat pack well in a thermos for hot lunch on the go.

Nutrition facts:  1/6 of the recipe without cheese or toppings yields: 381 Calories; 7g fat; 37g net carbs; 30g protein


Lime Chicken Tacos: A Freezer Meal That’s Slow Cooker and Pressure Cooker Friendly


Any meat that has to marinade makes a great freezer meal. Just don’t thaw it and refreeze it.  If your meat is already frozen, you can pour the marinade on it and put it back in the freezer.

Therea re two ways to make this into a freezer meal: 1. You can cook the meat through and then freeze it shredded and ready to serve, which saves time at the dinner time.  2. Or freezing it uncooked and in the marinade makes the freezer day prep super fast and easy. If you remember to pop it in the slow cooker or have an instant pot for faster cooking, this is a great option.

You’ll need 1 gallon freezer bag for this dish and then just your favorite taco toppings at time of serving.

I love how this dish is easily adaptable for all allergy and fitness needs.  For example, gluten free friends can use corn shells, or make a taco salad over corn chips. Keto friends can skip the honey and the shells or chips and make a big taco salad with full fat sour cream and cheese.  Dairy free friends can use avocado instead of dairy toppings.

Lime Chicken Tacos

Serves 4

1.5 lbs chicken breasts (These can be the ugly ones that are too thick or mis-shaped to grill)

1 Lime, zested and juiced

1 Tbs Olive Oil

2 Tbs Apple Cider Vinegar

1 tsp Honey

1 can, 4 oz, Green Chilies (If doubling the recipe, no need to double the chilies.  It saves money to use just 1 can while still giving great flavor.)

2 tsp Ground Cumin

2 tsp Chili Powder

1 tsp Minced garlic

A few dashes of cayenne if you like it hot

Combine everything in a Gallon size Freezer Baggie, press out the air.  Seal, Label and freeze.

To slow cook, place contents of the bag in a slow cooker and cook on high for 3 hours or on low for 6 hours. Shred with two forks and stir to coat in sauce.  Serve with a slotted spoon or tongs with your favorite taco toppings.

To Pressure cook, place contents of the bag in a pressure cooker. Add 1/4 c of water and cook at high pressure for 10 minutes.  Wait until pressure is reduced, or use quick release to bring down the pressure and remove the lid safely.  Shred chicken and stir into sauce. Serve with a slotted spoon or tongs with your favorite taco toppings.

Suggested Condiments: Tortillas 6″ or Tortilla chips, Shredded Lettuce, Diced Tomatoes, Diced Red Onion, Shredded Cheese, Sour Cream, Salsa, Guacamole

This is recipe #2 in our series, Fill your Freezer in 7 Days. Find more here.

Butternut Squash Chili

I love Chili and all things beans, but sometimes they don’t love me.  And beans never love my teenage son.

With butternut squash we can have a nice thick beanless chili without spending a fortune on extra meat. Originally I planned to cut the squash into bite sized squares for a nice texture similar to beans.  Then I remembered my kids aren’t big fans of squash…yet.   I have all sorts of secret plans to turn them into squash fans, mmmmmwwwwahahahahahaha.  It’s a work in progress.

I sauteed the squash in a skillet with a little coconut oil and chopped onion, then pureed it in a blender with a can of broth.  When I stirred it into the crushed tomatoes, the squash and onion disappeared.  Chili powder’s dark color made the camouflage complete.  You could totally save a step and use canned pumpkin puree instead.

Butternut quash’s mildly sweet flavor complements the spicy seasonings perfectly.  The kids gobbled this up.  It’s a hearty, comforting autumn meal that is lower carb and won’t cause bloating or other gastric distress.

Butternut Chili Con Carne

1 medium butternut squash, peeled and cubed

1 onion, diced

1 can, 15 oz beef or chicken broth  (or 2 cups homemade, cool in temperature)

2 lbs ground beef or turkey, browned and drained

1 can, 28 oz crushed tomatoes

3 Tbs chili powder

1 Tbs cumin

1 tsp salt

1 tsp garlic powder

1/2 tsp black pepper

Saute squash with onion in a little bit of coconut oil until fork tender, about 15 minutes.  Add to a blender or food processor with broth.  Puree.  (You can leave it whole if you like the texture.)  Combine everything in a stock pot and warm through.  The longer it simmers the better the flavors will meld.  This can be stirred together in the morning and held in a slow cooker on low until dinner.

Topping ideas: shredded cheese, sour cream, chopped chives, chopped tomatoes, olives, crushed tortilla chips, oyster crackers….

1/8th of the recipe prepared with 93% lean ground beef = 318 calories, 9g fat, 19 net carbs, and 34 grams of protein

This is day 11 of 31 Days of Pumpkin Recipes

1 Pumpkin spice mix

2 Homemade pumpkin puree

3 Pumpkin Sugar Cookies

4 Pumpkin Dinner Rolls

5 Pumpkin Cinnamon Rolls

6 Pumpkin Bagels

7 Butternut Chicken Stew

8 Healthy Pumpkin Pecan Scones

9 Pumpkin Waffles

10 Pumpkin Snickerdoodles

11 Butternut Squash Chili

12 Pumpkin French Toast Casserole

13 Pumpkin Muffin/Drop Cookie Mix

14 Easy Pumpkin Cake

15 Pumpkin Dump Cake

16 Baked Pumpkin Oatmeal

17 Pumpkin Mousse

18 Pumpkin Cheesecake

19 Pumpkin Latte

20 Pumpkin Pie Smoothie

21 Pumpkin Breakfast Cookies

22 Pumpkin Biscuits

23 Maple Pumpkin Butter

24 Stuffed Sugar Baby Pumpkins

25 Pumpkin Pancakes

26 Pumpkin English Muffins

27 Roasted Pumpkin Seeds

28 Baked Pumpkin Doughnuts

29 Pumpkin Biscotti

30 Pumpkin Caramel Monkey Bread

31 Impossible Pumpkin Pie

Homemade Lunchmeat: Pros and Cons

My colleague, Tiffany, at Don’t Waste the Crumbs, recently wrote about making DIY lunchmeat. It sounded pretty easy, so I gave it a try.  Here’s my experience:

Aldi Black Forest Ham

We usually buy Black Forest Deli Ham from Aldi for $3.49 a lb.  The kids love it and I buy it even though it’s “coated with Caramel Color.”  That makes me cringe a little every time I put it in my cart.  What is caramel color anyway?  I finally decided to put aside my fears and just look it up. According to this article, it’s basically toasted carbohydrates and is not any more harmful than caramel sugar.  The problem comes if you are allergic to the carbohydrate base which might contain wheat.  In this case, Aldi says it’s gluten free. We’ve never had a reaction, but we aren’t sensitive to any carbohydrates.

Black Forest Ham Aldi

Sodium Nitrite is the other ingredient that makes me cringe. It is added as a preservative to prevent food poisoning.  You will die much faster from botulism than you will from nitrite poisoning, but it has been shown to contribute to cancer in large doses. The first Trim Healthy Mama book said that while it’s nice to avoid nitrates there are enough antioxidants in one orange to counter any harmful affects from an average serving of preserved meat.  My kids won’t eat oranges :(. Sodium phosphate is a non-toxic salt used as a thickening agent.   Basically you can google any ingredient that you aren’t sure about and decide for yourself if it’s something you are ok with.

Sliced Turkey breast

I started my DIY lunch meat by buying a Kirkland frozen turkey breast from Aldi.  It was $8.99 for a 48 oz package.  At $3 a lb, it would save me $1.50 over buying 3 lbs of lunch meat, but there’s a catch.  Inside the package was a bag of “gravy” weighing 10.6 ounces, leaving me with only 37.4 oz of meat. Uncooked I’m now paying $3.84 per pound.

Sliced Turkey Breast 2

I rubbed the meat all over with seasoned salt and put it in the slow cooker.  I think I overcooked it a tad.  I didn’t really keep track of the time and the juices were caramlized by the time I returned.  It smelled heavenly.  I let it cool on the counter a bit before wrapping and chilling overnight in the refrigerator.  When it was completely cold I weighed it before slicing it by hand.  Trying to get the slices as thin as deli meat.  I wasn’t very good at it.

The finally cooked weight of the meat was 1.6 lbs.  $5.61 per pound.  This is 160% more than just buying lunchmeat.

attempted mandolin

I tried my mandolin slicer to see if it would be easier.  It made a crumbly mess.  You really need an electric knife or deli slicer if you want to automate things.

sliced turkey breast in the bag

It tasted amazing, but crumbled pretty easily.  This is probably because I overcooked it, which would have also reduced moisture content and weight a little bit.

Garlic Bread Sandwich

I had a loaf of garlic bread on hand and used it to make an open faced baked family sized sandwich.

baked garlic bread sandwich

Too bad we were out of tomatoes, that would have been really pretty.  The sandwich was delicious!  A big hit for everyone in the family.

Pros:

  • It was delicious and not that hard.
  • It may have fewer questionable ingredients (although the turkey breast was brined with a sodium solution and I forgot to check the ingredients before tossing the package to see if there were any cringe-worthy ones)

Cons:

  • It was a lot more expensive.
  • While it wasn’t that hard, it took more time than just buying lunch meat.
  • It was hard to slice as thin as deli meat
  • It crumbled easily

Would I try it again?  Probably not.  It was delicious but not budget friendly for us.  If I decide to give up lunchmeat altogether to avoid nitrites, cooking a chicken with bones and shredding the meat, would be more cost effective for us.

What do you think?  Would you try it?

Calico Bean Soup and Cornbread

Hearty bean soup is the perfect low cost dish for this spring weather that can be cloudy, drizzly and chilly in between the sunny, warm days.  It tastes so good, no one will realize how cheap it is to make. Beans are full of fiber, which is so good for you and yet can feel a little terrible at the same time if you aren’t used to it.  I have a hack for that.

calico bean soup

My dad was given this soup as a Christmas Gift from his secretary one year when I was a girl and the whole family loved the mix of flavors. My mom begged for the recipe and it has been a cherished favorite ever since.

Calico Bean Soup

3 cups of mixed beans (A 6 or 9 bean mix works great)

5 cups of water

1 Tbs dried chives

1 tsp salt

1 tsp dried savory

½ tsp cumin

1 bay leaf

½ tsp black pepper

1 can, 15 oz chopped tomatoes, undrained

The night before: Combine dry beans with 9 cups of water in a large bowl. Sit on the counter overnight. In the morning: Drain beans.  If you forget to pre-soak the beans, this recipe will still work.  Just add an extra cup of water.

Some say beans are harder to digest if you don’t presoak them.  We get gas either way.  Just being honest.  We are saved the embarrassment if we remember to take amylase enzyme before eating.  Amylase breaks down starches and helps the probiotics process the fiber. I take an enzyme blend to prevent any digestion discomfort.

Slow Cooker Method: Place drained beans in a slow cooker. Add cooking water seasonings, and tomatoes. Cook on low for 6-7 hours or on high for 3-4 hours.

Pressure Cooker Method: Place drained beans in a pressure cooker. Add cooking water seasonings, and tomatoes. Or combine ingredients in a pressure cooker and cook at high pressure for 40 minutes.

Discard bay leaf and sprinkle with dried or fresh parsley just before serving.

1/8 of the pot of soup has 122 calories; 15 net carbs, and 14g of protein

cornbread

Cornbread

This is a great all-purpose cornbread recipe and goes with a lot of different dishes.  Corn and Beans have complimentary proteins so when eaten together you get all the essential amino acids. Ground millet can be subbed for the cornmeal for those with allergies or sensitivities to corn.  It tastes very similar to the real thing.  Doubling the recipe is the perfect amount for a 9×13 pan.
1 cup cornmeal (or Masa Harina)

1 cup hard white wheat flour

1 Tbs Baking Powder

½ tsp salt

2-4 Tbs coconut sugar (brown sugar or honey) (If you are used to cake like cornbread go for the higher amount of sugar)

2 eggs

1 cup milk

¼ cup butter, melted

Preheat oven to 400 degrees. Combine dry ingredients in a bowl. Make a well in the middle of the bowl. Add eggs, butter, and milk. Stir until just combined. Pour batter into a greased 8×8 inch pan. Bake for 25 minutes or until a toothpick inserted in the middle comes out clean. Serve with butter and honey.  Makes 9 2″square servings.

A 2” inch square has 144 calories; 23 net carbs and 6g protein

BBQ Meatball Mix

I love these meatballs!  They are super easy to make, and the hardest part is getting out all the spice jars.  With this mix, that problem is solved. The meatballs make great appetizers, a hearty main dish, and yummy meatball subs. Bake these quickly in the oven, then let them simmer in sauce in your crock pot until you need them.

bbq meatball mix

Read more

Slow Cooked Beef Topped Bean Enchiladas

We had an unexpected death in the family last week. Darren’s Grandma was 92, but still living alone in her own home with her mind, sight and hearing sharp as a tack.  He lived with her during the summers after his family moved to Texas and again when he graduated from High School so he could farm. They were very close. I lived with her part of the time when I was student teaching and she taught me a lot of things about frugality, being a homemaker, wild edibles and frying mountain oysters.

Lest you think she was all sugar and spice, she was a person who told things as she saw them.  Every time she saw me she complained about my long hair, big earrings and tall heels. When I got pregnant with our 4th baby, she offered to teach me about birth control. I learned to smile and roll with it. If she didn’t care about me, she wouldn’t say a word.  It was her way of saying, “I love you.”

She had a deep faith and prayed poetically. When Darren and I had been married 2 years, her son died in a tragic car accent.  It was a serious time of grief for all of us.  She told me death was beautiful and not to be sad.  She had already buried her husband and oldest son.  She KNEW they were in the arms of Jesus.  During her service I kept hearing her voice say those words, “Death is beautiful.”  But I still miss her.

My oldest son was acting up in the car during the funeral procession to the gravesite, poking his siblings and making them scream. I told him, “Your grandmother is in a hearse 10 cars ahead of us.  Remember what we are doing here and what your frame of mind should be.”

My oldest, Heidi, chimed in, “Yeah if grandma were here right now, she’d whack you with her cane.”

He said, “If she were here right now, I wouldn’t dare.”

After the funeral Saturday we went to her house with all her children, grandchildren, great-grandchildren (28!) and a few extended family.  The church brought over the funeral meal leftovers and we ate and visited just like we would have on Christmas day.  The only thing missing was her and we all felt it. It was a lovely day until it was time to leave and I realized it was probably the last gathering like that in her home.  The last time there would be fig Newtons in the jar put there by her own hands.  The memories flooded in as tears running down my face.  My first date with Darren was there, a whole day of learning to farm. Not long after she decided Darren was taking too long and offered me her wedding ring set so we could just go get married.  She didn’t see any point of big weddings or long engagements.  If you love each other, go make a life together. What’s so hard about that?

I had plans to finish Kids and Money month strong with some posts about Kids and Christmas spending, but it was just more important to be with family.  I’ll come back and visit the topic again in a few weeks, but first I want to get some recipes out there.  Too many times I’ve searched my own site for a favorite recipe to refresh my memory on some of the details and find it wasn’t there.

This recipe is my go to when life gets really busy.  It throws together in 15 minutes and then just has to heat through in the oven.  Every ingredient is available at Aldi making a very frugal main dish. Add a tossed salad for a complete meal or make it bigger with sides of Spanish rice, corn, and fruit.  If you are gluten free, grab some gluten free tortillas.  Low carb tortillas work great here too, for a THM S Meal (You can have up to 3 Tbs of refried beans in an S setting.)  You can also assemble the whole thing in a slow cooker and cook on low for 3-4 hours.

Beef Topped Bean Enchiladas

Ingredients

  • 1 jar, 24 oz salsa
  • 1 lb ground beef or turkey
  • 1 onion, chopped
  • 1 tsp minced garlic
  • 10-8" flour tortillas
  • 1 can, 15 oz refried beans
  • 1 can, 15 oz black olives, drained
  • 2 cups shredded Cheddar, Colby, or Monterey Jack

Instructions

  1. Preheat oven to 350 degrees.
  2. Brown ground beef with onion and garlic, drain.
  3. Stir salsa into ground beef mixture. (If you have picky kids, puree the salsa in a blender first, and use onion powder instead of chopped onion.)
  4. Chop the olives and reserve 1/3 for topping.
  5. Divide refried beans, olives and 1/2 of the cheese cheese among tortillas and roll up. Place seam side down in a 9x13 casserole dish.
  6. Top with beef mixture and spread to cover the edges.
  7. Top with remaining olives and cheese.
  8. Bake for 15 minutes or until heated through.
http://www.groceryshrink.com/beef-topped-bean-enchiladas/


Homemade Beef Stew Mix

homemade beef stew mix

Beef stew is one of those dishes that is hard to mess up (if you use the right about of salt.)  Onions and garlic can give plenty of flavor on there own.  Once you taste a stew with just the right blend of herbs, it changes everything.  Read more

Classic Chili Mix

classic chili mix

Classic Chili Spice Mix

1 cup Chili Powder

1/2 cup Cumin

1/4 cup Garlic Powder

1/4 cup Minced Onion

2 Tbs Oregano

1 Tbs Sugar (or equivalent)

1 Tbs Salt

1 tsp Pepper

1/4 tsp cayenne (optional)

Use 2 Tbs of mix to season 1 lb of ground beef, 1 can of diced tomatoes with juice (or 2 cans of tomato sauce), 2 cans of pinto beans and 2 cans of kidney beans.  I don’t drain my cans.  If you prefer to drain them, add more sauce or water to make up the volume in liquid.