Why I stopped Blogging

Back in October of 2017 I went to 2 blogging conferences. One was in Ohio and the other in Texas. I was convinced that the reason why I wasn’t successful in blogging was because successful bloggers went to conferences and made connections. I hadn’t gone before because conferences are expensive and I’m terrified to travel alone. I get lost easily, am afraid of crowds, and enjoy being at home.

I thought it would help my family so I went to these conferences anyway. I met a lot of lovely people and really stretched my comfort zone. I learned a lot. Mostly what I learned is that making a full time living blogging requires more than full time hours. It requires hiring staff and creating a real company that feeds a lot more people than just us. Blogging was more than writing encouraging or educational articles. It was professional photography, script writing, filming, editing, scheduling social media posts, running chat groups, a constant presence on social media, SEO optimization, production calendars, scripts, affiliate marketing, recruiting sponsors, buying and selling advertising and a whole lot more.

I met lots of people who were successful, but they all had something in common: sacrifice. Some of them lost marriages, some of them lost themselves to drugs or alcoholism, some of them lost their kids to the world, some lost their friends. Their brand depended on Looking happy and successful on the outside while life was crumbling around all about them. They talked about the people they lost like you would talk about a cancer that was removed. Oof….I wasn’t down for any of that. I also met some people who truly kept it together but the blog became a family affair. Husbands became photographers, video editors, computer programmers, or social media experts. It was hard to determine when the work day began and ended. It was never ending. My husband emotionally supported all my goals, but didn’t have an interest in personally getting involved.

I was trying to build my blog business to save my husband from his accounting career that he chose for reasons that no longer applied to us and didn’t really enjoy. But when I really looked at our situation it became clear to me that he didn’t WANT or NEED me to save him. In fact, he was much happier going to work and having clear production and end of work day boundaries then he ever could working from home as my assistant.  When or if he decides he’s ready for a career change, he is more than capable of making that change himself. I will be right behind him cheering him on in whatever his goals become.

Going to the conferences was supposed to help me to build a successful business  in blogging, but instead it convinced me that I didn’t want to do it at all. I tried to hang on for another year for the sake of my meal planning service. I even enrolled in personal training school thinking the certification would help me grow my recipe service. But then something really scary happened.

I was fixing dinner one evening in December just before Christmas 2018 and called my kids to the table. My 2nd son was in 7th grade and usually came home from school and went straight to his room for a nap. When he didn’t come to the table, I went up to his bedroom in the attic to wake him. He wasn’t there. He wasn’t anywhere. I PANICKED. I asked everyone in the house if he had come home from school and no one knew. I called every friend he had to see if he had gone to their house. I called his bus driver, his school principal…everyone I could think of. I sent my oldest son up to school to look for clues while I waited at home in case he showed up.  I posted on my personal facebook page asking for community help to look for him. Eventually we exhausted all our own resources and called 911.

The 911 dispatcher asked me if my son would hurt himself. “NO!” I insisted. But then I realized every parent must feel that way. What if I didn’t really know my son? What if he was hurting and I was too busy chasing my dreams to notice? What if he was dead? I leaned over the side of my front porch and said, “I’m going to throw up.”

The dispatcher said, “Ma’am, Ma’am…stay calm. Stay with me.” He told me to stay home and he would send a police car over to take my report. Except he didn’t. He never called it in. I stayed at home waiting for a police officer that would never come wasting precious hours that I could have spent looking for my child. I find that part hard to forgive, but through the grace of God I have forgiven him.

Soon, friends were on my porch organizing a search party. Another friend called a police officer that attended church with me and knew our son. He happened to be on duty near my neighborhood, so even though he wasn’t officially dispatched he used his skills to begin searching. I didn’t know he was on the job and was still home waiting for a officer.

The police friend started at the main road and drove back and forth across every neighborhood street between there and our house. In the darkness, a block from my house, he spotted my son. He pulled his patrol car up beside him and rolled down his window. In his stern voice he said, “Dub, where are you supposed to be right now?” Dub looked up and burst into tears. Dub got into his car and the officer called my cellphone. “I have your son; I’m bringing him home.” Those are the sweetest words I will ever hear. I still cry when I think about that moment. It is forever seared on my heart. I am aware that not every son comes home, that he was at high risk, and that it was my fault.

Dub had stayed after school for Christian Club. He woke me up that morning to remind me, because the club doesn’t meet every week. I wasn’t quite awake and even though I responded to him, I didn’t register what he said. After club, I didn’t come. I was taking another son Christmas shopping without a thought that I was supposed to be there for him. Everyone left school, even the staff went home, leaving my son there alone. He didn’t have a phone and we lived 6 miles from school. He waited 2 hours for me. It got dark. He had a full backpack, his clarinet and a heavy coat under his arm and he started walking home.

He crossed the HIGHWAY on foot and walked down main roads. He passed gas stations, fast food restaurants, lots of businesses, but never went in to ask to use the phone. He said it was “too scary.” Many of my friends saw him on the road but didn’t recognize who he was. It took 3 hours of physical walking to make it to the place where the officer found him and all the while I can imagine he was thinking that we forgot him, didn’t love him, didn’t care.

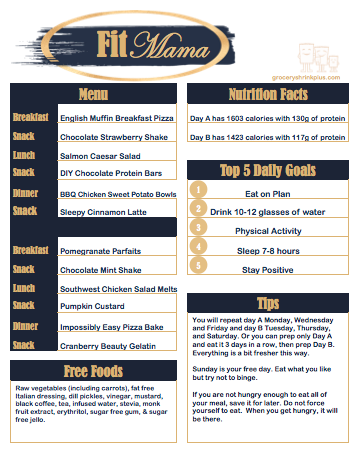
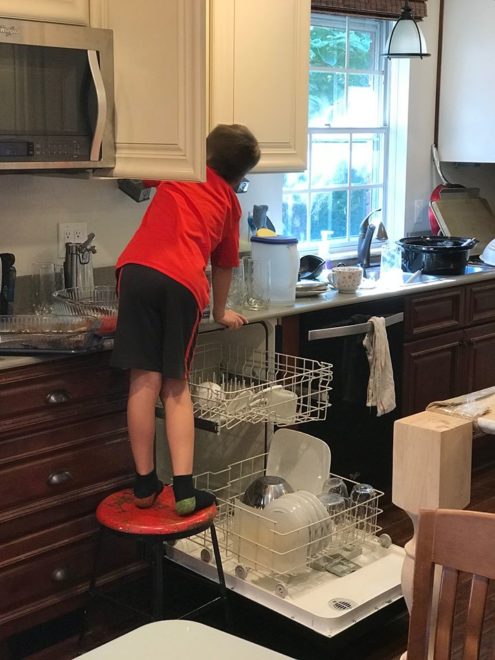
The next month, we did the end of the year books for my meal plan business. There was good money potential in it I knew, but I had trouble with the advertising side of things and would need to hire more help to make it profitable. Darren showed me that I was earning less than $1 an hour after expenses and explained the sacrifice the family was making so I could chase that dream. I instantly let it go. I refunded every subscriber their remaining balance and closed the service.  Without the meal plan business there was no income to pay for the blog tools, email services etc…so I canceled them too. For the first time in years, I felt free.

Strawberry Sugar Cookie Cut Outs: No Spread, No Chill, All Natural

Whelp, it has been 3 years. I can explain, but later. I made up this recipe today as a Valentine’s gift to my family and wanted to share. I honestly don’t know if anyone is still out there to find this recipe, but if you do IT’S YUMMY. I canceled all my email services and lead capture software when I took a long blogging break and don’t have a good way to notify you I’m back. So If you find this post, leave a comment so I know you’re here.

2 sticks (1 cup) unsalted butter, softened

1 cup sugar

2 eggs

1 tsp vanilla extract

1.2 oz freeze dried strawberries, divided

2 tsp cream of tartar

1 tsp baking soda

1/2 tsp salt

2 3/4 cups unbleached all purpose flour

Granulated sugar for rolling

additional for frosting

1 cup powdered sugar

2 Tbs liquid egg whites (optional)

1 Tbs heavy cream (optional)

1-2 Tbs water

Preheat oven to 350 degrees.

Using a food processor or coffee grinder, pulverize freeze dried strawberries into a powder. Use a fine sieve to strain out the chunks.  Set aside.

Cream together the butter and sugar until light and fluffy.  Beat in eggs and vanilla, scraping the bowl as necessary. 

Beat in 3/4 of the strawberry powder, reserving the remaining 1/4 for the frosting. 

Beat in cream of tartar, baking soda, salt and flour. 

Roll out on a sugared surface to 1/4 or 3/8 inch thick.  Cut into desired shapes and place on a greased baking sheet.  Bake for 10 minutes or until set but not brown.  Cool on the pan for 5 minutes, then transfer to a wire rack. 

For frosting, mix powdered sugar and remaining strawberry powder. Stir in egg whites, cream and water until desired spreading consistency. Spread frosting on cookies with a knife and set out to dry. Frosting will self level somewhat.  If you want to leave out the egg whites and cream, just water can be used to thin the frosting to desired consistency. 

Let’s talk about NEAT: The Key to Affective Weight Loss

Neat isn’t about how organized your house is, but cleaning definitely counts as NEAT.  NEAT stands for

Non

Exercise

Activity

Thermogenesis

It’s basically your amount of activity during the day apart from formal workouts.  It is the largest contributor to your daily calorie burn, even IF you workout. For that reason neat is the biggest indicator of  your body composition and overall weight.  Walking, laundry, cleaning, gardening, painting, carpentry, playing with the kids, riding bikes for fun, roller skating, hiking, walking the dog, bathing the dog, hula hooping….it all counts.  Any movement on your feet adds to your overall calorie burn for the day.

This is important because the amount of fat stored on your body is a direct result of the amount of calories you eat, vs the amount of calories you burn.  Fat is just stored energy and you can change the amount you have stored by using it for energy when the  calories you consume aren’t enough to satisfy the demands of your activities.

It’s important to track NEAT and the best way to do it is with a step counter.   This is the one I have.  Without tracking, most people don’t move around nearly as much as they think they do. Studies have shown that people who do formal workouts get much less NEAT than those who don’t.  It’s human nature to feel like you’ve done your workout for the day, so it’s ok to sit and rest.  It can mean burning fewer calories overall than someone who doesn’t work out at all.

Does that mean you shouldn’t work out?  Not at all.  Working out at a level that increases your heart rate into your target zone (aerobic) also increases the number of mitochondria in the cells.  Mitochondria are the power houses of the cells that govern how many calories they use.  The more mitochondria you have the more calories you burn and the more energetic you feel.  Wish you had as much energy as your child? Move more, move fast, move loads, and challenge yourself.

The other part of energy usage and calorie burn is the number of muscle cells you have in your body.  Muscles are the only cells that burn calories at rest.  Lifting heavy weight is KEY to increasing your metabolism.  While aerobic exercise uses fat for energy during the workout, once you stop working out, you stop burning calories at an accelerated pace.  When you lift weights, the calorie burn isn’t as high as aerobic exercise during the workout itself, BUT you burn at an accelerated pace for the rest of the day.  This results in an overall daily calorie burn that is HIGHER than aerobic exercise.  Plus you build new muscle cells that keep on burning even while you sleep.

You need all 3: aerobic exercise (for increased mitochondria), weight training (for increased muscle cells) and NEAT (for increased overall daily burn) for affective weight loss.

My personal goal is no less than 10,000 steps a day and YES that step count can include my formal workout.  NEAT plus workout > 10,000 steps.

Hope this helps!

Love,

Your Personal Trainer

Angela

The Secret to Homemade Flaky Layers Biscuits

A few weeks ago our church put on an event called Homespun University.  Volunteers taught classes on a topic they enjoyed and we could choose from a large variety of things to learn about including organization, home decor, self defense, cake decorating, herbs, essential oils, and scripture study. One of our members is a retired professional baker who owned his own bakery for years. He offered a class on biscuits and I jumped at the chance to learn from him.

Before I got married I baked a lot of biscuits, but they weren’t the best.  Sometimes they were hockey pucks.  It worried my husband so much that he begged his Aunt to have me over for a biscuit baking lesson.  Then I entered the fitness phase of my life and biscuits became a thing of the past.

Recently I started balancing real baked goods, with actual wheat flour into our rotation. Sometimes I’d rather have a tiny bit of a real treat than a full serving of a sugar free, grain free blech. It’s all about portion control and activity level to make it balance out in the end.
I bought the Magnolia Home cookbook (How does Joanna cook like this and stay so thin?) and excitedly tried her biscuit recipe.  It had way tooooooo much butter and they were just ok.

The recipe I’m about to share with you is better.  A lot better.  I tried it first with all-purpose white flour, but I’m going to try it again with my home ground fresh hard white whole wheat flour.

First here are the secrets:

  1. Use COLD butter.  Keep it in the fridge until just before using it.
  2. Don’t overwork your butter.  Cut it in until it’s the size of peas not fine crumbs.
  3. Don’t overwork your dough.  Kneading is for yeast breads, not biscuits. It’s ok to have some flour that isn’t worked in at the first.  As you lightly roll it into layers it will work in.
  4. Don’t roll the biscuits too flat.  There isn’t yeast in these so keep them tall, so don’t’ press out all the air that’s forming from the baking powder reaction.  I leave mine about 3/4 inch thick before cutting.
  5. Don’t twist the cutter.  Twisting the cutter seals the edges and keeps the biscuit from rising into layers.
  6. Brushing the tops with milk before baking, makes sure there won’t be a dry flour dust on your biscuits from the rolling flour.
  7. Use a HOT oven temperature.  This quickly seals the outside crust, trapping air inside and forcing a higher rise.

Flakey Layers Biscuits

3 cups All Purpose Flour

4 tsp baking powder

1/2 tsp salt

10 Tbs Cold Butter

1 1/3 cups Cultured Buttermilk

2 Tbs Honey

Preheat your oven to 450 degrees. Makes 12 biscuits.

In a large bowl whisk together the flour, baking powder and salt. Cut the butter into slices then add to the flour mixture and use a pastry cutter to work into the flour until the butter is the size of small peas.

In a glass measuring cup, beat together the buttermilk and honey.  Then pour into the flour mixture.  Stir just until it has mostly come together, then dump out onto a lightly floured counter.  Gather dough into a ball.

Dust a rolling pin with flour and with a light touch, roll the dough out about 1/2 inch thick. Fold the dough into thirds, then roll again and fold into thirds again.  Repeat one more time.  Lightly roll the dough about 3/4 inch thick, then cut with a biscuit cutter.  Instead of bunching up the scraps into a new ball to roll out again (which would destroy your layers and overwork the dough) slide them together on the counter and push bath together, keeping your layers intact to cut again.

Brush the tops with milk and bake for 8 minutes or until golden on top.

12 biscuits; 220 calories each, 10g fat, 26g net carbs, and 4g protein

Made with Hard White Whole Wheat Flour 218 calories, 10g fat, 24g net carbs, 5g protein

If you try it, let me know how it goes!  If you want to see it in action, let me know and I can do a facebook live video.


My top 10 favorite Ikea kitchen items

Before our Ikea opened in the Kansas City area, I borrowed a trailer, drove it empty 20 hours to Washington DC, filled it full at Ikea, then drove it home.  The Chicago Ikea was closer, but we were going to DC to visit friends anyway and it seemed like the perfect combo.  My first visit to the store was overwhelming and I was thankful to have my friend with me to help me navigate the displays, know what proper Ikea manners were, and figure out how to steer the cart.

For Ikea newbies, my first tip is to go with a friend who has been there before.  Ikea is not a shopping trip, like a trip to Target. It’s more of a destination, like a trip to the zoo or a museum.  The top floor is set up in little model apartments and display areas showing how to use the products.  There is very little to actually take with you and buy on this level.  It’s just for inspiration and it’s so much fun! Plan on at least 2 hours your first few times.  After that, if you are in a hurry you can create a shopping list with the online app, stay off the 2nd floor displays and just go grab your stuff.  When I plan to do that, it never fails that they have changed all the displays and I walk around just to see everything anyway.  Now that Ikea is in Kansas City, sometimes I just go to walk around for inspiration and log steps in my tracker.

My house  is full of Ikea products.   If I were a true home decor blogger I might be embarrassed about how much comes from one store, but it’s affordable and works well. At first I was going to do a basic post on my favorite Ikea items, but there are TOO many.   I decided to break it up into categories to help keep the post an appropriate length.  So without further ado, here are my top 10 kitchen favorites.  I often buy some of these and put them together for a wedding shower gift along with some toxin free cleaning products.

Gubbrora Silicone scraper spatulas.  It seems so basic, but I find myself wanting this scraper over all the other brands in my kitchen.  It doesn’t stain, goes right in the dishwasher and does a perfect job.  At only $.99 each it’s a perfect addition to a wedding shower gift as well.  They could improve it with better color combos.  For now, I always grab the black and white.

Rort Beachwood Spoons in regular and flat tip.  These are sturdy and smooth and season well with food grade mineral oil.  I got rid of all my other wooden spoons after trying these.


Pabjuda whisk set.  My favorite whisk is the tiny one!  It’s so great for making a 2 egg omelet or other small mixes like salad dressing.  The large size is just right for gravies. The only other whisk I have now is a silicone one for my special non-stick pans.  I much prefer these when I’m cooking with stainless steel.

Produkt Milk Frother. This is my most recent Ikea purchase and I LOVE it.  I use it to mix hot cocoa or protein powder into hot drinks.   Be sure it’s near the bottom of the cup before turning it on or the powder on the surface will fly everywhere.  It creates this mini-vortex in your cup that will completely mix everything together.  I don’t use heavy cream in my drinks, so I’ve never had foam rise to the top or had the drink actually whip.

Proppmat Beech Cutting Board.  This is my favorite board hands down. I grab it for everything except raw meat.

Upphetta French Press.  This simple steeper can make a quart of coffee or loose tea and strain it without bits in your cup.  It’s easy to clean and dishwasher safe.  I love that it is light and fits in my cupboard and doesn’t have to sit on the counter.

Efterfragad Stainless Steel Vacuum Food Container.  I bought one of these for each of my kids for packing soup and other hot foods for lunch.  It has a nice wide mouth, is a nice size for easy cleaning, dishwasher safe, keeps food hot until lunch, and has never rusted. It’s easy not to get the lid tightened all the way, and then it will leak.  Just make sure theres no gap between the black and silver portions and you’ll be ok.  Previously I paid more money for stainless steel thermoses off Amazon and they rusted after the first washing. I’m much happier with these.

Smula Tray. I use these trays to help clear off the table after a meal, to take food outside for campfire cooking or grilling, and as general project corrals to clean the table off in the middle of crafting for a meal.

Direkt Nylon Utensil Set. I love them so much I have 2 sets and got rid of all my other similar items.  Perfect for non-stick cookware.

Sotvatten drinking straws.  These are the wider straws for thick smoothies.  One pack lasts us forever because these straws go through the dishwasher in the utensil holder.  They wash and reuse over and over again.  Ikea also has smaller bendy straws that I keep on hand for when one of my kids is sick and must drink lying down. They don’t wash as well as the fat straws and have more of an environmental impact.  We definitely use them less, but they have their purpose.

That’s my current line up of favorites.  They aren’t new earth shattering technology, just hard working basics that I use every day. Do you have some favorites that aren’t on my list?  Tell me about them in the comments.  I’d love to try something new!

10 Ways to Stick to a Fitness Routine

Avocado Ranch Fajita salad

If you’ve been reading for awhile, you already know I had a 4 year struggle with my health that got better enough for me to care for my family, but still left me in unexplained states of exhaustion for days and an extra 30 lbs of stubborn belly weight. Doctors kept telling me I was fine, when I was obviously not fine. Last January I finally got so frustrated with the situation that I signed up for Personal Training school. I hoped along the journey to finally figure out why I was exercise intolerant and fix it forever.

School is the main reason my blog has been so hit or miss lately.  Juggling the 3 side hustles while keeping up with my studies was a challenge for sure. 

I passed my exam last Thursday and am an official personal trainer! While I don’t have all the answers I was hoping for, I worked closely with doctors through the process and have enough to safely pursue my own fitness while supporting others in their goals.  I am finally able to exercise without crashing.

Part of me feels ashamed to admit that I’m a personal trainer, because I don’t look like a fitness model. The other part of me recognizes that we all have our journeys in fitness. Just because I don’t look like a fitness model, doesn’t me I don’t know my stuff. A national certification board just gave me their stamp of approval and that’s something to celebrate no matter what my waist measurement is at this exact moment. I’m much further in my health than I was just a year ago and for that I’m grateful!

The hardest part for anyone on a fitness journey is consistency.  Showing up day in and day out with proper nutrition and physical activity is not easy.  Here are 10 things I’ve learned in my own journey that have helped me stay consistent.

  1. Have a plan.  Know what your workout is going to be ahead of time.  It’s hard to get started if you don’t know what to do.

2. Set out your workout clothes and pack your gym bag the night before.  Make it easy for the alarm to go off, dress, grab your water bottle and get busy.

3. Have a fitness buddy.  This is easier said than done, I know.  But people who have someone else in their life to work out with and share nutrition goals with are far more likely to stick to them.  It’s even more helpful if your workout buddy lives in the same house.

4. Keep progress reports. Take those before photos and measurements and repeat them every 2-4 weeks.  Collage them side-by-side so you can prove to yourself it’s working.  It’s no fun to take those before pictures.  I get it!  But one day you’ll be so happy you did.

5. Know yourself.  Are you an all or nothing person?  Perfectionists have the hardest time sticking to a fitness routine, because one slip up makes us want to quit altogether.  Let it be ok to make mistakes and get right back on track. On the other hand this type of personality also struggles with one taste of brownie leading to scarfing the whole pan.  In those cases, learn to be ok with not having a taste.  Then find treat recipes that are still supportive of your goals.

6. Schedule your workouts. Figure out the routine that works best with your schedule and personality.  While it’s totally ok to work out every other day by fitting both weight training and cardio into the same session, some people have to workout every day to stay consistent.  The first missed day, even when it’s scheduled will most likely become 2 missed days and pretty soon we aren’t going at all.  Others prefer every other day off to fit in their responsibilities. They are both perfectly fine ways to get fit, but make a decision about what’s best for you and then schedule it in.

7. Reward your hard work with rewards that support your goals.  It might be a new outfit , a pair of earrings, or an outing with your family. Whatever you decide write it down as a “When I…..I can…..” statement.  One of my favorite reward systems is participating in DietBet. I love that I can earn a little bit of cash by making healthy choices.

8. Focus on what you can control. You can control if you do a workout and how much effort you give.  You can control what you put in your mouth. You cannot control the scale.  It’s so freeing to stop worrying about the things we can’t control and taking action on what we can control. When everything else is in place, the scale will take care of itself.

9. Don’t self sabotage. Our will-power has limits.  We might be able to turn down a sugary treat once, but if it’s offered a 2nd or 3rd time chances are we’ll take a taste and then scarf the whole tray.  Don’t keep foods in the house that don’t support your goals. I get it that most of us live with people…and children….and there’s going to be stuff in the house we can’t always control. I ask my older kids to keep their fun foods hidden in their bedrooms and my husband locks his in the hunting safe. Find something that works for you.

10.  Meal Prep. People who plan their healthy food in advance and make it easy to grab instead of a unhealthy convenience item are way more successful in reaching their goals.  This is so true for me that I spend a lot of time each week putting together prep ahead meal plans and shopping lists for my own use and let members of Groceryshrinkplus have a copy to adapt or use as they see fit .

Please, leave a comment and let me know what you think. Which of these tips is the most important to you? Where are you on your health journey? How can I help?

4 Hidden Expenses that Can Destroy Your Budget Plan


Several factors can affect the way you budget your household. This is why we wrote the article ‘How to Get Your Husband to Budget With You’. When it comes to narrowing down household expenses, two heads are better than one. Now, let’s take a closer look at another potential budget plan destroyer: hidden expenses.

Acquiring the Latest Technology

This may seem glaringly obvious, but you don’t really need that new smartphone. Unless you need to acquire the latest version of a phone, computer processor, digital camera, or graphics card for your job or career, there’s really no real reason for you to get it. Don’t get caught in the hype and social pressure of always having the latest gadget. It’s likely to be an expense that you don’t really need, and there will be cheaper versions on the market.

Succumbing to “Good Deals”

It’s good to take advantage of discounts, but don’t let mall and outlet store sale events fool you. Mall department stores are notorious for marking up items and then selling them at “discounted” prices. Again, avoiding the hidden expense here is important. Bustle state that there’s no need to buy items that you normally wouldn’t buy just because they’re “on sale.”

Overpriced Coffee

It’s no secret that franchise and boutique coffee shops overcharge for coffee. If your office or workplace has a kitchen or similar facilities, just brew your own. The money that you spend on quality brews at coffee shops translate to more than twice the amount of a home or office-brewed coffee of similar quality. Additionally, the more you brew your own, the better you’ll eventually be at picking the right beans and brewing them correctly. The only thing better than saving money is acquiring a new skill while you’re at it.

Hidden Bills and Taxes

Hidden bills and taxes are some of the most frustrating ways to spend money, and this is more of a problem than most people realize. For example, if you buy a property in a city like New York, you might be surprised to find that the title costs are unexpectedly high. Check the paperwork and you’ll likely see that the most expensive item on your title bill is something that’s called mortgage recording tax.

Here’s what you need to know about this semi-hidden bill that can cause frustration to homeowners trying to budget their expenses. It’s a percentage of the new mortgage debt amount and is generally paid by whoever buys the property. The city-imposed tax applies to all new mortgages, and is due when the mortgage is recorded. Unless you’re buying a co-op unit, you’ll need to factor in the cost of your mortgage recording tax early on. Otherwise, you might fall short of your original budget and find yourself having to dig deeper into your savings. The lesson here is to always read the small print.

Another notorious source of hidden bills are hotels that list hidden charges on your final bill. This is commonly done via “drip pricing,” which the Federal Trade Commission explains is when hotels only reveal prices as the buying process proceeds. This means being charged for things like valet parking, pool maintenance, exercise facilities, or other privileges even though you haven’t technically benefited from them. So before you book any hostel, motel, resort, or hotel, be absolutely clear about what you need to pay. And if they still charge you erroneously, feel free to contest the bill.

Avoiding any and all hidden expenses is a matter of being informed and assertive about your own financial rights. Always do your homework whenever you’re planning to spend a significant amount of money or even just a little.

Update on the Zone Cleaning for Kids

We’re two thirds through the summer so I feel like I can safely update on how our zone cleaning is going.  If you missed the first post describing our system, find it here. First of all, it’s still going!  That’s a win in my book since most of my efforts at chore charts have ended by the 2nd week.

Here are a few photos of zones in action:

I show these photos as they are because I want to be transparent that our house isn’t magazine ready at all times just because we’re doing zone cleaning.  It’s not perfect for sure, illustrated by the boy practicing the piano in pajamas (and my clutter all over) even though getting dressed is higher up on his list.  I’m focusing on the fact that the boy is PRACTICING.  The amount of music progress we’ve made since the charts came out is staggering and worth the whole effort by itself.

So what’s working?

  1.  The fact that we have a consistent plan. The boys are thriving on the consistency and are helping to hold each other accountable in a mostly good natured way.
  2. I have passcodes on all the devices (except for the shared chrome book they use for school.)  Even the ones they bought with their own money.  So they have to bring it to me before they can get on it, which means I have the chance to ask if they are done with their zones.
  3. The boys are getting a lot of pride out of their zones. Check out this facebook post:

5.  We had a fail one day where I caught all the brothers in a dark room under a blanket watching a video on the Chromebook. The video was on my approved list but nobody had done anything on their list. They were all still in PAJAMAS!  It was 9am and I gathered up every electrical device in the house and locked them in my room.  I was like, “Bummer.  I’m so sorry this happened. Don’t worry, tomorrow we start again.  You can have everything back tomorrow, after your zones are done, as long as you get today’s zone work done too.”   There was weeping and wailing and gnashing of teeth.  It’s the kind of day that you PRAY for when you are doing a system like this, because they knew I meant business and that I WOULD follow through.  We’ve never had a problem like this again.

6.  I’ve had the opportunity to teach them how to do some new chores that they hadn’t done before.  Like secrets about getting the pink mold out of the bathroom, how to clean the shower without getting your hands dirty, and what it means to be truly clean.  Plus they’ve finally learned where all the dishes go in the kitchen! I try really hard not to be too picky, but after we’d been going several weeks, I started doing inspections and sending kids back to redo sub-par work.

7.  This is the most consistent we’ve ever been with reading and music practice!!!

What’s not working?

  1. I can’t remember the order of the zones and the boys often can’t find their paper on Sunday when it’s time to trade.  I’m constantly asking, “Who’s in this zone?” It would help if I had a row of nails for them to hang their clipboards on when not in use. Then we could find them easily and I could see who goes where.  It would also help if I made up a file with all the zone assignments for the year.
  2. The list is pretty overwhelming for Grant (he’s 7 with some sensory issues.)  Some days it makes him want to curl up in a fetal position and never get out of bed.  I often work his zones with him, teaching him how to do things along the way.  He does help and as long as he’s working too, I’m fine with it.  I’m thinking about making separate, shorter zone sheets for him to rotate through that are different from his older siblings.
  3. Since the kids are able to pick and choose what to work on in their zones, several items never get done….like cleaning around the base of the toilets, scrubbing the bath tub or wiping down the cabinet fronts.
  4. Sometimes the work is just poorly done and I have to send them back to do a decent job.  This definitely takes more management than it seems.  The boys will get lazy and not set a timer, do a 5 minutes job in their zone and think they are done.  I have to be consistent with accountability on spending a good quality 20 minutes in their zones.  The more consistently I check on them the less likely they are to try to get away with stuff.  In the beginning I had to check every time, and I used it for a chance to give them atta-boys as often as I can.  Now I only have to check a few times a week. Because they never know when an inspection will pop up, they do good work most of the time.
  5. Sometimes I need help later in the day with emptying the dishwasher or setting the table.  Invariably the boy asked to help says, “That’s not my zone.” or “I already did my 20 minutes.”  They are not allowed to respond to me that way when given a direct request and in the scheme of the amount of work required to run our house 20 minute is NOTHING.  So we’ve had a lot of correction to do in this area and it’s still a work in progress.

What do you think?  Do you have any chore tips or stories for us?


Makeover Monday: Hannah’s Living Room

Hello!  Makeover Monday is my FAVORITE post to do and it has been way too long.  If you would like to have one of your rooms featured on Makeover Monday, send a photo to angela@groceryshrink.com and a link to your decor pinterest board.  Clutter is no problem, but keep in mind I show a before picture on the post.  We won’t judge but I want you to feel comfortable.

Hannah is a childhood friend of mine.  Her parents were instrumental in helping Darren and I form our relationship that eventually led to marriage.  So when she reached out on Facebook for help making her new home reflect her style, I was excited to help.

She mentioned that she wanted to lighten up the space, but not with white walls.  Her Pinterest board for the room was full of this color palette.

Source

Here are the best parts about here room:

  1. Her sofa and love seat are already a beautiful navy with great lines.  Her puppy damaged the large sofa significantly and she was hunting for slip covers since replacing it wasn’t in the budget. With the lines on it, I recommend finding as close a match as possible to the fabric and hand sewing a patch on it, then strategically draping a throw over the spot.

2. Her antique side tables! The one with the marble top is especially beautiful.  They belonged to her husband’s great-grandmother and deserve to stay.

3.  Her ginger lamp is classic and large enough for the space.  An updated lamp shade shape will bring it into the modern trend.

4.  Hardwood floors!  A previous owner glued a strip of hunter green vinyl between the dining and living rooms and another piece at the entry.  Plus they spilled a large amount of fingernail polish.  When she can budget enough to have them sanded down and refinished (minus the vinyl,) that’s the way to go. But still it’s such a blessing to have hardwood.

5.  It’s a huge room with so many options for arrangement and storage.

For her paint color I chose Glimmer by Sherwin Williams.  It’s a gray/green/blue that will brighten up her space and give it a calm vibe.  Putting wood tones in the room will keep it from feeling too cold.

The curtains that are perfect for her space are unfortunately a discontinued pair from Anthropology.  She can search for them on Ebay, or get a similar look by dip dying a pair of white curtains. Ikea has several great selections and they all come long enough.  The trick to making curtains look like a pro did them, is to hang them as high as possible (but still touching the ground) and wide enough that they don’t block any of the glass and natural light.  This is a little tricky, because you need enough fullness at the sides that it looks like you could cover the whole window with gathering and it needs to be wide enough even pushed open that it’s not bunched up super tight.

Most curtains at Walm-mart or Target come 84 inches long and that’s not long enough for ANY room.  Look for at least 95 inches long, longer if your ceilings are taller than 8 foot. For privacy, I recommend these shades in snow drift.  They disappear to a 1 inch band when pulled all the way up.  And in her case, I’d paint the band black to make them completely disappear into her black windows.

Source

This rug is from Rugs USA and is a flat woven wool rug.  I love how wool has vibrant colors that last and wears well for many years even with heavy traffic. The drawback is that food coloring will stain it permanently. Something I learned the hard way when my kids ate popsicles over my rug. (No more artificial food colors at our house for many reasons!)

An area rug is essential even if your room has carpet, but that much more so if it doesn’t.  A rug grounds a space and makes it feel cozy and connected.  The biggest rug mistake I see, is getting one that’s too small.  8×10 is about the smallest that should go in any room (unless the room is smaller than 8×10.)  At the minimum all the front legs of the furniture should be fully on the rug.

Source

Lighting is an often overlooked way to set the stage for the style of the room.  Ceiling fans are usually a quick way to kill style, but in the southern midwest they are a necessity to get through the hot summers, even with central air.  This fan combines the best of style and efficiency and is a nice BIG size for her nice big room.

Scale is such an important part of good design.  I snagged a new to me coffee table from a garage sale Saturday and it is quite a bit bigger than my old one.  I was shocked how my better my room looked with the larger table.  The old one was just the wrong scale.

Source

When I was looking at her hooks by the door, scale was the first thing that jumped out at me.  Her small little hook rack looks like it’s half apologizing half trying to hide.  She doesn’t have a foyer in her home or a front closet, so she gets to embrace the chance to have a beautiful exposed hook area and let it truly shine.

I recommend that she uses a board and batten wainscoting treatment on her wall, then putting hooks directly into that.  Her door is right next to the wall, but I would extend the board and batten all the way to the corner (there wasn’t a good way for me to illustrate that in the after photo so imagine it ;). )  I wouldn’t start the hooks until just beyond the point when the door is swung open.  Then use a nice large hall table or bench there to designate a proper entry way for her home. @BlueBarnCottage on instagram is the source for this part of the photo.  Her feed is a must follow!

The other perfect part of this entry are the black frames going across the wainscoting and continuing on along the brick of the hearth corner. This keeps the brick from breaking up the wall and making it look too short.  With the wainscoting the same height as the brick and the pictures going across the top it looks like one continuous line.  The example has botanical prints in it that she can print for free here.  But black and white family photos would be another great option.

To help delineate the entry even more, I arranged two chairs to create an entry hall behind them.  They are open enough that you can walk between them, unlike placing a sofa in this spot. This arrangement also brings the seating area closer together.  When arranging furniture the seats should be close enough that you can still hear each other talking softly. All the seats should be able to reach the coffee table or a side table, and if you can lean forward and hold hands with your guest to pray for her, it’s close enough.  Don’t feel like your furniture has to all be along a wall.  Pull it forward, let it breathe, and create an intimate gathering place.

Painting her front door and window black was a bold move for me.  I usually prefer white in these spots so your eye travels outside without distraction, but when I did a side by side of black or white frames, the black was the clear winner.

Just for giggles here’s a before and after right next to each other.

What do you think?  Would you ever paint your door and windows black?

P.S. A note for Hannah: It didn’t show in this picture, but I would move your piano to the wall where your love seat currently sits.  And if you’re feeling brave, paint it one of the colors from your palette.  Then pull your love seat opposite of the two chairs, up close so the corner of it is near the corner of your sofa and it can enjoy the use of the round coffee table too. (I’m not sure if the dimensions will work here but to work there should be about 3 feet between the piano and the back of the loveseat, when the bench is pushed in.) Then I’d put your other antique side table in the little corner made by the sofa and love seat.  If you use the roll-top desk, put it on the wall where your piano used to be.


Summer Zone Cleaning for Kids

I haven’t been the best in the past about organizing chores with my kids.  Instead of having some kind of routine or chore chart, where they know what they are expected to do ahead of time, I just asked them to come help me as needed.  Plus I tried to teach them basic manners like clearing your own dishes from the table.  The important word here is “tried.”  I still find a ridiculous amount of dishes in the rooms that they aren’t allowed to eat in.

We taped out placement for our kitchen island and have paint out for the cabinets and new countertops ready to install, but Brandon did his best work in the kitchen zone anyway.

The end result is kids who know how to do basic things but aren’t self directed.  I started getting angry, towards the end of the school year, that my my kids could come home and sit in a disgusting room and play Minecraft with each other on their ipods and not even think about picking up a throw pillow or taking a plate to the kitchen without being asked.  I know they are tired from school, but that’s no excuse for being lazy slobs.

I turned to pinterest once more, just in case there was a new chore chart idea that might work for us.  I have tried so many, and by tried, I mean I bought the supplies to craft them and then sold the supplies in my yard sale a few years later.

30 Handmade Days to the rescue! Her Summer Rules were perfect for us, because all I had to do was print it out on cardstock, laminate it (or put it into a protective sleeve) and stick it to a clip board with a dry erased marker attached with yarn. I pulled up excel and copied her style, but changed the details to match our specific needs.

Then I made a 2nd sheet inspired by the Fly Lady’s zone cleaning.  I divided the main parts of our house up into 4 zones, because I have 4 kids home this summer.  The kids set the timer for 20 minutes and work that long in their own zone.  They can pick from the list and get to stop when their 20 minutes is up.  Sometimes I work with the kids on sticking to a job until the job is finished, but sometimes it’s a better strategy to just work on a big project with a distant deadline in bite sized chunks of time.


The Secrets to Motivating Kids to Clean

  1. Clear Expectations.  They know where to start and how to do it and where to find the supplies.  (Please use safe non-toxic cleaning supplies.)
  2. Time limits.  If the job can’t go on forever, they are more likely to start it.  Fly Lady recommends 15 minutes per zone, but we have a big house with lots of people in it, so 20 minutes works better for us.  Fly Lady was also designed for 1 person to do alone.  For that reason, only 1 zone gets looked at each week.  She keeps the more daily type chores  off the zone cleaning list and makes it more a list of monthly type chores.  Since someone is working in each zone every day at our house, my zone list includes some daily and weekly chores as well.
  3. Positive Feedback: There’s a balance between constructive criticism and being so picky with their cleaning that they get super discouraged.  It’s better to pick out what they did well and let the rest go unless you see some blatant lazy stuff.  Even then, just pick one thing to ask them to improve.
  4. Choices: By providing a list and letting them choose from it, they feel more empowered and are less likely to test the limits.  Ideally everything on the list gets done at least once during the week, but they can do it in the order that feels best to them.
  5. Change: We change zones every week, which keeps it new and more interesting for them.   To keep it simple, I just have them change in order.  So if they had zone 1 last week, then they will have zone 2 this week, etc.
  6. Consequences: If the kids go on electronics without completing their chart, I get to keep the device for the rest of the day.

If you’d like to see the files I printed for my kids, I uploaded them here.  It’s an excel file that can also be opened in google sheets and changed to reflect the needs of your own family.

Do you have a summer system that’s working for you?  I’d love to hear about it.