There are a lot of things I love about our family room. It’s open concept so we can see the kitchen from our comfy sofa. It’s big with lots of options for furniture placement. It has yummy hand scraped hardwood floors and French doors leading out to a sunroom and deck.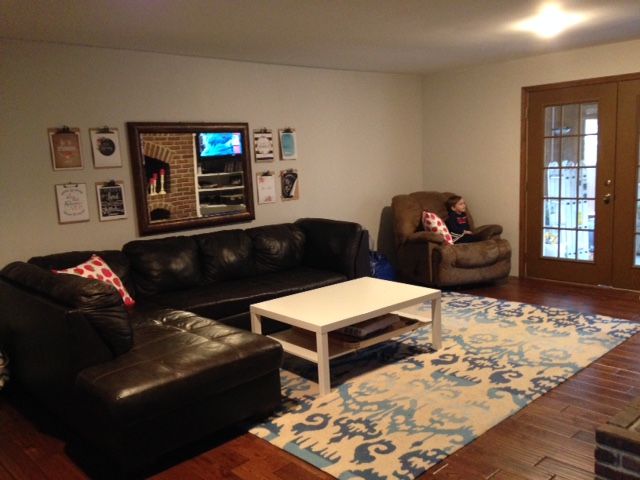
The room has a unique fireplace that was constructed from the bricks removed during the demolition of the old stock yards in downtown Kansas City. The bricks are a good color tone with enough variation to give texture and interest without being gaudy.
The room is dark. It’s landlocked and even during the lightest part of the day, needs a light on for normal activity. Even with the lights on it feels dark.
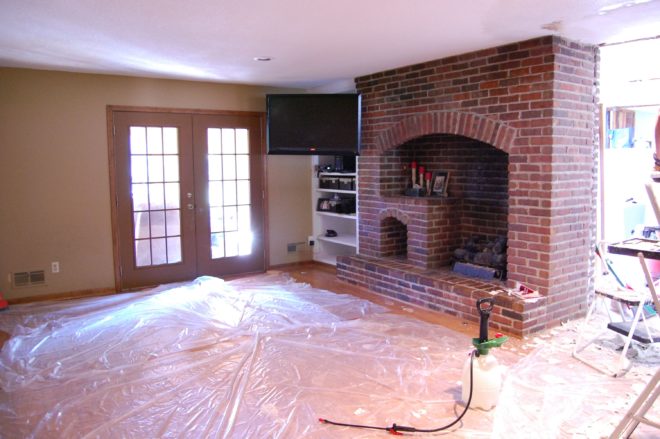
It was even darker before we painted over the dark olive beige with a pale gray. Painted the trim white, and took down the wall between the family room and the kitchen.
My gut has been telling me the dark brick has to go if I ever want a light and bright space. It’s so massive that it absorbs a ton of light, and the inside is stained black from soot. I’ve tried several methods to clean it up, but it’s deep into the porous surface of the brick. I’ve lightened it some but the stain is still there.
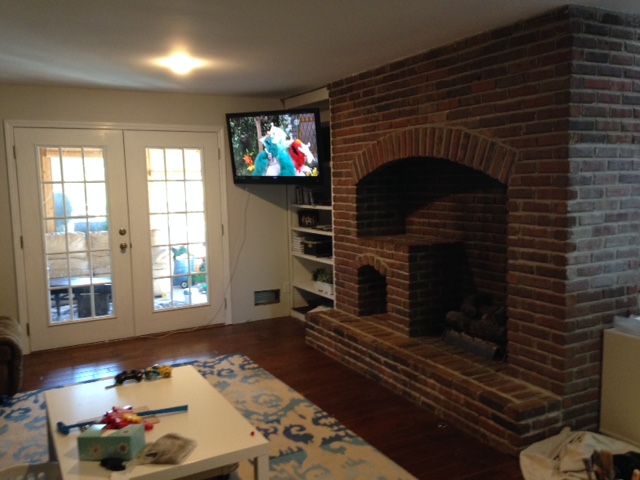
In a last ditch effort to save the brick, I decided to paint the french doors white to bring in as much light as I can. It helped a bunch and every time I walked by my heart gave a little leap of joy. As much as the little things we did improved the space, it only made the dark brick stand out more…and not in a good way.
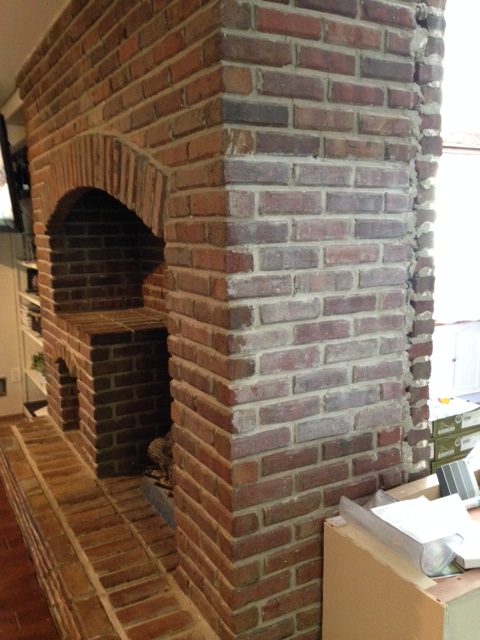
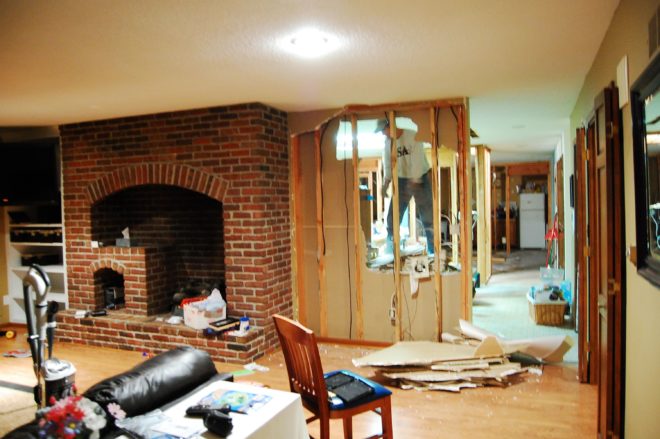
When we took down the wall between the rooms, there was an unfortunate seam in the brick never meant to see the light of day. I was imagining seeing the cute exposed brick wall from the front doors….but that seam is NOT cute. We plan to cover it with a floor to ceiling chalkboard with a wide white frame all the way around. SOOOO since I was going to cover it up completely, I took a risk and tested a white wash technique first.
I loved it and hated it at the same time. My mom told me it looked dirty, but my online friends from the Cozy Minimalist class told me it was beautiful. I finally got up the nerve to start on the part that would be seen.
I spent a few hours painting, and then wore out. You can see the top left corner and the inside has been done. At this point, I was pretty sure my mom was right and I had ruined it. Then I remembered The Nester telling us, “You can’t ruin something you already hate.” It took several weeks for me to find the nerve to finish the project. I decided if I hated the whitewash look I would paint it solid white.

The paint I chose tends to settle during the painting process, so the fireplace got lighter and lighter as I went on. I had to go back over the places I started with to make it blend with the rest of the brick. It ended up lighter overall than I had planned, but I love it anyway.
This is just an iphone picture, and doesn’t do the space justice. The brick finally feels like it goes with the rest of the room. I quick made a moss covered monogram to hang on the new whiter brick, and have plans to style up the space more with inspiration from here and here.
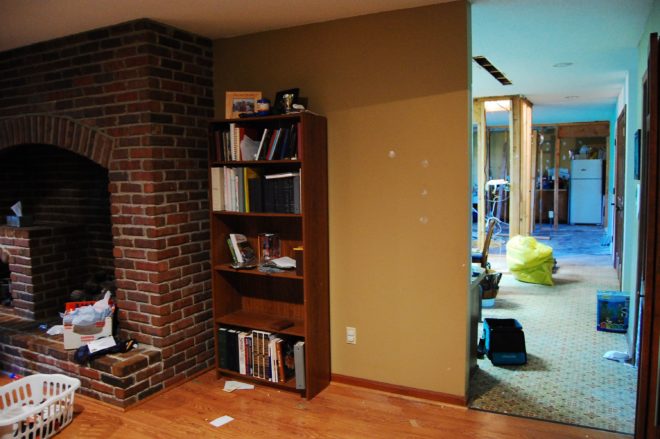
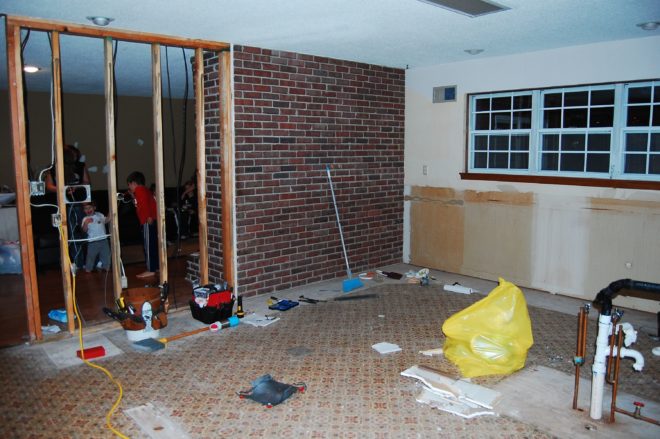
I’m KEEPING the original brick on the backside where it is exposed in the dining room. Here’s a picture of the back side of the fireplace back during our construction phase. I can’t believe I’ve never taken a picture from this direction “finished.” Ok, we aren’t finished yet, my buffet table on the brick wall is still those stacked flooring boxes with a tablecloth on it. But we’ve made progress since this.
Choosing the type of paint for the brick was a challenge. Brick is hard to strip paint from, no matter what. Latex paint CAN be removed from brick with this stripper or this one, but latex paint is not heat friendly. My fireplace has a gas insert, and while it is too expensive for us to use right now, we have hopes one day to make it more efficient. We didn’t want to permanently eliminated our option of ever using the fireplace again. I thought about using latex only on the outside and using heat proof grill paint on the inside, but it only came in black. Painting the massive inside of the fireplace black would fight against my goal of light and bright.
While searching for paint that is heat friendly, I came across milk paint. Milk paint is permanent on brick. It soaks into the pores and becomes one with the material. It doesn’t bubble, crack or peel when exposed to high temperatures. And unlike traditional lyme white washing, milk paint won’t rub off on hands or clothes once it’s cured. Going with this option meant never being able to go back to raw brick again. That’s scary for me, because I’m kind of fickle when it comes to decorating. I took the risk because letting fear trap me into keeping a look I hated was worse than never being able to go back.
There are lots of different brands of milk paint. I chose this one because it keeps longer than the rest while still being REAL milk paint. Some milk paints are only good for 24 hours after mixing up, but this one lasts 6 weeks. (I loved having a time limit though, or I might not have finished even now.) The paints that are “like” milk paint but not really made with milk, I didn’t trust. I wasn’t sure they would have the heat proof quality I was looking for.
The paint instructions say to mix it equal proportions with the powder and water. I did that first to make sure the powdered mixed up well, then added 2x more water for a whitewash look. My finished formula was 1/2 cup paint powder to 1 1/2 cups water. I brushed it on with a natural bristle brush, stippling it into the texture when necessary, then used an old flour sack tea towel to wipe it off. The wiping off part was key to an even texture and removing brush strokes.
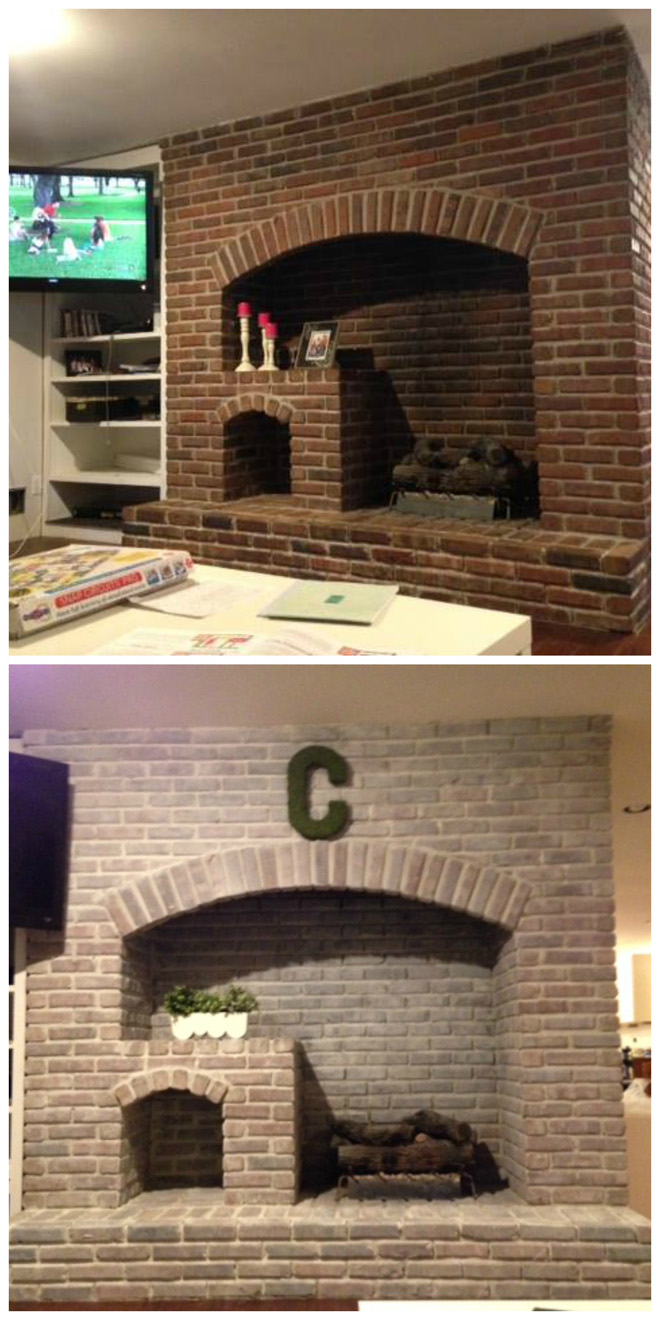
Just for fun, here’s a before and after:
P.S. Thank you for making it safe for me show you my imperfect house and imperfect pictures. I’m holding back the urge to point out all the flaws. I know no apology is necessary–because we’re friends like that.
That is cute! I like that it is lighter but still has the look of brick
Angela Coffman: The Grocery Shrink it looks AWESOME! great work!
Love the way it looks!
The Magic brush fb page has really good ideas she just painted her fireplace too. Good job!
Looks great!
It turned out beautiful!
I think it looks really nice, Angela! I also love that the angst led you to paint the French doors white, too…big improvement all around!! Can’t wait to see the updated kitchen
I think it looks fantastic and brings the light that you needed. 🙂
It looks fantastic!
Love it!!
I love it!! It looks great!!
“Don’t let the perfect be the enemy of good.” –Voltaire
I hear you on seeing all the flaws when I’m done doing a project (that is the trouble with perfectionism:). Nobody but you will ever notice what you are noticing:) It looks great–so good in fact I’m eyeing my own fireplace right now!
Thanks, Stacy! There are lots of painted fireplaces on pinterest. You might be able to find a painted version of something similar to yours so you can preview it 🙂
LOVE it! And love paint that has an expiration. All my projects need that-lol!
I LOVE IT!!! Now I am so excited to do my own! 🙂
I can’t wait to see pictures!