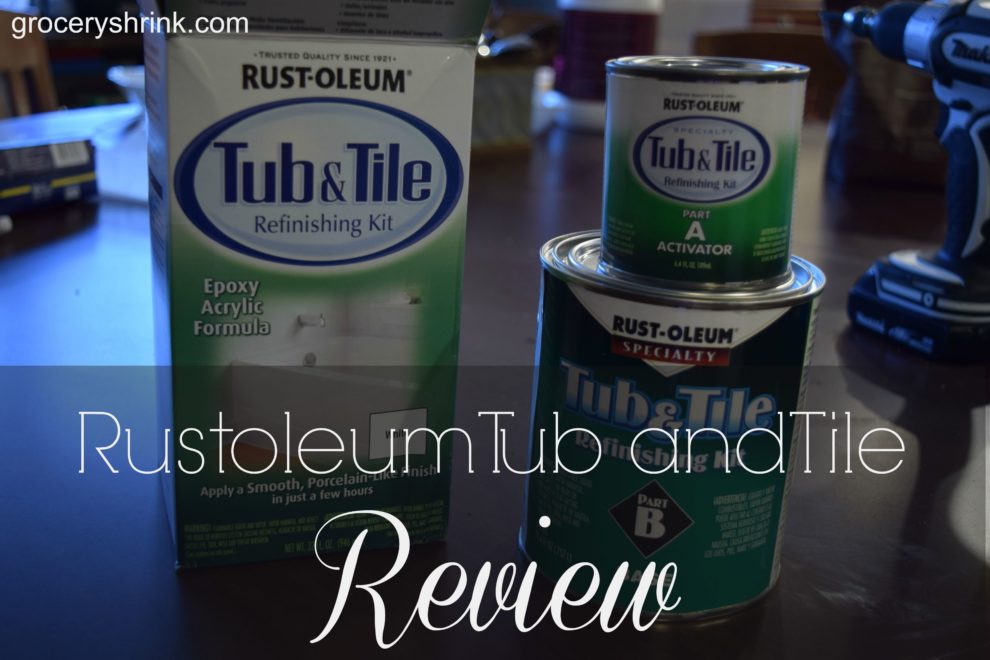
Knowing my bathroom remodel budget was made of pocket lint, I contacted Rustoleum and asked if they would donate some product in exchange for a video, a couple of blog posts, plus some serious social media promotion. They graciously declined and bruised my ego a bit in the process. It’s important to note that I purchased the product myself and have no conflict of interest in this review process.
My final recommendation, for those of you who just want the verdict, is to use this product as a last resort only. My project looks great, from a distance, but has enough imperfections that a new shower unit would have been a lot nicer. The process was not easy and riddled with difficult steps, any of which could make the final outcome fail. (Translation: Lots of anxiety and procrastination.)
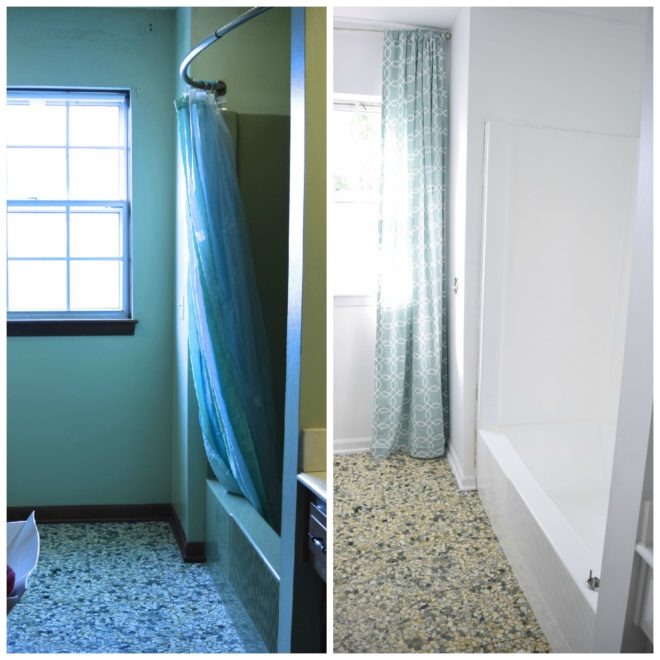
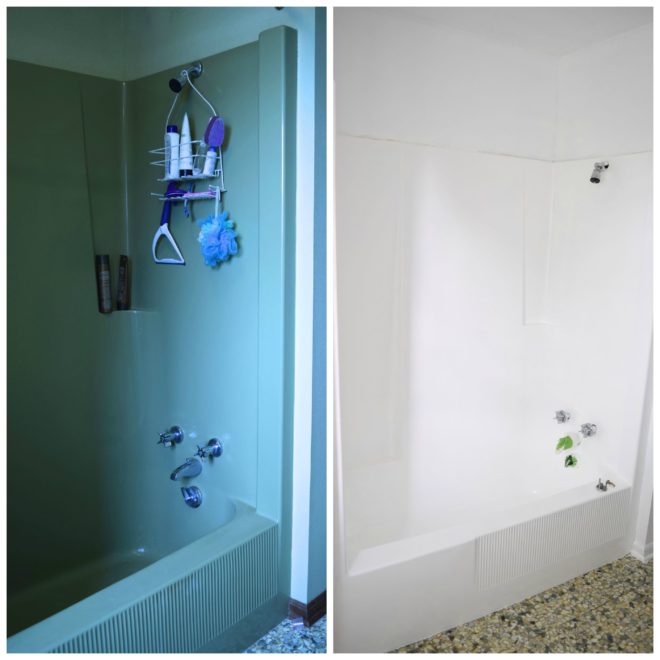
Shower before and after. The colors are truer in the after picture.
Tub and Tile Transformations is only sold online in my home town. Both Home Depot and Lowes have switched to a similar product in another brand to stock their shelves, although Home Depot still offers Rustoleum’s online. At the time of this post Amazon and Home Depot’s prices are about the same. This is important because if you run out, and the first coats have a chance to cure before your new product arrives, you will have to start over with the sanding process before doing another coat. Argh! (I drove all over town going to the locations Rustoleum’s website recommended for buying the product. It turns out those recommendations are just for stores who carry something from that brand and are not product specific. Call first before wasting gas.)
![]()
Sink Top Before and After
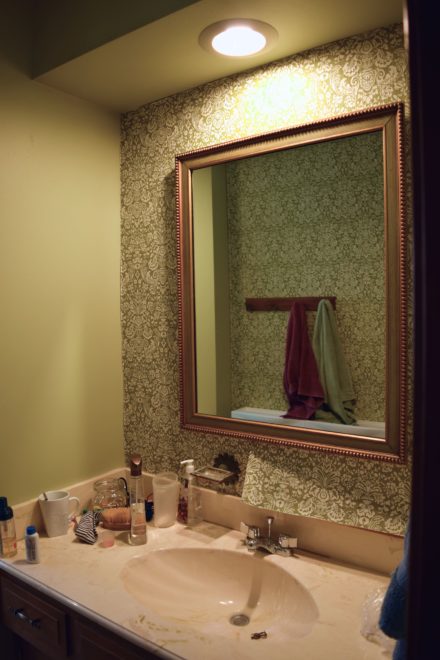
Sink: The real before
At the last minute, I decided to do my sink in addition to the tub/shower. What I didn’t know is this small addition would require an extra box. I love the look and am glad I did it. I just wish I had purchased enough product from the start.
I’ll update this post in 6 months after we’ve given the finish a true test and see how it holds up. If it wears like iron, I’m considering doing our other bathroom with it–even though it was NOT a simple project. So far it has not gotten wet yet.
Facts:
1. Our fiberglass tub/shower was installed in 1971. It is olive green and sucks the light out of the room. It also has feathering lines of wear in the finish. Otherwise it is in good condition and works well.
2. We chose this method because our shower unit is 1 piece and the room was built around it. We would need to saw the old unit to get it out and then would need to remove walls to fit another 1 piece shower/tub unit in. There are multi-piece shower units available for around $400 (plus professional install) that could go in without removing walls. The drawback to these are seams that need to be caulked that will eventually harbor mold.
3. The project cost me around $140. $75 for 3 kits, plus a filtering breathing mask, painter’s tape, sandpaper, comet, lime a-way, surgical gloves, 14 foam rollers (I’ll explain that in a bit), a huge multi-pack of foam brushes, roller trays, and caulk. I also used 3 paint sticks which I had on hand and a window fan. I saved hundreds over replacing the unit (especially since that’s not a DIY project for us) but our result won’t be as long lasting as a new unit would be. We never plan to move, so this isn’t a fix it up to sell it type project for us. It is more of a borrowing time until we have money to do it right type of project.
4. Step 1 is to remove the drains and loosen the covers around the faucets. This one step just about stopped the whole project. If Darren hadn’t agreed to help with this it would have been a no go. I wasn’t physically strong enough to remove 45 year old rusted plumbing pieces.
5. Step 2 is to remove the old caulk. In the reviews on Amazon failing to do this properly resulted in peeling epoxy several months down the road. I spent hours with a razor blade and tweezers and still am not sure I got it all. (Anxiety!)
6. Next is to scrub the shower with comet and an abrasive pad. (The green Scotchbrite, not the blue.) Rinse well, then use Lime-away, twice for good measure. Scrub it down and rinse really really well again. Any dirt or residue cleaner will mess with your finish. (Not to stress you out at all.)
7. Keep in mind that if you have removed your drains at this point, no water should go down the plumbing in your shower. If it does, it could rain through the ceiling below and create another project. Since I had already convinced DH to remove the drains we had a bucket under the light fixture on the floor below to catch my first oops, and then I used a scrub bucket and rag to wash the rest of the times. Rinsing was no longer a possibility for me.
8. Then sand with fine grit sand paper. The finest grit they recommend is not available at your average hardware store in a size to fit a palm sander, so I went up to the slightly coarser grit that they said would still work. Some reviewers also said that even though they sanded, the finish still bubbled and peeled on the floor of the shower after several months of use. That made me nervous. They recommended a palm sander to rough it up more than hand sanding, so I did that. The corners, round bits and angles made palm sanding challenging. Once it’s sanded rinse, dry thoroughly, and use a tack cloth to catch any remaining dust.
9. Now you can tape off the edges. The tape is important even though the epoxy will leak under in spots and the tape will likely pull off wall paint since it is on the edge of drywall (even if you use the good green stuff.) Use a drop cloth too. Normal paint just scrapes off the floor, this won’t.
10. Open the window, turn on the exhaust fan. Turn on a window fan directing air outside and put on your breathing mask, the kind with filters on both sides that makes you look like an alien. This stuff stinks, will cause headaches, and make you forget your favorite color. Trust me. Use the mask.
11. Open both cans on a drop cloth or stack of newspaper. Pour the smaller can into the larger can and stir until the whole thing is the same consistency. For awhile the top layer will feel thinner than the stuff on the bottom. Just keep stirring. At this point you have about 5 hours to use up that can of stuff before the whole thing hardens. You can re-coat in an hour, if it’s dry.
12. Wear disposable surgical gloves. (It won’t wash off your hands, though fingernail polish remover and Goof Off will take it off.) Use the small foam brushes to get any spots the rollers won’t reach. Use the foam roller to roll the big areas. You should note that you have about 5 minutes once you dip your brush or roller in the epoxy before it dissolves beyond use. If you use it too long, flakes of the roller will stay behind in your epoxy and permanently texturize the finish. Some of them will dry sharp and make baths uncomfortable for little hiney’s. I used about 2 rollers per coat.
P.S. The epoxy also will dissolve your surgical gloves. Mine held up for the coats but then shredded when I tried to take them off.
13. Watch out for drips. The epoxy is very thin and drips easily. Drips will dry permanently ugly. It self levels only to a point. The package suggested each can would provide 1 shower/tub coat or 2 bathtub only coats. I got 2.5 shower/tub/sink coats from a single can. I had to put it on this thin to prevent drips. Since it took 3 boxes to cover the green, That’s about 7 coats x 2 rollers each coat. I used 14 foam rollers (and still ended up with some bits of roller left in the texture.)
14. After you have your 7 coats in place, let it cure for 3 days. Caulk and replace your drains and faucets and give it a try.
15. The epoxy tries super hard in a glasslike enamel finish. If you don’t have roller bits in it, it’s smooth and shiny.
After hearing the good the bad and the ugly, would you ever try a project like this?
I have thought about trying this on our bathroom counter. The sink is built in the counter top like yours. I wasn’t sure if that would endure all the water.
I’ll let you know how it wears for us.
But in their defense, I have to say I’d use the kitchen counter kit again. Used it two years ago and love it.
I’m thinking about using Giani Granite for our bathroom sink. I was looking at Rustoleum for our tub/shower enclosure that sounds just like the one you have except that ours is an old 50’s mauve color. I’d be very interested in if it holds up for you. The reviews were iffy.
I’ll have to check out Giani Granite. That’s a new name for me.
WOW! Not a small project! I’m not sure I’d ever tackle a project that intense (I mean, where were your six children during all of this?!) but then I’m the girl who had no bathtub for seven years rather than look at the pink tub and gold-flecked tile original to the house.
On the other hand, GREEN….?!
lol! I’m thankful my kids are older. I took breaks to drive the older ones to their jobs and the little ones just played together. Green was pretty awful. Even though we can’t use it yet, it’s still a major improvement.
It is a really amazing transformation. Do you think anyone else would notice the imperfections? I bet they wouldn’t. It looks really good!
Sheila, that’s a great point. As long as the imperfections don’t mess with the durability of it, I’m going to just be thankful it’s no longer GREEN.
Wow, that’s quite a project. Thanks for sharing at the #HomeMattersParty – we love partying with you! Hope to see you next Friday. 🙂
~Lorelai
Life With Lorelai
Thanks, Lorelia! You got a great party going on there.
Any updates on how the probuct has held up?
The roller left little bits behind as it disintegrated. In a few spots these bits have broken free and left dots where the green shows through. It’s still an improvement overall, but I’ll need to go back and fix those areas eventually.