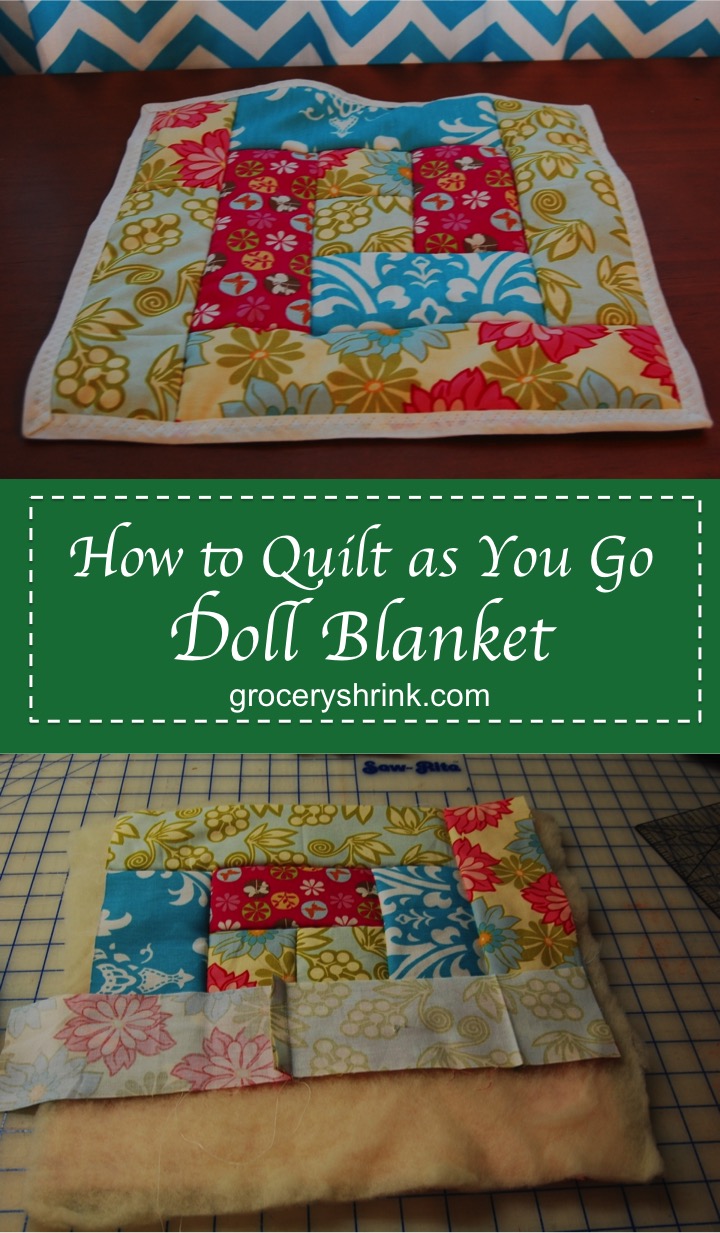
This adorable doll quilt is the perfect companion to our dollar tree Doll Bassinet/ Moses Basket. Tutorial here.

I used the leftover scraps from the basket to complete it. It took about an hour from start to finish. This same technique can be used to make quilted bibs and larger throws for real babies or for nursing home residents. It goes together super fast since you quilt it as you go and there is no hand sewing. (My choir students are working together to make a larger version. It’s a little more fiddly to make it bigger, but it still works.)
Materials: 1. Quilt backing 1 inch bigger than your desired finished quilt. I used dimpled minky, but flannel, satin, or quilting cotton are all nice. My doll is 12 inches long, so I wanted a 12 inch square blanket. On bigger quilts espeically, choose a backing fabric that has no lines to reveal if you go crooked :).
2. Thin quilt batting the same size.
3. Cotton scraps in strips (if your scraps are too short you can piece them together ahead of time.) My strips were 3″ wide leftover from the previous project, but yours can be any size. They don’t all have to be the same width either.
4. 1/2″ wide Double fold bias tape–purchased or homemade.
5. If you have a walking foot, it helps to get through the layers. And when it’s time for binding a hump jumper helps too. The hump jumper is pictured below.
 Step 1: Place your backing right side down on a table and layer the batting on top. Find the center and mark it with a pin.
 2. Cut a square of fabric (any size) and center it, right side up, on your quilt. Pin it in place.
 3. Place a second piece on top, right sides together. Mine are exactly the same size (3″ square) but you could make your any width as long as it is the same length as your first piece.

Stitch along one edge. and then flip the top piece out so you can see the right side. Since you are stitching through all the layers, this is a good time to use a walking foot and lengthen your stitch a little. Also every time you add a piece and get ready to stitch, make sure your backing is nice and smooth.
 4. Place your third piece on top, right sides together. Again, it can be any width as long as it is the same length as the first two pieces put together. If you have made a log cabin quilt before, this is the same principle. Stitch through all layers and flip out again.

 5. Keep stitching and flipping pieces, working in a box, until your quilt is as big as you need it to be.


 I stitched this strip long and trimmed it after.

 I didn’t have a strip long enough for the last piece, so I sewed two smaller scraps together ahead of time.
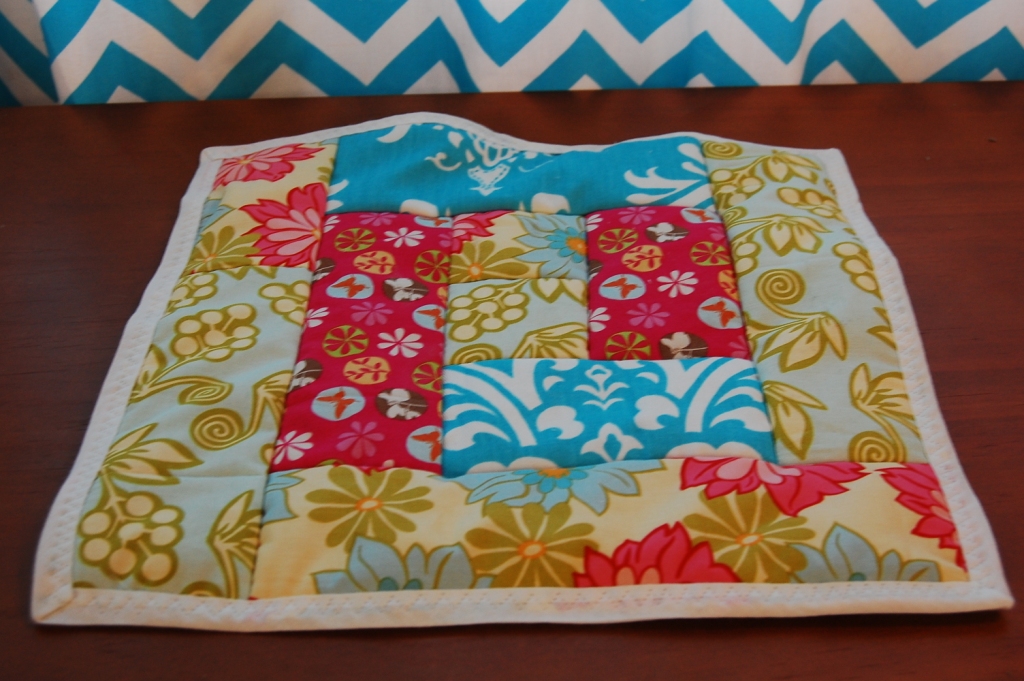
 Look at that. The quilt top is pieced, stretched to the backing and quilted already. Well now, aren’t you fast!
Now take your ruler and rotary cutter and straighten out the edges. And baste the edges together a scant 1/4 inch away from the edge all the way around. This will make it a lot easier to bind.
 I hope you didn’t groan when you saw that we would be binding the quilt with bias tape. I agree, it’s a pain when you stitch from the front and the back doesn’t get caught. It just looks messy. That’s why we are going to use a cute triple zigzag stitch to bind your quilt. Not only is it adorable but you can’t miss! But it’s best to take off the walking foot for this. The wide swing of the needle may make it hit a walking foot and break.
Start on one edge about 2″ before the nearest corner. Leave a good 5″ tail of bias tape before you start stitching.
 When you reach the corner, stop stitching 1/2 inch away from the edge. Pull your quilt out of the machine without cutting threads. Fold the bias tape around the corner creating a nice mitered corner on the front and the back. Then put the fabric back in, back stitch, and keep going.
 You can clip the loopy threads when you are all done. It’s pretty thick here and most machines won’t want to go forward at the corner. This is when a hump jumper is helpful. If you don’t have one a thick piece of folded fabric (like denim) works too.
 Stop sewing when you are about 5″ away from the edge of your starting tail. Be sure you did turn your final corner though. Take the fabric out of the machine and measure the total width of the bias tape when every edge is completely unfolded.
 Then trim your bias tape so it is this much longer than it takes to just meet the starting end.
 I cut mine a smidge shorter, because bias tape tends to stretch.
Unfold both ends of bias tape and place at right angles right sides together. Pin exactly the way I did, then stitch from the tip of the pin to the ball, removing the pin as you go.
 Trim off the excess triangle of fabric, leaving a 1/4 inch seam allowance. Then finger press the seam open.
 Then refold all the edges so the bias is tape is back the way it was. It should fit perfectly to finish zig zag binding your quilt.
 Here’s a closeup of the corner and the zigzag stitch.
 The back shows the quilting lines.

 Now wrap that baby up :).
What a great tutorial!
Thank you sew much for the tutorial…….I have to have pictures with the instructions……Visual learner…..Love Hugs…..Janies
You’re welcome Janies! I’m glad you found me.
NONE OF THE PICTURES SHOW. WHEN I CLICK ON THE X I GET 404 ERROR.
THANKS
Argh, Thanks for letting me know Brenda. It looks like the picture files are corrupted. I’m looking for the originals.