The Best *Free* Baby Gift Tutorials from Around the Web

Best Baby Tutorials

To make the list, the tutorials needed to be useful, adorable, free, super easy, use small amounts of materials, and be fast to make. Like I woke up late Saturday morning, and the shower’s at 2pm and I don’t have a gift yet, fast to make.

Click photos to go to the source and get the info:

IMG_2110

You’ll need a bib to use as a pattern for this one, but it’s a great concept for using up scraps.

Mrs Biddle Bibs

 I didn’t use drool bibs until I found these.  They didn’t cover up a cute outfit, they MADE a cute outfit.

liberty-bibs-all-1

Drool bibs for the little ladies :).00

This scrappy bib tutorial comes with a printable pattern.

a

When Grant was born I made 2 of these out of Minky.  Oh man, everyone was jealous.  He still loves them 3 years later.  We moved him to a toddler bed instead of a twin bed, so he could still have his sheets.

Baby TomsBoth free and paid options at this site.  Such cuties!

MakingHomeBaseSweaterUpcycleValentinesDayLegWarmers_zpsfd3eee36

Baby leg warmers from sweater arms

Baby legs from socks

Baby leg warmers from socks

babytightscoverpage

Baby tights from recycled t-shirts.

Baby tie onesies

Tie onesies! These are fast and easy to make and so cute!  Now little man can get all dressed up for church.

crochet-baby-turban3

Crocheted baby turban.  So cute! So fast!  And just takes a bit of yarn.

liberty-bonnet-600-3Sherpa lined winter bonnet

soft block tutorial

felt lion taggy 3Felt and Ribbon Lion Tag Toy

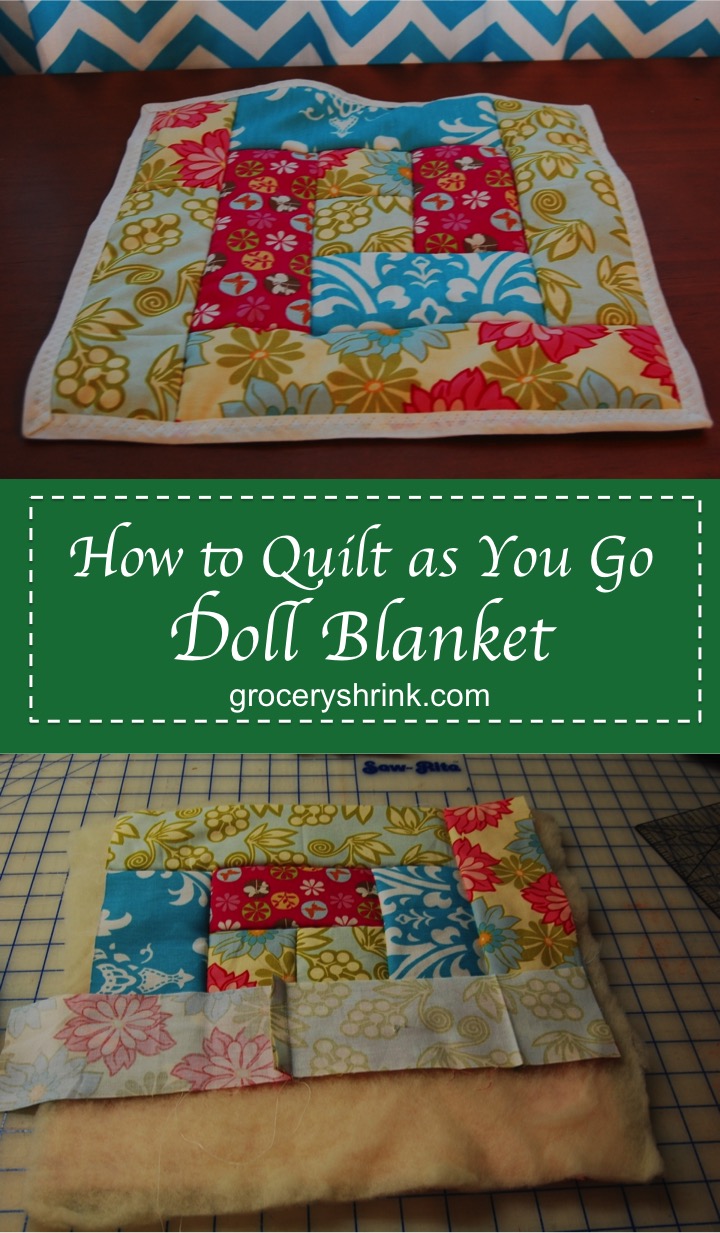
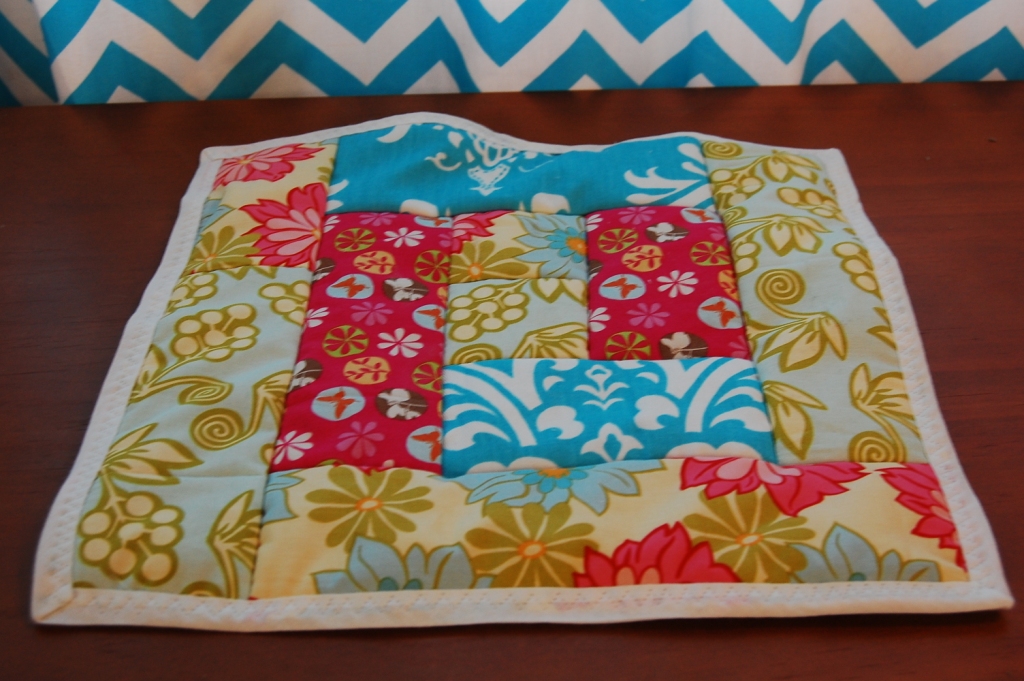
Quilt as you goThis is a doll quilt, but the same principle works for a baby quilt, start with a 45 inch square backing and batting.  You can also, just do strips across instead of a log cabin look. I made one of these for a shower in 2 hours one Saturday morning.  It’s an impressive gift that uses scraps and a short amount of time.

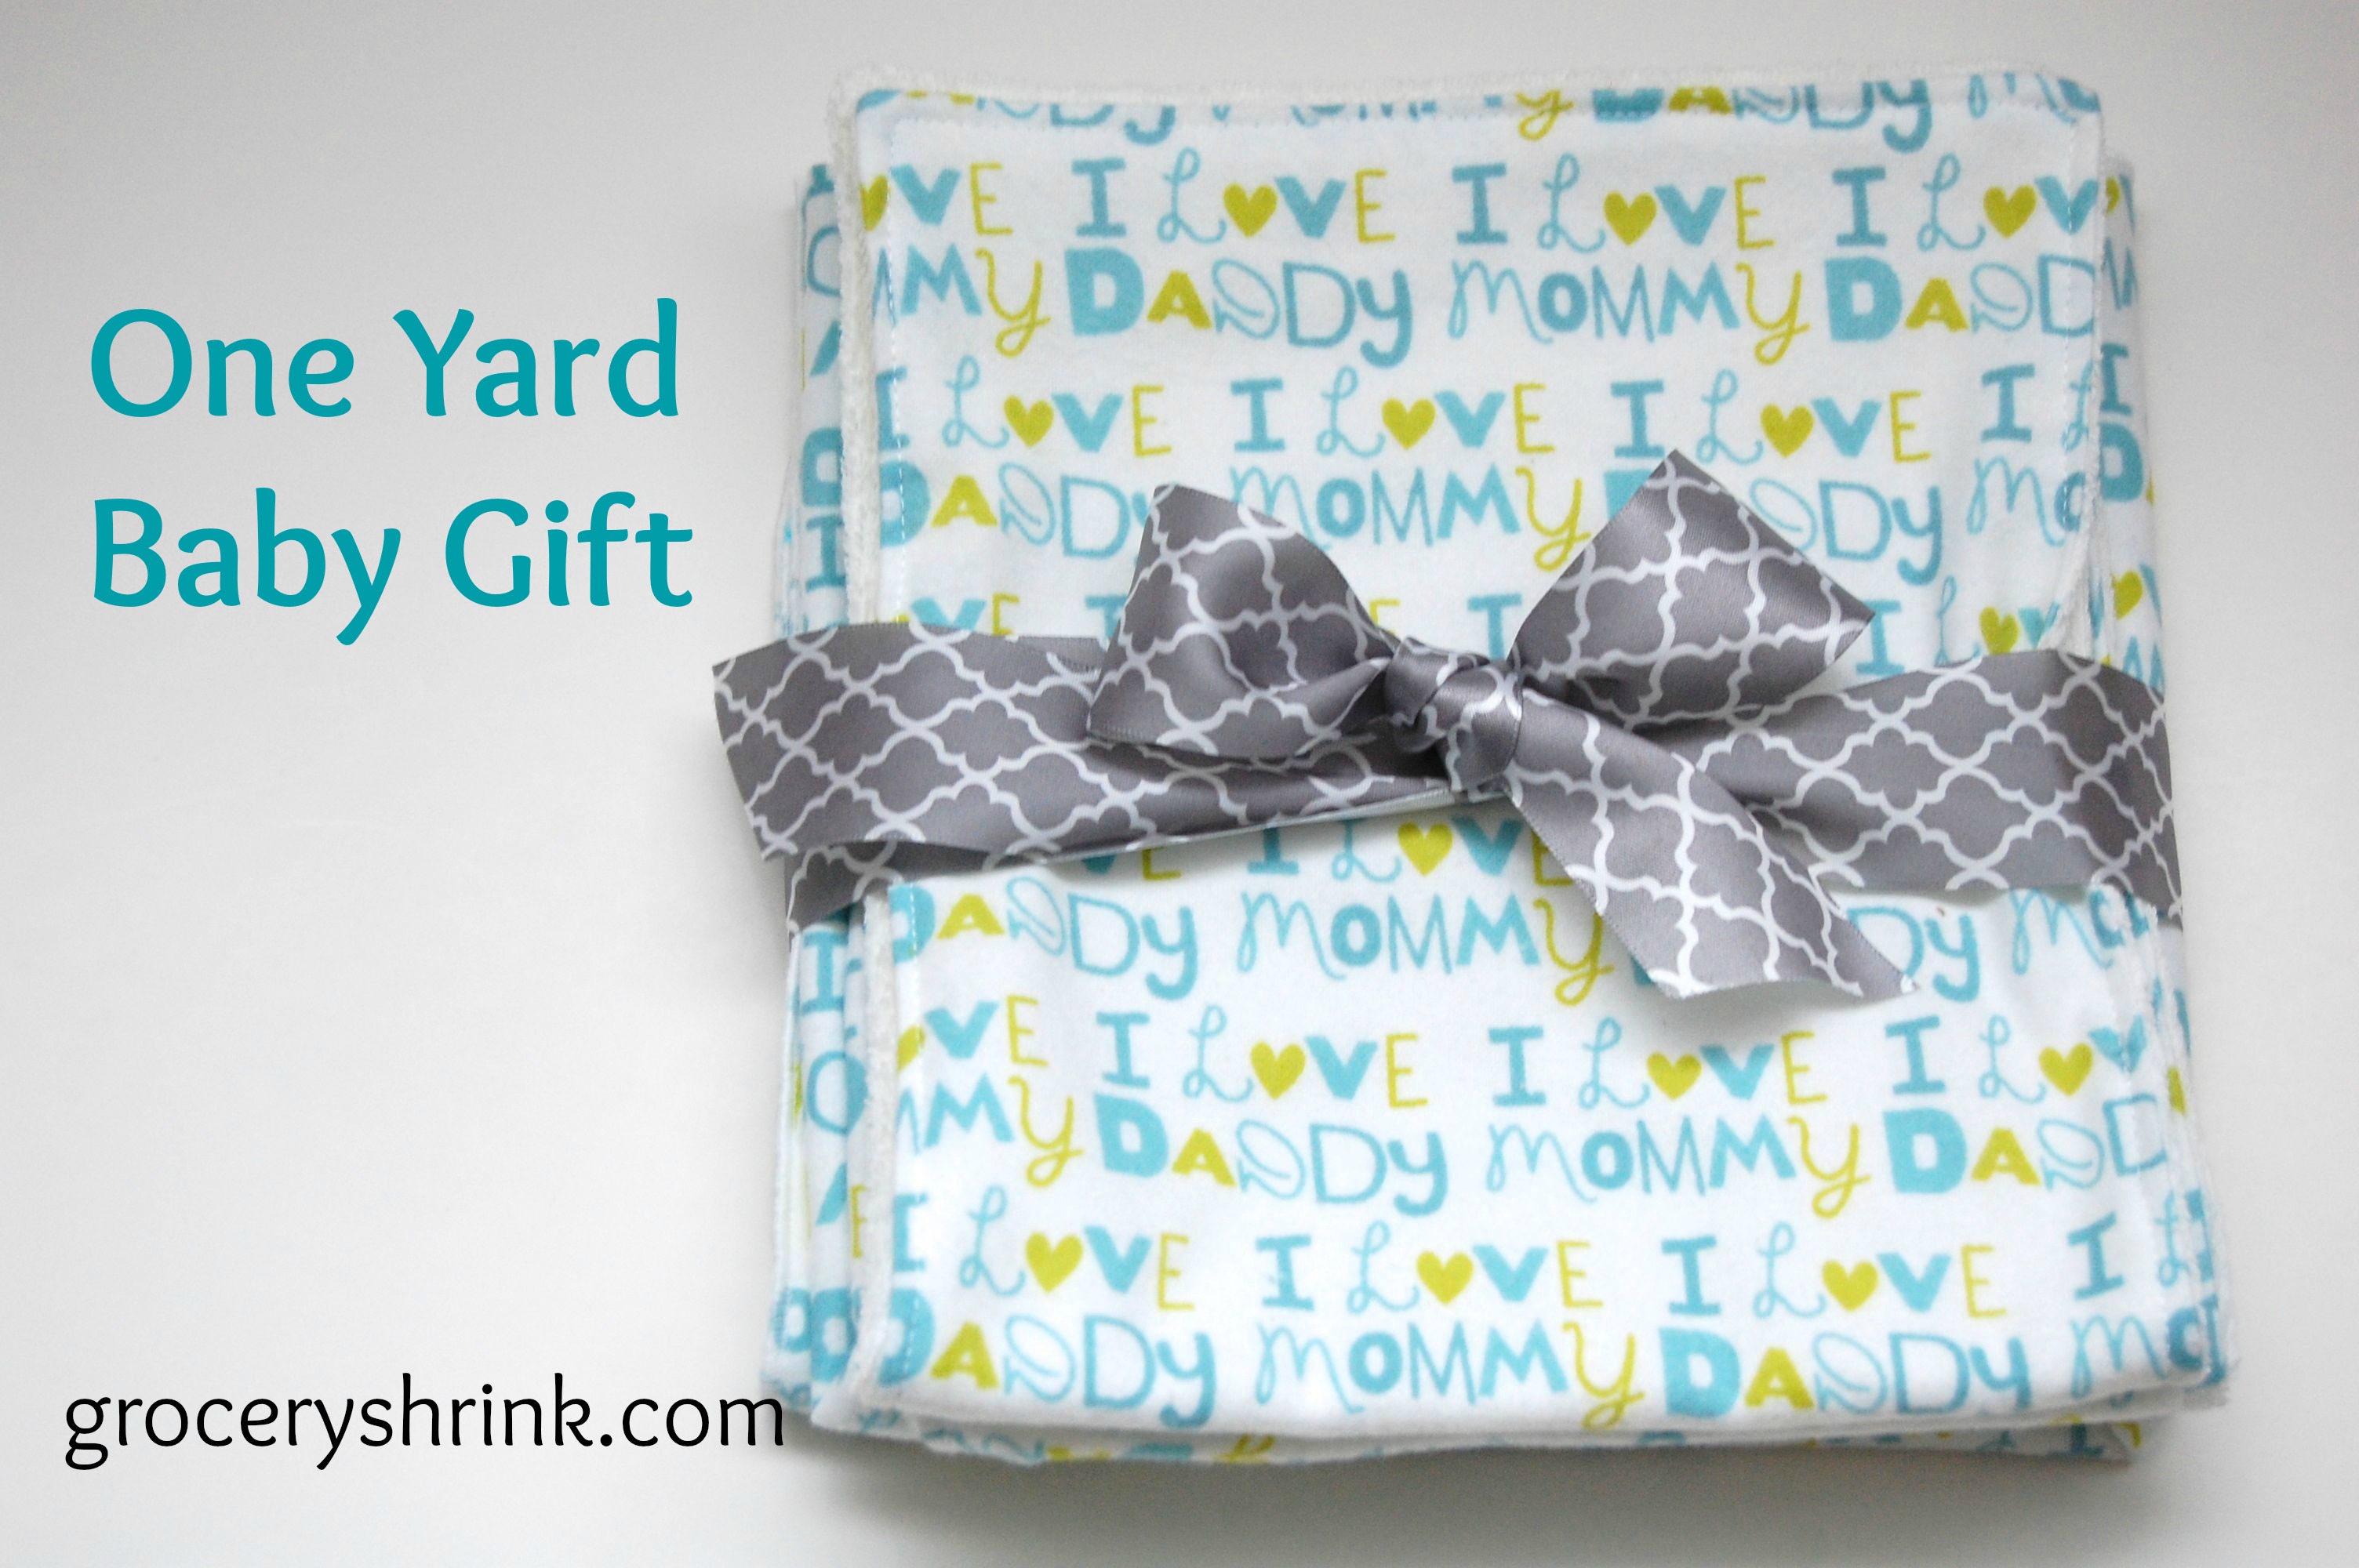
One yard baby gift

Use 1 yard to make a receiving blanket and 2 burp cloths.

IMG_4855

Gown made from a t-shirt, printable pattern.

BrandonandHeidi

Knotted Baby Hat printable pattern

ezragraysCrocheted slippers

david_peacoatCrocheted Peacoat (I made one like this and it turned out darling!)

Crocheted Baby Hoodie

Baby Gown and Hat Set for Free

Baby gift Idea #2. Are you brave?  How brave?

Brave enough to sew with knit?  What if it were free? (Well… free according to the craft hoarders rule book.)

Photo Credit ThisMamaMakesStuff.com

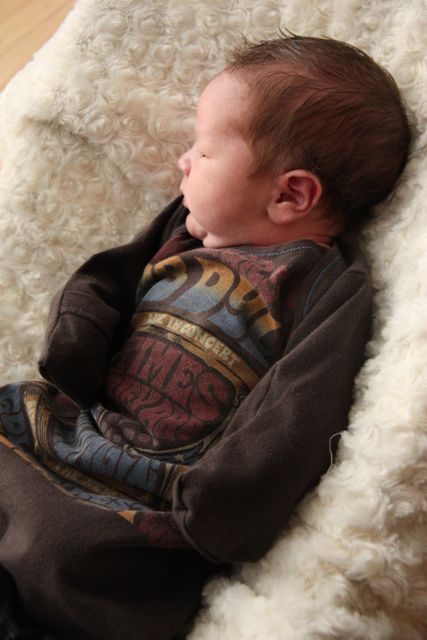
If you have a spare t-shirt, you could make a darling infant gown with it and if it doesn’t work out….you only lost the shirt.   Even better, The pattern is free from This Mama Makes Stuff.  Her tutorial includes how to make the fold over cuffs to protect the babies from their own sharp fingernails.

Here are my sewing with knit tips:  Use a ball point needle to keep from tearing permanent holes in the knit.  Use a longer stitch length.  If you can reduce the pressure on the foot a little to keep the fabric from stretching out of shape.  If you have a walking foot, you could do that instead.  If things do get stretched out of shape, try to steam them back with the iron. Then just relax and enjoy it.  Sewing with knit is my FAVORITE!  No basting to ease in seams, it just goes together like a dream. You are going to love it!

If you have some fabric leftover from the shirt make a matching hat:

Free pattern here:

Preemie hat pattern

and a less ink printable pattern PreemieKnottyHat

If the knit is fairly stretchy it will fit a newborn well too.  It’s on my 9lb 2 ounce bouncing baby boy above.

So Let’s say the shirt was “free” and you got the gown and hat out of it.  And then spent $3.75 on flannel to make a blanket and 2 burp cloths….You could wrap the gown, hat, and burp cloths inside the blanket (using the blanket as “wrapping paper”) and man, what a cute gift you have for less than $5 and about 2 hours worth of sewing.  Aren’t you clever?!


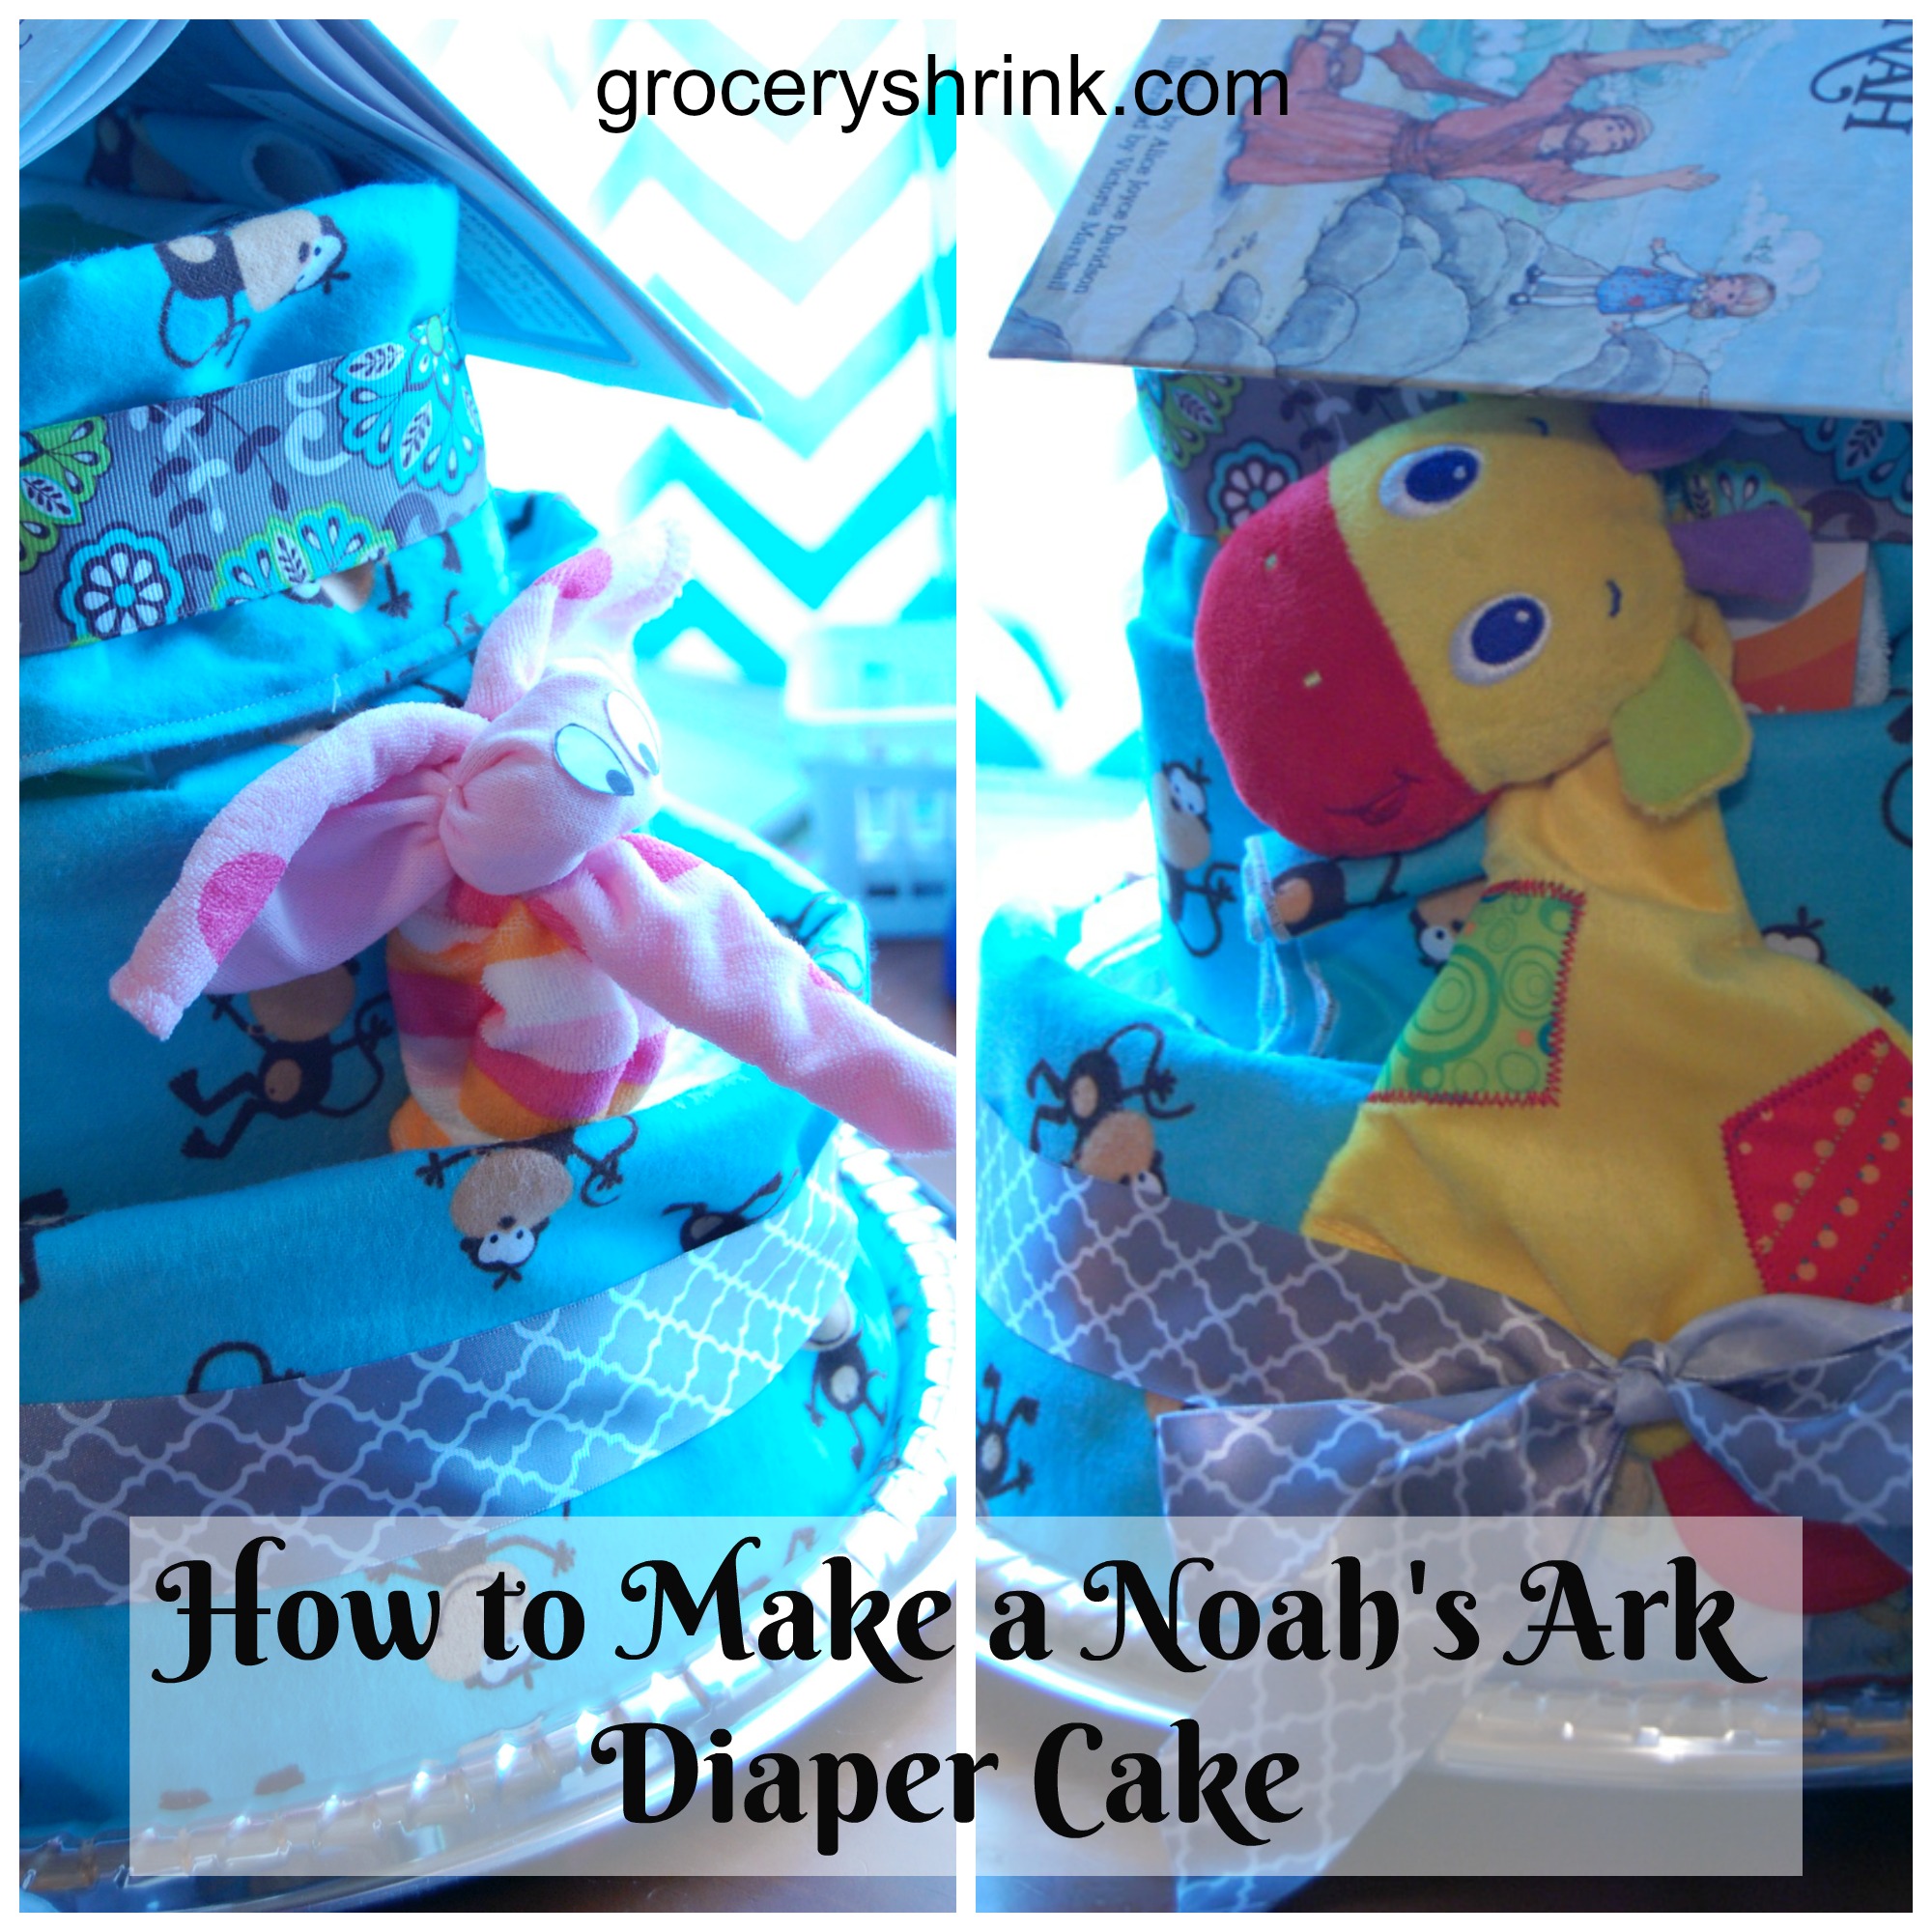
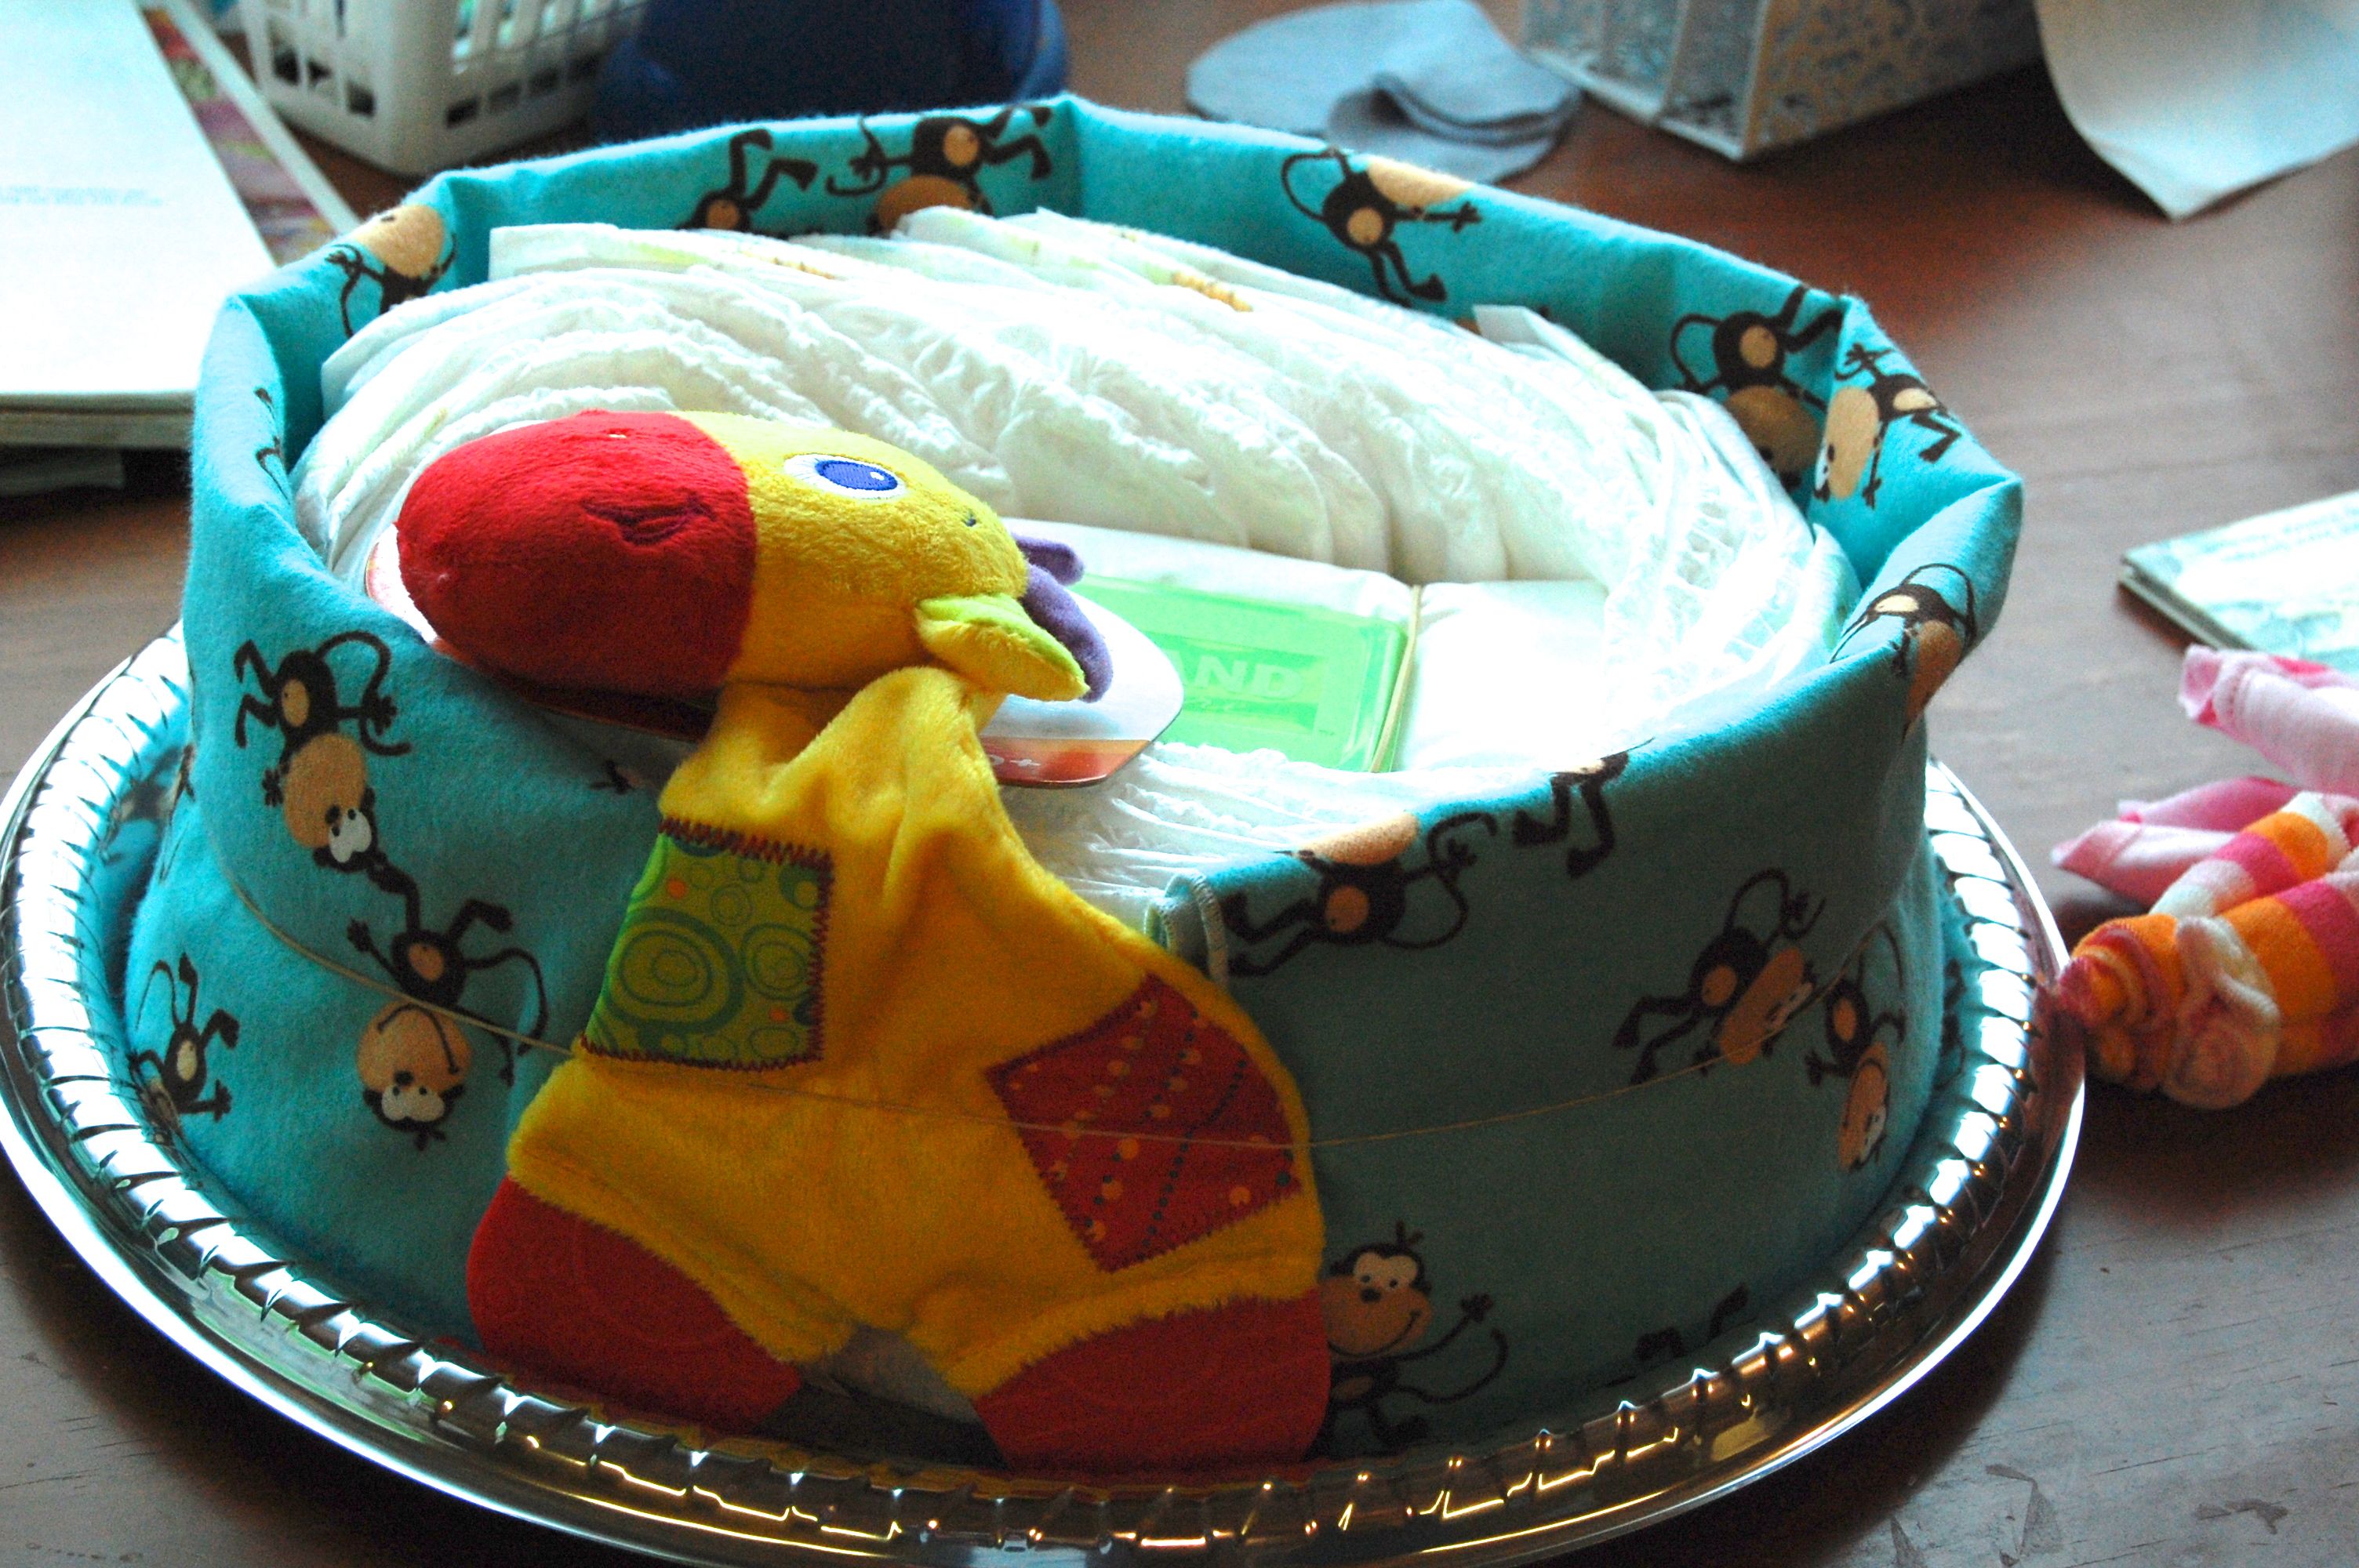
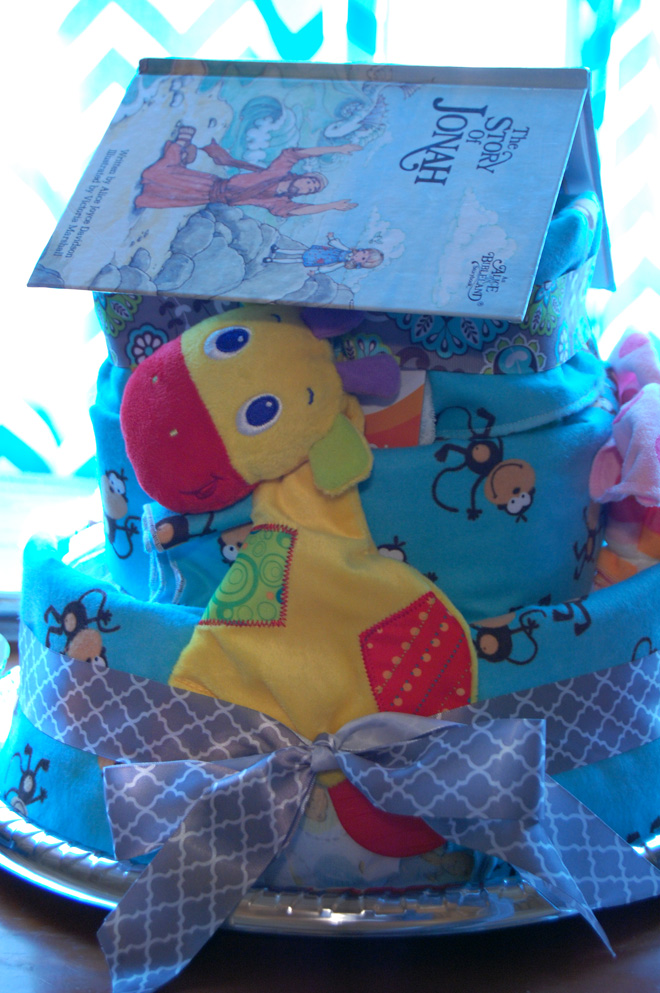
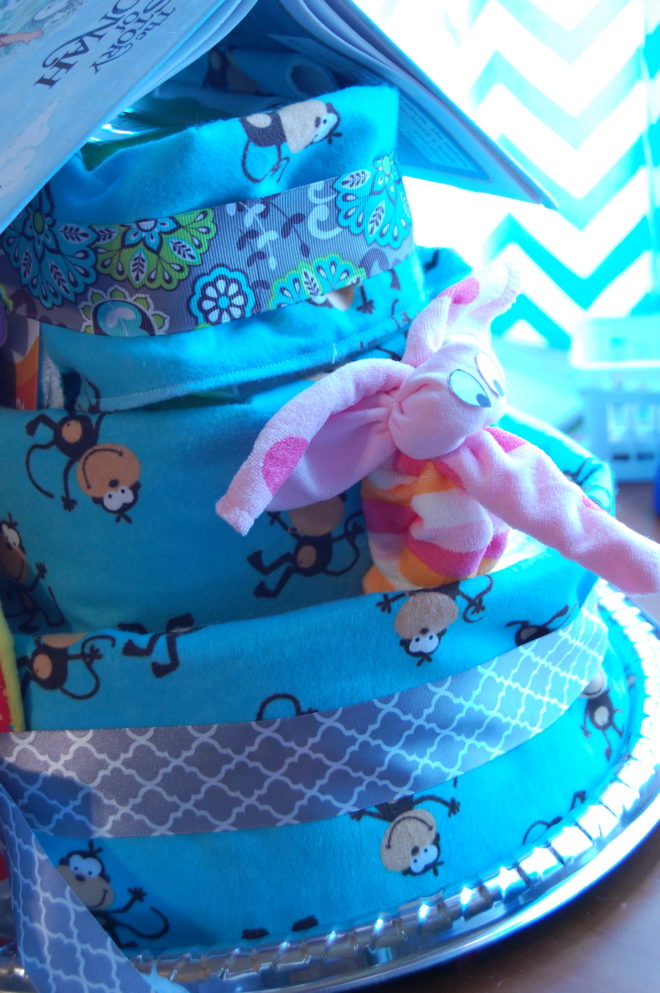
How to Make a Noah’s Ark Diaper Cake

You will need:

2 receiving blankets

4 burp cloths

2 wipes containers

1 small package of size 1 diapers

A children’s book or this

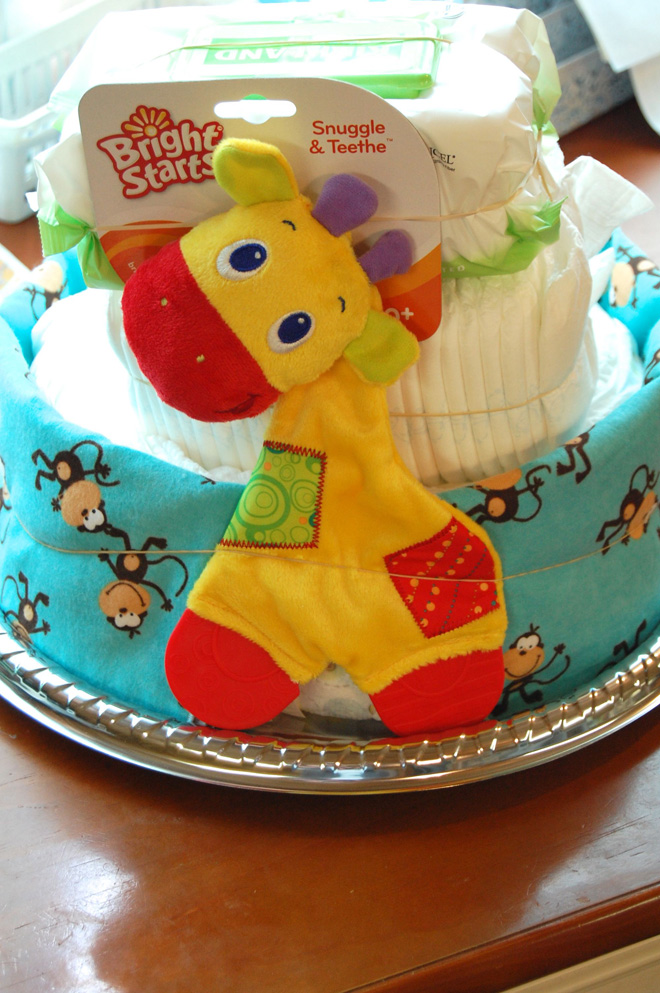
Giraffe teether toy

Washcloth animals (opt.)

Rubberbands

Plastic tray (with metallic finish from Dollar Tree)

Ribbon


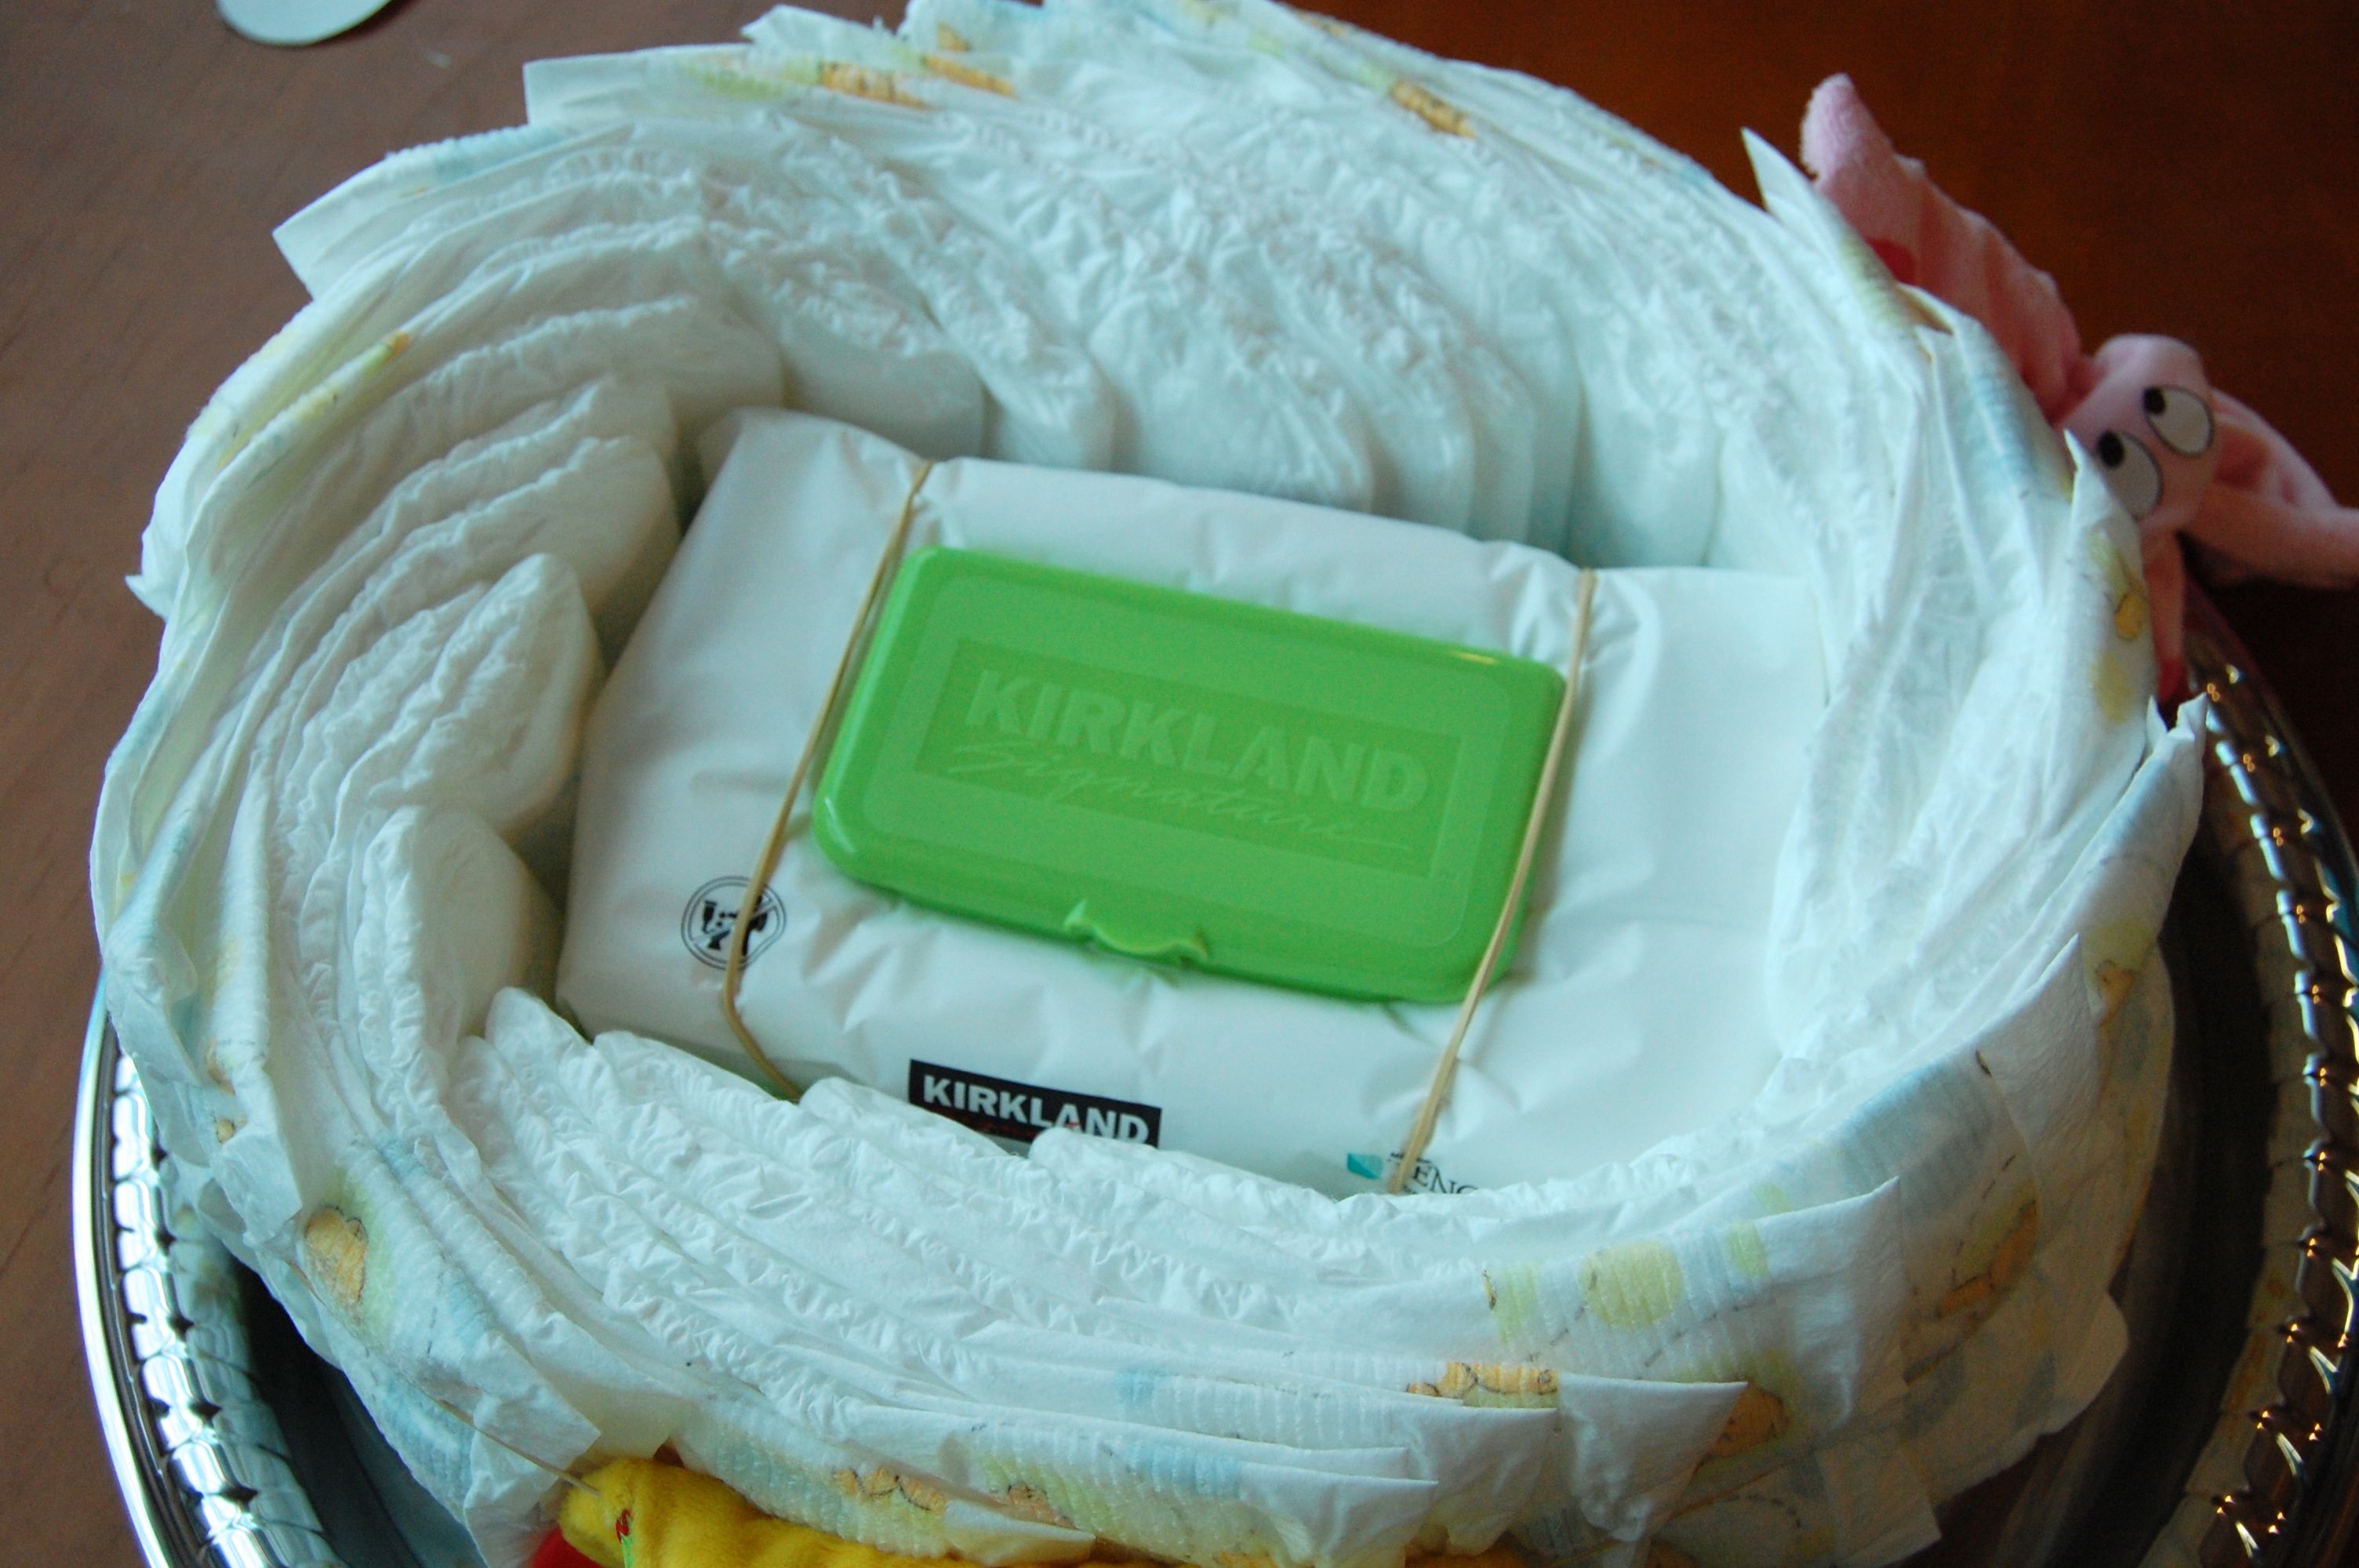
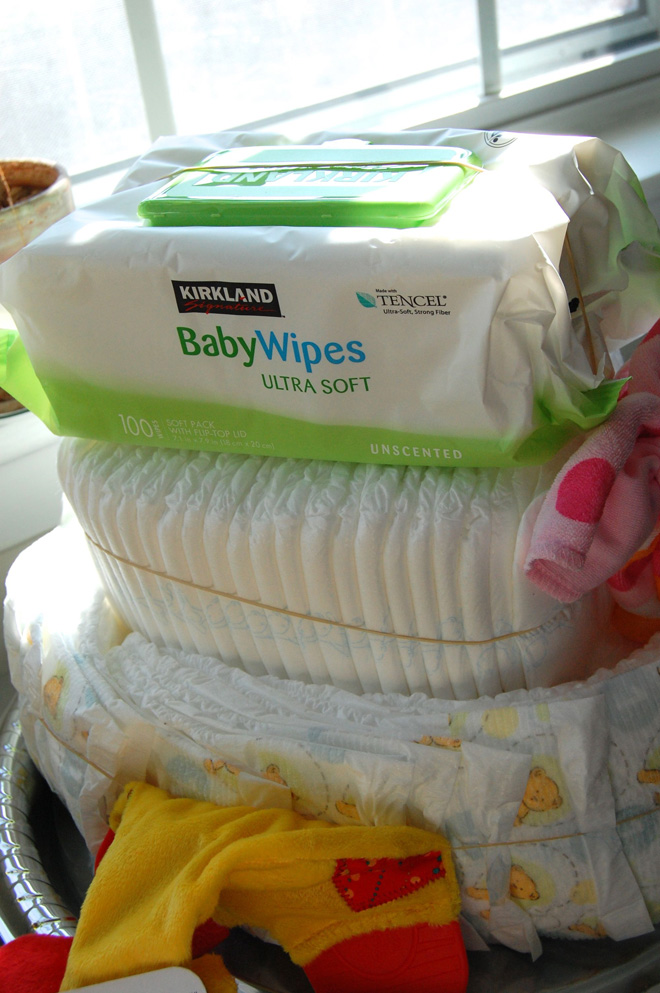
Place one wipes container in the middle of the tray. Ignore the two rubberbands you see, you won’t need them. Put one rubber band around the middle to hold the diapers in place.  Use half of the diapers to wrap around the wipes container and secure with a rubberband.


Fold a blanket lengthwise until it is just slightly taller than the diapers and wrap it around.  There will be a 3-4 inch gap in the center.  Use a toy to cover the gap (Or you can use a burp cloth here.)  Secure with rubber band.

Make the second tier from the remaining half of the diapers.  I just put a rubber band around them to secure them in the same shape they came out of the package. The third tier is just another package of wipes.


At this point you can secure everything together with rubberbands and help Mr. Giraffe hold his head up.

Wrap the top two layers with the remaining blanket and burp cloths.  Tie on ribbons to hide the rubber bands. Gently lay the book on top for a roof.  (Take the book off for travel since it isn’t secured in place.

I added this little elephant made from 2 baby washcloths.  I’m not very good at making these things, so stopped at the 1 elephant.  I used these instructions:

And cut the eyes out of a blank white address label.


A One Yard Baby Gift

I love giving, but sometimes I get gift anxiety.  What if they don’t like it?  What if they think I’m cheap? What if I spent all that time and it doesn’t come out right?

These feelings could all be avoided if I just went to the store and purchased something and gave them the gift receipt.  Sometimes I do that.  But this year….oh my!  I think everyone and their dog is planning to get married and have a baby this year, then throw a birthday party and invite one of our kids to it.  I’m glad they are, and super glad they invited us.  Sometimes the gift budget doesn’t stretch.

It just gives a reason to be a little more creative, right?

(I once talked to a friend, who admitted to turning down birthday party invitations for her kids because they couldn’t afford a gift.  Hey, y’all.  Don’t do that here, mk?  I’d rather have you sans gift then let you worry one moment about finances.  Our kids have enough stuff and they won’t even notice, I promise.)

So I thought I’d talk about gifting this month a bit and give some ideas for what to do for baby showers, weddings, kid birthdays and such.

First up is this one yard baby gift.  You will need 1 yard of flannel; and 1 clean towel or scrap of terry cloth  at least 16 x 18 inches. At Hobby Lobby 1 yard of flannel is $5.99 use a coupon and this gift will cost around $3.75 (with tax.) I used knit terry leftover from diaper making. If you use woven terry, use as thin a terry as you can get–cheap towels are perfect.


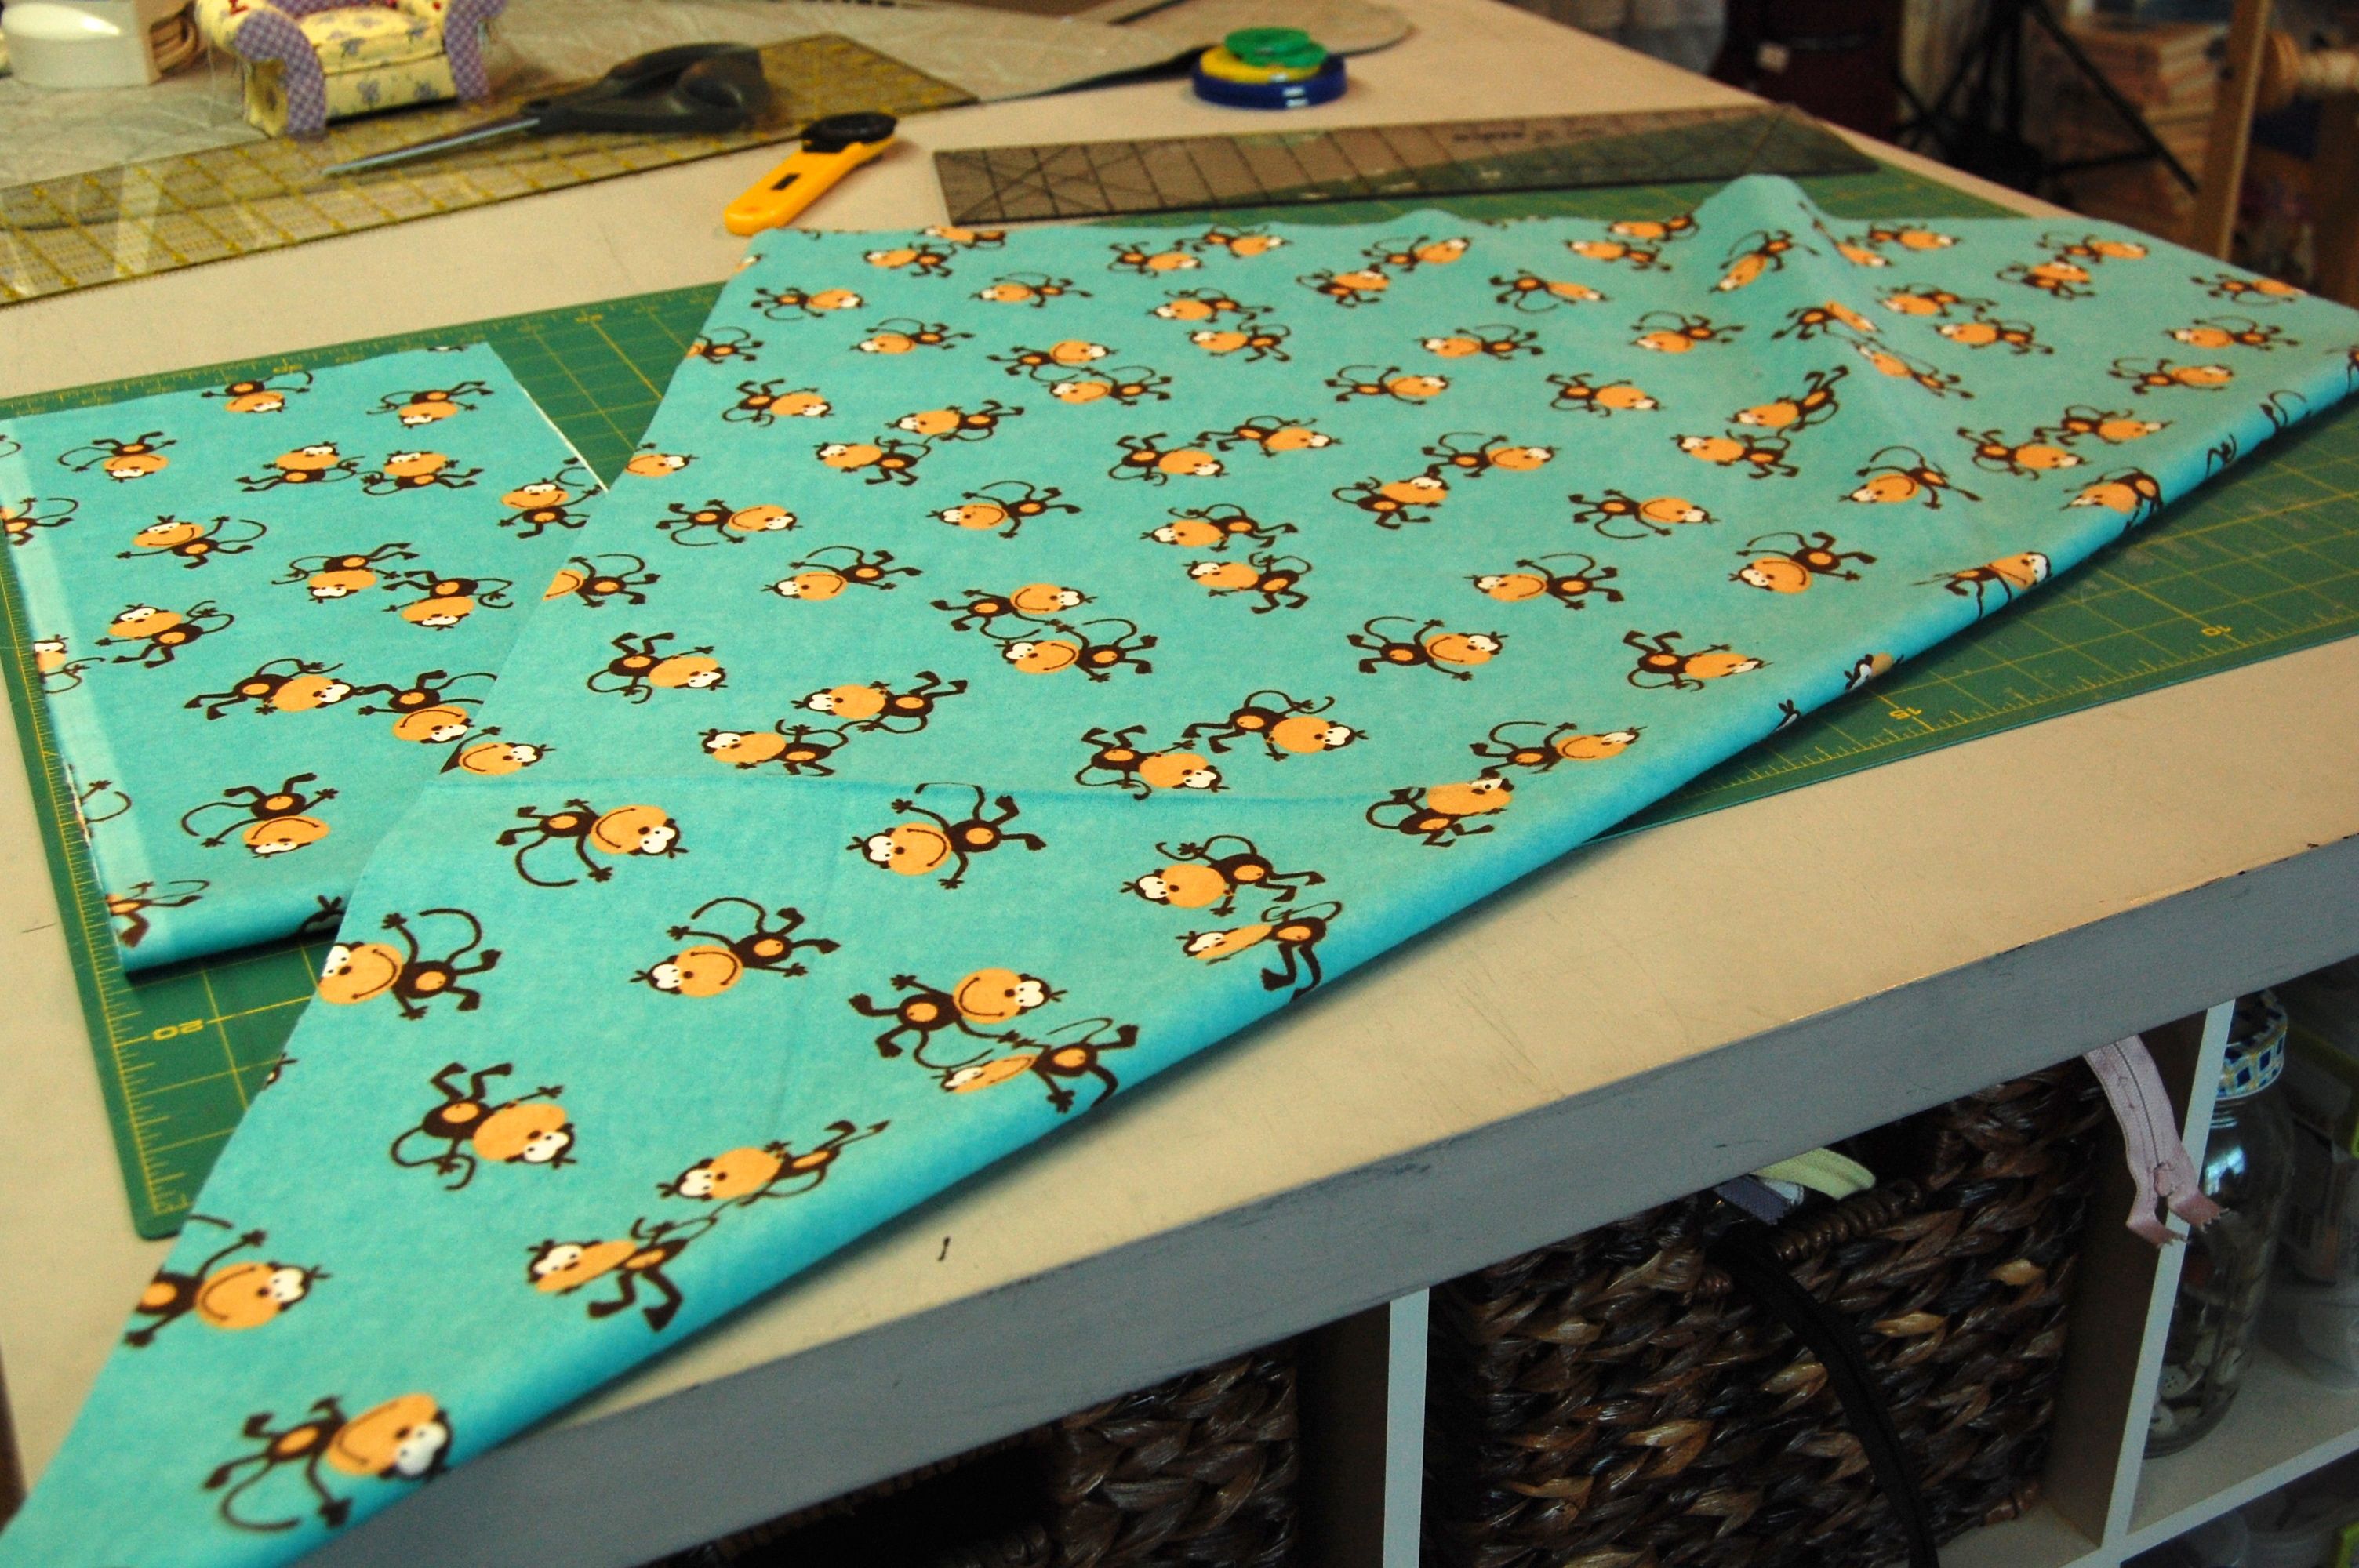
First find the selvage edge of your fabric that is printed all the way to the edge.  Cut an 8 inch strip off this edge, then cut it in half to get two 18 by 8 inch pieces.  (These will become 2 burp cloths.)

Cut the remaining fabric into a perfect square.  I fold it into a triangle and cut off what’s hanging off–super technical method ;). This will be a perfect receiving blanket between 36 and 34 inches square.  Ever notice that the store bought ones are too tiny to be any good?  I used to make mine 45″ square, but really those were too big.  These are perfect.

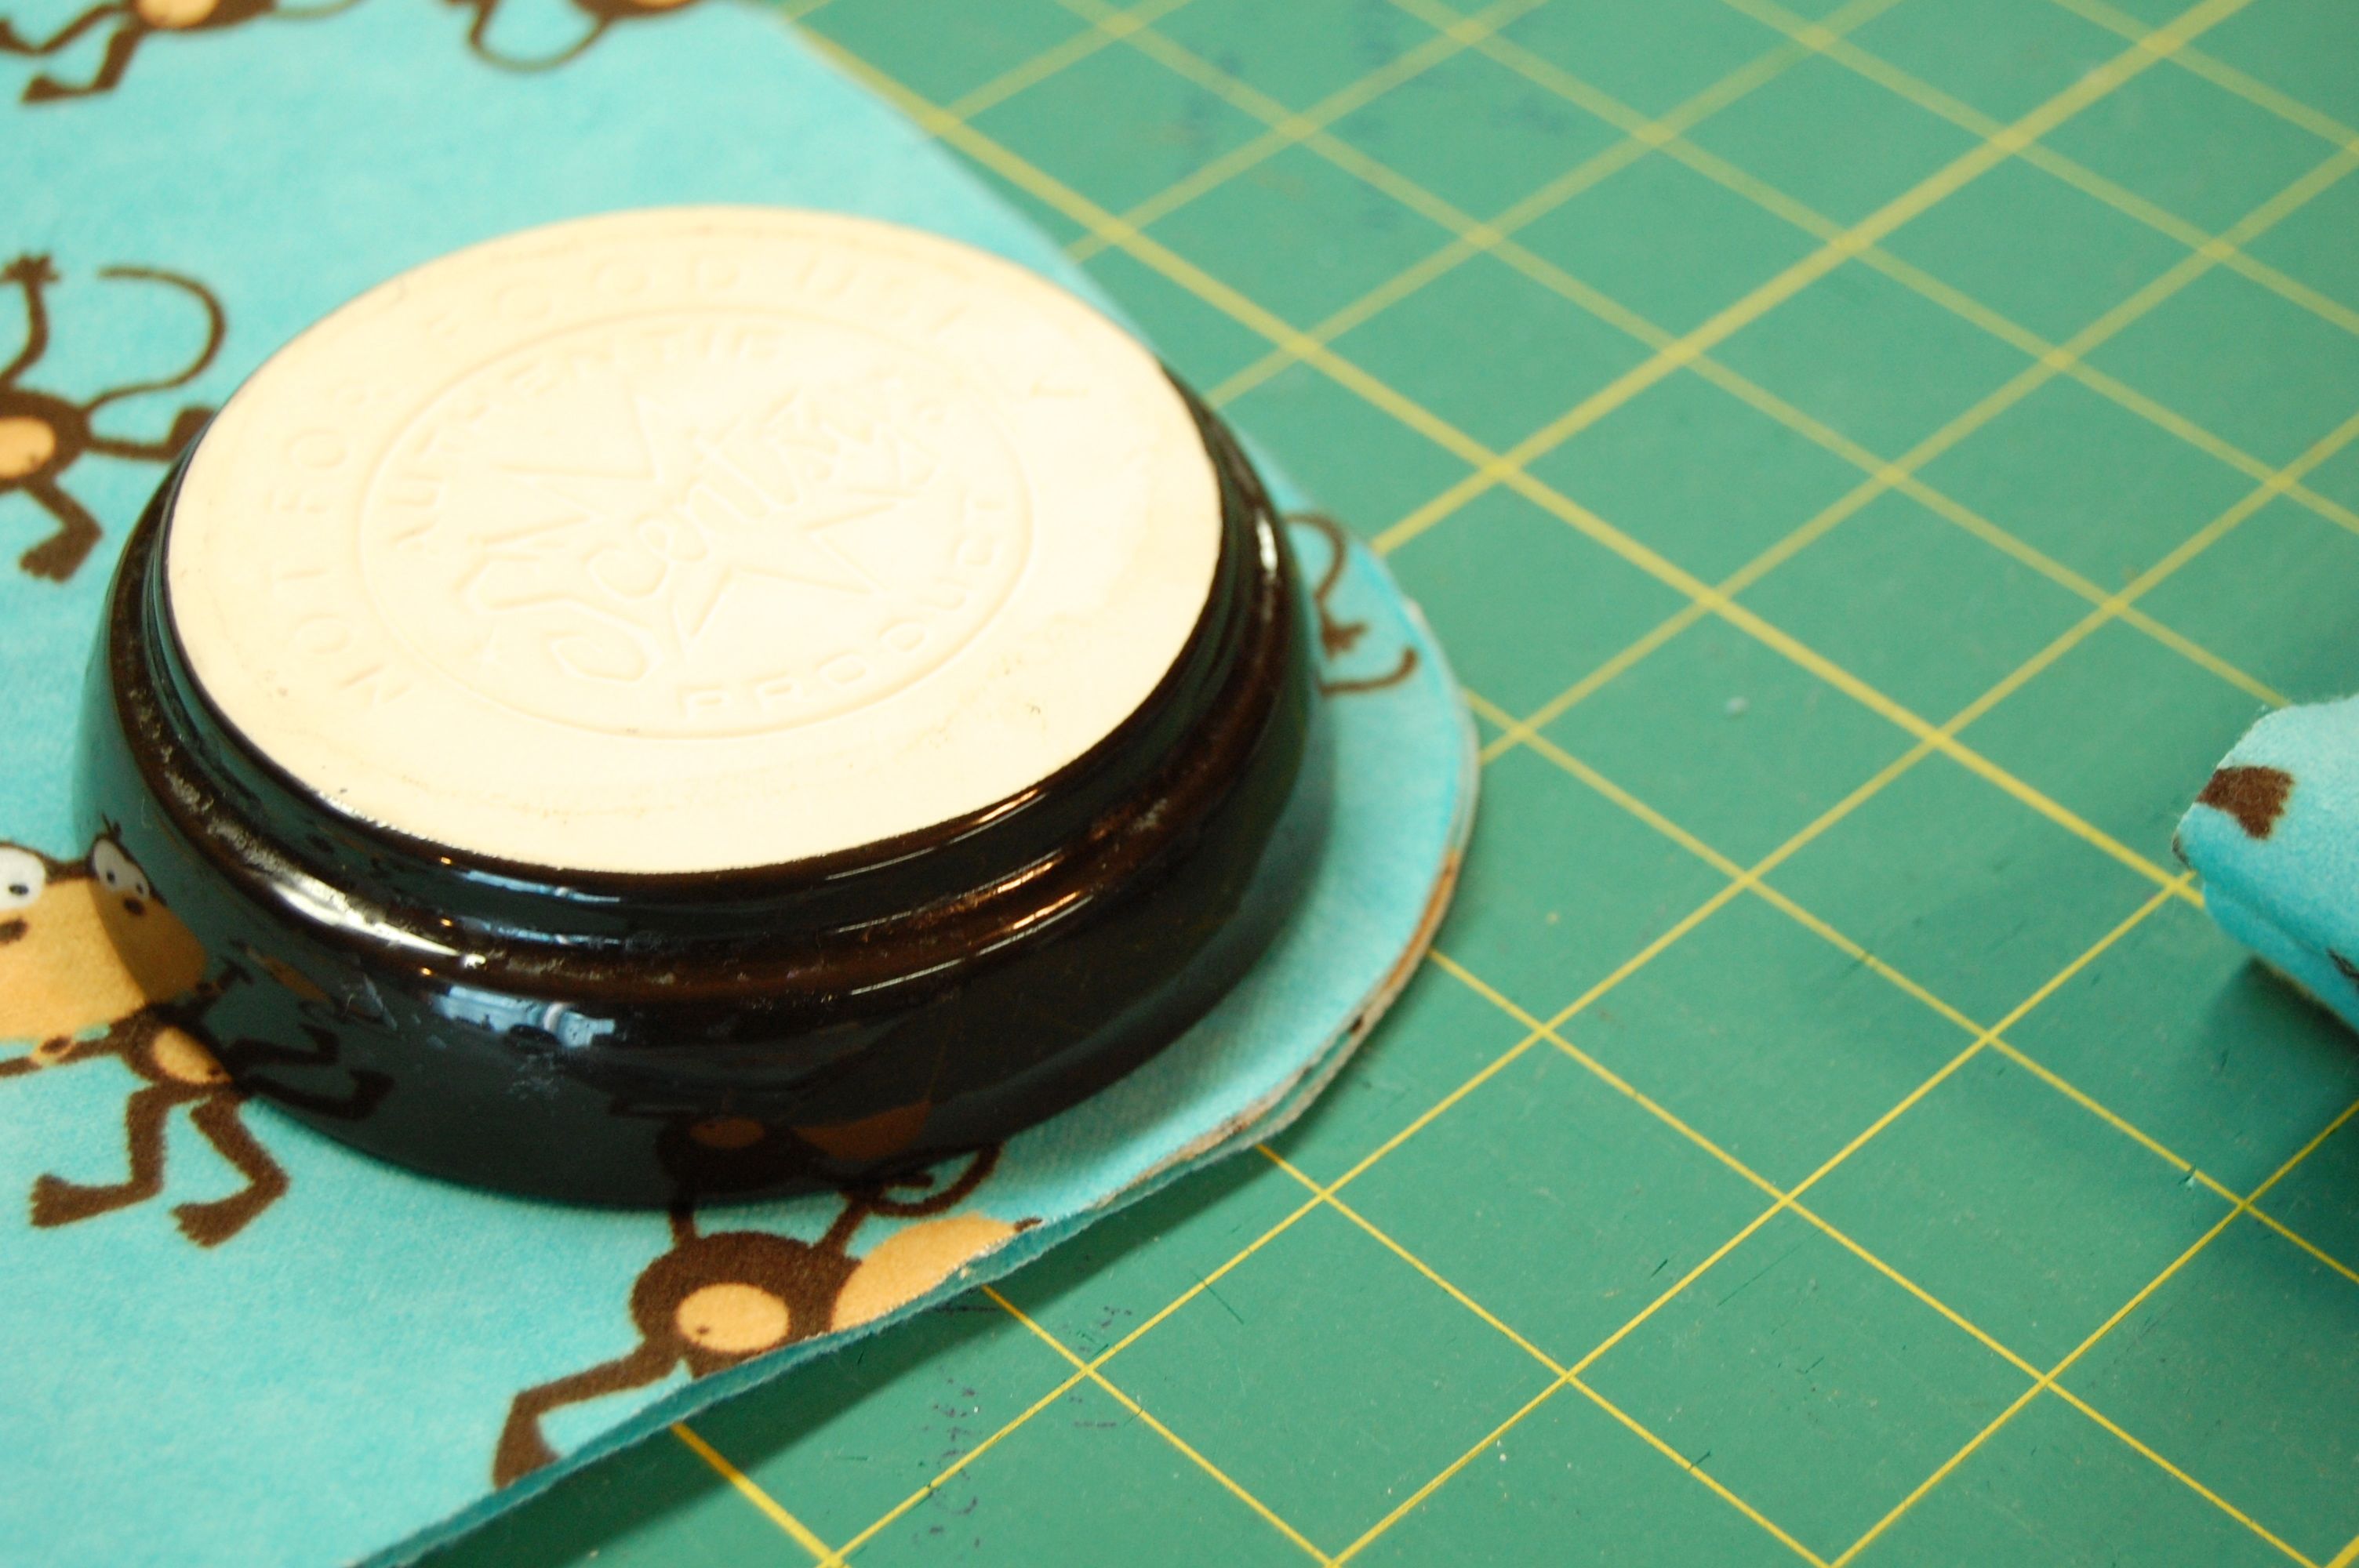
Fold the flannel square into fourths, perfectly lining up the corners.  Take some time to do this well. Then, find something round and trace a rounded edge on the outer corner.  (Double check–no folds here, at all–right?) Then cut it out. (I used a Scentsy top–see the logo? #notanashtray)


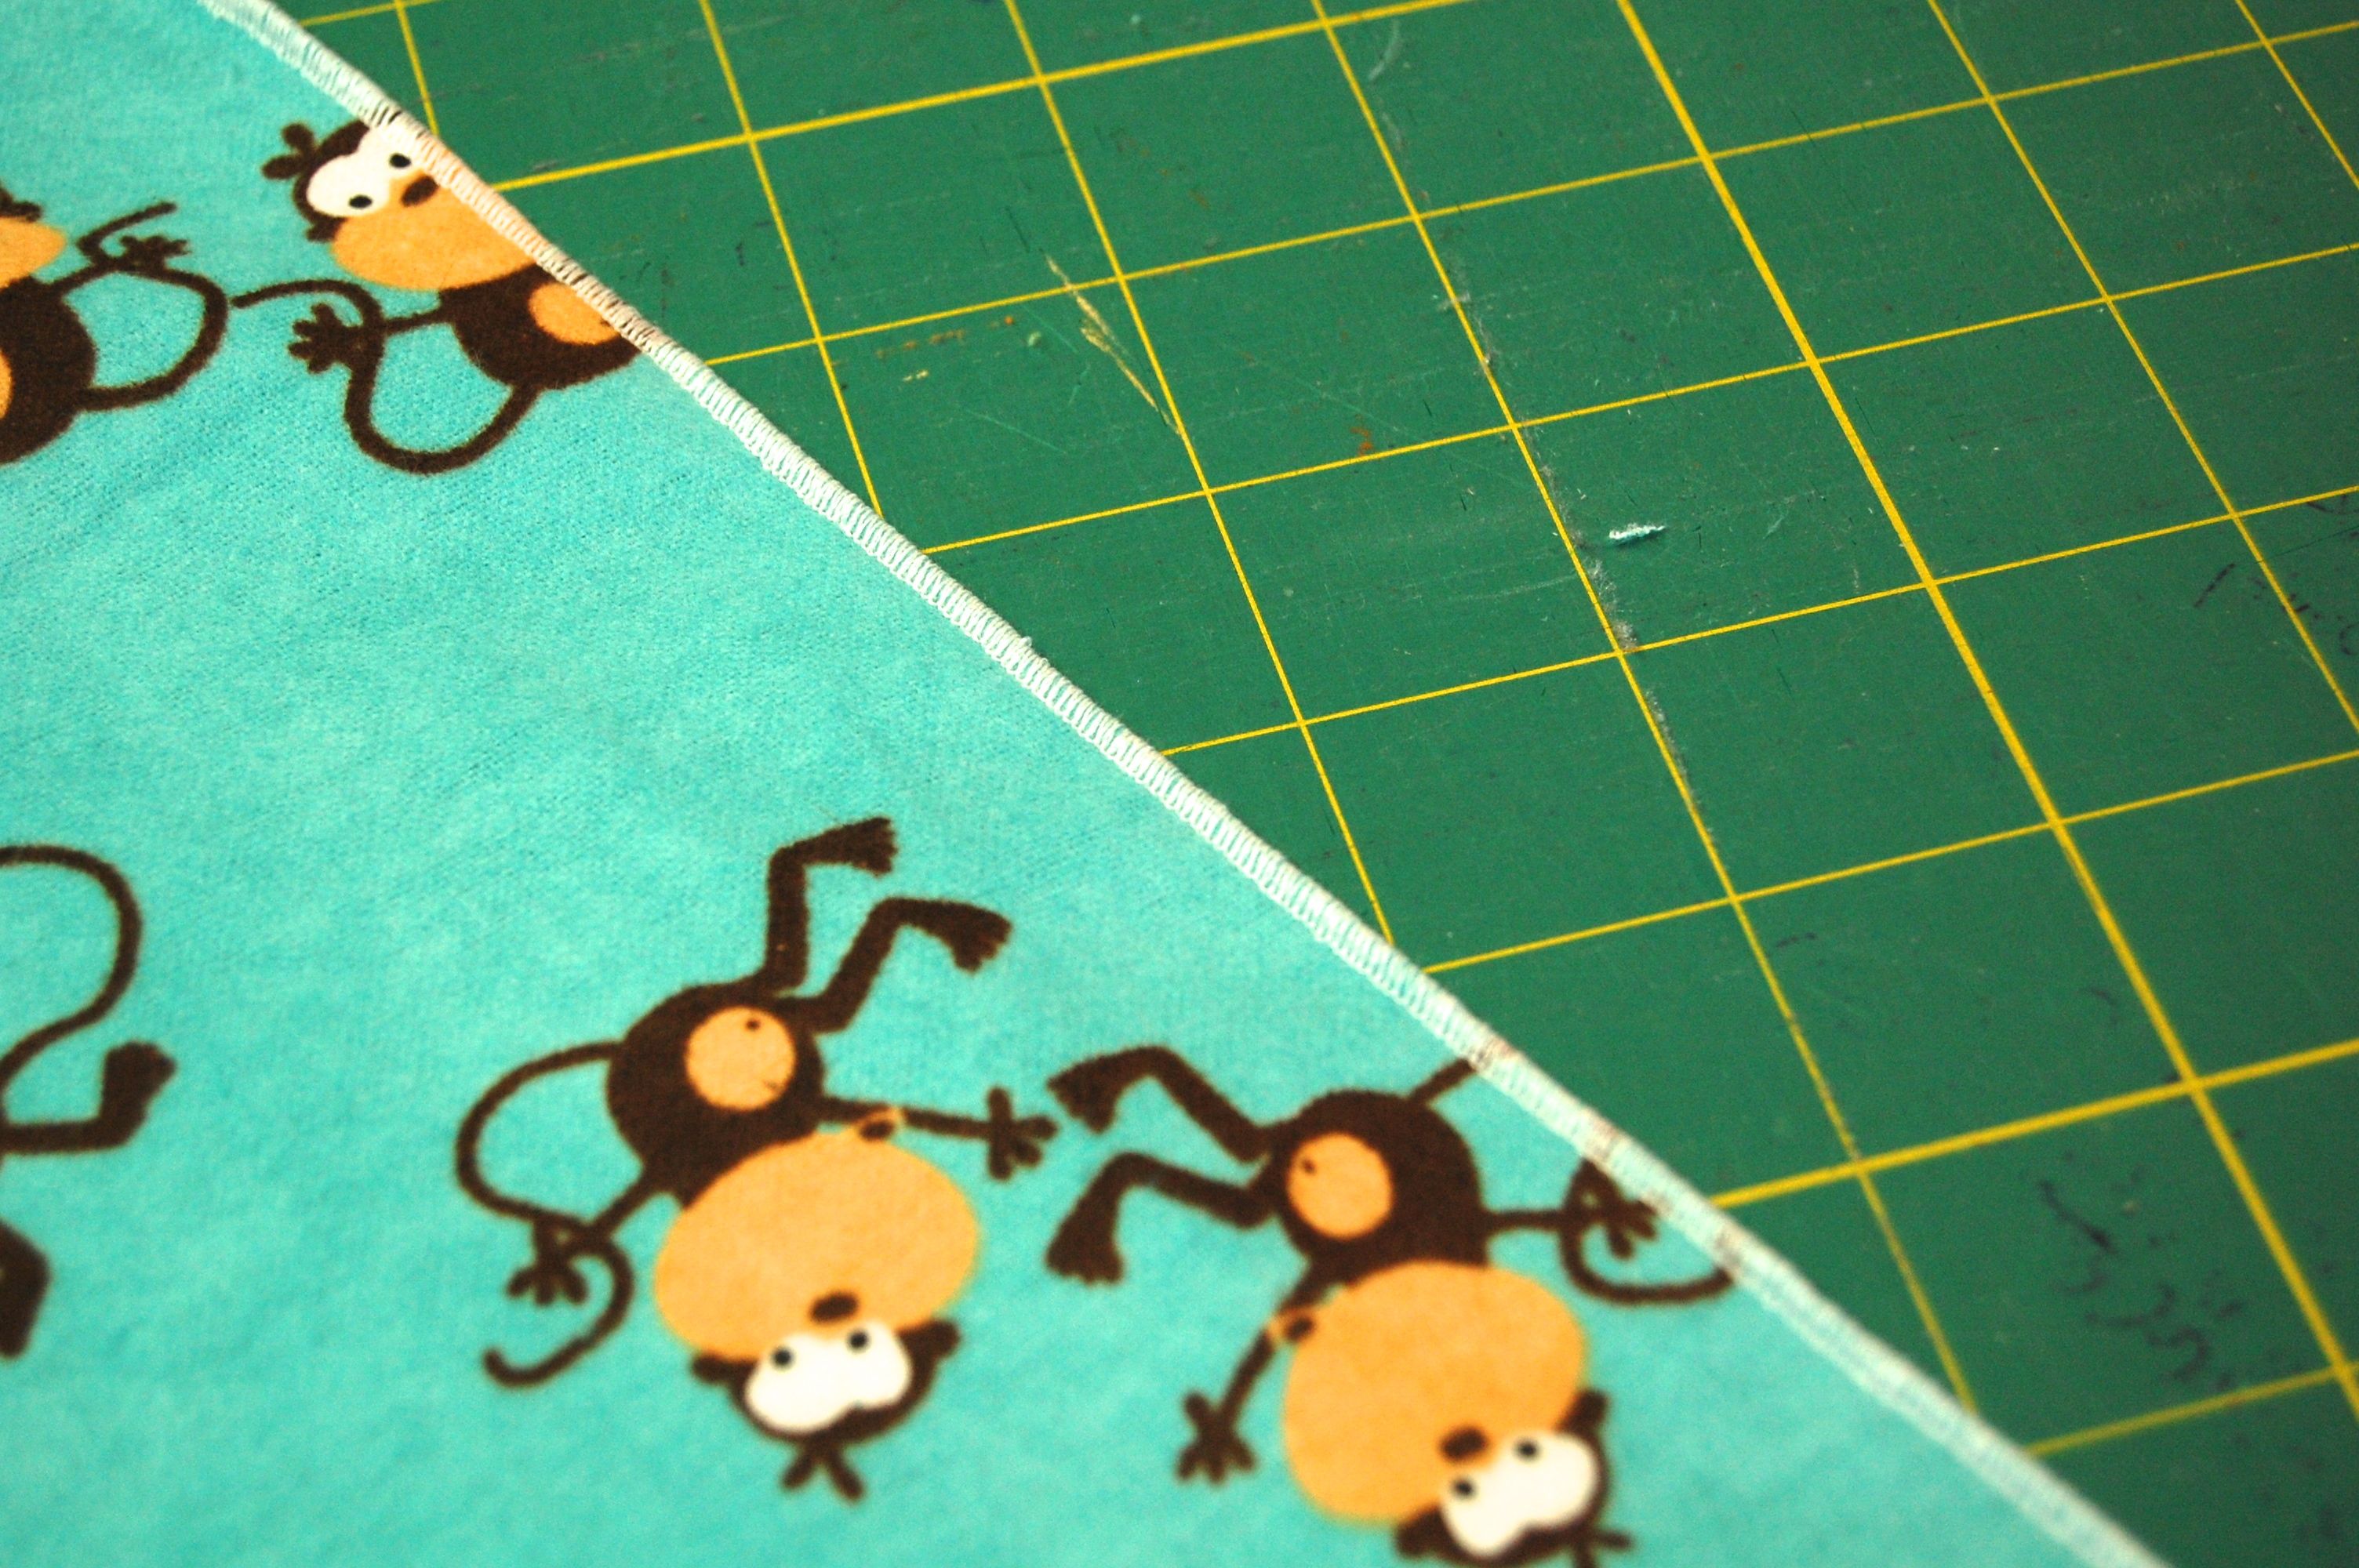
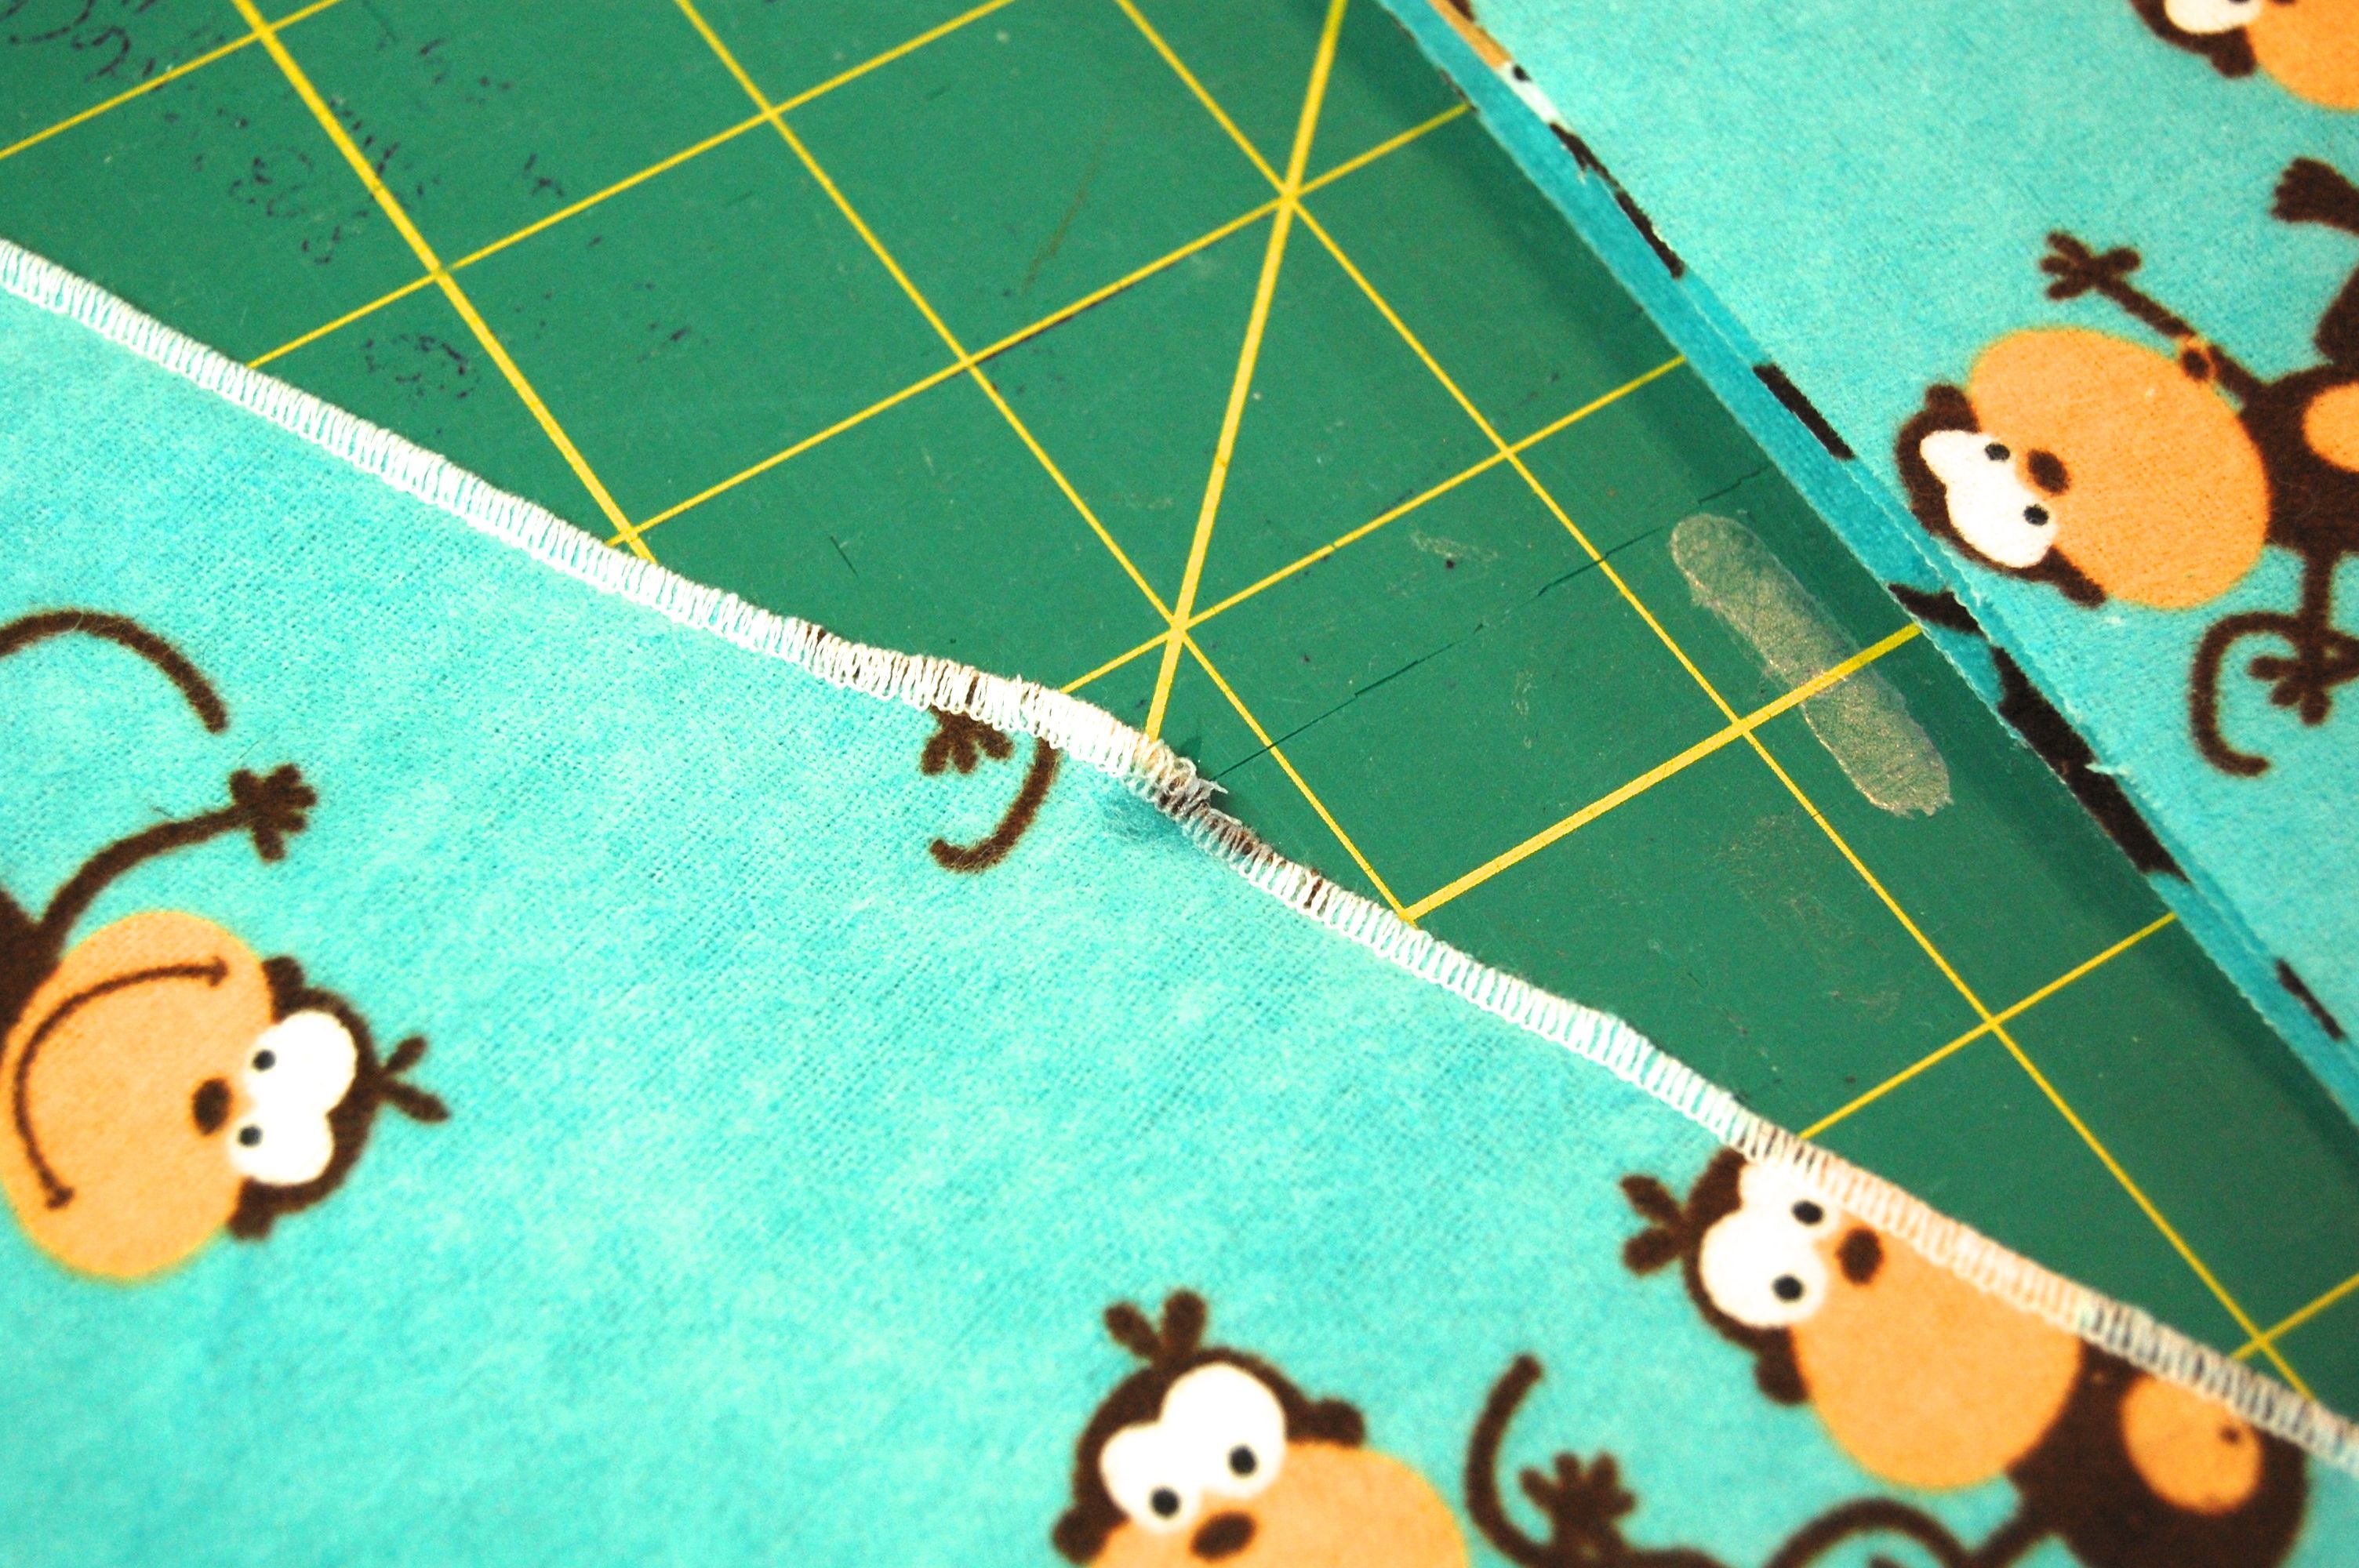
Next run the edge of the blanket through a serger adjusted for a rolled hem. No serger?  Try this.


At the place where you start and stop, dab a little bit of fray check to keep it from unravelling.

 To finish the burp clothes use the 2 flannel 8 x 18 pieces you cut out as a pattern to cut 2 pieces of terry cloth.  Place the rectangles right sides together and stitch around the outside with a 1/4 inch seam allowance, leave a 3″ space for turning.

Turn right side out and press.  Then top stitch a scant 1/4 inch away from the edge all the way around.  This will close up the hole and make these wash and dry nice and flat.

1 yard = 1 receiving blanket and 2 burp clothes for $3.75. (Update 3 years later and flannel is on sale for $2.50–score!)

High Five!

If your budget is a little bigger than that, buy 2 coordinating yards and make double.  Or add a toy or an outfit.

I’ll show you what else you can do with these tomorrow.


Doll “Quilt As You Go” Tutorial

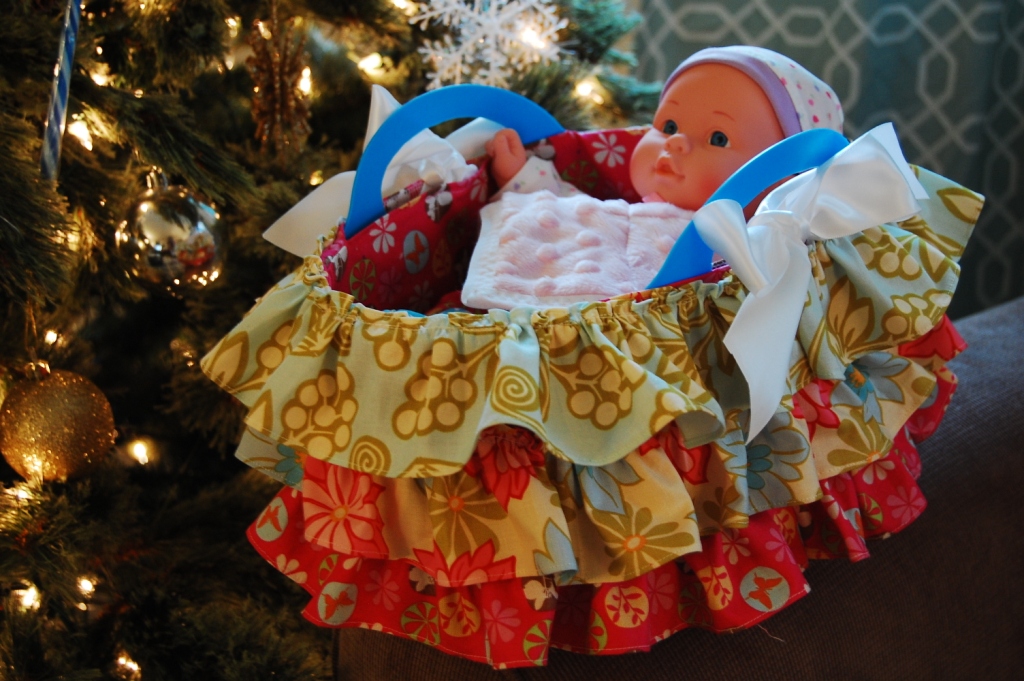
This adorable doll quilt is the perfect companion to our dollar tree Doll Bassinet/ Moses Basket. Tutorial here.

I used the leftover scraps from the basket to complete it.  It took about an hour from start to finish. This same technique can be used to make quilted bibs and larger throws for real babies or for nursing home residents.  It goes together super fast since you quilt it as you go and there is no hand sewing. (My choir students are working together to make a larger version. It’s a little more fiddly to make it bigger, but it still works.)

Read more

Doll Bassinet or Moses Basket Tutorial

Baby Doll Bassinet Pattern
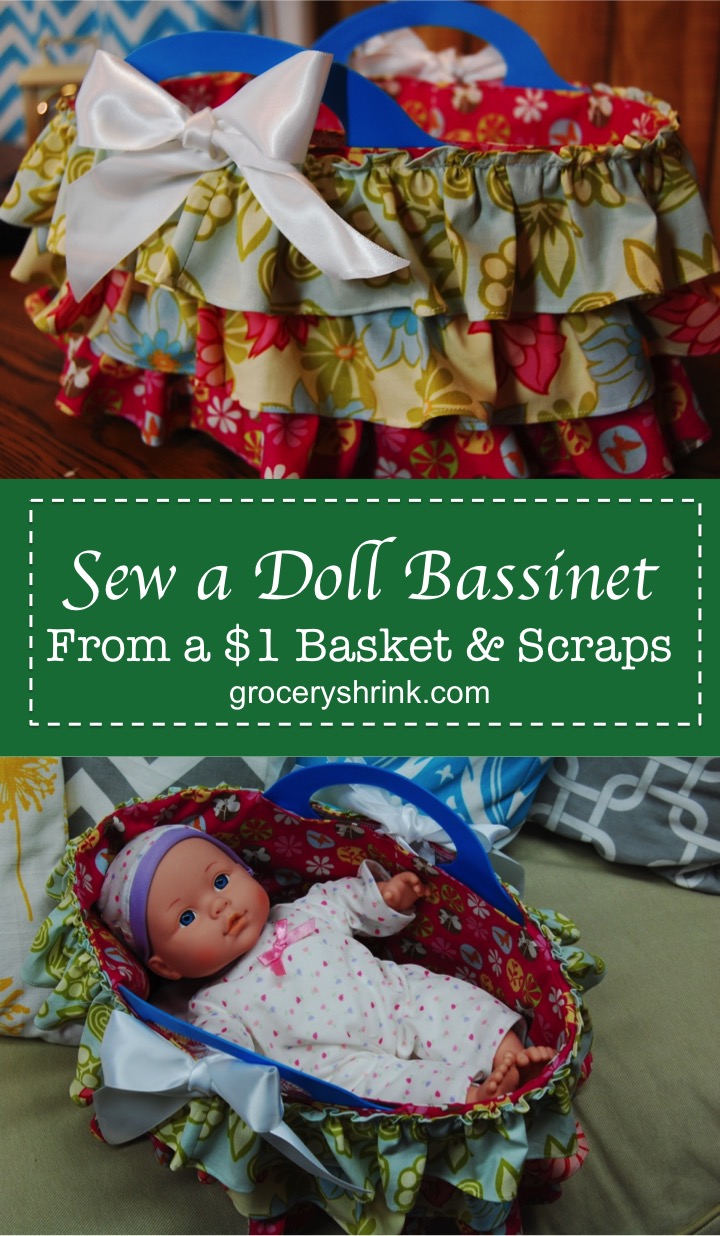
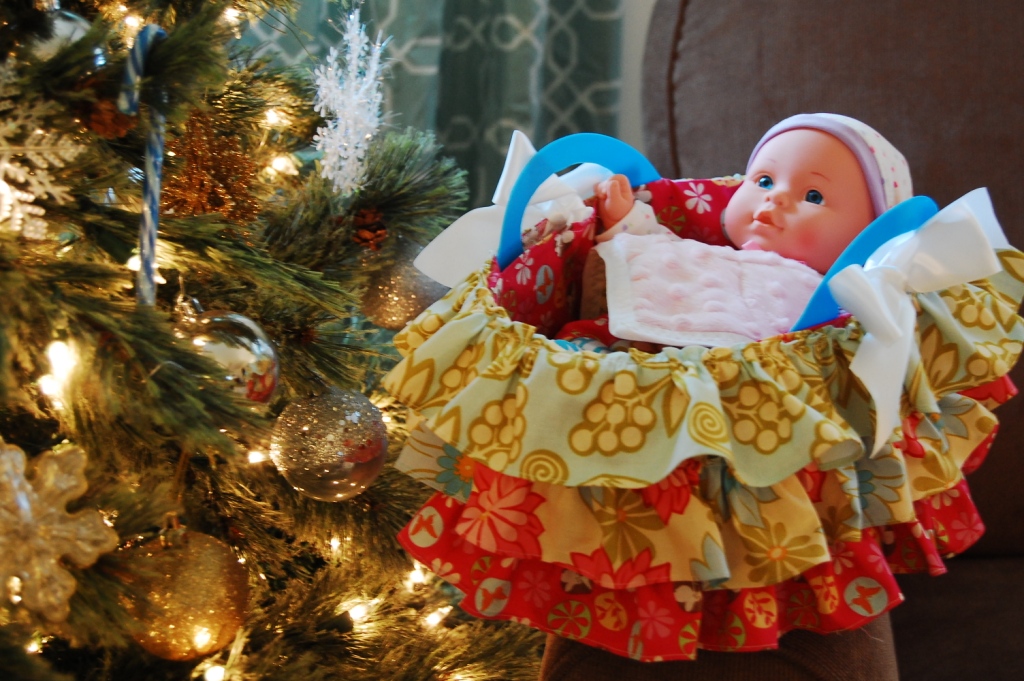
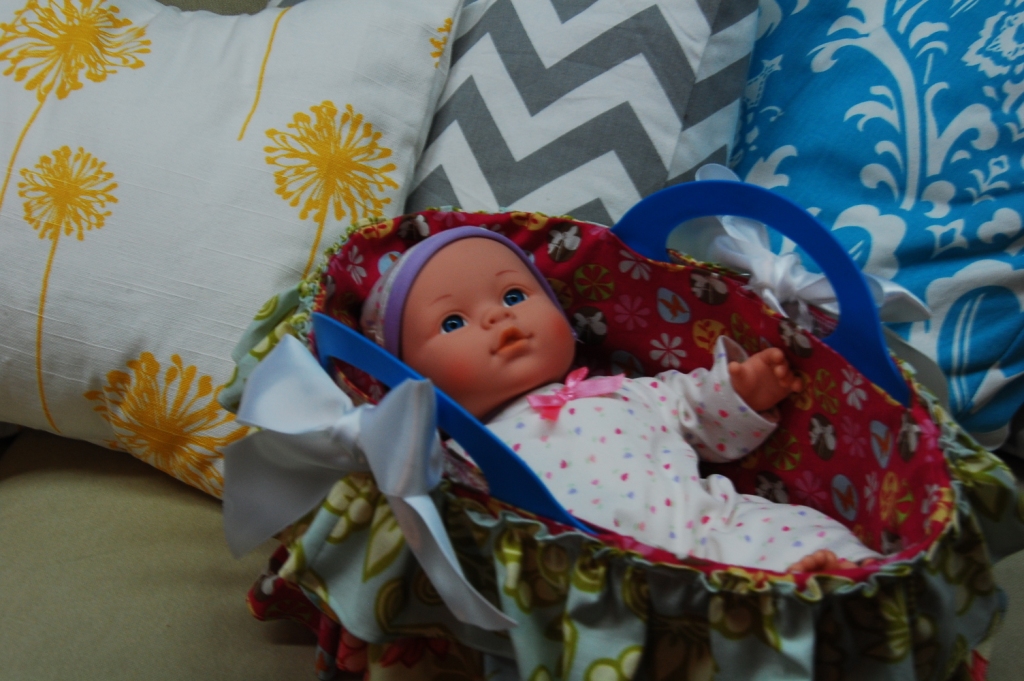
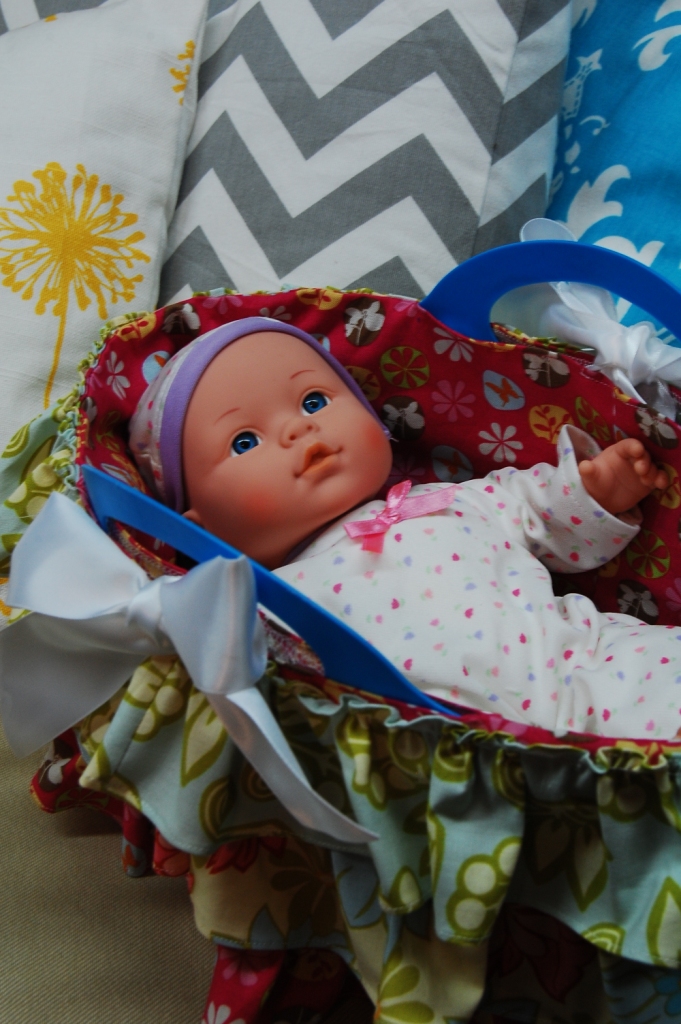
Wouldn’t a little girl you know be delighted with a new dolly and a basket to carry her in?
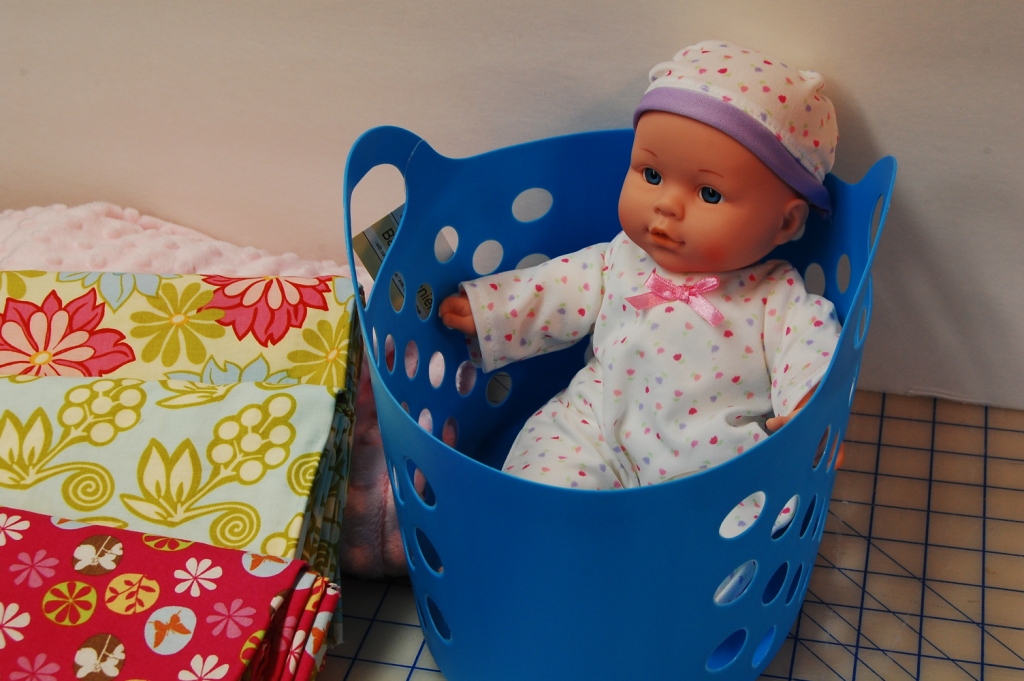
For an experienced seamstress, this project takes about 2 hours.  Plan a little more time if you are new at this.

You will need:

1 dollar tree basket.  This one is about 11 inches long by 7 inches wide (just slightly smaller.)

An 8-12 baby doll fits perfectly. My doll is 12 inches and is from Big Lots.  Just perfect for my 18 month old niece.  This one or this one would also be perfect.

3-4 fabrics.  I chose one for the mattress, and 3 for the basket cover. 1/4 yard of each is plenty–or just scraps.

A small amount of poly stuffing

1 1/3 yards of ribbon

Normal notions: thread, pins, scissors, etc.

Mattress Pattern Piece

1.  Mattresss:  Trace the pattern with a pen onto your mattress fabric.
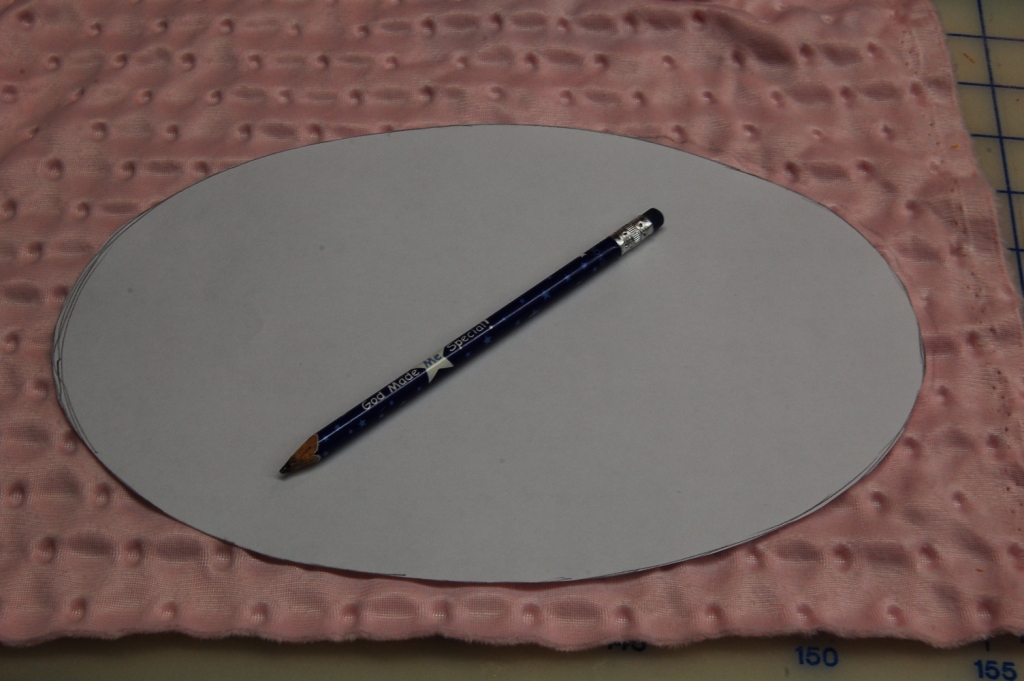
2.  Fold fabric in half and stitch on the drawn line, leaving an opening for turning.
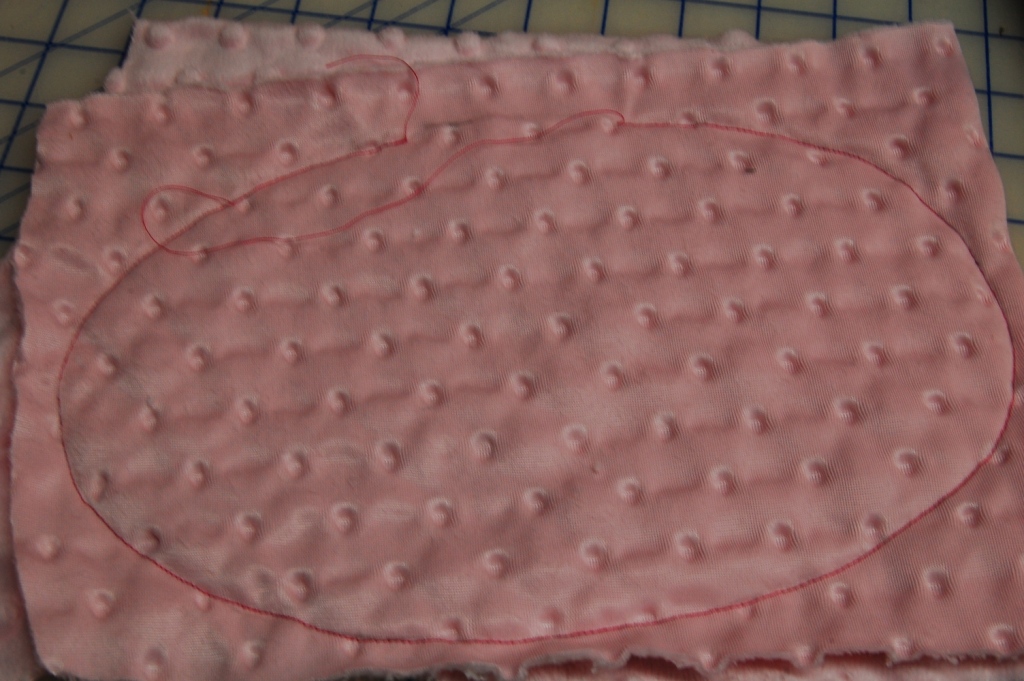
3.  Trim excess fabric leaving a 1/4 inch seam allowance.
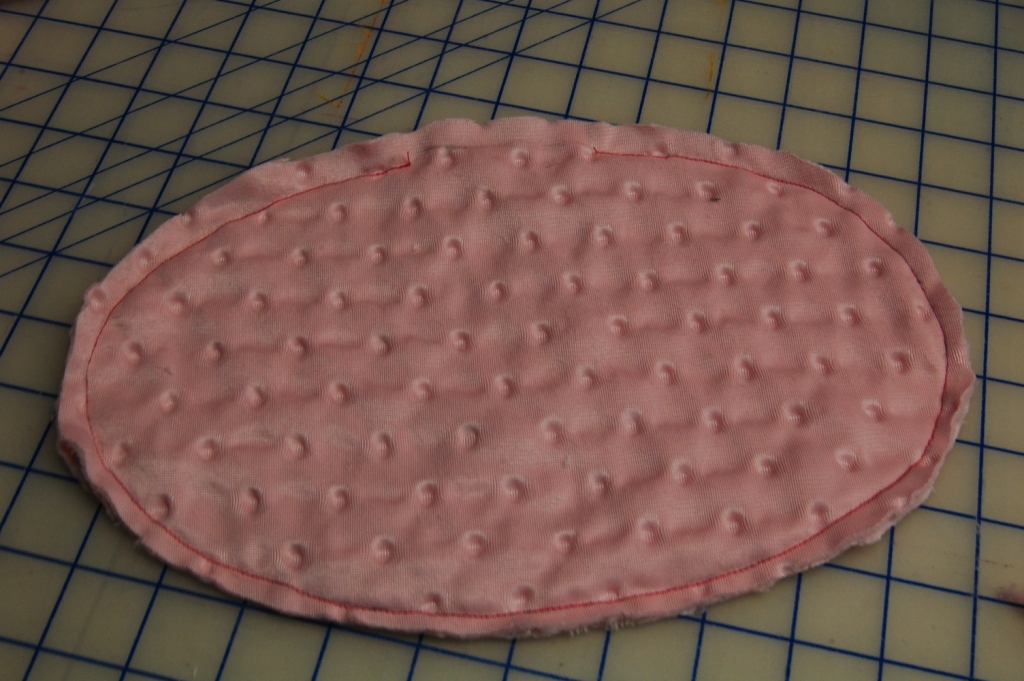
4.  Turn right side out and lightly stuff with a small amount of poly stuffing.
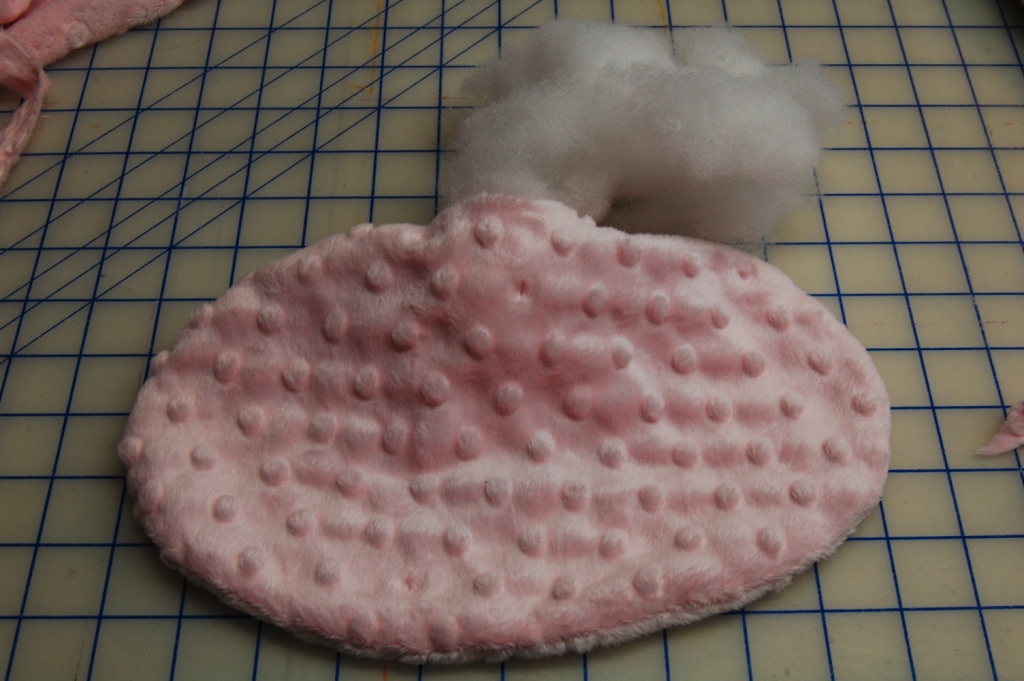
5.  Slip stitch the opening closed and set aside.
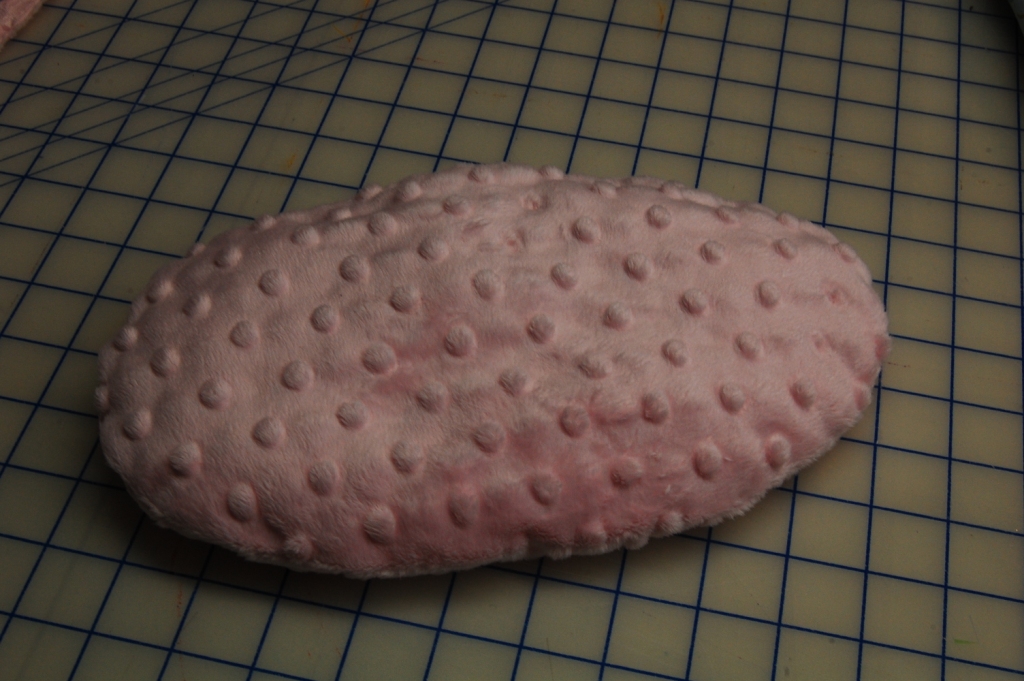
For the basket cover: Cut 1 oval

2 rectangles 6 x 31.75 inches for the lining

And 6: 3 x 31.75 rectangles for the outer ruffles. I cut 2 each from 3 different fabrics.
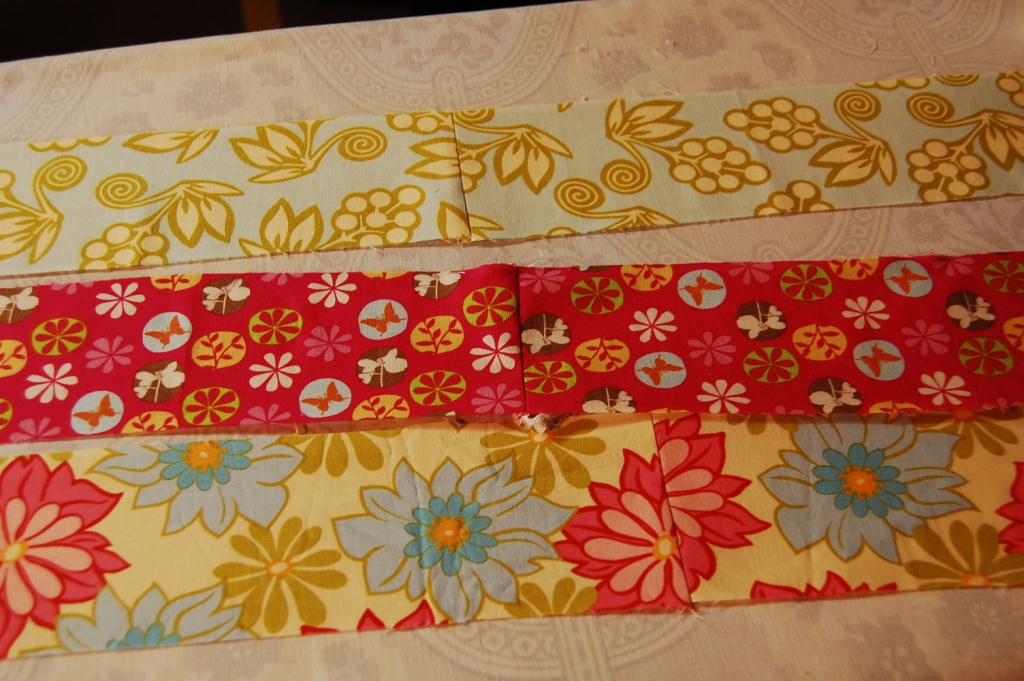
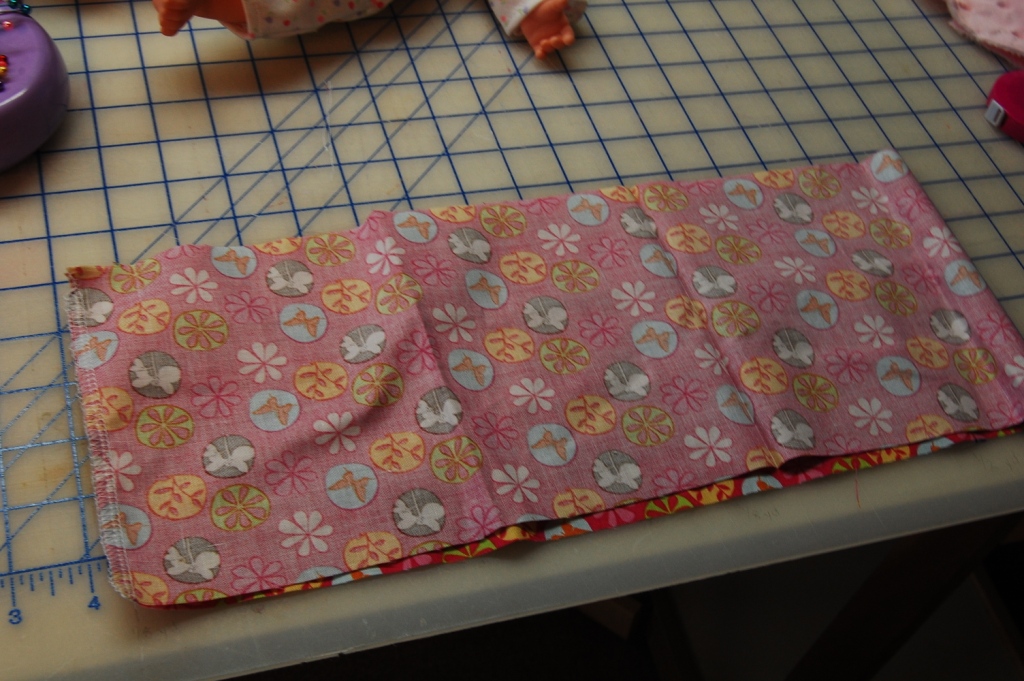
1. Sew each 6″ wide rectangle into a loop using a 1/4 inch seam allowance.  (I used a serger to keep it tidy, but you could zigzag the edges if you don’t have a serger.
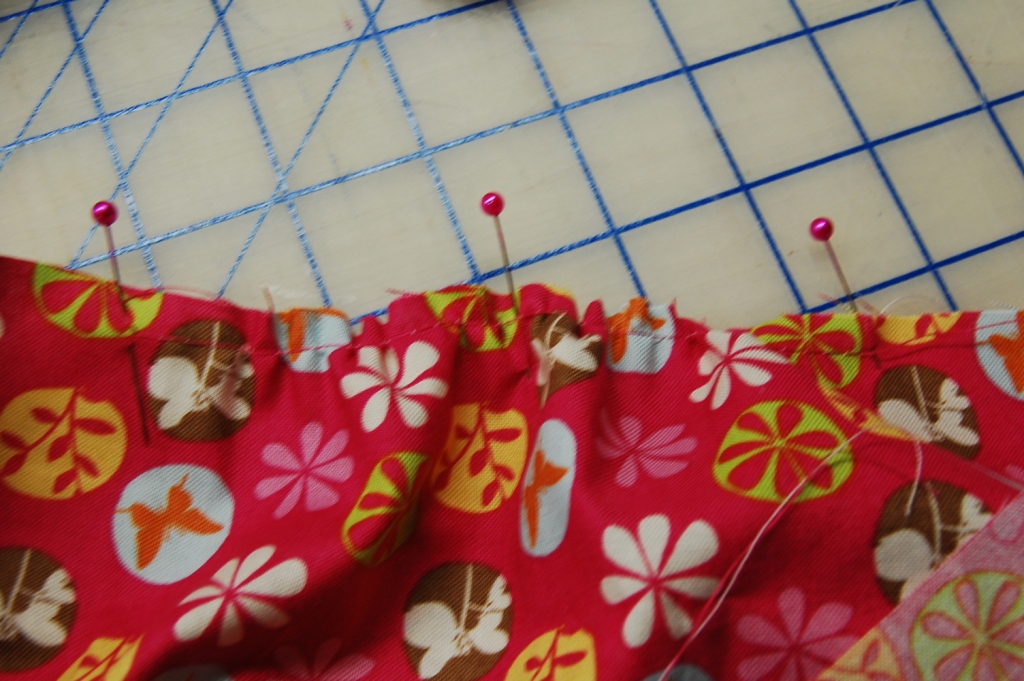
2.  On one 6″ tall loop of fabric only, run 6″ long swaths of gathering stitches on opposite ends from each other.
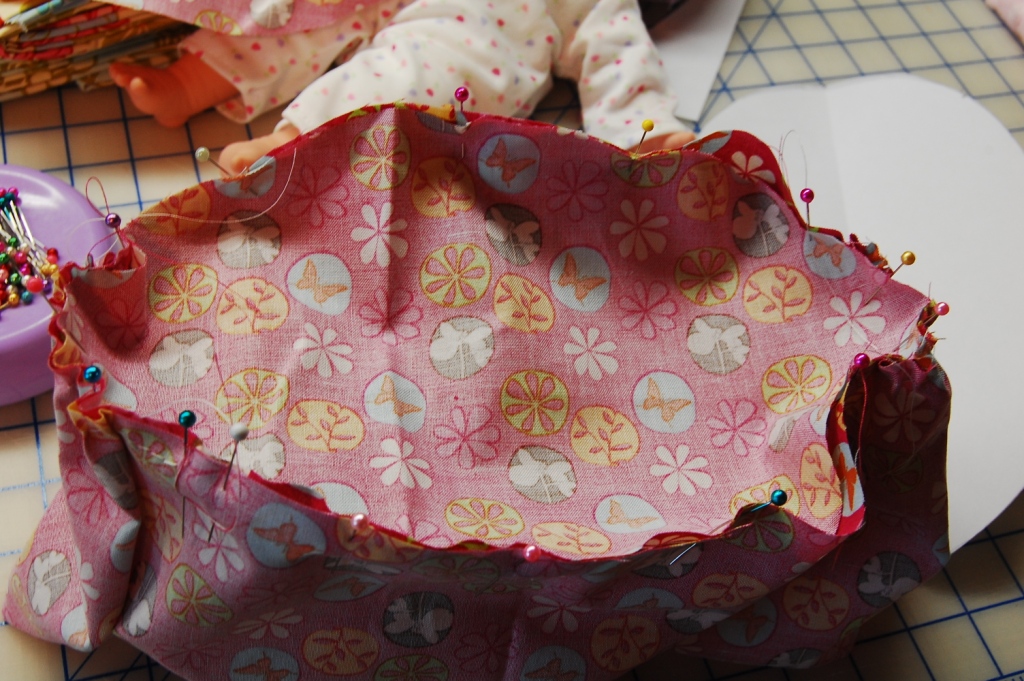
3. Divide both the oval and the loop of fabric (that you just put the gathering stitches in) into fourths.  Pin them rights sides together, matching the fourths and putting the gathering stitches around the oval ends to help everything fit well.  Stitch with a 1/4 inch seam allowance, then finish the raw edges.
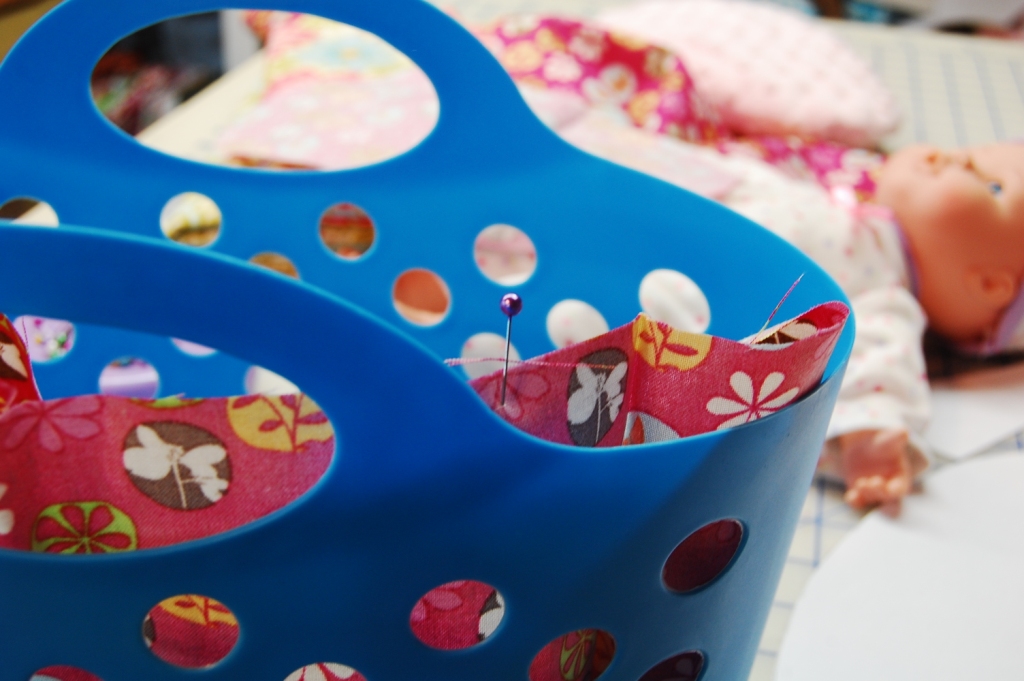
4.  Slip your liner inside your basket and mark each side of the handle with a pin.  Be sure to get the widest part where the handle meets the top of the basket.
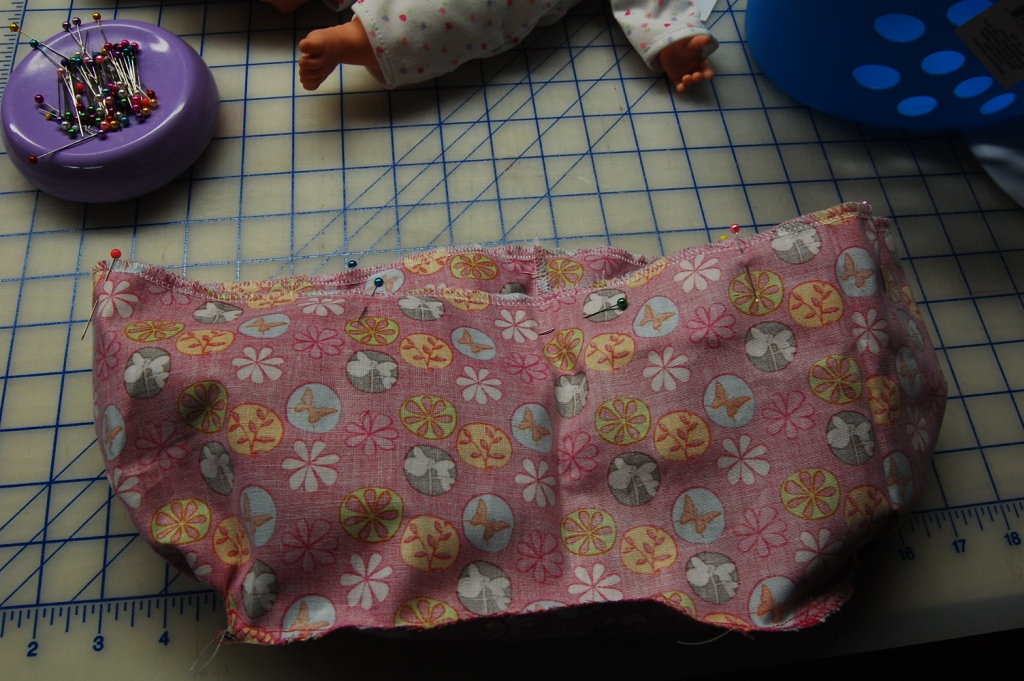
5.  (Note:  Before I did this step, I serged around the top of both loops of fabric so on step 6 the hemmed edges would be finished.)Pin your second 6″ tall loop of fabric to the top of the basket liner, right sides together.  Stitch with a 1/4 inch seam  leaving two openings for the handles between the marks you made with the pins.
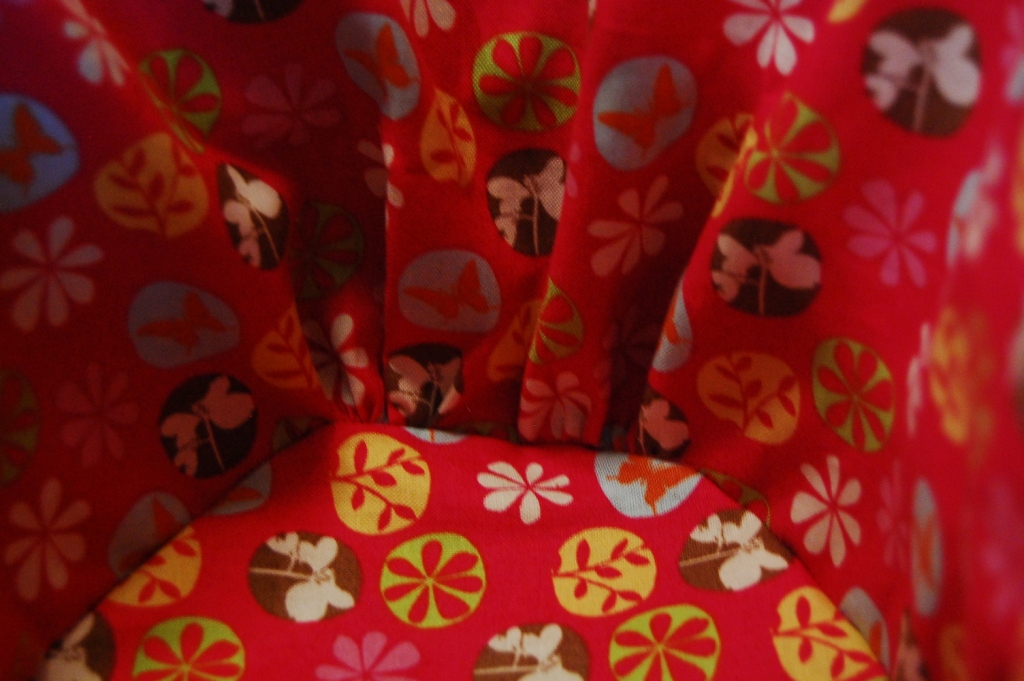
The ends will have cute little gathers like this on the inside.
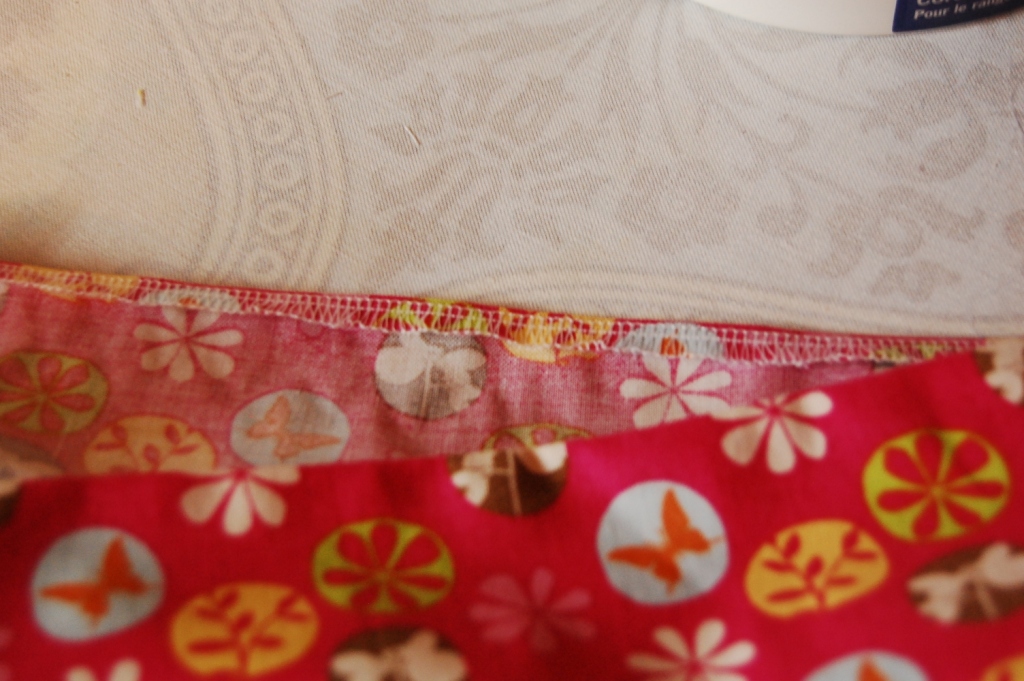
6. Press the seam allowance under on the openings left for the handles and top stitch all the way around to hem the edges.

7.  Make 3 pairs of loops for ruffles, by  sewing 2–3″ wide strips of fabric right sides together on the short ends, 3 times. Then hem both long edges of each loop. You could do it the hard way by double pressing narrow hems and top stitching or by using a rolled hem stitch on the serger.  I used a rolled hem foot on my sewing machine, tutorial below.
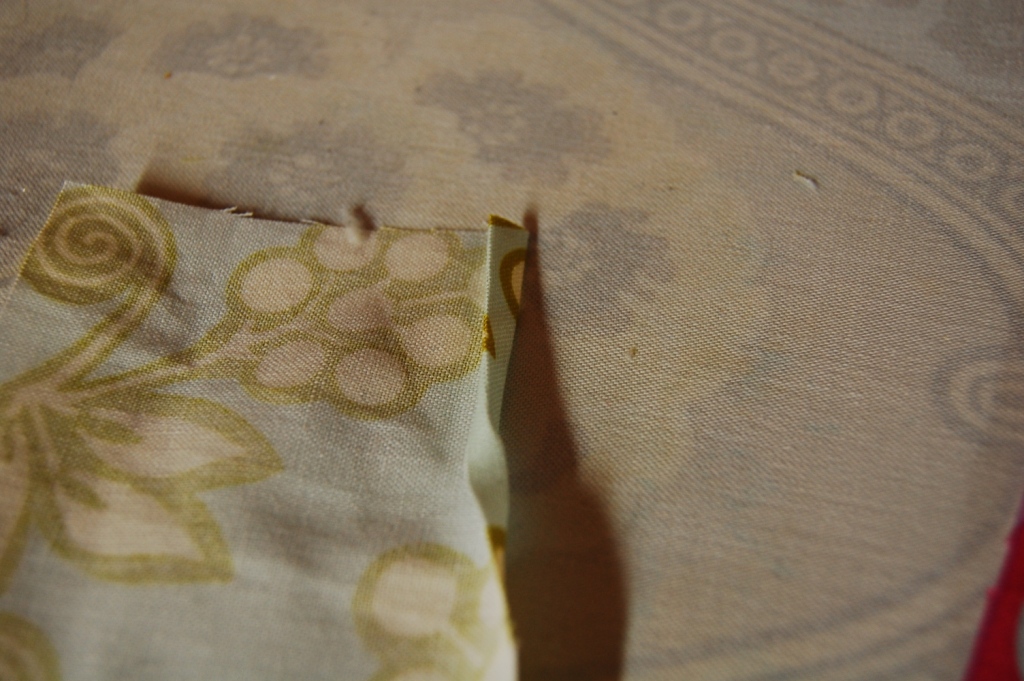
a.  First start your hem by pressing a small double turned hem about an inch down the strip of the fabric. (since it is hard to pull a seam through a rolled hem foot, I waited to sew my second seam until after the pieces were hemmed.
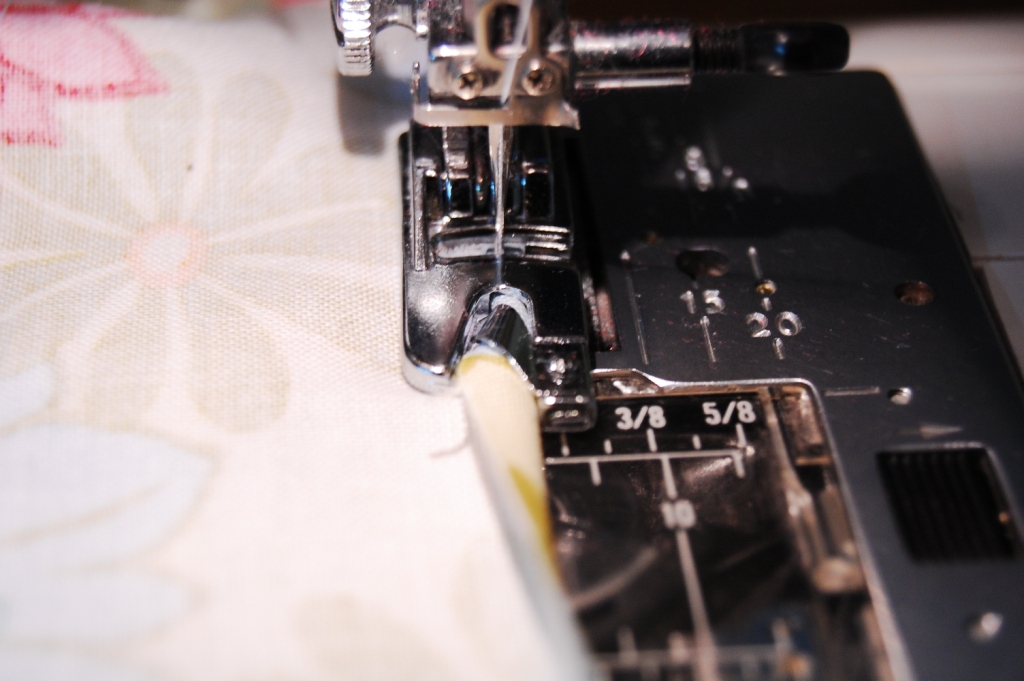
b.  Then slip your fabric into the foot so the raw edge fits into the guide.  The portion you previously pressed under is ready to go under the needle for a perfect (in theory) start.  As you feed the fabric through the foot be sure the raw edge is always fed into the guide correctly.  A little practice with some scraps will have you a pro in no time.
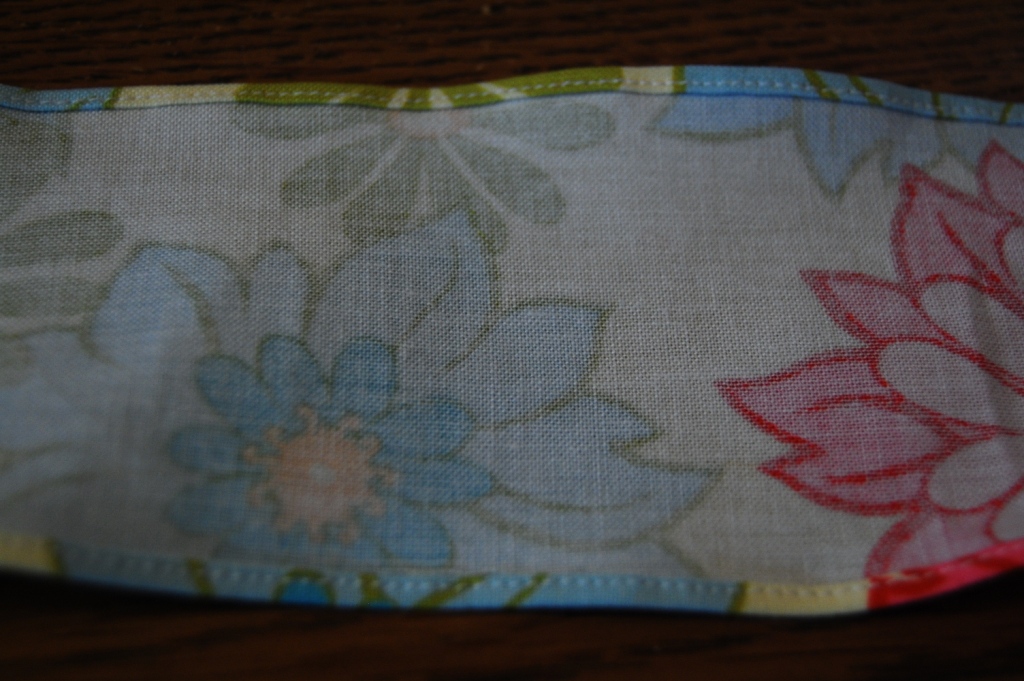

c.  It’s a challenge to go over the seam, you may need to use some gentle pressure to pull the seam through the foot. While you have your hemming foot out, hem the bottom edge of the basket cover too.
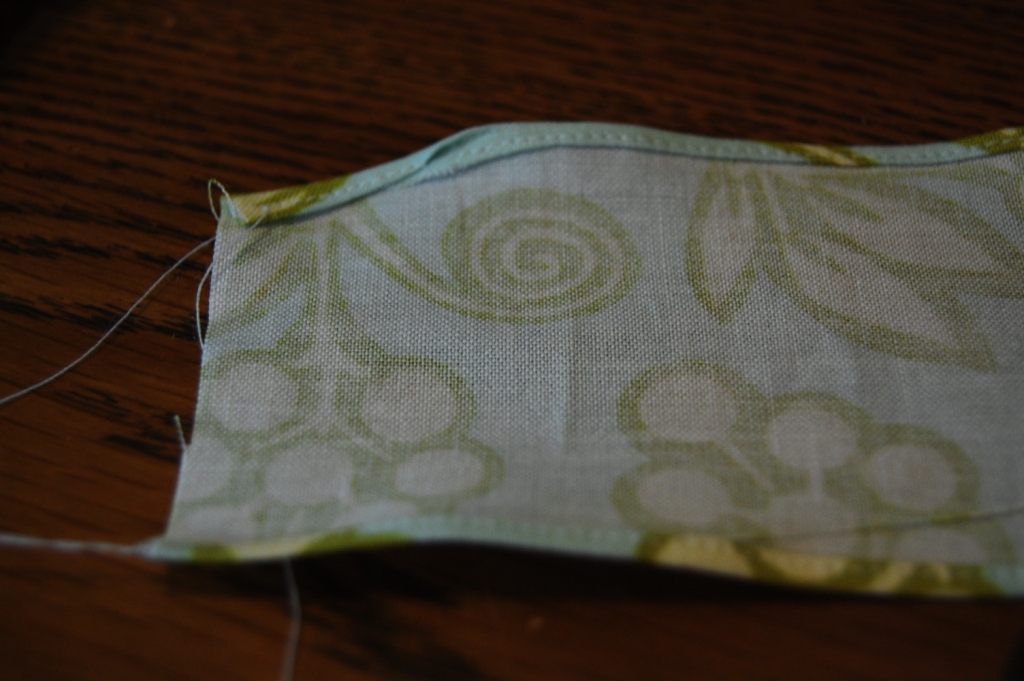
I had a rough start on this ruffle.  But once I got the whole thing put together it wasn’t very noticeable.  So relax and have fun with it.
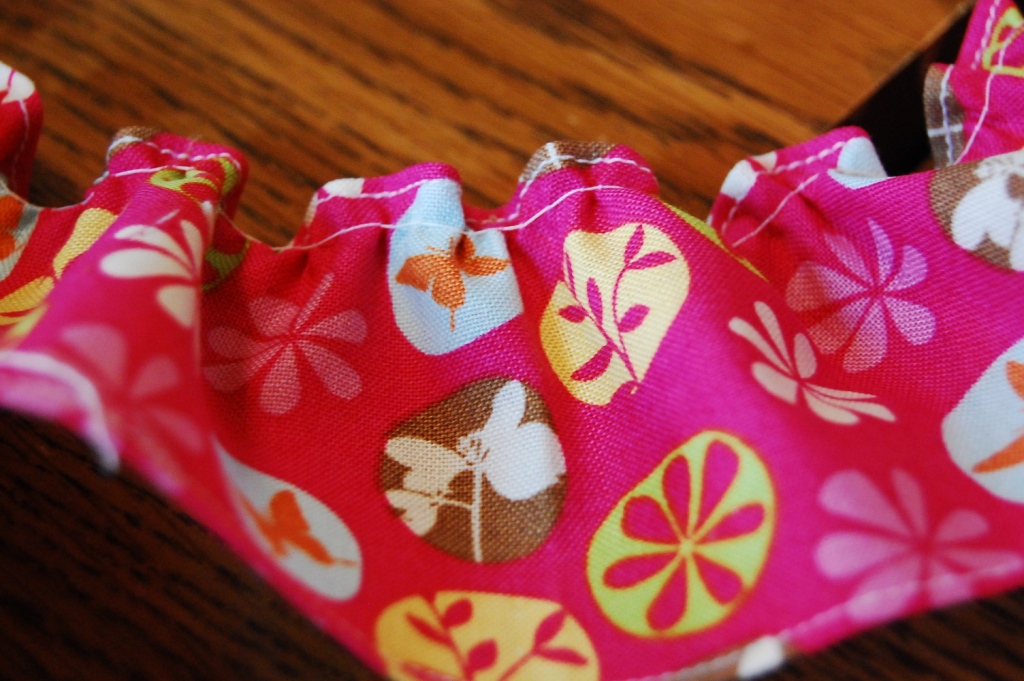
9.  Now that your ruffles are hemmed.  Divide them into fourths with pins, then run a single gathering stitch around the top.  (Hint, if you tighten your top needle tension as tight as it will go, the ruffles will gather themselves as you run the basting stitch. You will see be able to adjust them to fit as you go.)
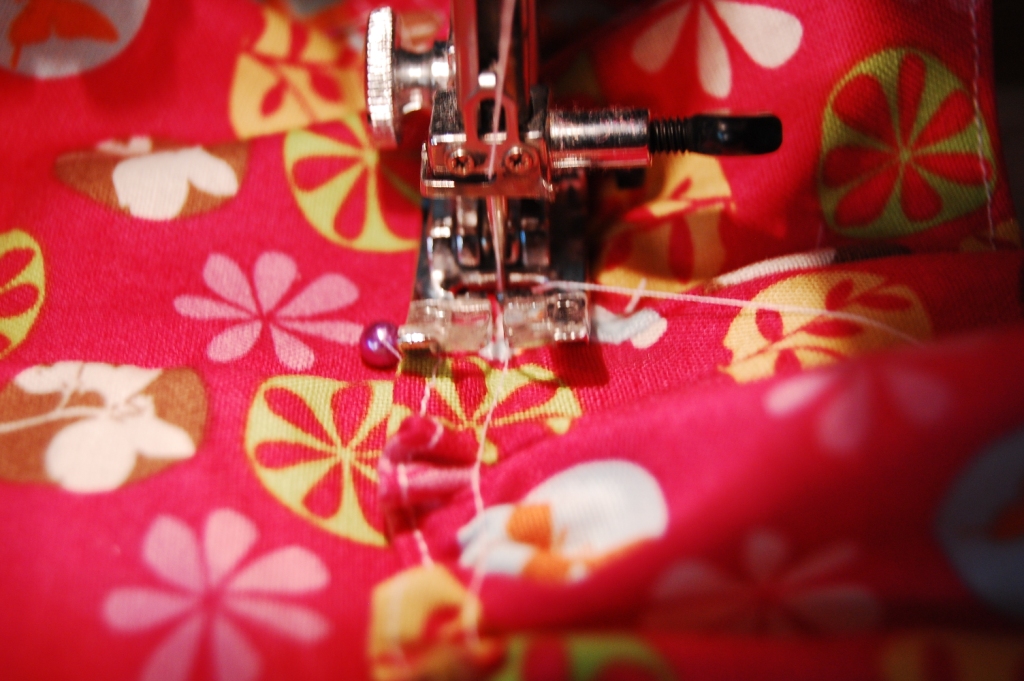
10.  Divide your basket liner in fourths too and pin your ruffle in place, matching the fourth markings and drawing up the gathers to fit. Pin the ruffle so the bottom edge of it lines up with the bottom edge of the basket liner. This was easy to do when the liner was actually on the basket.  Then top stitch the ruffle in place stitching right over your gathering stitches.
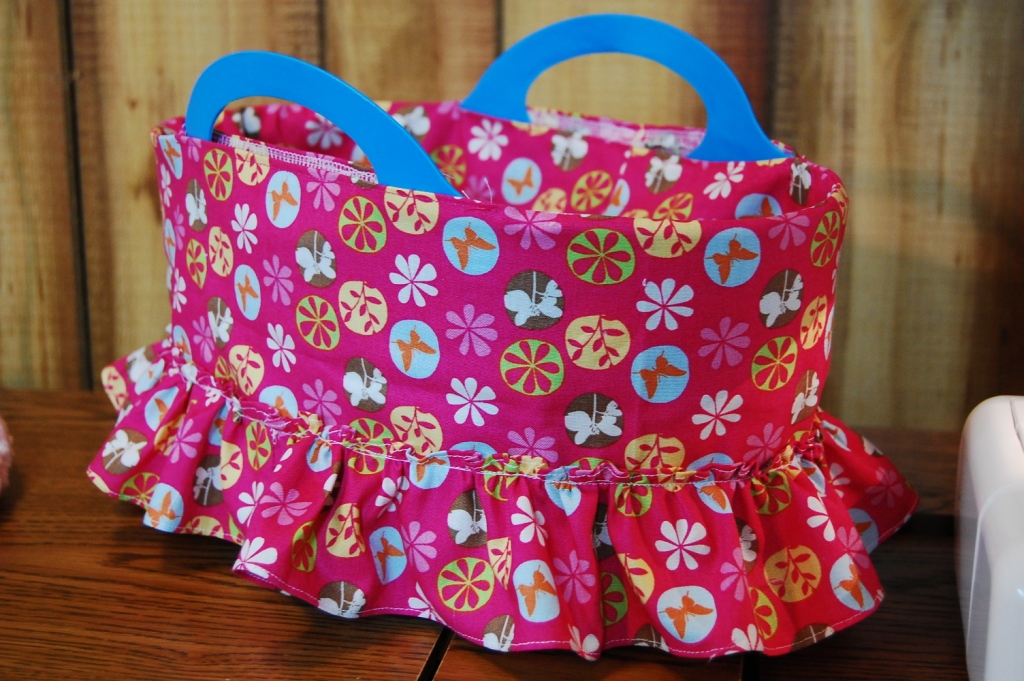
This is pretty adorable just like this. So if you want to, you can stop here.  Or add the next two layers of ruffles the same way, overlapping each row just a bit and lining up the top row with the seam line on the basket.
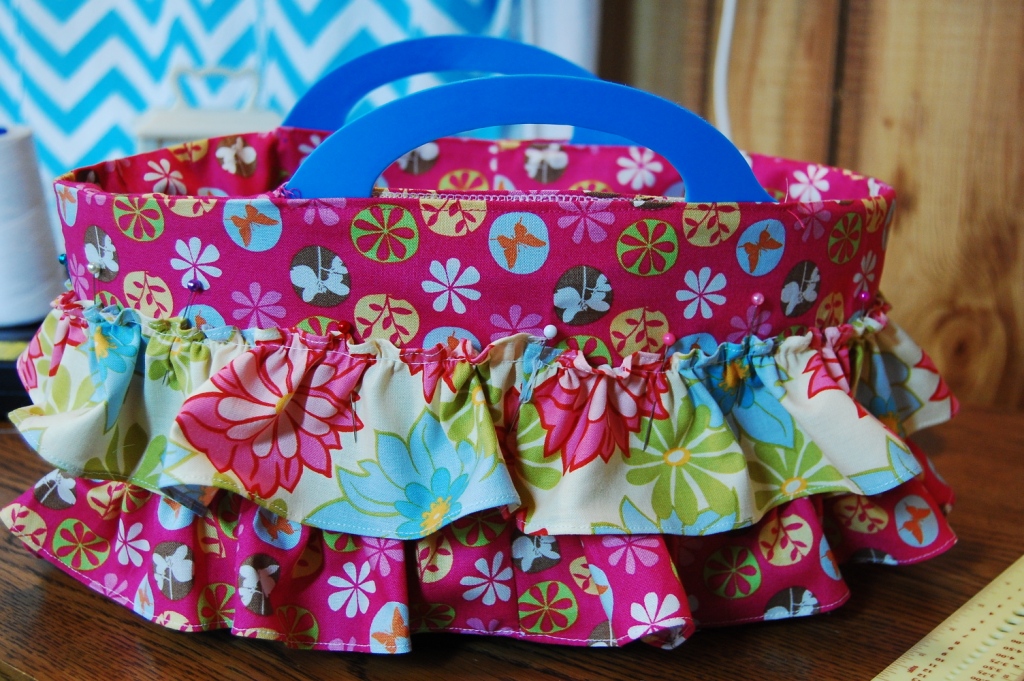
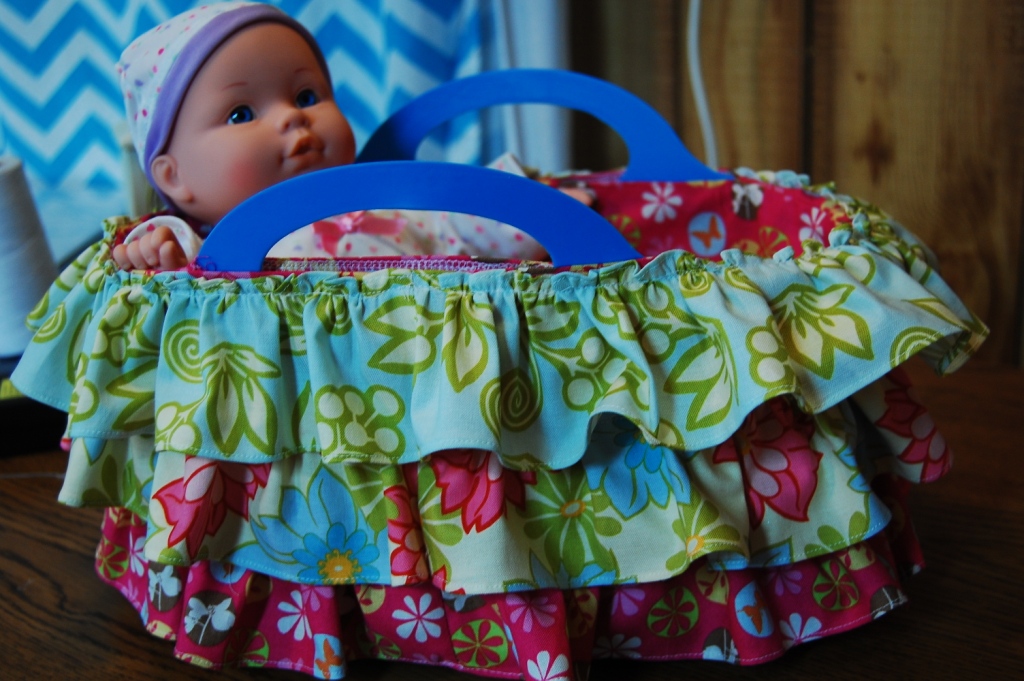
Almost Done!

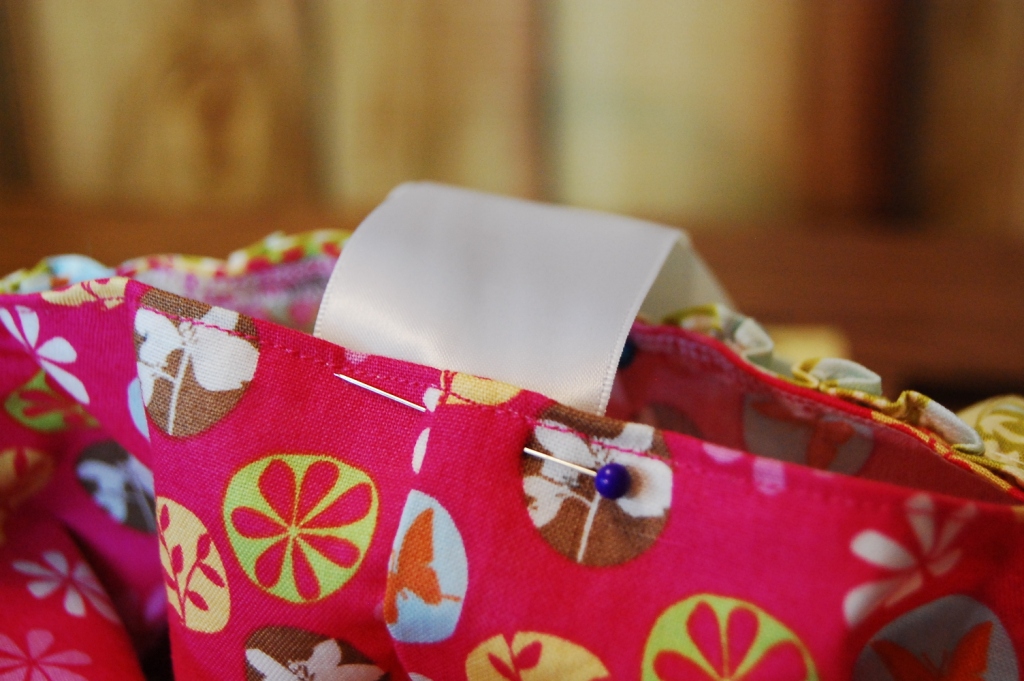
12.  Use Fray Check or a candle to seal the ends of your ribbon.  Then pin in place centered on each side of the gap left for the handles.  Stitch in place along the same stitching line you hemmed with.
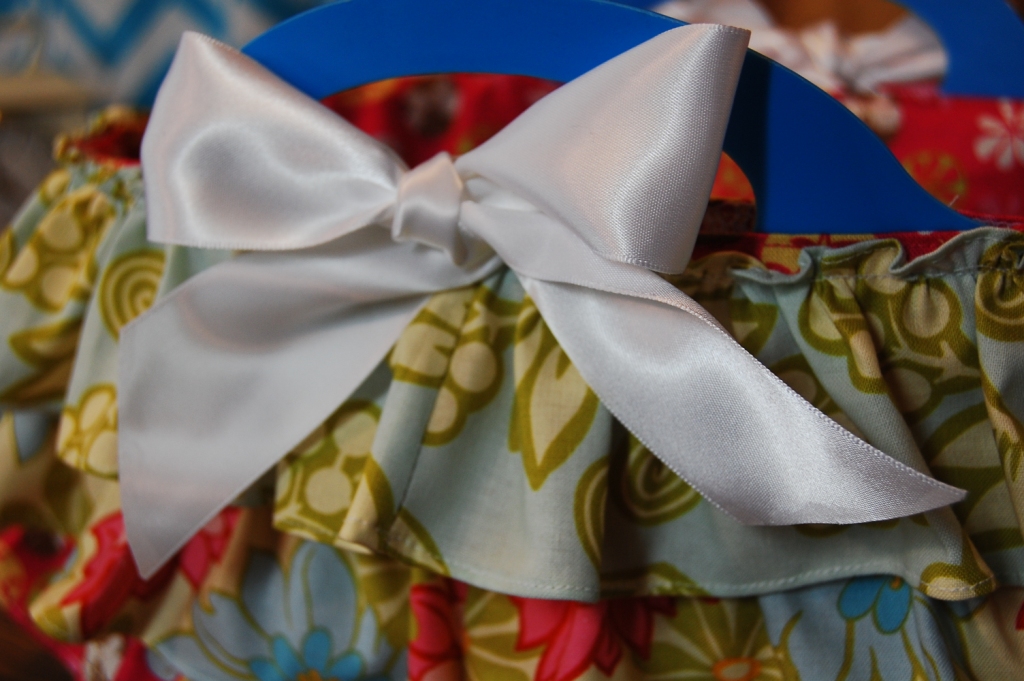
13.  Tie your bows, insert the little mattress and the dolly. Stay tuned tomorrow for the matching quilt tutorial.  You’ll be amazed how fast you can piece, quilt and finish it.  Great for last minute gifts.
 

Post contains affiliate links.

Run for a Life–Get a Gift

I signed up for my first 5K yesterday.  It was a whim.  I paid my fee quickly so I wouldn’t change my mind.  Then I convinced Heidi to run with me.

Your Donation Saves a Beating Heart--Click to learn more.

I’m not a runner–I generally dislike running, but I’m ready to change my mind about running.

This cause is enough to change my mind.

The race benefits The Women’s Clinic of Kansas City.  My home town has a Planned Parenthood clinic right across the street from the high school.  It’s been there for years, making me feel sad and helpless at the same time.  In 2004, the next door space in the strip mall opened up, and The Women’s Clinic took action.  Now side by side across the street from the high school are TWO choices. In 2011, thanks to the generosity of donors they opened a second clinic in Grandview, MO.  As donations flow in, more clinics can open.

The Women’s Clinic offers a free pregnancy test and SONOGRAM to every woman in crisis.  Plus ongoing support, medical referrals, and post-abortion counseling for those reeling from past decisions.  They take donations of maternity clothes, baby clothes, toys and gear too. And offer classes and volunteer opportunities to those who want to help make a difference.

All of these services take money to keep real choices available.  If you feel passionate about life, will you donate today?

To Say Thank You…I have some gifts for you.

Hurry! Offer Ends July 15th.

Everyone that donates $5 or more, will receive a free week Menu Plan–just like the ones I mail out weekly for Grocery Shrink Plus Subscribers.  Everyone that donates $20 or more will receive a free set of all 4 of my ebooks.  Donate $25 or more and get both!  You can donate either on my page or Heidi’s page and qualify for the free gifts.  Be sure to include your email address on the donation page so I can send your gifts to you.  100% of contributions go to The Women’s Clinic.

If you live in the Kansas City Area, will you join my running team? Sign up here. And select The Pitterpats for your team.  I’ll email you my training schedule (from the Couch to 5K), so we’ll be fit and happy in time for race day.

Grant’s First Birthday

Don’t forget to enter our giveaway here. The winner will be chosen Friday, May 4th.

It doesn’t seem possible that my baby is 1.  The past year has been a blur for me, but I wouldn’t do it differently if I had the choice.  I never felt quite myself this past year.  I don’t think it was depression, but more like a case of being seriously overwhelmed.  When I think about what we accomplished–new baby, school transition, moving, progress with remodeling two homes, plus the kid’s activities with soccer, orchestra, church plays and choir performances, and travelling for Darren’s ministry–it’s not a wonder.  There were good times too, but I felt like I was constantly reminding myself to take a deep breath and just go with it.

For Grant’s actul birthday, we went up to church and played games with our Twirties (twenties and thirties) group.  It was fun and Grant enjoyed it too.

We usually keep 1st birthdays pretty low key.  Anything big makes the babies miserable.  Really, they just want their food and a nap.  And too many presents is torture.  One year olds want to play with the first gift they open.  To take it away just to hand them a new one to open….just to take it away…Well, they don’t see the fun in that.

I was tempted to skip the hooplah all together, but we had never had dinner guests in our new home.  So I invited my brother and his family and my parent’s over for Sunday dinner.  Just 3 gifts to open—almost too many, but just about right.

A MegaBlock  dumptruck from my Brother.

A ride on toy and shopping cart from my Mom and Dad.  (Grant isn’t quite walking yet and we’re hoping these push toys will help with his development.)

 We bought him a small electronic house from my sister-in-law at my garage sale.  It has a light-switch on it, Grant’s favorite thing, lol.

We let Grant play with each toy for awhile before Darren unwrapped and showed him the next item.  No birthday boy tantrums–yay!

He took his first steps on the day after his Birthday while being a noisy baby in the foyer with Daddy during his older brother and sister’s orchestra concert.  I missed it.

But I saw this! Lol.  He sure is a happy guy…most of the time.

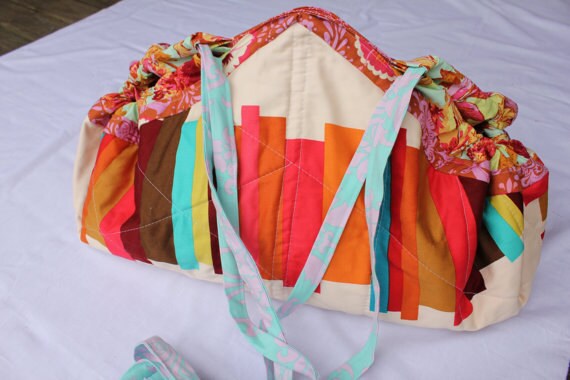
Play mat disguised as a toy tote

I saw this on pinterest:

We had a baby shower last weekend to attend and I stayed up late the night before making a fast version for the new mama.  I didn’t have time to do as much piecing and I rushed too much on the quilting, but with all it’s flaws, it’s still usable.

I love that you can tote all the toys in it, and then just spread it our for a clean place for baby to play.  Well done TickleandHide!  You can se their etsy shop here:  http://www.etsy.com/shop/TickleandHide?ref=seller_info

It felt good to be sewing again!  Even if just for a few hours.

Grant is 6 months

It took me awhile to take his pictures this time.  I prefer outdoor lighting, but the weather wasn’t very cooperative.  I’llhave to get a new plan for the winter months, lol.  His 12 months onesie now fits him properly.  It will have to streeeeetch to make it to his first birthday.

His mood was ever changing for this photo shoot.  His front teeth are trying to make an appearance and disrupt his sleep and his pleasant attitude.  It’s things like this that will make us celebrate when they finally break through!