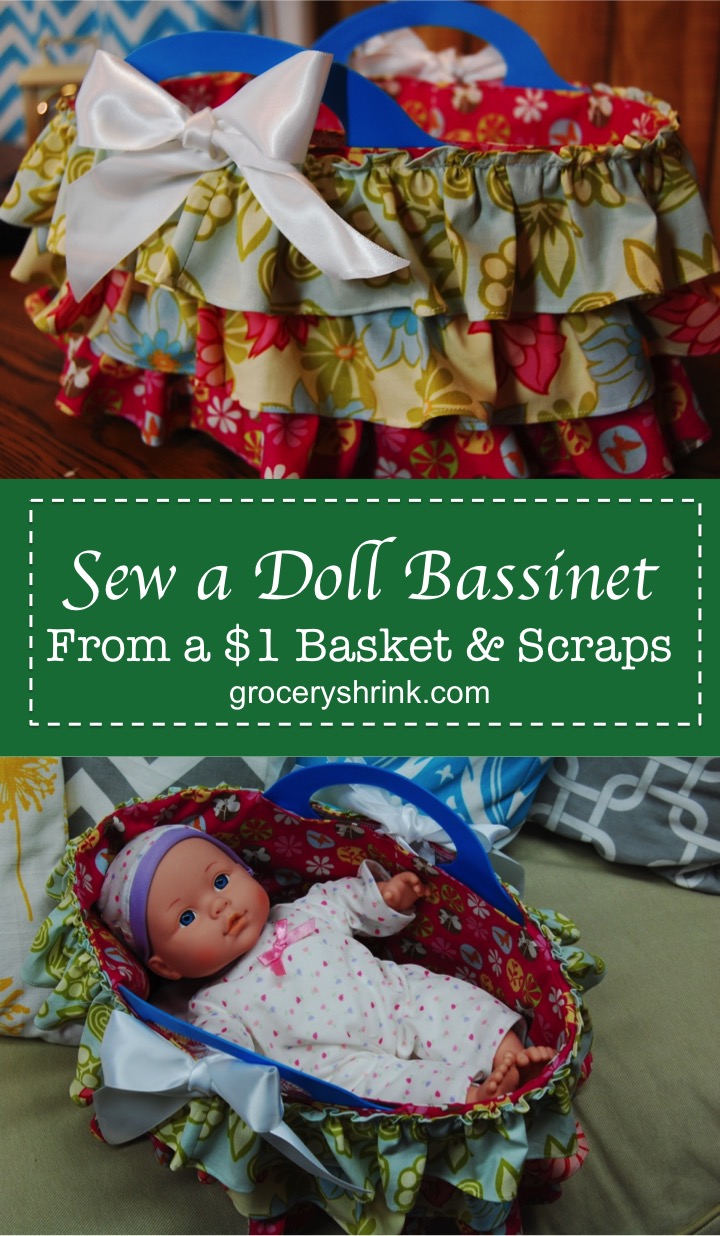
 Wouldn’t a little girl you know be delighted with a new dolly and a basket to carry her in?
 For an experienced seamstress, this project takes about 2 hours. Plan a little more time if you are new at this.
You will need:
1 dollar tree basket. This one is about 11 inches long by 7 inches wide (just slightly smaller.)
An 8-12 baby doll fits perfectly. My doll is 12 inches and is from Big Lots. Just perfect for my 18 month old niece. This one or this one would also be perfect.
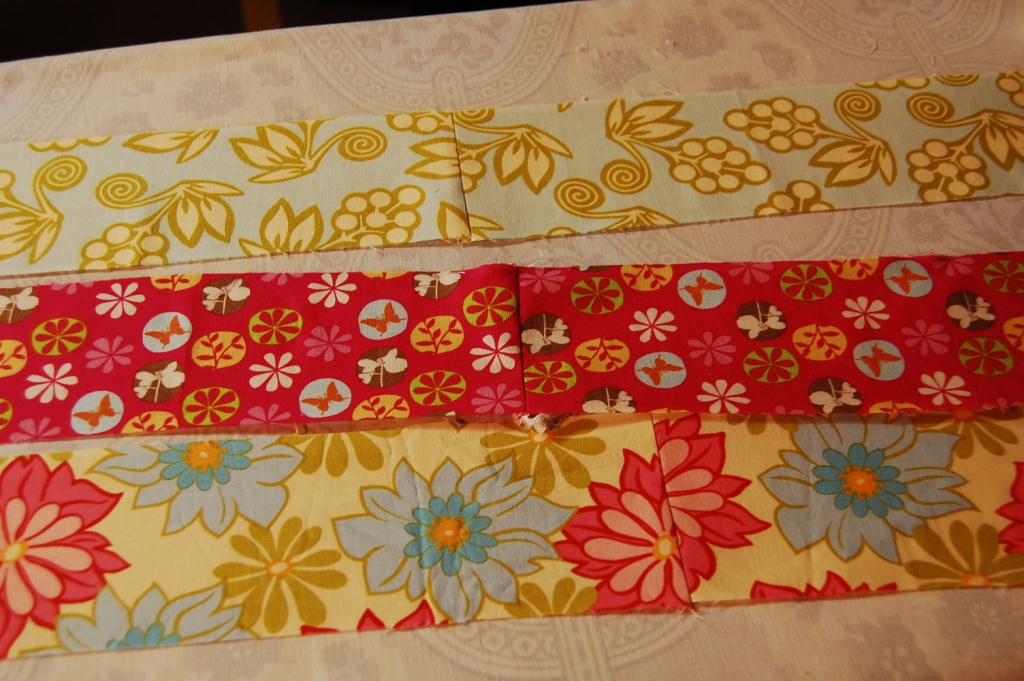
3-4 fabrics. I chose one for the mattress, and 3 for the basket cover. 1/4 yard of each is plenty–or just scraps.
A small amount of poly stuffing
1 1/3 yards of ribbon
Normal notions: thread, pins, scissors, etc.
1. Mattresss: Trace the pattern with a pen onto your mattress fabric.

2. Fold fabric in half and stitch on the drawn line, leaving an opening for turning.
 3. Trim excess fabric leaving a 1/4 inch seam allowance.
 4. Turn right side out and lightly stuff with a small amount of poly stuffing.

5. Slip stitch the opening closed and set aside.

For the basket cover: Cut 1 oval
2 rectangles 6 x 31.75 inches for the lining
And 6: 3 x 31.75 rectangles for the outer ruffles. I cut 2 each from 3 different fabrics.

1. Sew each 6″ wide rectangle into a loop using a 1/4 inch seam allowance. (I used a serger to keep it tidy, but you could zigzag the edges if you don’t have a serger.

2. On one 6″ tall loop of fabric only, run 6″ long swaths of gathering stitches on opposite ends from each other.
 3. Divide both the oval and the loop of fabric (that you just put the gathering stitches in) into fourths. Pin them rights sides together, matching the fourths and putting the gathering stitches around the oval ends to help everything fit well. Stitch with a 1/4 inch seam allowance, then finish the raw edges.
 4. Slip your liner inside your basket and mark each side of the handle with a pin. Be sure to get the widest part where the handle meets the top of the basket.
 5. (Note: Before I did this step, I serged around the top of both loops of fabric so on step 6 the hemmed edges would be finished.)Pin your second 6″ tall loop of fabric to the top of the basket liner, right sides together. Stitch with a 1/4 inch seam leaving two openings for the handles between the marks you made with the pins.
 The ends will have cute little gathers like this on the inside.
6. Press the seam allowance under on the openings left for the handles and top stitch all the way around to hem the edges.
7. Make 3 pairs of loops for ruffles, by sewing 2–3″ wide strips of fabric right sides together on the short ends, 3 times. Then hem both long edges of each loop. You could do it the hard way by double pressing narrow hems and top stitching or by using a rolled hem stitch on the serger. I used a rolled hem foot on my sewing machine, tutorial below.

a. First start your hem by pressing a small double turned hem about an inch down the strip of the fabric. (since it is hard to pull a seam through a rolled hem foot, I waited to sew my second seam until after the pieces were hemmed.
 b. Then slip your fabric into the foot so the raw edge fits into the guide. The portion you previously pressed under is ready to go under the needle for a perfect (in theory) start. As you feed the fabric through the foot be sure the raw edge is always fed into the guide correctly. A little practice with some scraps will have you a pro in no time.
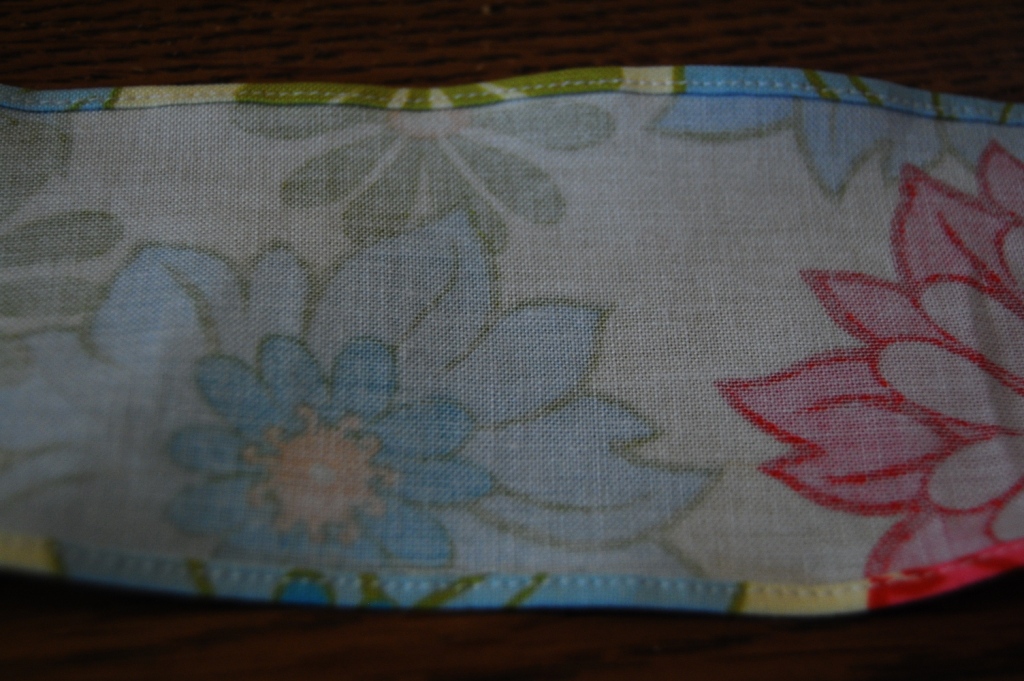
c. It’s a challenge to go over the seam, you may need to use some gentle pressure to pull the seam through the foot. While you have your hemming foot out, hem the bottom edge of the basket cover too.
 I had a rough start on this ruffle. But once I got the whole thing put together it wasn’t very noticeable. So relax and have fun with it.

9. Now that your ruffles are hemmed. Divide them into fourths with pins, then run a single gathering stitch around the top. (Hint, if you tighten your top needle tension as tight as it will go, the ruffles will gather themselves as you run the basting stitch. You will see be able to adjust them to fit as you go.)
 10. Divide your basket liner in fourths too and pin your ruffle in place, matching the fourth markings and drawing up the gathers to fit. Pin the ruffle so the bottom edge of it lines up with the bottom edge of the basket liner. This was easy to do when the liner was actually on the basket. Then top stitch the ruffle in place stitching right over your gathering stitches.
 This is pretty adorable just like this. So if you want to, you can stop here. Or add the next two layers of ruffles the same way, overlapping each row just a bit and lining up the top row with the seam line on the basket.

 Almost Done!
12. Use Fray Check or a candle to seal the ends of your ribbon. Then pin in place centered on each side of the gap left for the handles. Stitch in place along the same stitching line you hemmed with.
 13. Tie your bows, insert the little mattress and the dolly. Stay tuned tomorrow for the matching quilt tutorial. You’ll be amazed how fast you can piece, quilt and finish it. Great for last minute gifts.


 Post contains affiliate links.