For awhile I’ve been doing room concepts in powerpoint. I had taken a class on using Photoshop to do the same thing only better, except I couldn’t justify spending the money on the program. THEN Costco had photoshop on sale for $40. I could do that. Doing rooms in Photoshop makes me deliriously happy. I can change angles, isolate objects, change their colors….anything I want, almost.
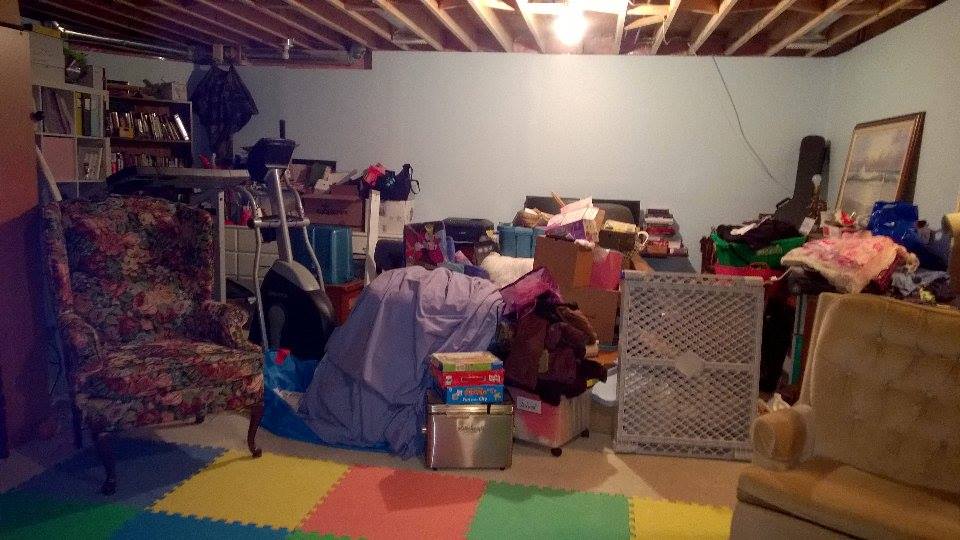
Debbie is a friend of mine from the Cozy Minimalist Class and a reader here. She graciously agreed to let me play with her basement design. She is expecting their 4th baby and in the process of getting the rest of the house ready, her basement ended up the catchall space. Most people have a room just like this and over time it can feel hopeless to be anything but storage.
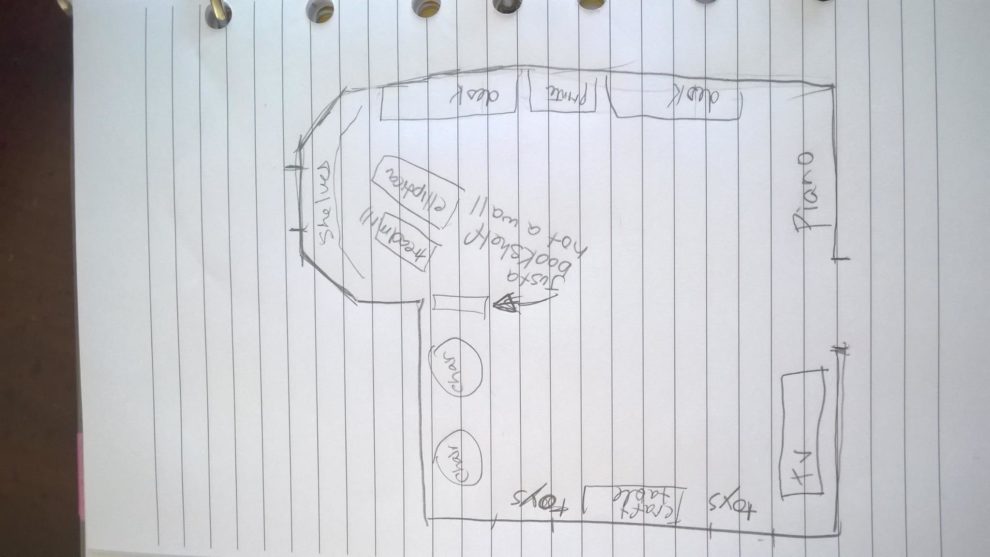
Here’s the floor plan so you can imagine the nice large space. It’s not finished on 3 sides and there isn’t money right now for permanent finishing. She needed ideas for affordable things she could do to make the space feel like a useable part of their home.
We are going on faith that sharing the before and after pictures is safe here. That GS readers are the kindest sort and I know you won’t judge. Most of us can relate to a catch all space.
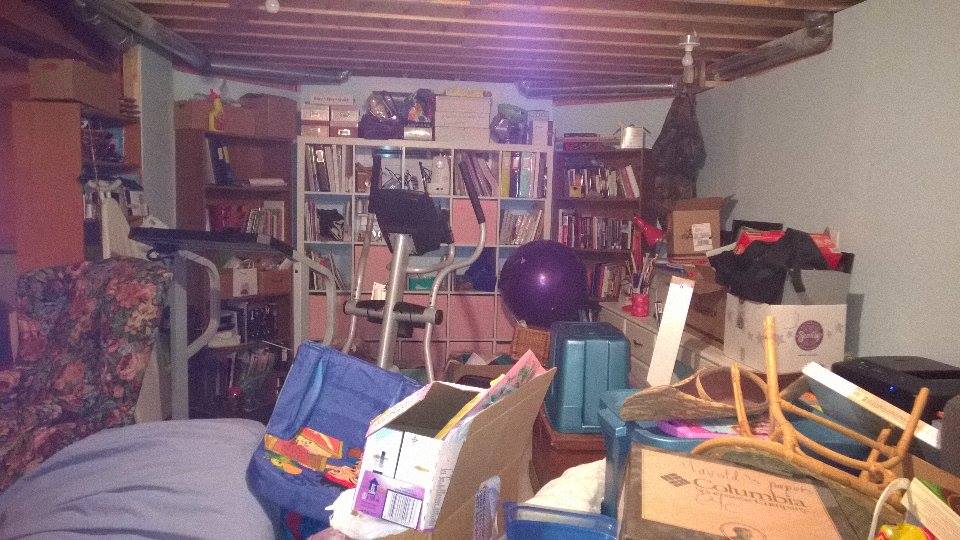
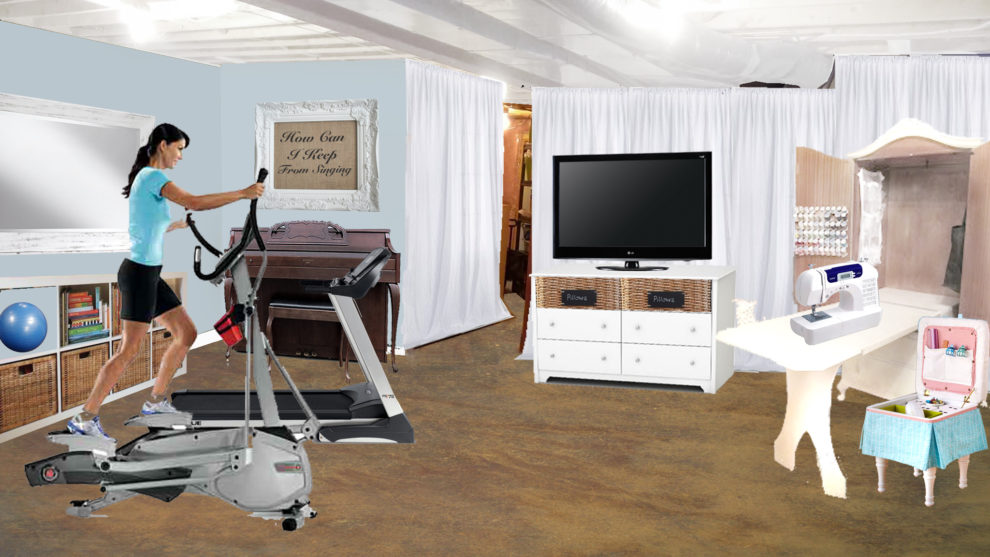
This is the bay area of the room and holds her book storage. She also likes tucking her exercise equipment in this area and used it a lot when it was accessible. Here it has a nice view of the television and is out of the way so the kids don’t trip on it.
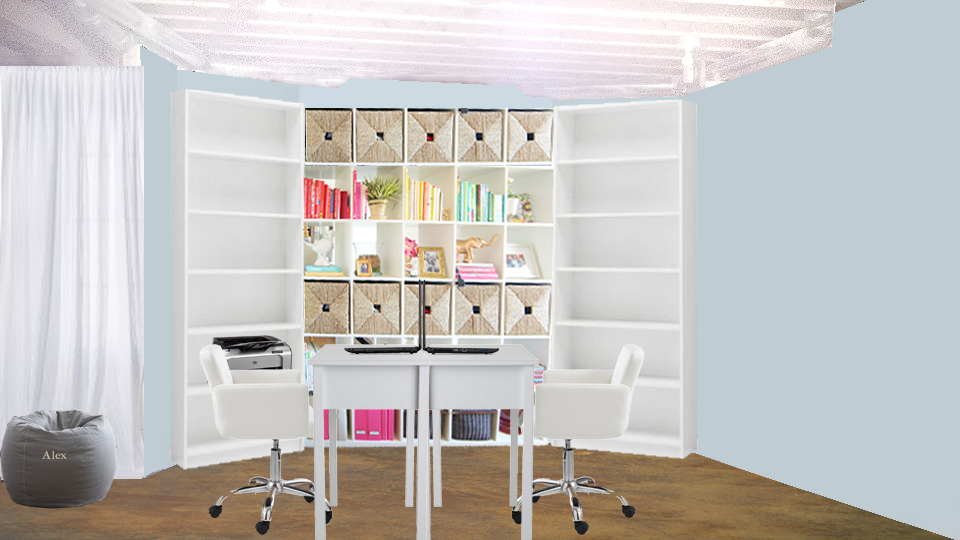
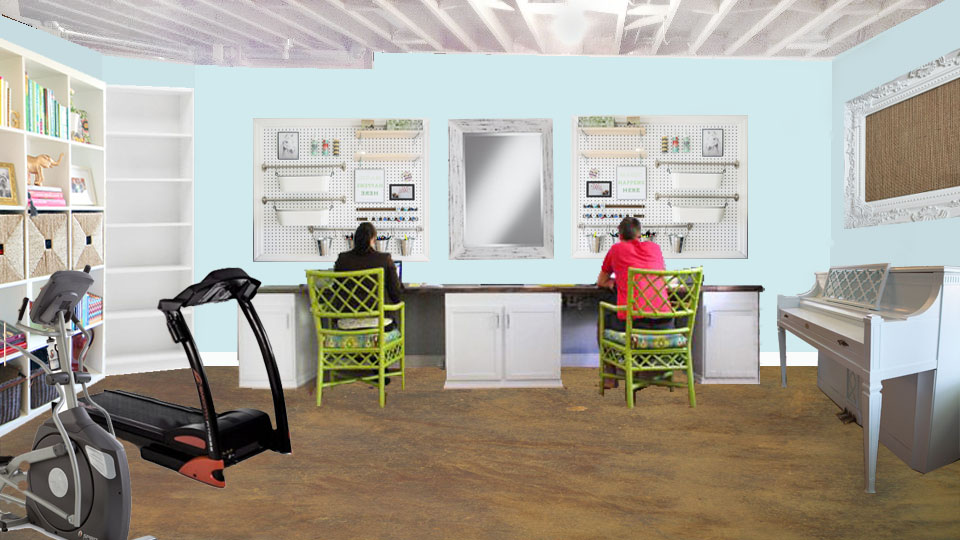
I wanted her to see what it might look like if she moved her shared office space to that part of the room. It made sense to be able to put the printer and papers on the bookcases. She loved the look, but it didn’t really work to have the exercise equipment out in the main part of the room.
In the concept the room is finished by spraying painting the ceiling white. It helps the exposed wires and pipes etc to blend together and brightens the space. The bare concrete floors are painted with concrete enamel paint in two tones for texture. And I recommended building the bookcases up to reach the ceiling for more storage, allowing her to get rid of the extra book case to the let and open up the room even more.
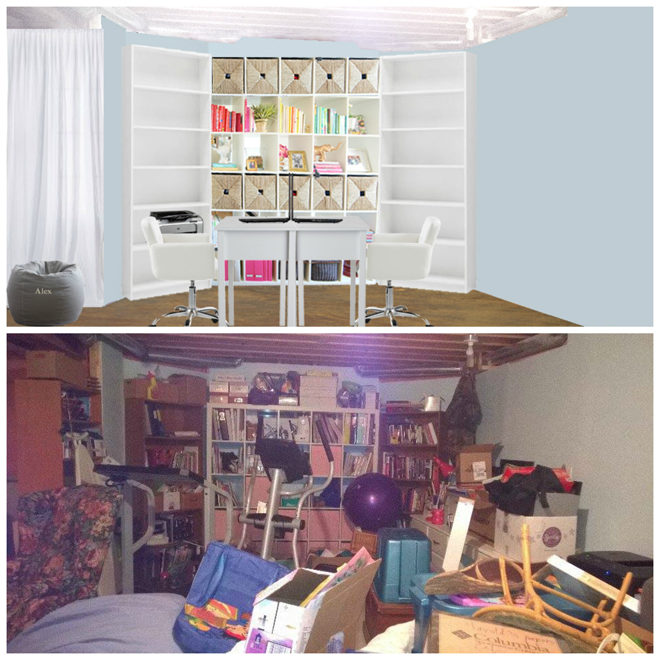
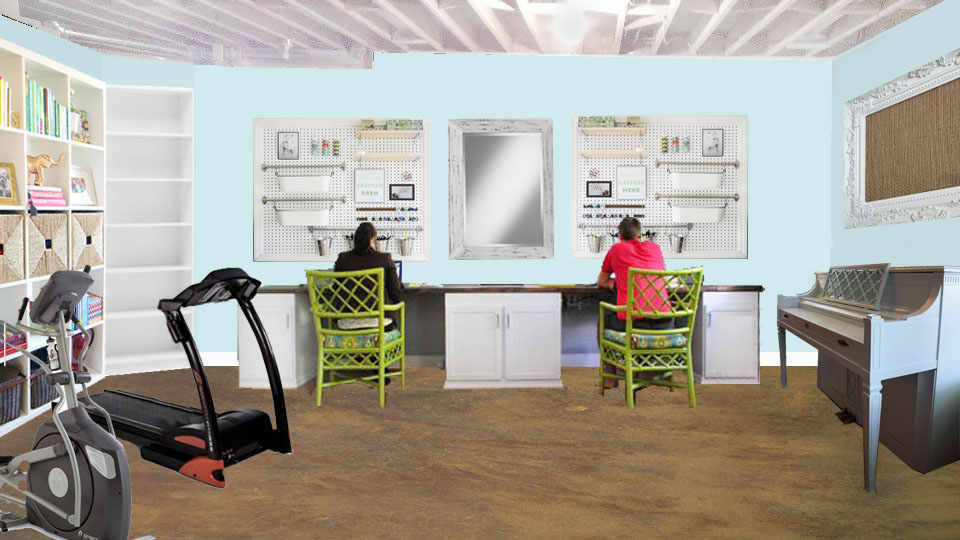
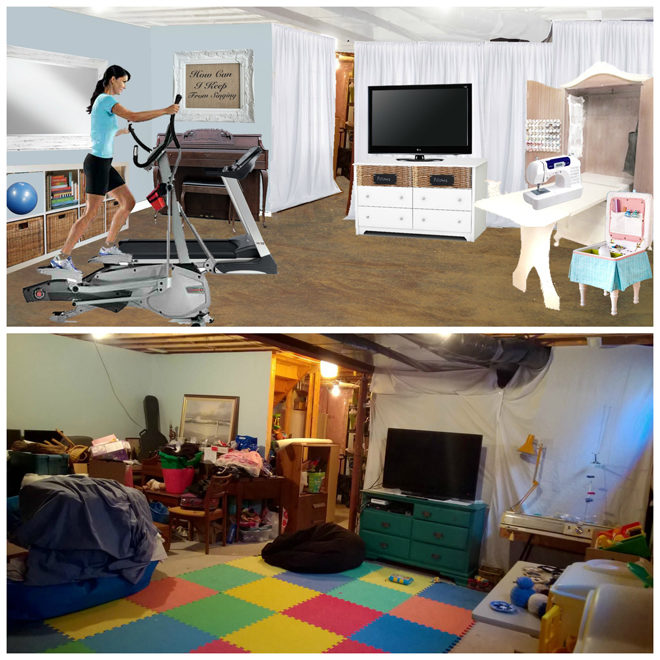
Here’s the before and after close together:
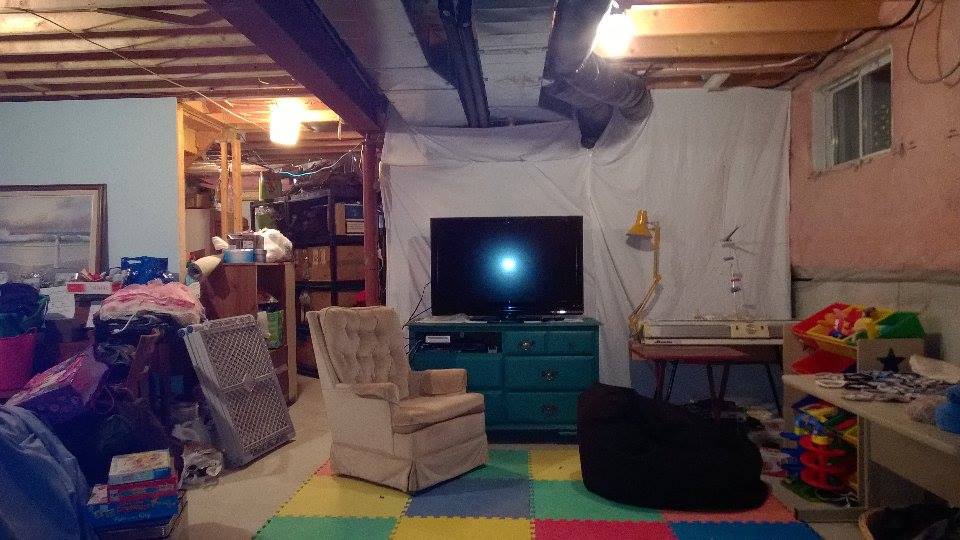
Here’s a before view of the wall to the right of the bookcase area. Otherwise known as the “Long wall”
Since she needed me to move the office back to the long wall opposite the toy/craft area, I borrowed a custom shared desk idea from Young House Love and convinced John and Sherry to pose as Debbie and her husband hard at work.

Each spouse has their own pegboard organizer to keep their tools close at hand. Debbie’s could double as her craft area now if she wanted it too, but I had another craft area in mind just in case. The mirror in the center helps to increase the light in the dark basement area. The piano is a family heirloom but also used by several members of the family. I wasn’t sure how they would feel about painting it to feel more part of the room. I gave them a couple of concepts just in case:
White
Or Powder Blue. The burlap board above the piano can hold their scripture memory verse for the week, or whatever they like.
This view shows what it might look like with the exercise equipment out on the long wall. Ikea shelves with wicker baskets hold smaller equipment while a large mirror above bounces light and allows them to check form. I kept her old dresser for the media cabinet but gave it a fresh coat of white paint and replaced the top drawers with wicker baskets. The unfinished walls are draped with $5 Wal-mart flat twin sheets threaded over electrical conduit pipe hung from the ceiling. (Electrical conduit pipe sells for $2 for 10 feet at the hardware store and is easily cut to length with a hacksaw or bent around angles by stepping on it a pulling.)
My favorite part is that little craft armoire in the corner. Everything stores inside, even the table itself. Read about how to make it here.
This next side of the room is the family/play room. She needs floor space for aerobics, storage for toys and seating for the family to watch a movie together. This is also where she likes to work on crafts while the children play nearby.

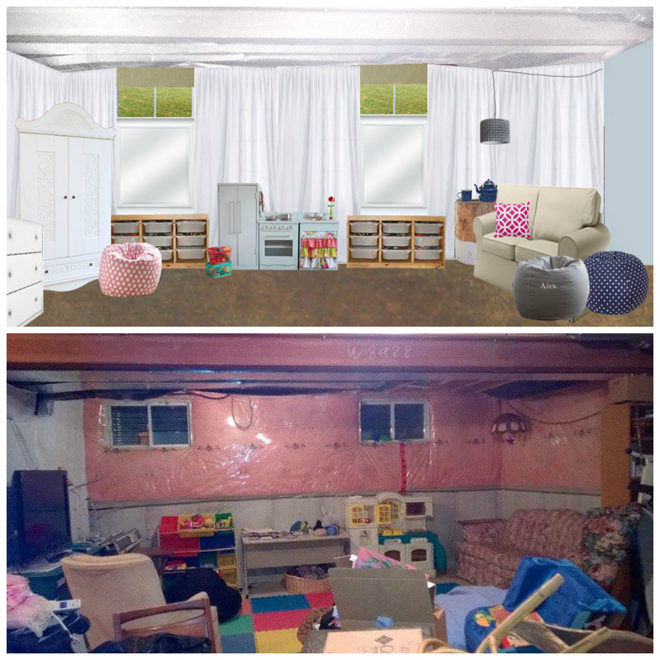
I covered her walls with the same conduit pipe/flat sheet treatment, but the short windows felt dreary and blocked our ability to drape the walls beneath them. I solved the problem by adding mirrors below the windows. They make the windows look longer, bounce extra light around the room and can double as dry erase boards for the kids while they play. I used Ikea placemats above the windows to look like bamboo shades for a fraction of the price.
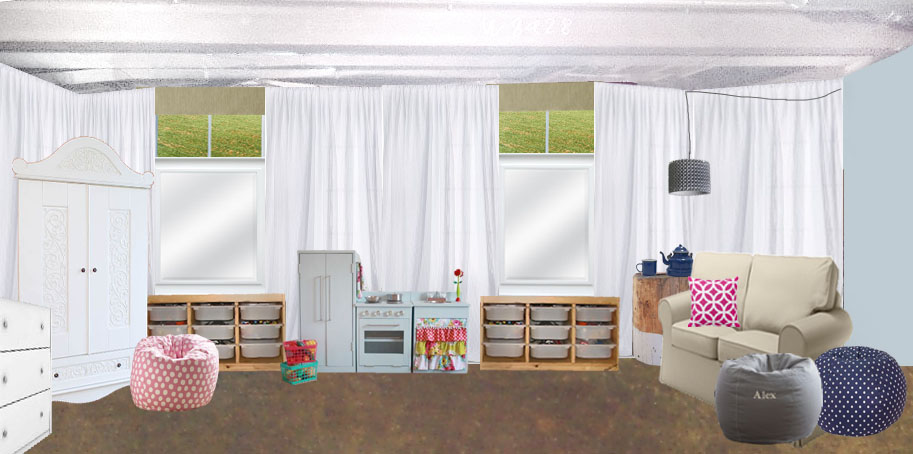
Here you can see the craft armoire folded up and tucked out of the way. Beanbags for the kids from Uglysofa.com have covers from a store that rhymes with Lottery Sharn but are filled with shredded foam for a lifetime of fluffy fun. (Typical styrofoam pellets will flatten and disappear in just a few months of use and aren’t worth the money.) Uglysofa has 20% off coupons on their facebook page and mailing list around holidays.
An Ektorp loveseat with washable slipcover gives seating for adults and a painted stump table holds a cozy tea pot in the corner. The kitchen set is made from free plans at ana-white.com. Trofast pine benches with toy storage give tons of organization for the children. I’ve tried lots of other toy solutions including Closetmaid cubbies and cloth bins from Target. They were too big and comberson for the children to manage. My FAVORITE way to organize toys is with the frosted Trofast in the smallest size (unless our collection of that item is to big) and Chalkboard tape on the fronts to label the contents. I like that they can be trained to pull out one bin and take it to their play area, then put it back before getting a different bin.
This type of design is so much fun for me, that I’m taking a risk and putting myself out for hire. Do you have a room that is completely overwhelming you? I can do a photoshop redesign for you with a shopping list and action plan and put all sorts of money saving ideas in it. This kind of thing takes hours and hours of work for me, so it’s regularly priced at $150. BUT until the 15th you can use the coupon code groceryshrink to get you $50 off. I only have a few listings available at this discount. Be sure to read the listing for all the details before you order.
How do you attach the electric conduit to the ceiling? This is such a great idea to hide stuff on shelves .
Great question, Cynthia. I use these hangers from Ikea: http://www.ikea.com/us/en/catalog/products/30219889/ They actually screw to the wall but can be installed all the way to the ceiling. You could also use these from the hardware store: http://www.homedepot.com/p/Simpson-Strong-Tie-PGT1-5Z-R-ZMAX-Galvanized-12-Gauge-1-1-2-in-Pipe-Grip-Tie-PGT1-5Z-R/100506800 and screw them to the ceiling.