Makeover Monday: Grace’s Kitchen

Grace was a camper in my cabin many years ago when I was a counselor at Jr. High camp.  She has always been tender hearted and giving, a true beauty inside and out.  They recently expanded their family of 6 to a family of 8 with the addition of two foster children, and their 3 bedroom, 1 bath house felt a lot smaller.

The doorway to the left of the stove is where the old dining room door was.  Now that it’s walled off, her fridge can go there.

This winter they sold their home and moved to a fixer upper just a few streets over from me.  The whole family pitched in together to wall in the dining room to make another bedroom. They also added another bedroom to the one already finished in the basement.

The wall straight ahead needs to come down.  It’s a load bearing wall, with ductwork and electrical in it, so it’s not a simple job.

Grace hosted a youth activity at her home a few weeks ago and invited my kids to join in the fun.  When I dropped them off, I was super excited to peek at the new digs.  She had two living rooms side by side. They turned one into the new dining room since the existing dining room was now a bedroom.  She mentioned her dream of taking down the wall between that room and the kitchen and adding an island for a more open feel and more workspace, and I offered to show her what it might look like in photoshop.

For her kitchen I removed the scalloped window trim and painted her upper cabinets white and the lowers navy blue.  And gave her copper drawer pulls, faucet, and mixer to warm up the space. The navy runner is from Dash and Albert.  The new fridge is tucked next to the stove, giving her room to blow the wall out to the left.

Here’s a side by side view.

In the dining room, I rebuilt her built in cabinets to be symmetrical, then gave them the same navy/white combo as her cabinets to make it feel like one big room.  I used a chunky beam to support the house with the wall gone and moved her duct work to the east wall. The electrical outlet can go right on her island between the two rooms.  Her fireplace got an update with white paint and a chunkier mantle.  Her original dining room table is already the perfect style and size to pop right back into the room, and with the table in place, she can put in a signature light fixture over the table.

Her original ceiling is tile, but since the wall is coming down anyway, I suggested they put drywall up instead.  I replaced her mini blinds with bamboo shades and simple white Ikea curtains.  I love her original floors, but with the wall down and the kitchen floor not matching, I showed them what it would look like to use vinyl click floor instead.  It looks like wood but it’s 100% waterproof and less prone to scratches than wood floors.  That’s a good combination with a lot of young kids around.

Would you like your room photoshopped and featured on Makeover Monday?  Send a few photos from your space to angela@groceryshrink.com and tell me your hopes and dreams for the room.  

Get a full service virtual makeover complete with 3D room layout plan, 2 photoshop views, step by step work list, and source list–all in your budget. Find out more.

room-makeover-short-banner

Learn how to use Photoshop your own designs with the Room Makeover class.

Makeover Monday: Peggy’s House

Peggy has a nice open floor plan with a kitchen, hearth room, and dining room all connected.  It has beautiful built ins and lots of windows, but it still felt dark to her.

She asked for advice in the Cozy Minimalist community for the hearth room only, wishing she could paint the built in cabinets and fireplace white, but afraid it wouldn’t look right with the black cabinets.

We were all distracted by her upper kitchen cabinet blocking the line of sight.  She had made it a lot better by removing both sides of the doors to allow some light through. She stores bowls in it that she uses frequently and was not excited to give up the storage.  I made a little photo for her so she could envision what it might look like all opened up with the white she was craving.

I removed the hanging cabinet and painted her remaining upper cabinet white. Matching crown molding around it would tie it all together even better.  Then added a floor to ceiling built in cabinet, a simple box made from plywood with doors and crown moulding, where her shorter bookcase was before.  Build it with free plans here. This would give her back the storage she lost without taking up any more space.  Just for giggles I added matching doors on her existing bookcases with the white mantle and mirror.  I also switched out her light fixtures for a modern farmhouse look.   I used her existing mirror over the fireplace, but I think a big round mirror would look even better.   Here’s the before and after side by side.

Peggy was concerned about the expense of refinishing the ceiling under the cabinet, but her ceilings are perfectly smooth.  In this situation, the ceiling is usually finished underneath and all she would need to do is fill in the screw holes with some quick dry spackle and touch up the paint.  I didn’t change her paint color in the new picture, but all the white accents make it look darker than when it was by the black.

Would you like your room photoshopped and featured on Makeover Monday?  Send a few photos from your space to angela@groceryshrink.com and tell me your hopes and dreams for the room.  

Get a full service virtual makeover complete with 3D room layout plan, 2 photoshop views, step by step work list, and within your budget source list. Find out more.

room-makeover-short-banner

Learn how to use Photoshop for your own designs with the Room Makeover class.

Makeover Monday: Bethany’s Kitchen

Bethany is a homeschool mom to 8!  Her dining room doubles as their homeschool room so needs amble storage. They also hosting family dinners for 20-30 people.  It’s great that they have an open floor plan so the crowds can spread into the kitchen and the living room and still feel connected.

She writes: ” The stained glass in the window was made by my uncle, and I really love the plum color in it. I also have a stained glass with aqua in it. And I  have a China cabinet that I want to repaint on the opposite wall (maybe white? Or a fun, bright color?)

Right now, I think the wall color is bringing me down. It’s just too blah. This room is in the north side of the house, so the light isn’t as bright. I don’t like white walls, but I need something light. I have thought about painting the chairs white, or all different colors of purple.”

Bethany!  Thanks for being a long time fan and for reaching out.  I think your wall color is charming and a good accent for your special window, but it’s pink undertone is fighting with the yellow undertones of the backsplash.  My first choice would be to replace the backsplash with a classic white subway tile.  This tile was first used in 1904 and it’s vintage charm insures it will never be “out.”

I love your light colored hardwood floors.  Lighter, more natural wood tones are at the front of the trend right now and your floors are perfect.  The cabinets and most of your furniture match them perfectly, which sounds like a great idea, but can make the room feel “flat.”

To break it up a little, I recommend painting your cabinets and island chairs white with gray seat cushions.  I also gave your island a little pop of plum color to say “Hiya” to your stained glass window. Inspiration here. I had trouble getting the color right, it’s too bright, but you get the idea. (If you don’t tile across the top of the window, add a bamboo blind.)  With the updates, I think your paint color works.

(The bright purple was bothering me, so here it is a little darker.  You can choose whatever shade coordinates with your stained glass the best.)

With the cabinets painted, the chairs could be left wood toned for more warmth if you prefer.

You already had the perfect curtain rod on the kitchen side and your curtains hung high and wide. I just gave you some beefier white curtains to fill up the wall space a little better. I think they would be amazing with plum colored pompom trim on the edges. Like these without the yellow embroidery:

 Here it is with Revere Pewter paint.  This paint is a little more friendly with your backsplash–a warm yellow toned gray.

I gave you a statement lighting piece in aged wood to add character and warmth to the space.

The depth of the wall on this side of the window looks narrower than the other side.  I would swap your homeschool storage with the mirror, so your curtain can hang freely on this side.  And I would swap your open storage with a vintage look armoire, so you can close the doors and quiet the space.  (Make sure it’s narrow enough to not block the window on either side.  If you can’t fine one on craigslist, you could consider building one out of Billy bookcases, covering the upper glass with gathered white cloth and leaving the very top clear glass.)

Like this one:

Or this one:

I love the dark color of your table and would keep it as is, but paint the dining chairs to match what you do with the Island seating.

Beef up the curtains to match what’s in the kitchen, and make sure they are all floor to ceiling. I’d be tempted to buy the thickest white Ikea curtains and crochet pompom trim edging to save money.

The last thing to cozy up the space is probably not practical at all for a family of 10, but a rug on hardwood grounds the space and brings in a cozy warmth.  If you go for it, get it big enough that all the chair legs will stay on it when people are sitting.  And choose one with plenty of pattern to hide stains.  Here are some ideas:

If you’d like to add some finishing touches, I’d do crown molding all around the room and swap out the dining room Chandelier with one that coordinates with the one over the island.

Would you like your room photoshopped and featured on Makeover Monday?  Send a few photos from your space to angela@groceryshrink.com and tell me your hopes and dreams for the room.

Get a full service virtual makeover complete with 3D room layout plan, 2 photoshop views, step by step work list, and within your budget source list. Find out more.

room-makeover-short-banner

Learn how to use Photoshop for your own designs with the Room Makeover class.

House Updates

We’ve been working on this fixer upper of ours for 4 years! This is the year we might get it finished.

I pulled the red sculpted carpeting on the second floor last year even though we didn’t have money to replace flooring.  The carpet was 40 years old and the allergens were really built up in it. As soon as we figured out it was part of why I was sick all the time we pulled it out. I painted the subfloor with porch paint and even though it was rough, it was ok.   As soon as I could save up the money, I bought the same flooring (TrafficMASTER Handscraped Seratoga Hickory) we put down in Heather’s room. (I still need to paint the walls, add trim and wainscoting and art. And move the mattress, ha ha–but baby steps.)

It’s a little darker than the trend is going right now, but it matches our vintage doors perfectly and is only $.99 a square foot.  Their lighter colorway in Lakeshore Pecan is only $.79 a square foot!  It has been in Heather’s room for almost 4 years now and it has worn perfectly.  No scratches or chunks out of it.  It has held up better than the real hardwood we installed on the main floor.

Next step is to replace the paneling in the office.  I was going to paint it white, but it has water damage that caused the panels to warp and fail at the seams, which could mean mold issues above. As much as I’m afraid to look behind the paneling, I can’t risk leaving mold up there.  With fresh white paneling up, the office will become the temporary master bedroom.  I’ll miss my closet, but I won’t miss running past the glass front door wearing nothing but a towel as I head to the working bathroom while hoping the glare of the sun off the glass blinds the neighbors before the sight of me in a towel does.  I’m imagining this kind of cottage feel:

Source

After that, we start removing the pine planked basement ceiling which is covered with 100 florescent lights.  I love the look of a painted pine ceiling, but the lights created 100 large holes that can’t be easily fixed.  The plan is to drywall the ceiling with a modest amount of LED recessed lights, and hope to leave the pine walls for painting.   Heidi and I have plans for the ruined pine planks.  We are hoping there will be long enough scraps to build some furniture.

The ceiling is coming down before we’re ready to finish the basement to give access to electrical and plumbing for the new master bedroom.  The master has been raw studs and exposed pipes and wires for 4 years.  I got tired of looking at it and thumbtacked twin flat sheets to the ceiling awhile ago.  It really did make waiting easier.

Under the plywood on the floor is a giant hole where the sunken bathtub with no surrounding walls used to live.  It was a big tripping hazard, so we had the tub hauled off by a metal recycler and plunked some plywood down so no one would fall to their death to the basement.  This is RIGHT in front of the entrance to the bedroom.  You could sit in the former bathtub in the master and watch the TV in the family room and hold a conversation with everyone, convenient :).   Plus, the kids liked using it as a slide.  They were pretty upset they day it left.

We are moving the door in the master bedroom from the family room to the foyer.  This will give us enough space to build an ensuite bathroom, and allow faster middle of the night access to the 2nd floor where the children sleep.  The doors are right on the other side of the staircase from each other.  The new door is to the left of the old one and makes good sense inside the bedroom also.  There’s just enough space for the new door to make it 36 inches wide with room for proper trim.

Here are the current plans for the ensuite:

Also on the list:  finish the basement, build organizers in the garage, replace the driveway, build a lower patio under the upper deck, cut a back door and add stairs to go to the yard, build a swing set and finish the landscaping.  We’re about $16,000 short on the budget for ALL of this, so some projects will have to wait while we save up money.   I’m also hoping that I over budgeted on some projects and we will find money as we go along.  Bwa ha ha!  Like that EVER happens in remodeling.

We refinanced our home in January.  My parents hold the mortgage to the house.  It’s a rare situation I know, but they are very frugal and built a nice savings that my mom was afraid to invest in the stock market.  It was sitting in the bank making %0.005 interest driving my Dad crazy.  He was interested in loaning it to us where it could safely grow.  We were getting a mortgage anyway and would have to pay the interest somewhere, and it feels really good paying it to them.  We have the mortgage on direct deposit, so every month they automatically get paid.  We’re never late and everyone has peace of mind.  That simple piece of organization keeps the family relationship good.  I know this is something that Dave Ramsey says to never do, but it works for us.  This January, my folks gave us back all the principal+interest that we had paid them over the last 4 years and started our loan over.  If we are super careful, it should be enough to finish the house modestly.


DIY Pompom Trim Blanket

We have a bonus room over our garage that I’m using for my office/craft room/guest room.  It has a high vaulted ceiling and the previous home owners used every inch of floor space by not putting in knee walls.  The wall shown here with the window in it, is the only wall in the room that you can put furniture against and even that contains the tall laundry chute.  (I’m tempted to rip this out and just have a hatch in the floor.) Also the thread cabinet on the wall and the sewing table are going to new homes.

The whole room is paneled in 1970’s press board. It would look darling painted white, except for where the roof leaked many years ago, and warped the boards. I’m not sure what to do about that….so I’ve left it natural while we worked on other rooms. I used to have bright blue and white chevron curtains on the rods but am ready for a change.  I’m living with nothing while I decide what will be next.  There are outlets everywhere in the room, on the ceiling and on the floor.  It’s a crafter’s dream and strange all at the same time.  It’s going to be tricky to lay the floor in here, which I hope will happen December 26th.

After subjecting our guests to sleeping on an air mattress with a lumpy hide-a-bed mattress thrown over the top, I decided to invest in a more substantial guest bed.  I found this bed frame for a queen bed that folds up into a small square, yet the reviews said it was sturdy enough to use as an every day bed frame.  When folded, the bed frame perfectly fits in a triangle shaped cubby hole in the corner of the room by the furnace utility closet and tucks out of the way when not in use.

The bed frame didn’t require a box spring. I went to Ikea and tried out all their mattresses and came home with this one.  I had first thought to get an all foam mattress, but this one was surprisingly more comfortable.  It came vacuum sealed and rolled up in a cylinder shape, which made getting it home really easy.  I could imagine it sliding into the cubby beside the bed frame when not in use.  When I cut the plastic and the mattress fully expanded in the room, it was clear it wasn’t tucking behind anything.  SOOOO, my brilliant idea left me with a folded up bed frame in the corner of my office and a mattress on the floor.   Then I saw this blog post from ZevyJoy.  She explains how she used a $50 Ektorp slip cover to turn a queen bed into a daybed for their family room.  Since queen daybed frames were running $300-$1200 online, I thought this was a fabulously frugal alternative.

I made one more trip to Ikea for an Ektorp slipcover, some pillow forms and pillow covers to make my own version at home. (The shopping trip that inspired this post.) The effect is limited with the paneled walls and bare plywood floor (except for the well loved rug I threw down for feet safety, but it still beats the mattress on the floor vibe.  I used as much of what I had as possible.  The ektorp cover is stuffed with my spare feather pillows that I had been collecting for a few dollars at a time at second hand and salvage shops.  The chenile bedspread was in a free bin at my neighbor’s garage sale, because her new puppy had chewed a few holes in it.  (After mending it’s hard to find the damaged spots in all the texture.)

I love the texture of a chunky pompom throw and wanted one to cozy up the guest bed, but they are crazy expensive. The thought of wrapping a thousand homemade pompoms to sew to a blanket wasn’t very appealing, and I’m not a fan of finding strings all over the house that fell out of said homemade pompoms.  Crocheted pomopms are FAST and cannot lose strings.  I started with an Ikea Polarvide throw for $3.99.

The scalloped edge is adorable, but not great for this application.  I just grabbed my good fabric scissors and cut them off, ending up with a pile of petal shapes that I saved in a baggie waiting for inspiration for another project.

I chose Lion Brand Homespun Thick and Quick in Dove for the poms.  I wanted a chunky boucle yarn, to make it go faster and give the poms a furry texture.   It took almost all of 2 skeins to get around the blanket. At $8.99 a skein that would have upped the price of the throw quite a bit, but you probably guessed I used a 40% off coupon at Hobby Lobby for each skein.  (The final project cost was $14.79.)

I used a P hook from this set, but you can use any size and any type of yarn you prefer.  Start by chaining long enough to go all the way around the blanket.  After I had a fairly long chain, I started pinning it to the blanket as I went so I’d know as soon as my chain was long enough.  It also kept that huge chain from twisting.  Join with a slip stitch to close and single crochet in each chain around.

To form the pom: chain 6 and form a 3 double crochet cluster in the 3rd chain from the hook.  *Chain 3, then form another 3 double crochet cluster in the 3rd chain from the hook.  Slip stitch to fold those two clusters in half and form a ball.  Then chain 3, skip the next 3 single crochet stitches from your foundation row and single crochet in the next stitch.* Continue from * around.  Finish off and weave in the ends.

When you get to the end, if you don’t have a exactly 3 chains to skip, it’s ok to skip 2 or 4 or whatever is left.  It won’t show in the final blanket.

Here’s a video from Bella Coco that gives a nice visual:

When the edging was all finished, I used a long zigzag stitch on my machine to attach it to the blanket, using cream thread on the top and gray in the bottom so the threads would blend away.  The only problem was the chunky boucle kept getting caught in my presser foot.  Several times I wondered if hand stitching would have been the better plan.

Makeover Monday: Hide the Cords

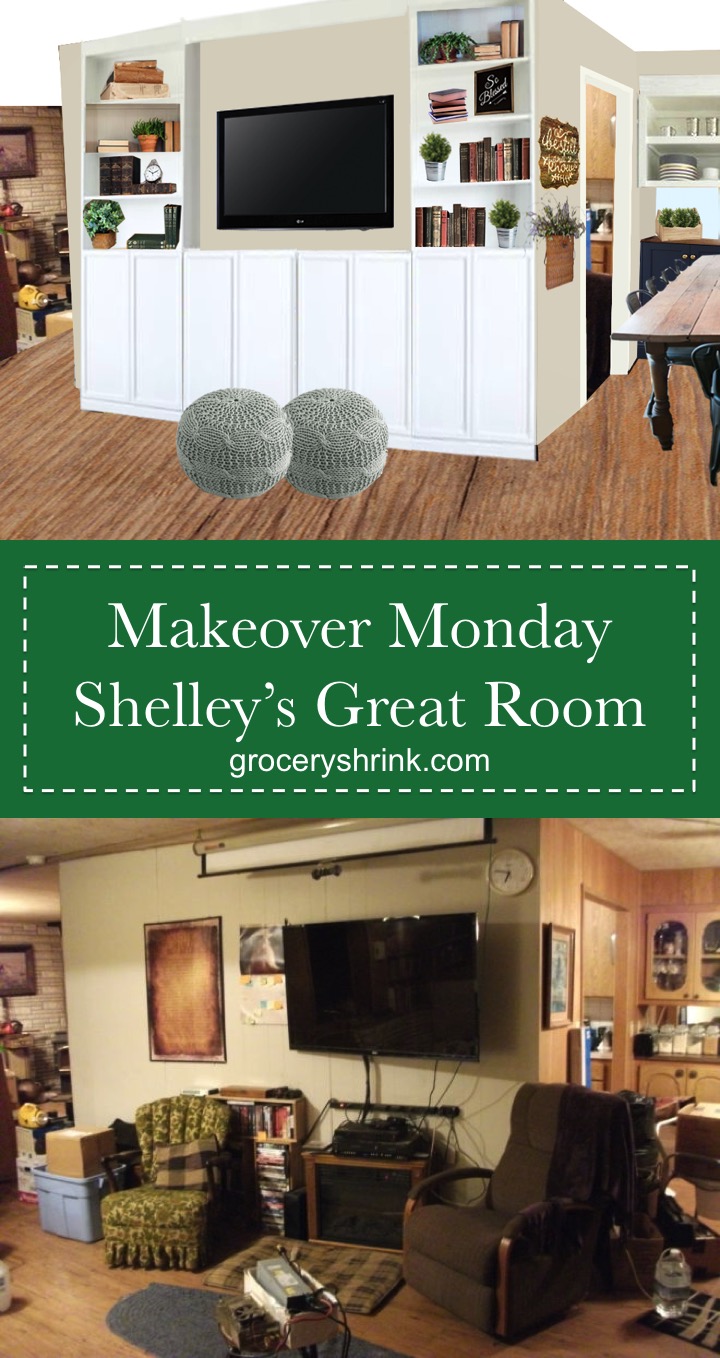
Shelley contacted me two weeks ago wanting to spruce up her living room before her 9 children and all their grandchildren descended for Thanksgiving.  If that sounds daunting, it gets even more so.  After their children grew up, Shelley and her husband downsized their 5400 square foot home into a 2 bedroom double wide trailer in the country.  Then her good friend became terminally ill with cancer. Shelley spent the last few months staying with her friend to care for her until she passed away.  When Shelley got home and saw how everything fared while she was away, she was overwhelmed.

After I heard her story, I couldn’t help but love her heart.  I offered her smaller design packages to save her money, and she wouldn’t dream of it.  “I want the whole package–all of it.  And I want to pay.”  She also agreed to let me share her before and after pictures, even though privacy (along with speed) is part of the privilege of being a paid client. Heart of gold.

This is a good opportunity for me to share the details of what comes in a full package.

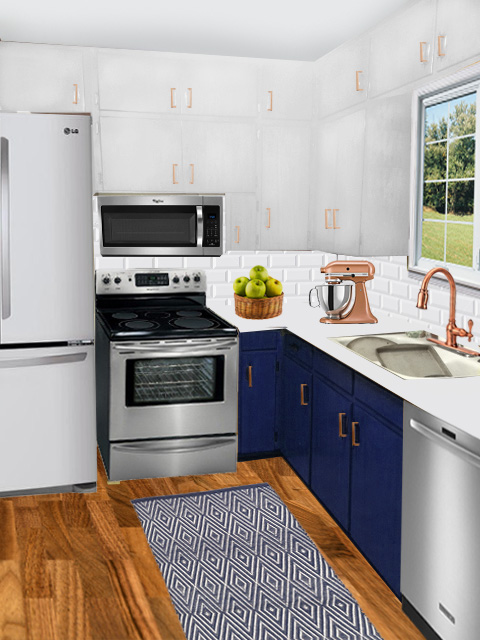
1. 2 pictures showing the new design
2. Shopping List with prices and sources within your specified budget
3. Step by step work list
4. 3-D furniture placement plan (video)

5. A Shared Custom Pinterest Board
6. One revision

At first Shelley was sure she wanted to keep all her original furniture.  I worked with her on that and showed her some slip cover options etc.  After rearranging everything according to the furniture layout plan, her husband sat on their old love seat and said “no way am I sitting on that!” and he bought her a new full size sofa and started talking about chairs. I love this so much because they were sticking to tiny pieces of furniture thinking that their home was small and they needed to conserve space.  Compared to what they had before, it is small, BUT the living space is much bigger than an average home.

Shelley's living room private Pinterest

The first thing we did was set up a shared private Pinterest board where I could pin sources to all the things I was putting on her shopping list and get her feedback.  She started window shopping and pinning things that she would like me to include in the design, especially new paintings that I might take a color scheme from.  I searched her Pinterest and Houzz pages she had previously made to get a feel for her style and color preferences.

I discovered through her boards that she loved horses and farmhouse style.  I found this original art piece on etsy that was beautiful and affordable:

horse-painting-on-etsy

The painting helped me choose her colors: Benjamin Moore Simply White (for Trim and shelves); Edgecomb Gray (for walls); Wedgewood Gray (Curtains and Accessories); and Hale Navy (for bottom of the hutch and accessories.)

shelleys-paint-scheme
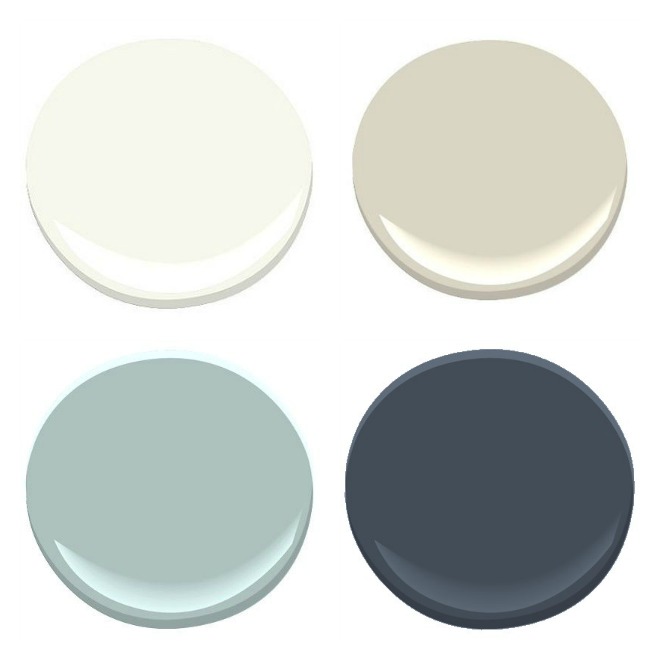
I chose her neutrals specifically for their yellow undertones.  They had just laid new country pine wood floors and if she used neutrals with pink undertones, or even a true white, they might look orange.
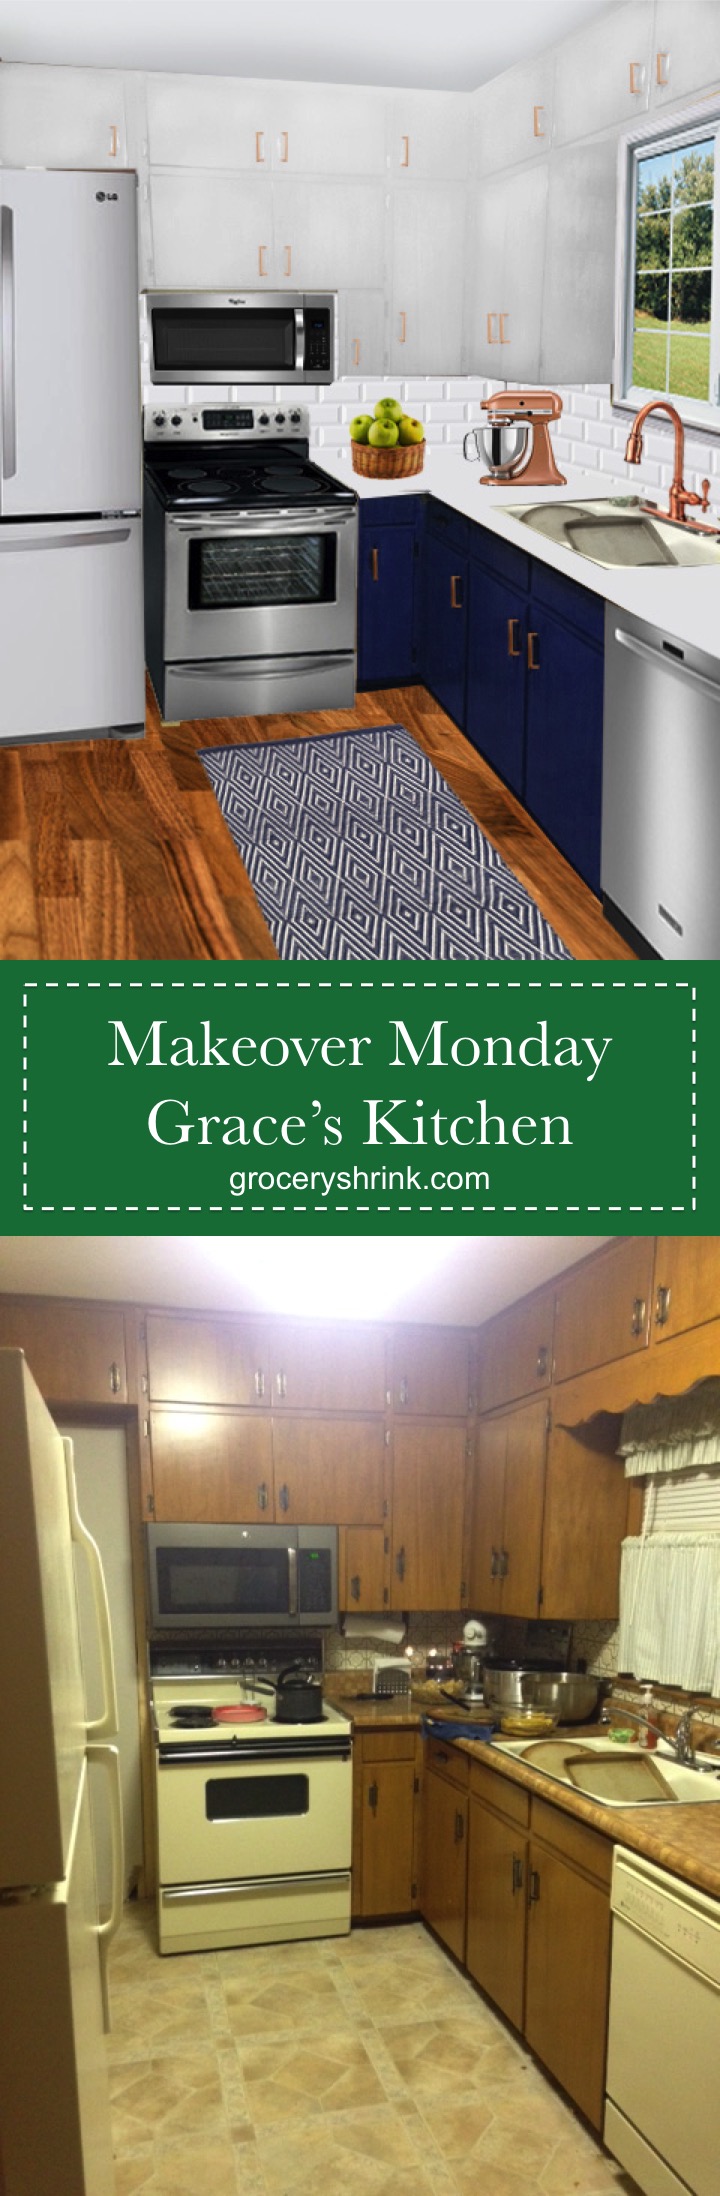
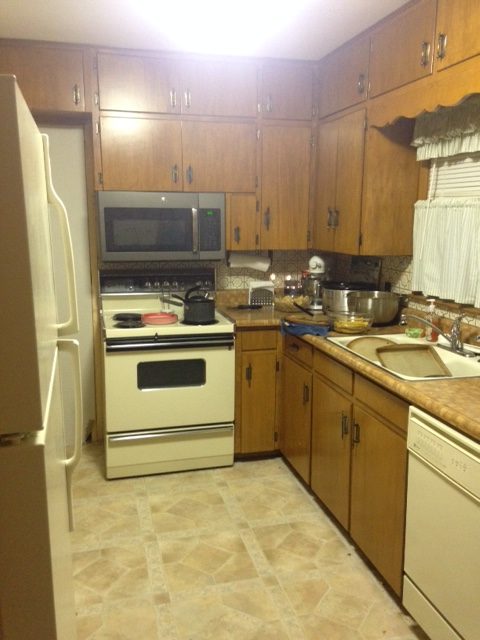
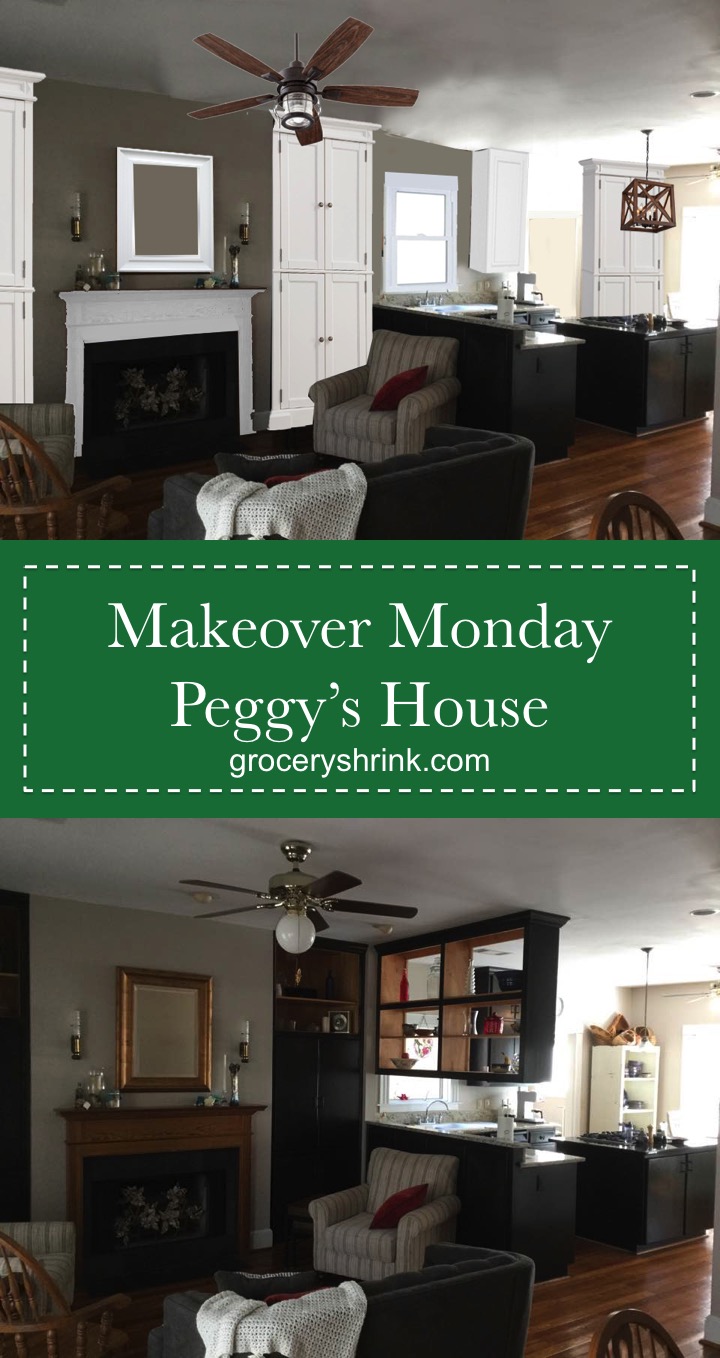
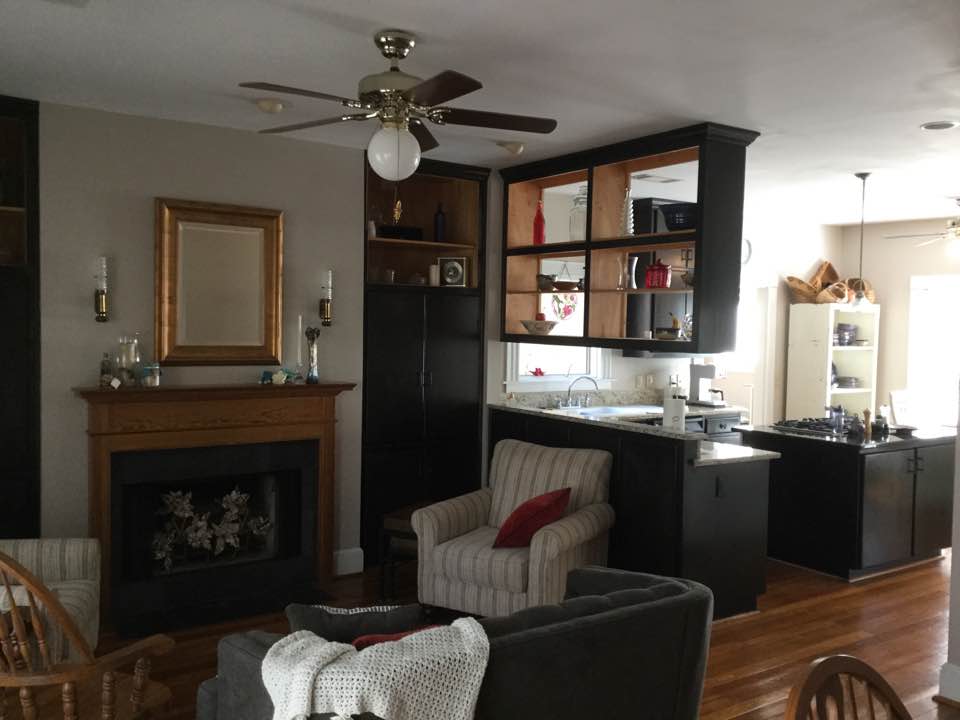
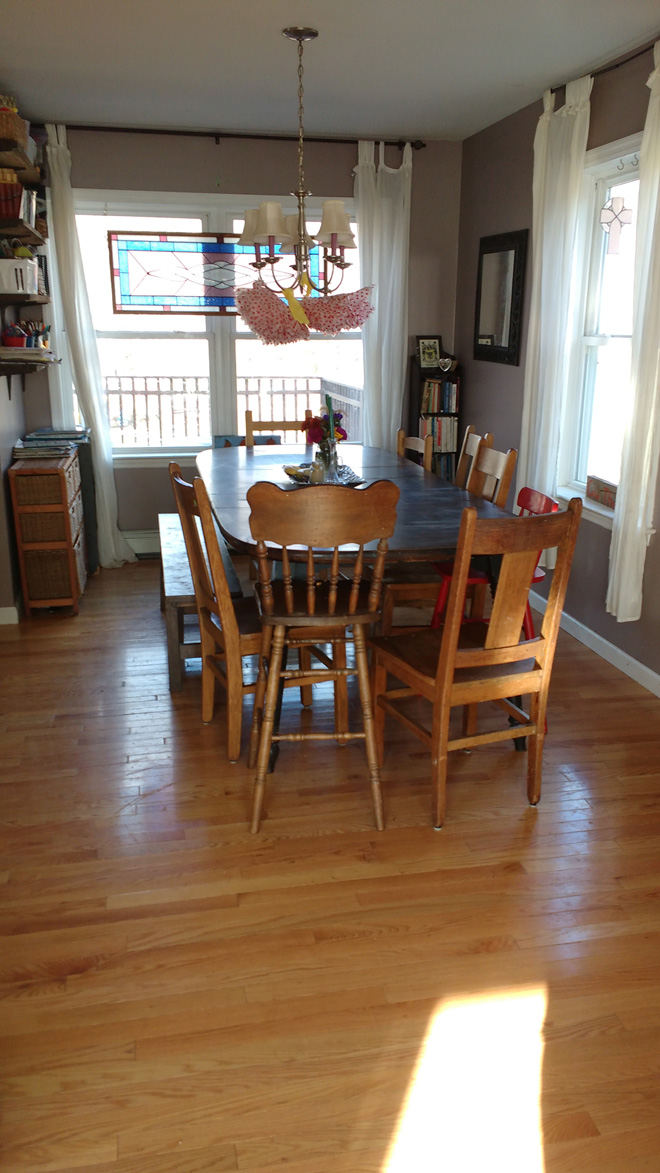
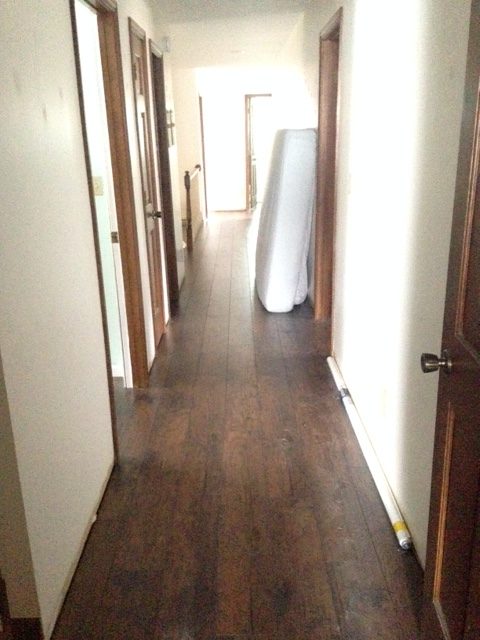
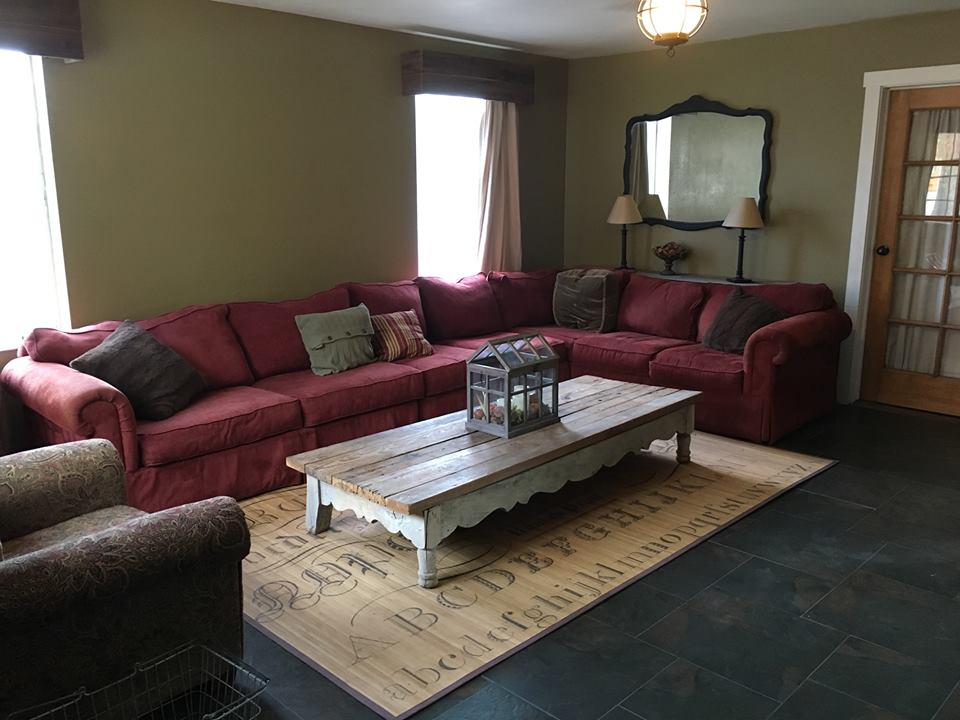
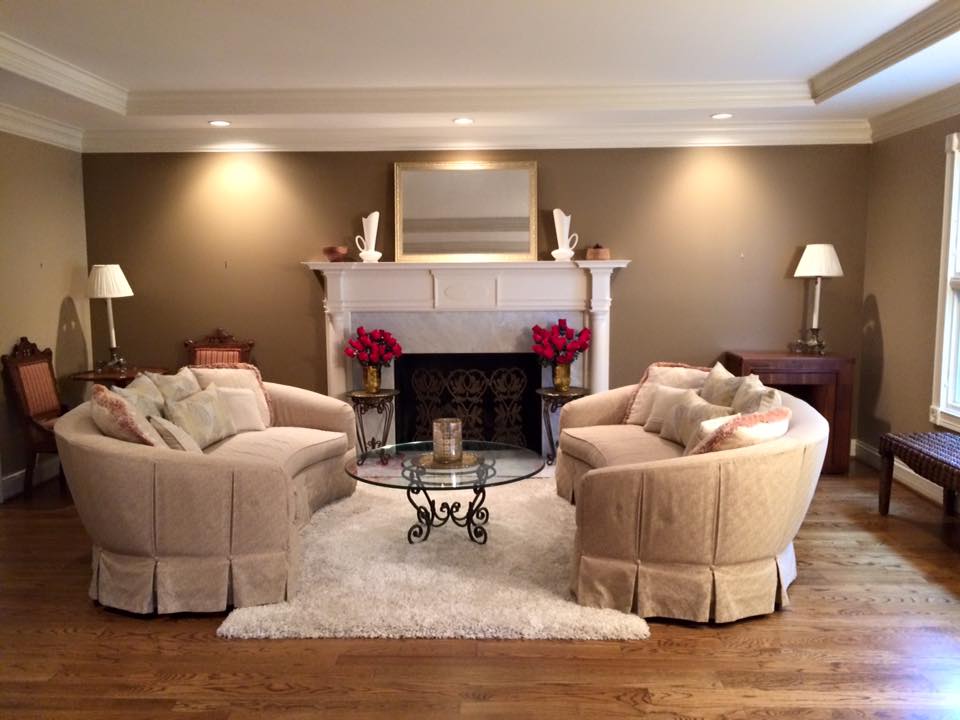
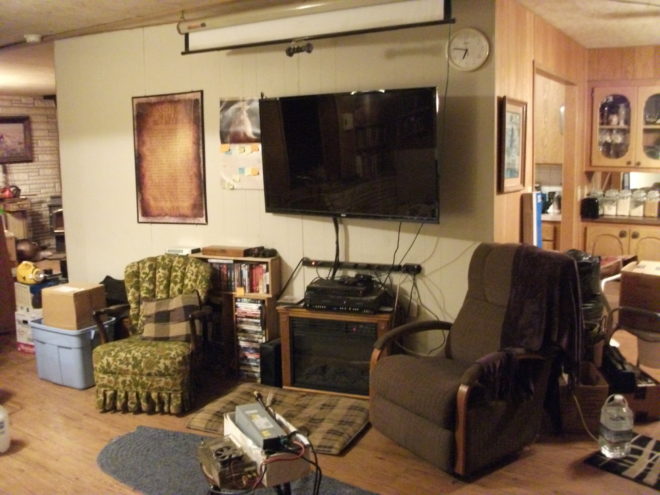
Here’s her before:

Shelley before 1

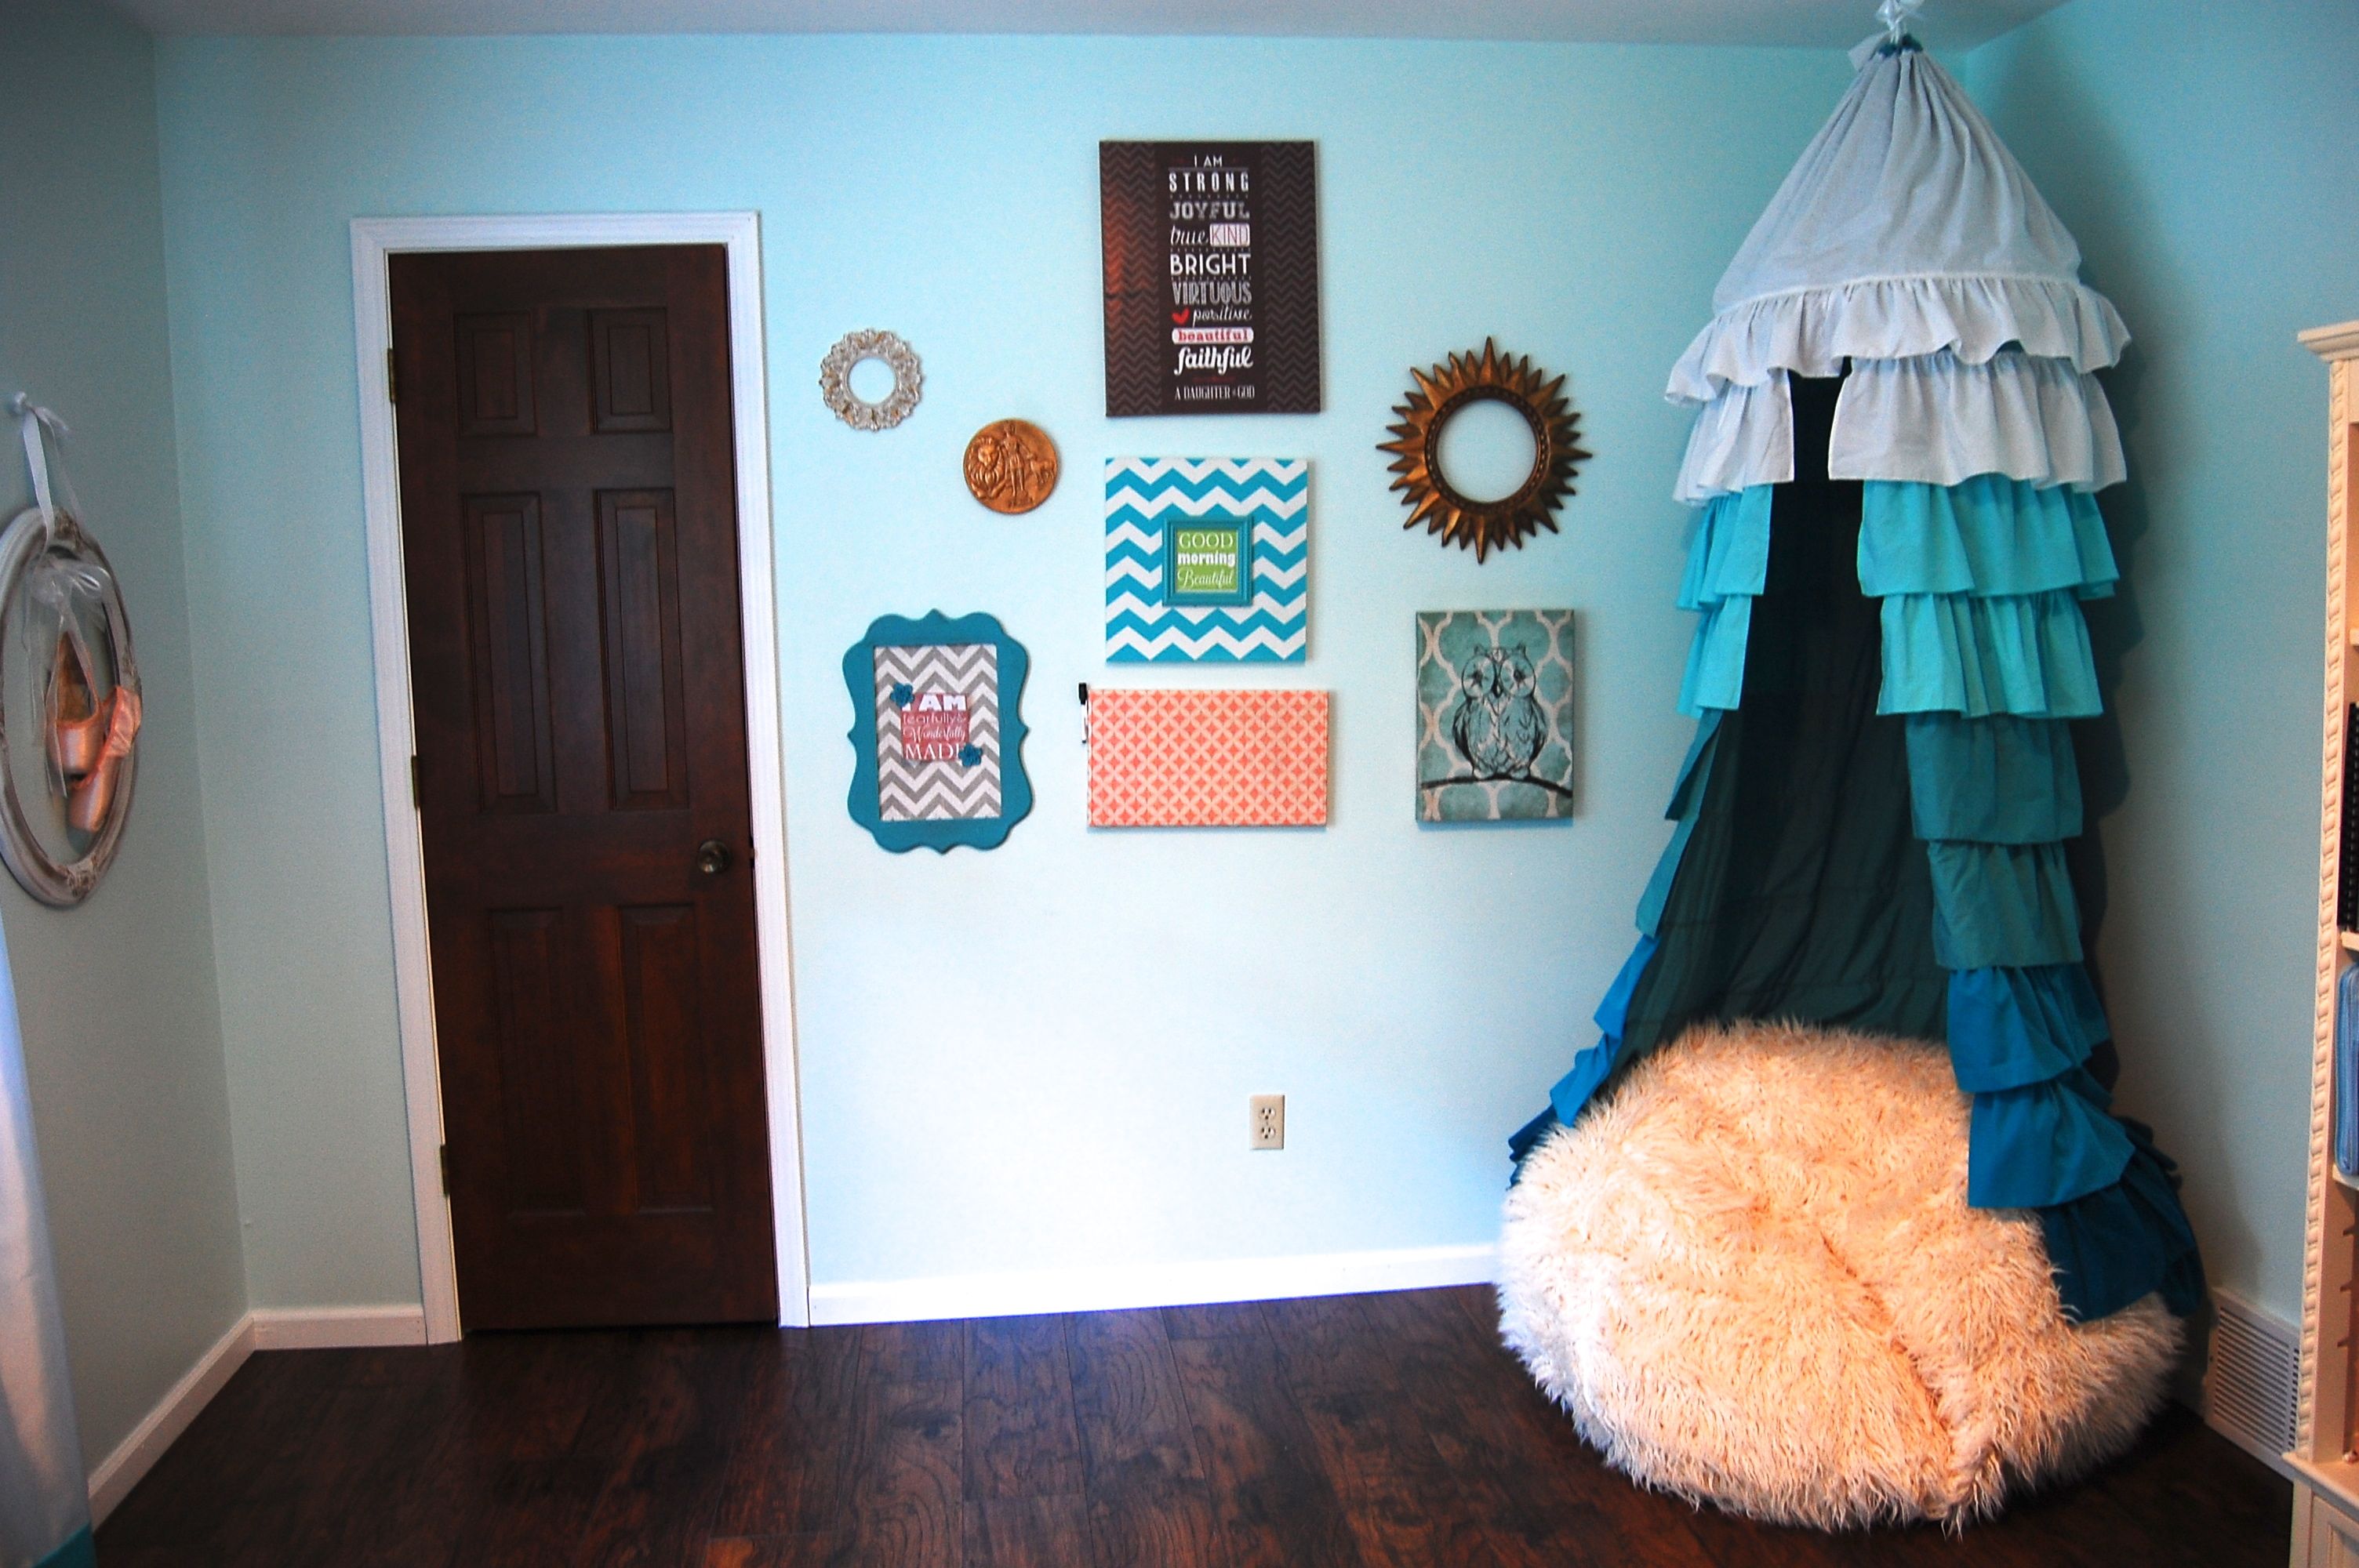
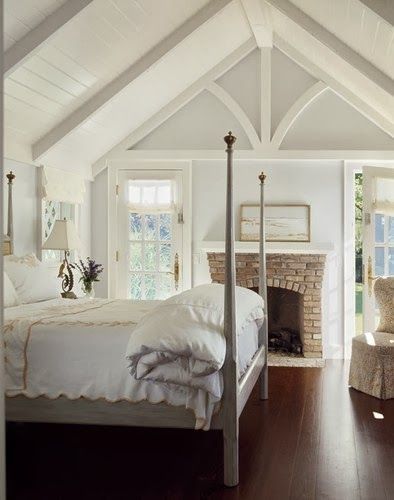
The first thing I noticed was her little green chair on the right.  So cute! Imagine it with a slip cover to look like this, except with a floor length skirt.

slipcovers-by-shelley

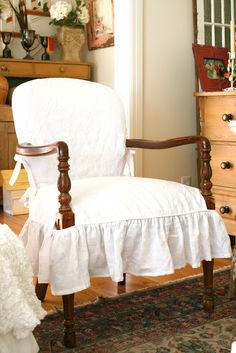
via Slipcovers by Shelley

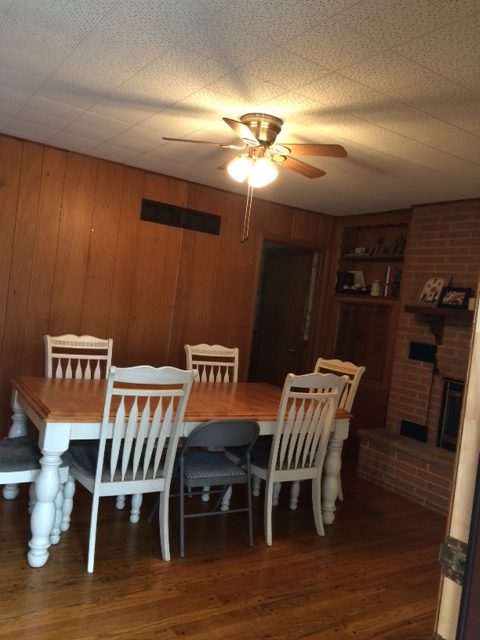
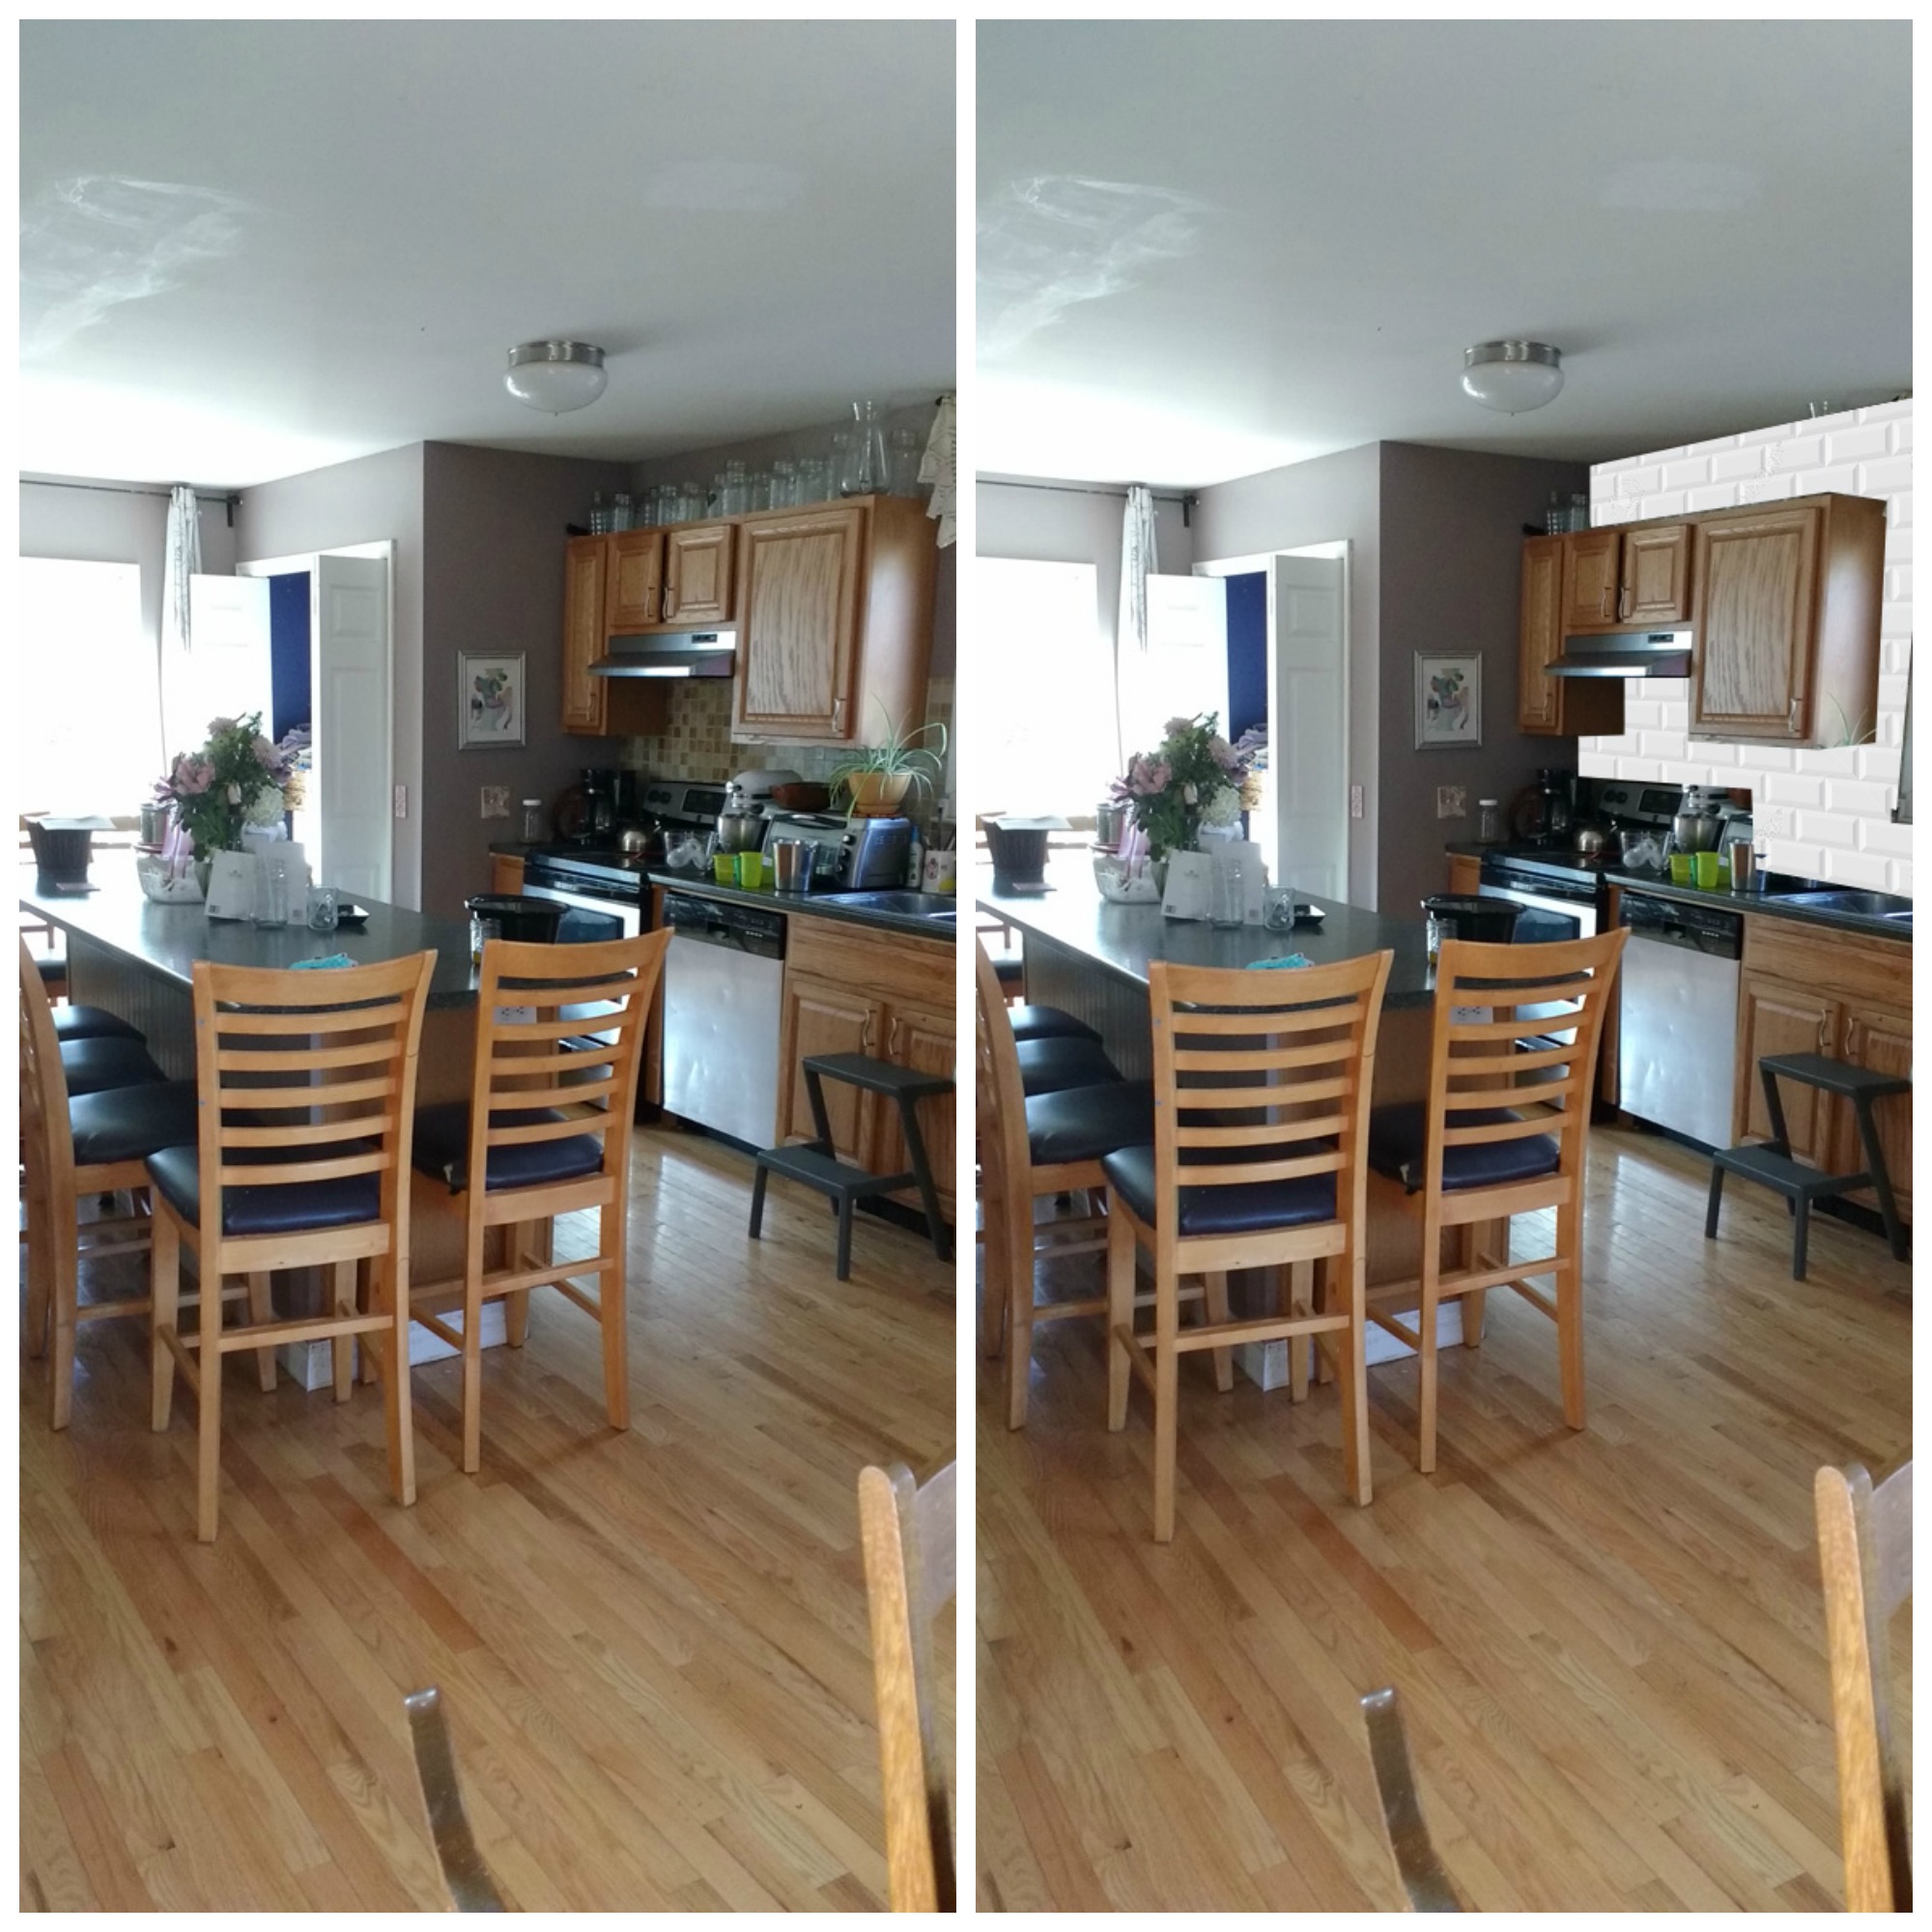
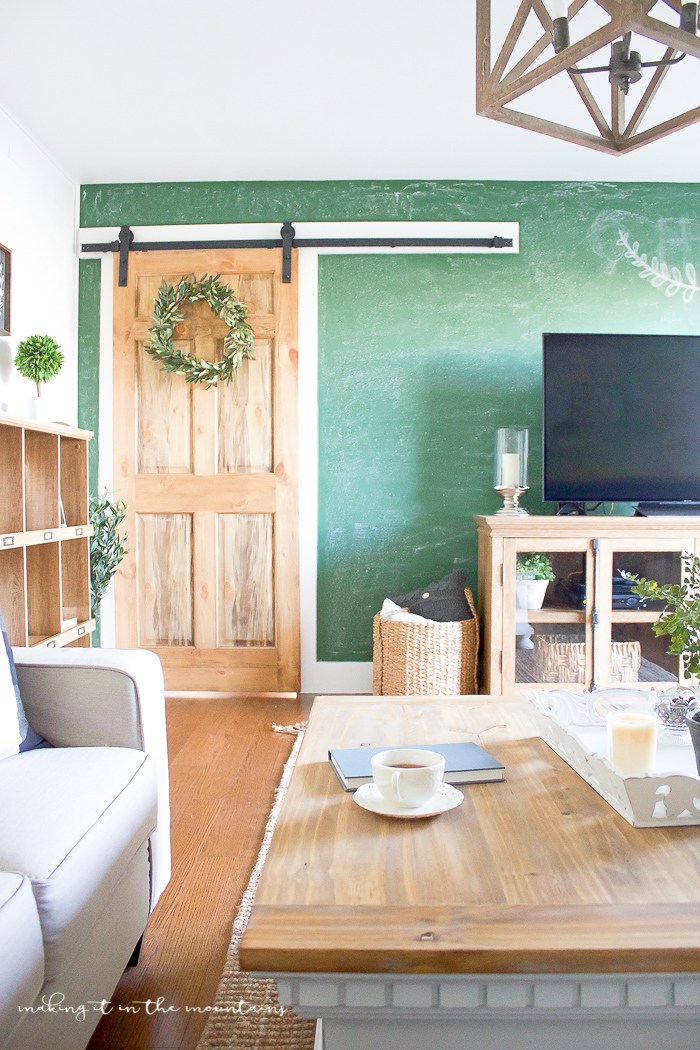
I also noticed that all the wood in her home was the same tone of pine.  While it seems logical to match woods for a cohesive look, it ends up making a space look flat.  I suggested she paint the pine on the walls Edgecomb gray and the pine trim and entry paneling Simply white.  Then to mix in darker tones of wood in picture frames, coffee table and other furniture pieces.

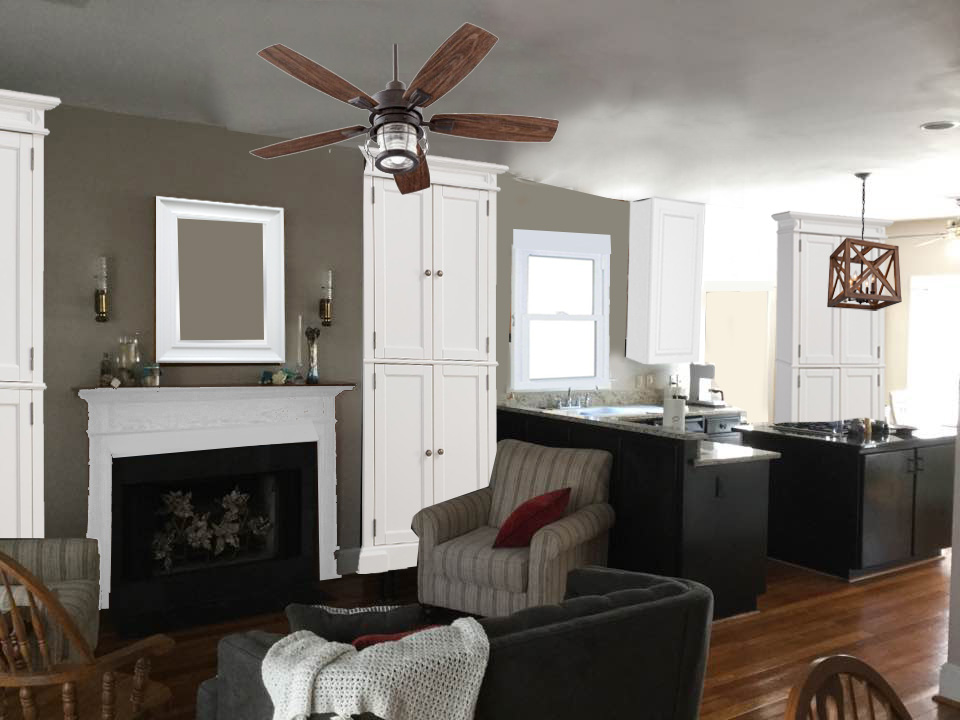
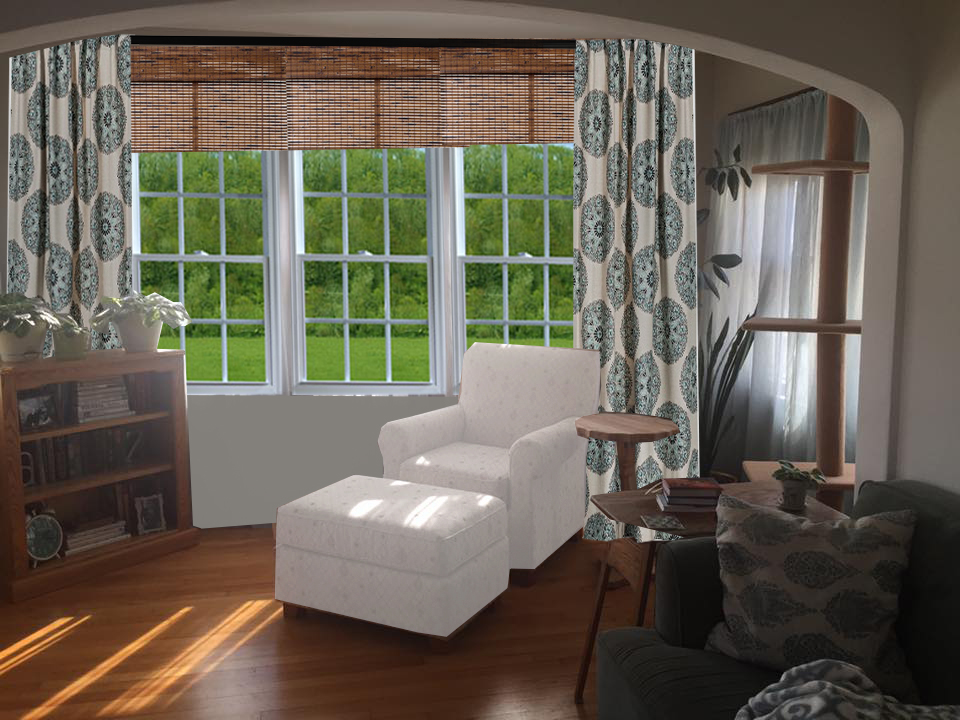
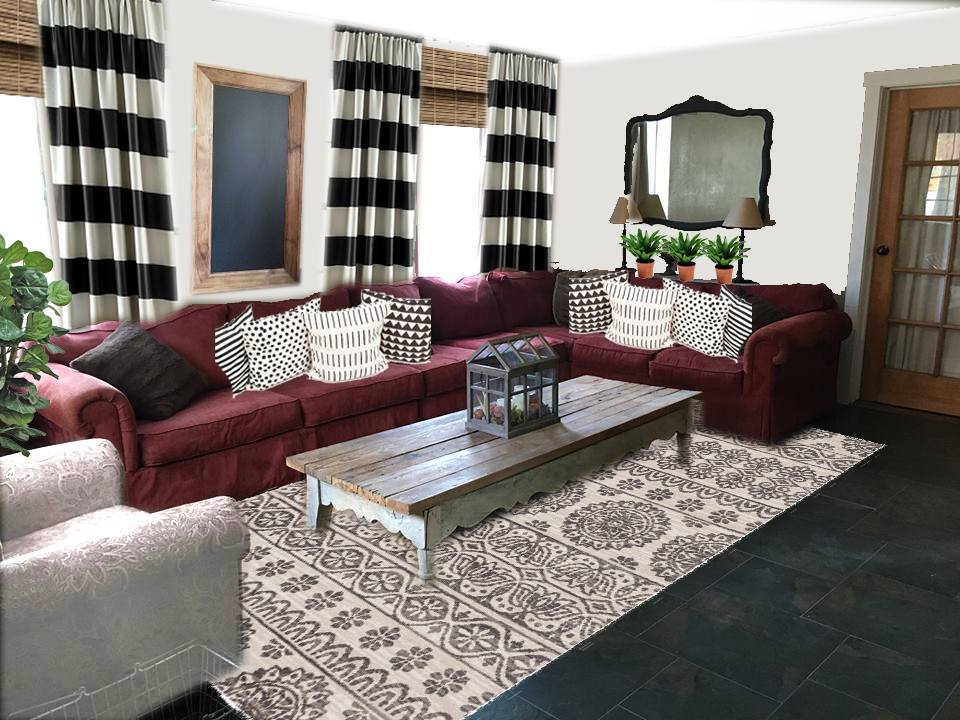
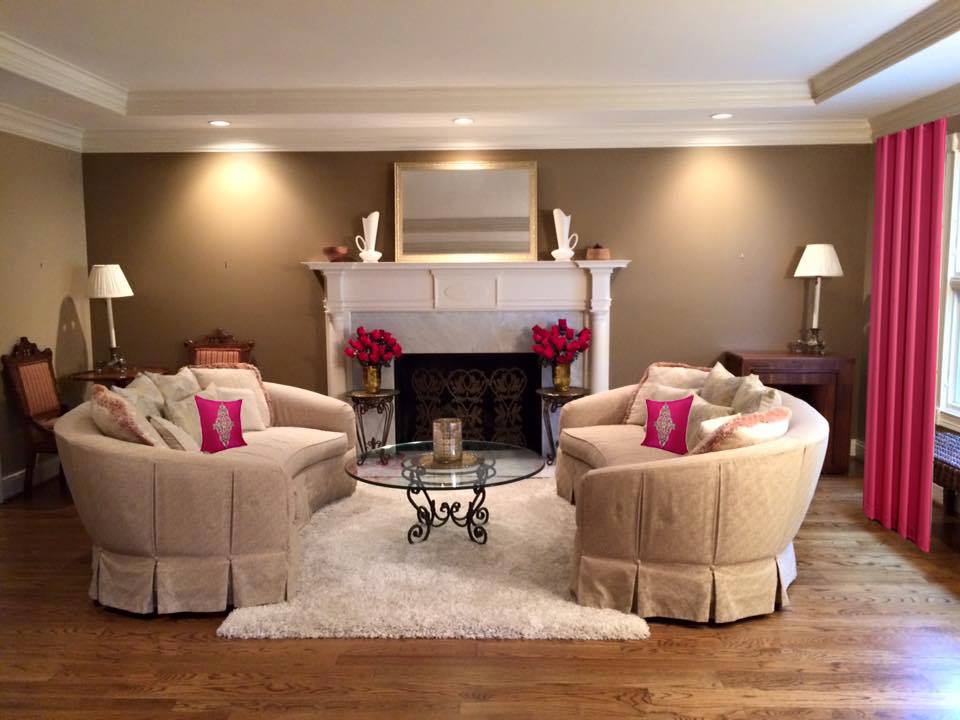
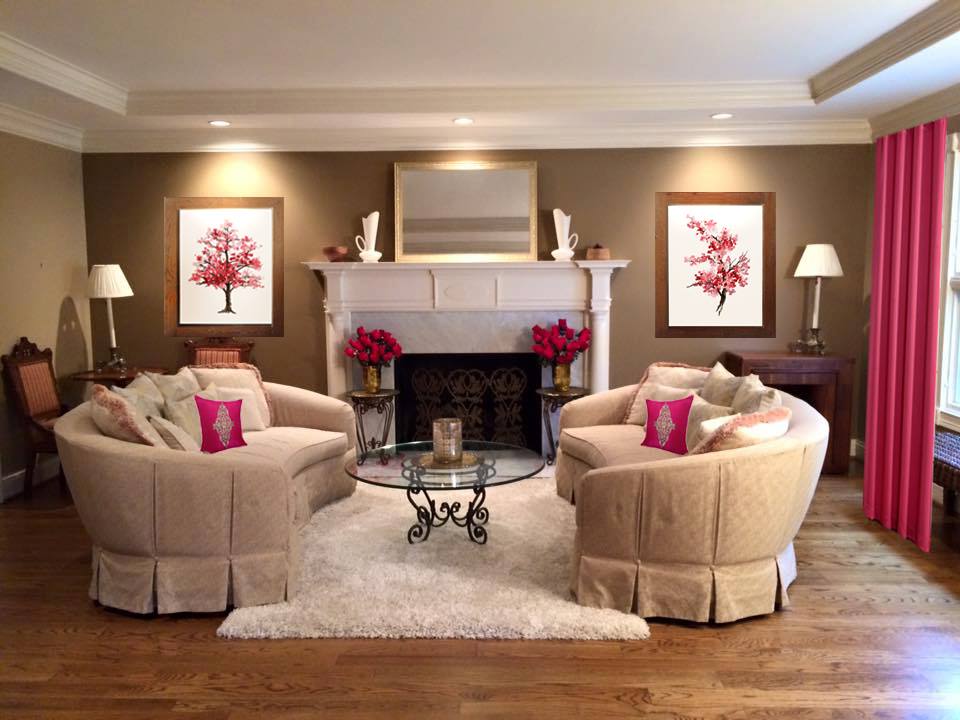
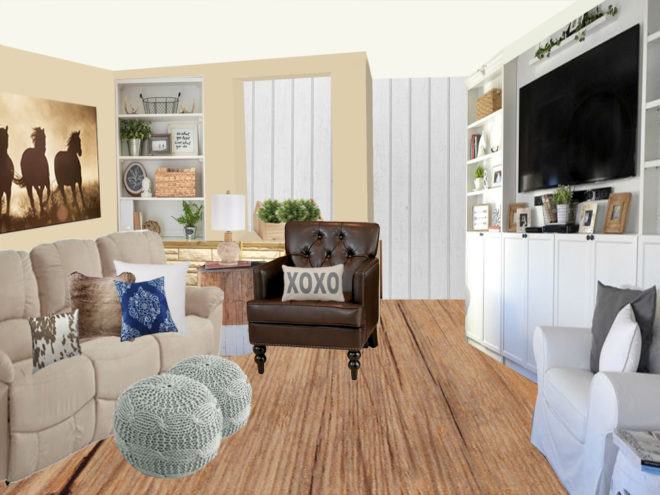
I made 2 different concept photos for her of this view, because I really wanted her to get an Ektorp sectional.  Sectionals seat the most people in the least amount of space and it fits perfectly in her corner. You’ll notice in this picture, the walls are a different shade of tan, one she requested because they already had the paint and I switched out the painting from the blue horses to one similar to one her husband found in their shed that she wanted to use.

shelleys-living-room-sectional-view_edited-1

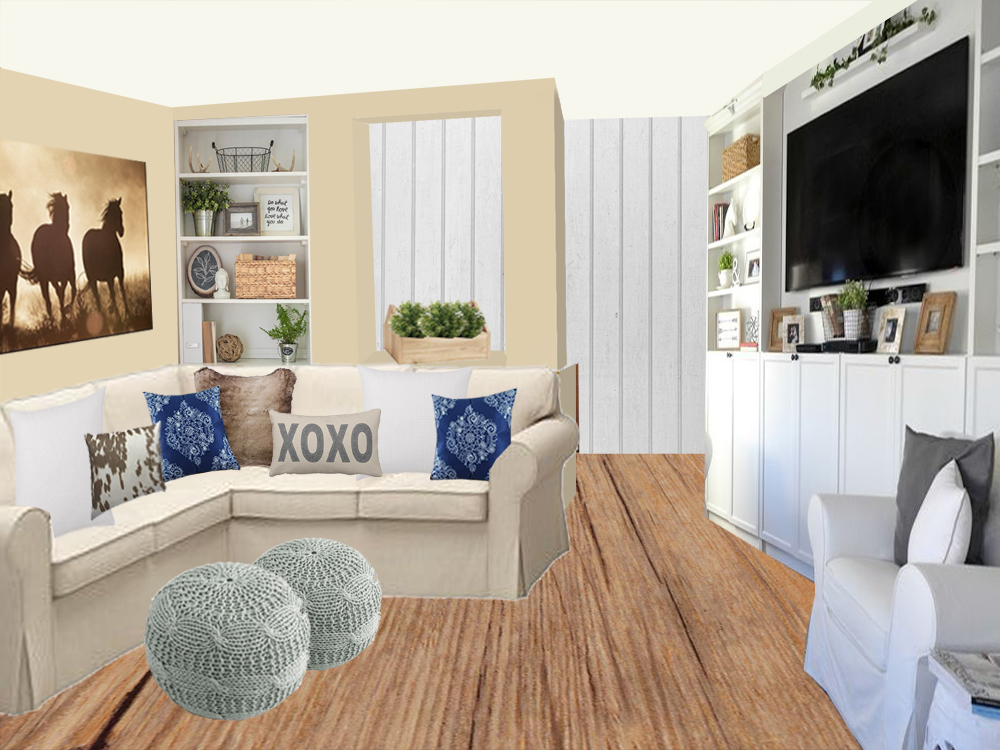
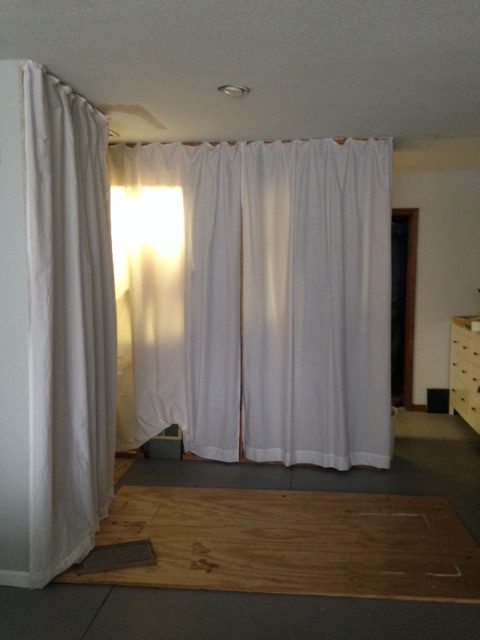
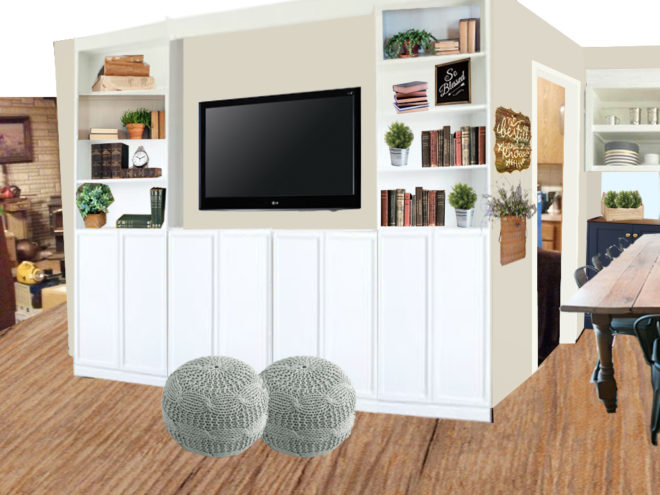
I created a built in media center for her to house her giant TV, with tons of storage below for dvds and toys for the grandkids.  It’s all built affordably and easily from Ikea Billy bookcases, with the extensions and optional doors.  They also have a giant pull down movie screen that they use a lot and I hid it behind a cornice and crown molding.  It’s easy to reach up and grab when they want it but hides away invisibly when not in use. The main goal here was to hide all the cords.  They are such tiny things, but give a sense of visual stress. I gave her choices of coffee tables to use over the poufs, but none were in the right format for the photo without hiding the sectional.

shelleys-living-room-sofa-view_edited-1

Here’s another concept with the sofa they were considering.  They thought it would be more comfortable than the sectional, so they bought it in a dark navy similar to the hale navy we will use in their dining room.

Shelley before 4

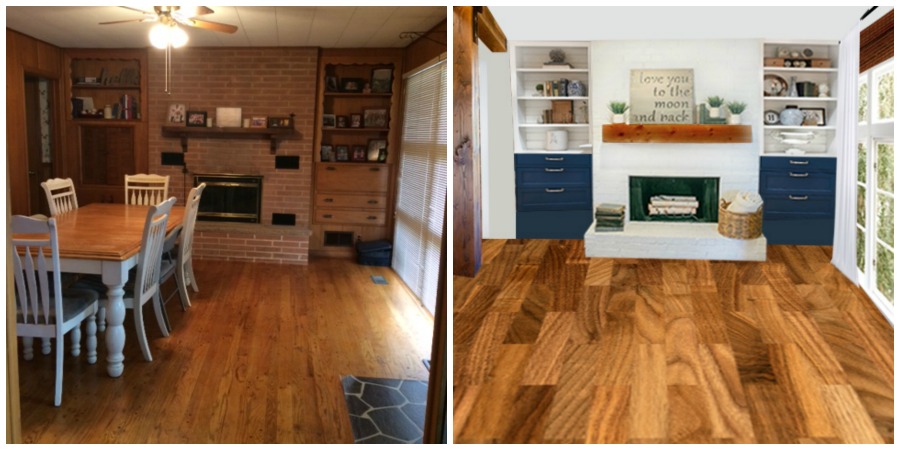
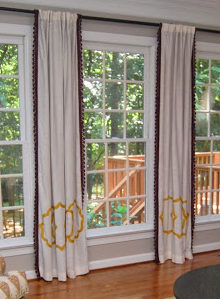
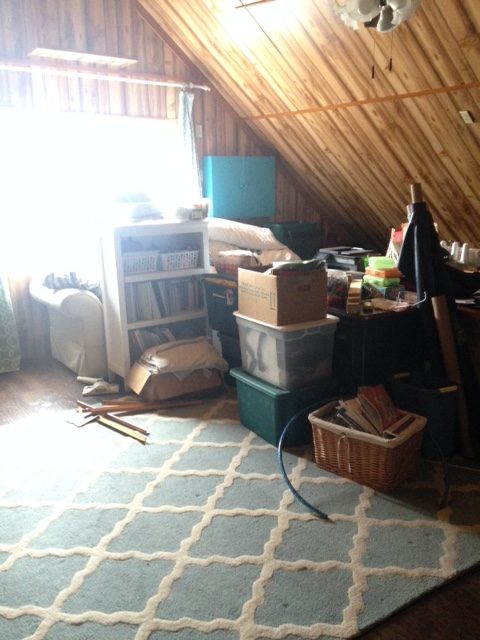
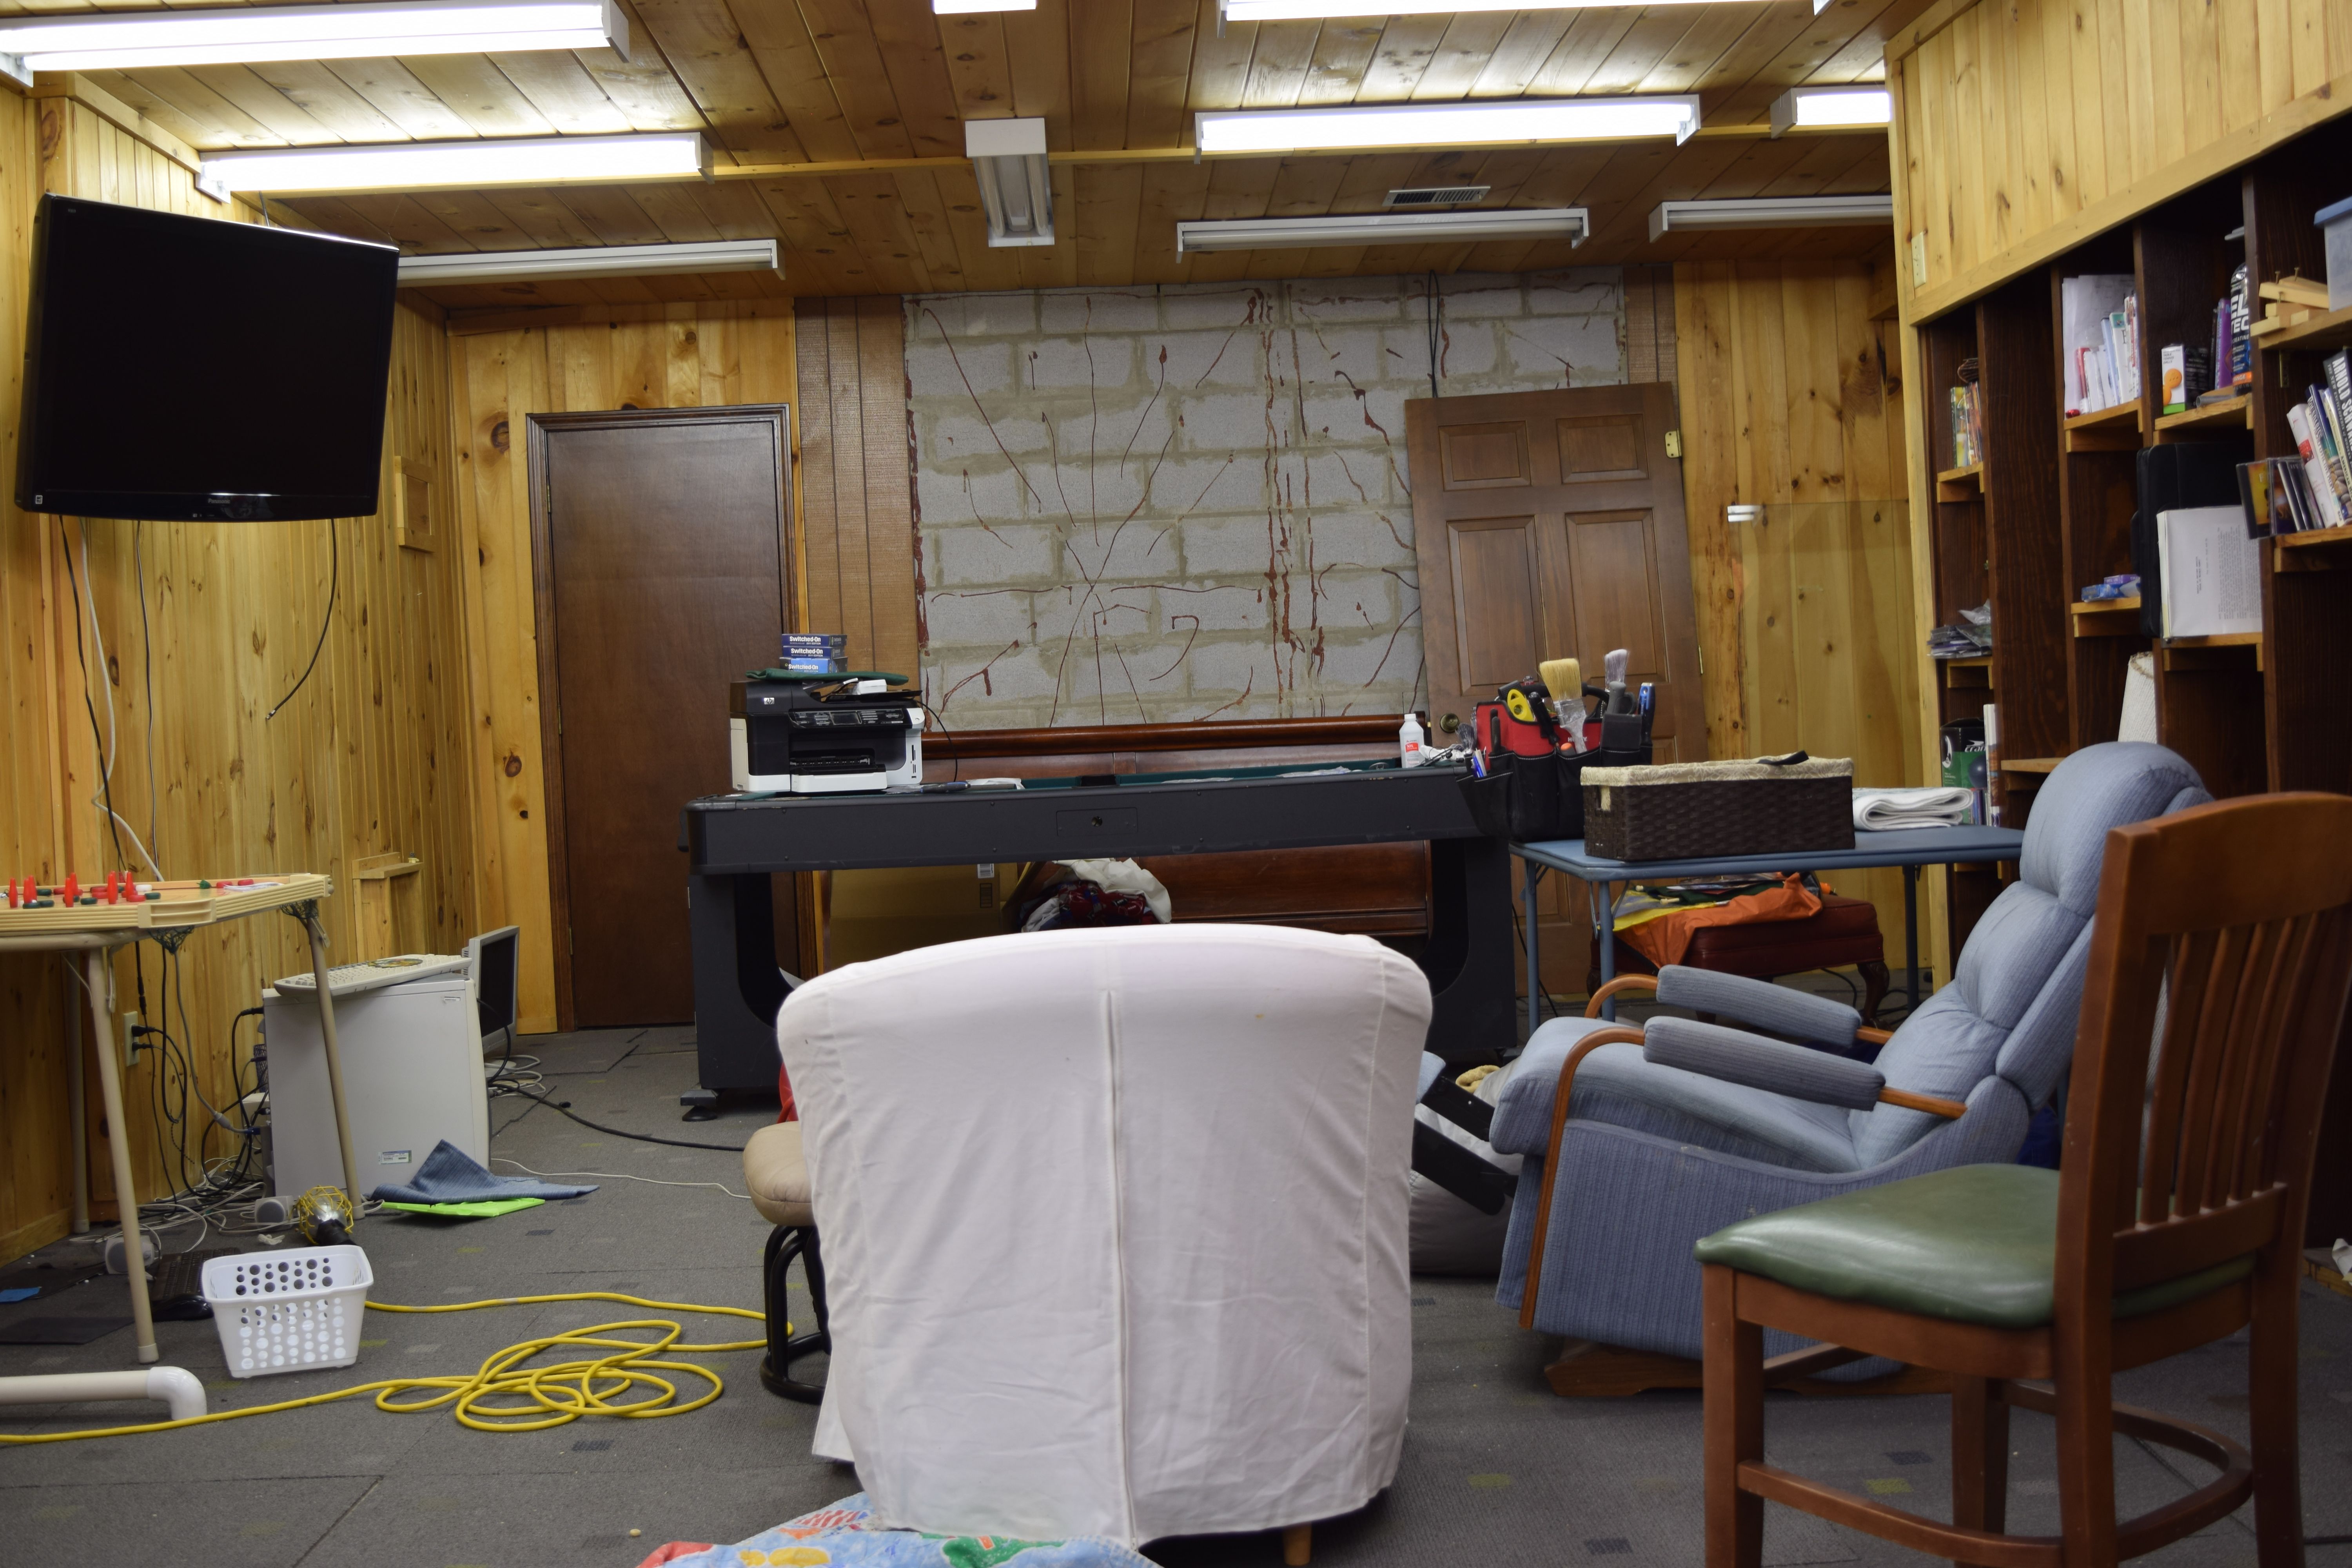
Here’s a before view of the Ham Radio corner.  I used this photo to help with the 3D floor plan rendering.  At first, Shelley’s husband made me promise not to touch the radios, but I couldn’t help myself.  I sent her this photo, and asked her to show her husband and see what he said. I told him I would create this only classier in another room if he would let us move the tower of cords and electronics blocking the window:

ham-radio-corner

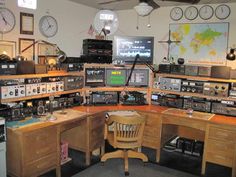
He loved it and said, “Forget the living room.  Just build this in there instead.”  Bwa ha ha!  That whole thing really backfired.   In there?  Isn’t there another room?  I made her show me pictures of every other room, lol.  They were right, there wasn’t another room.   I wanted to chop the visual height of all the radios so the eye was sent to the beautiful windows and beyond.  In the process, I needed to set up an area so he could actually use them.  The way they were it was so inconvenient that he didn’t spend much time with them even though he loved them.

corner-sawhorse-desk

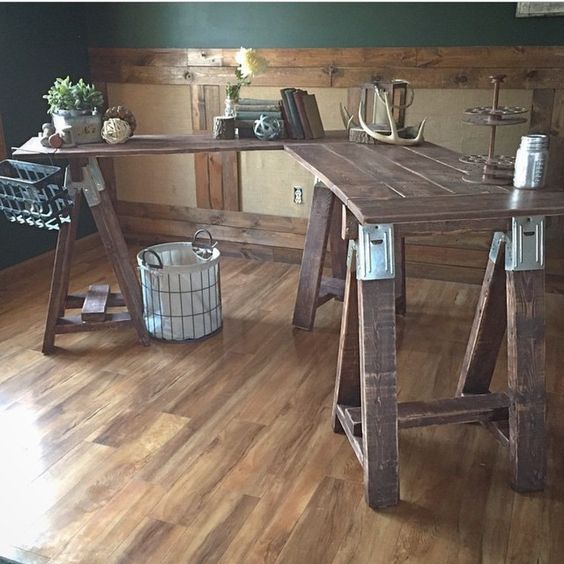
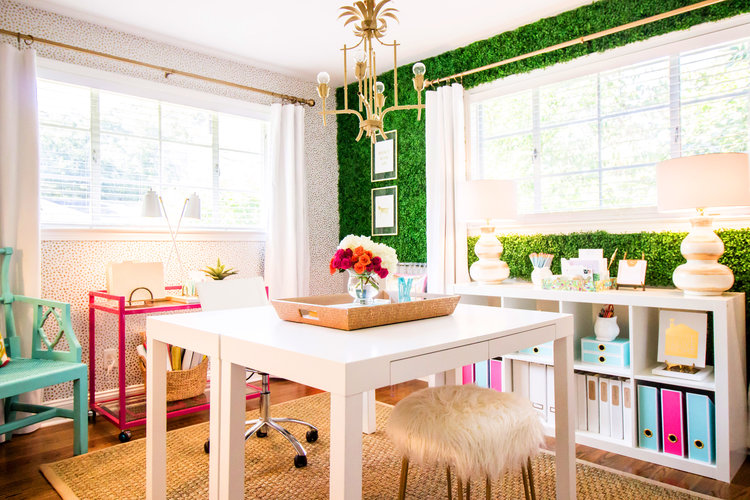
I found this picture, based on a sawhorse console table by Shanty-2-Chic.  I’ve built 3 of these in my home and they are very easy and affordable.  For this design, I replaced the pieced top with hollow core doors for more workspace.  This will give him 14 feet of workspace!  I recommend she uses clips to secure the cords to the wall behind the window curtains.  (Hide all the cords!)

Here’s a 3d layout of the room showing how the desk fits in.

Here’s a 2nd 3d view with a sectional

Shelley before 3

shelleys-living-room-entertainment-view_edited-2

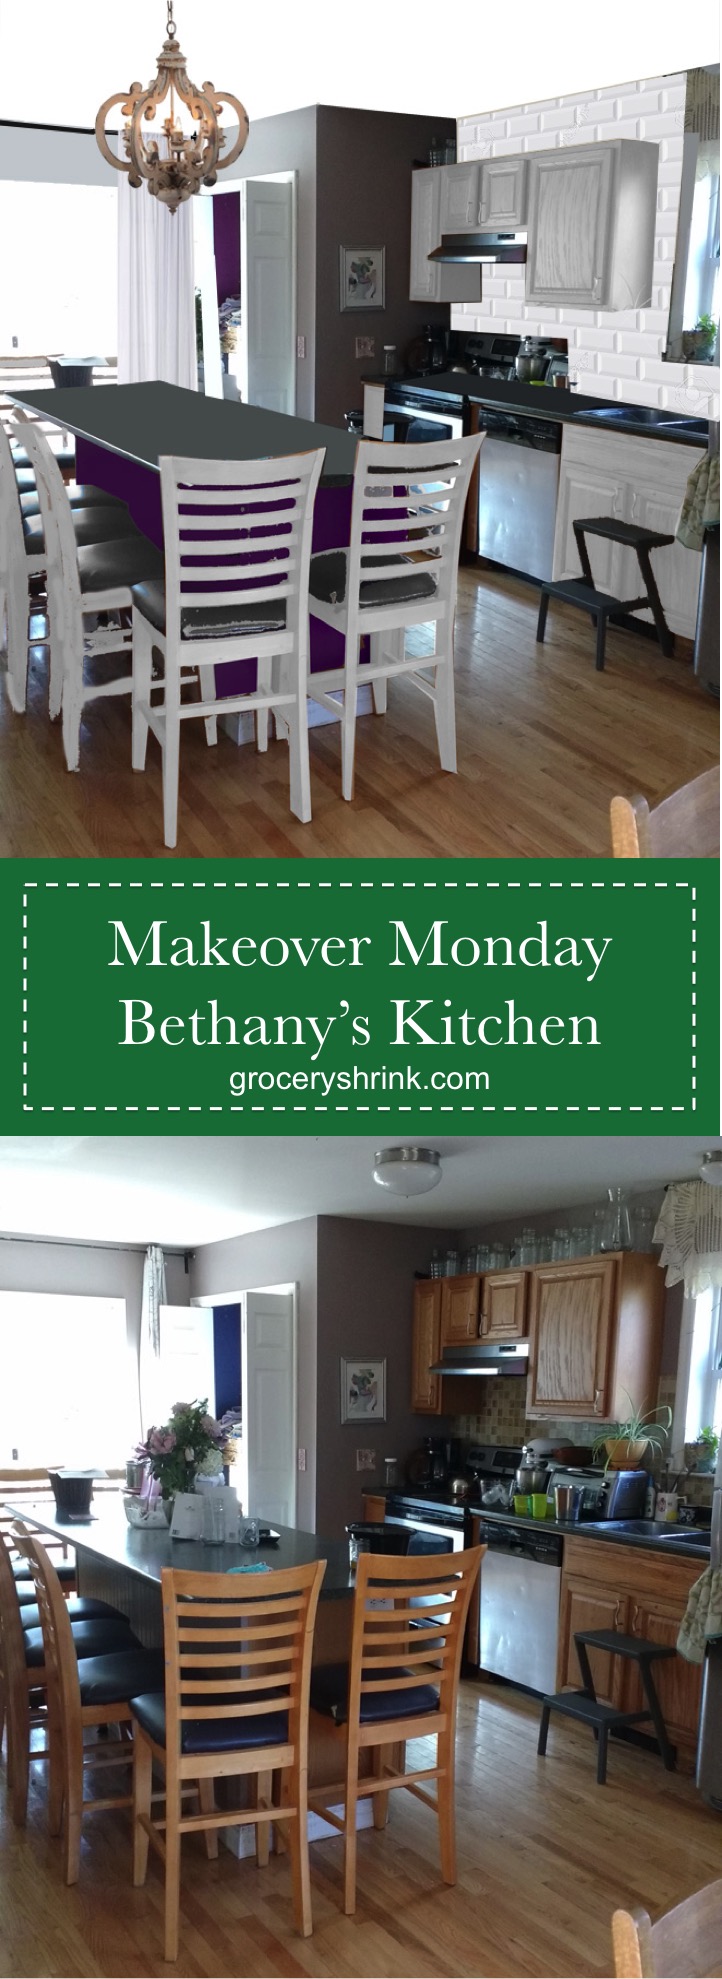
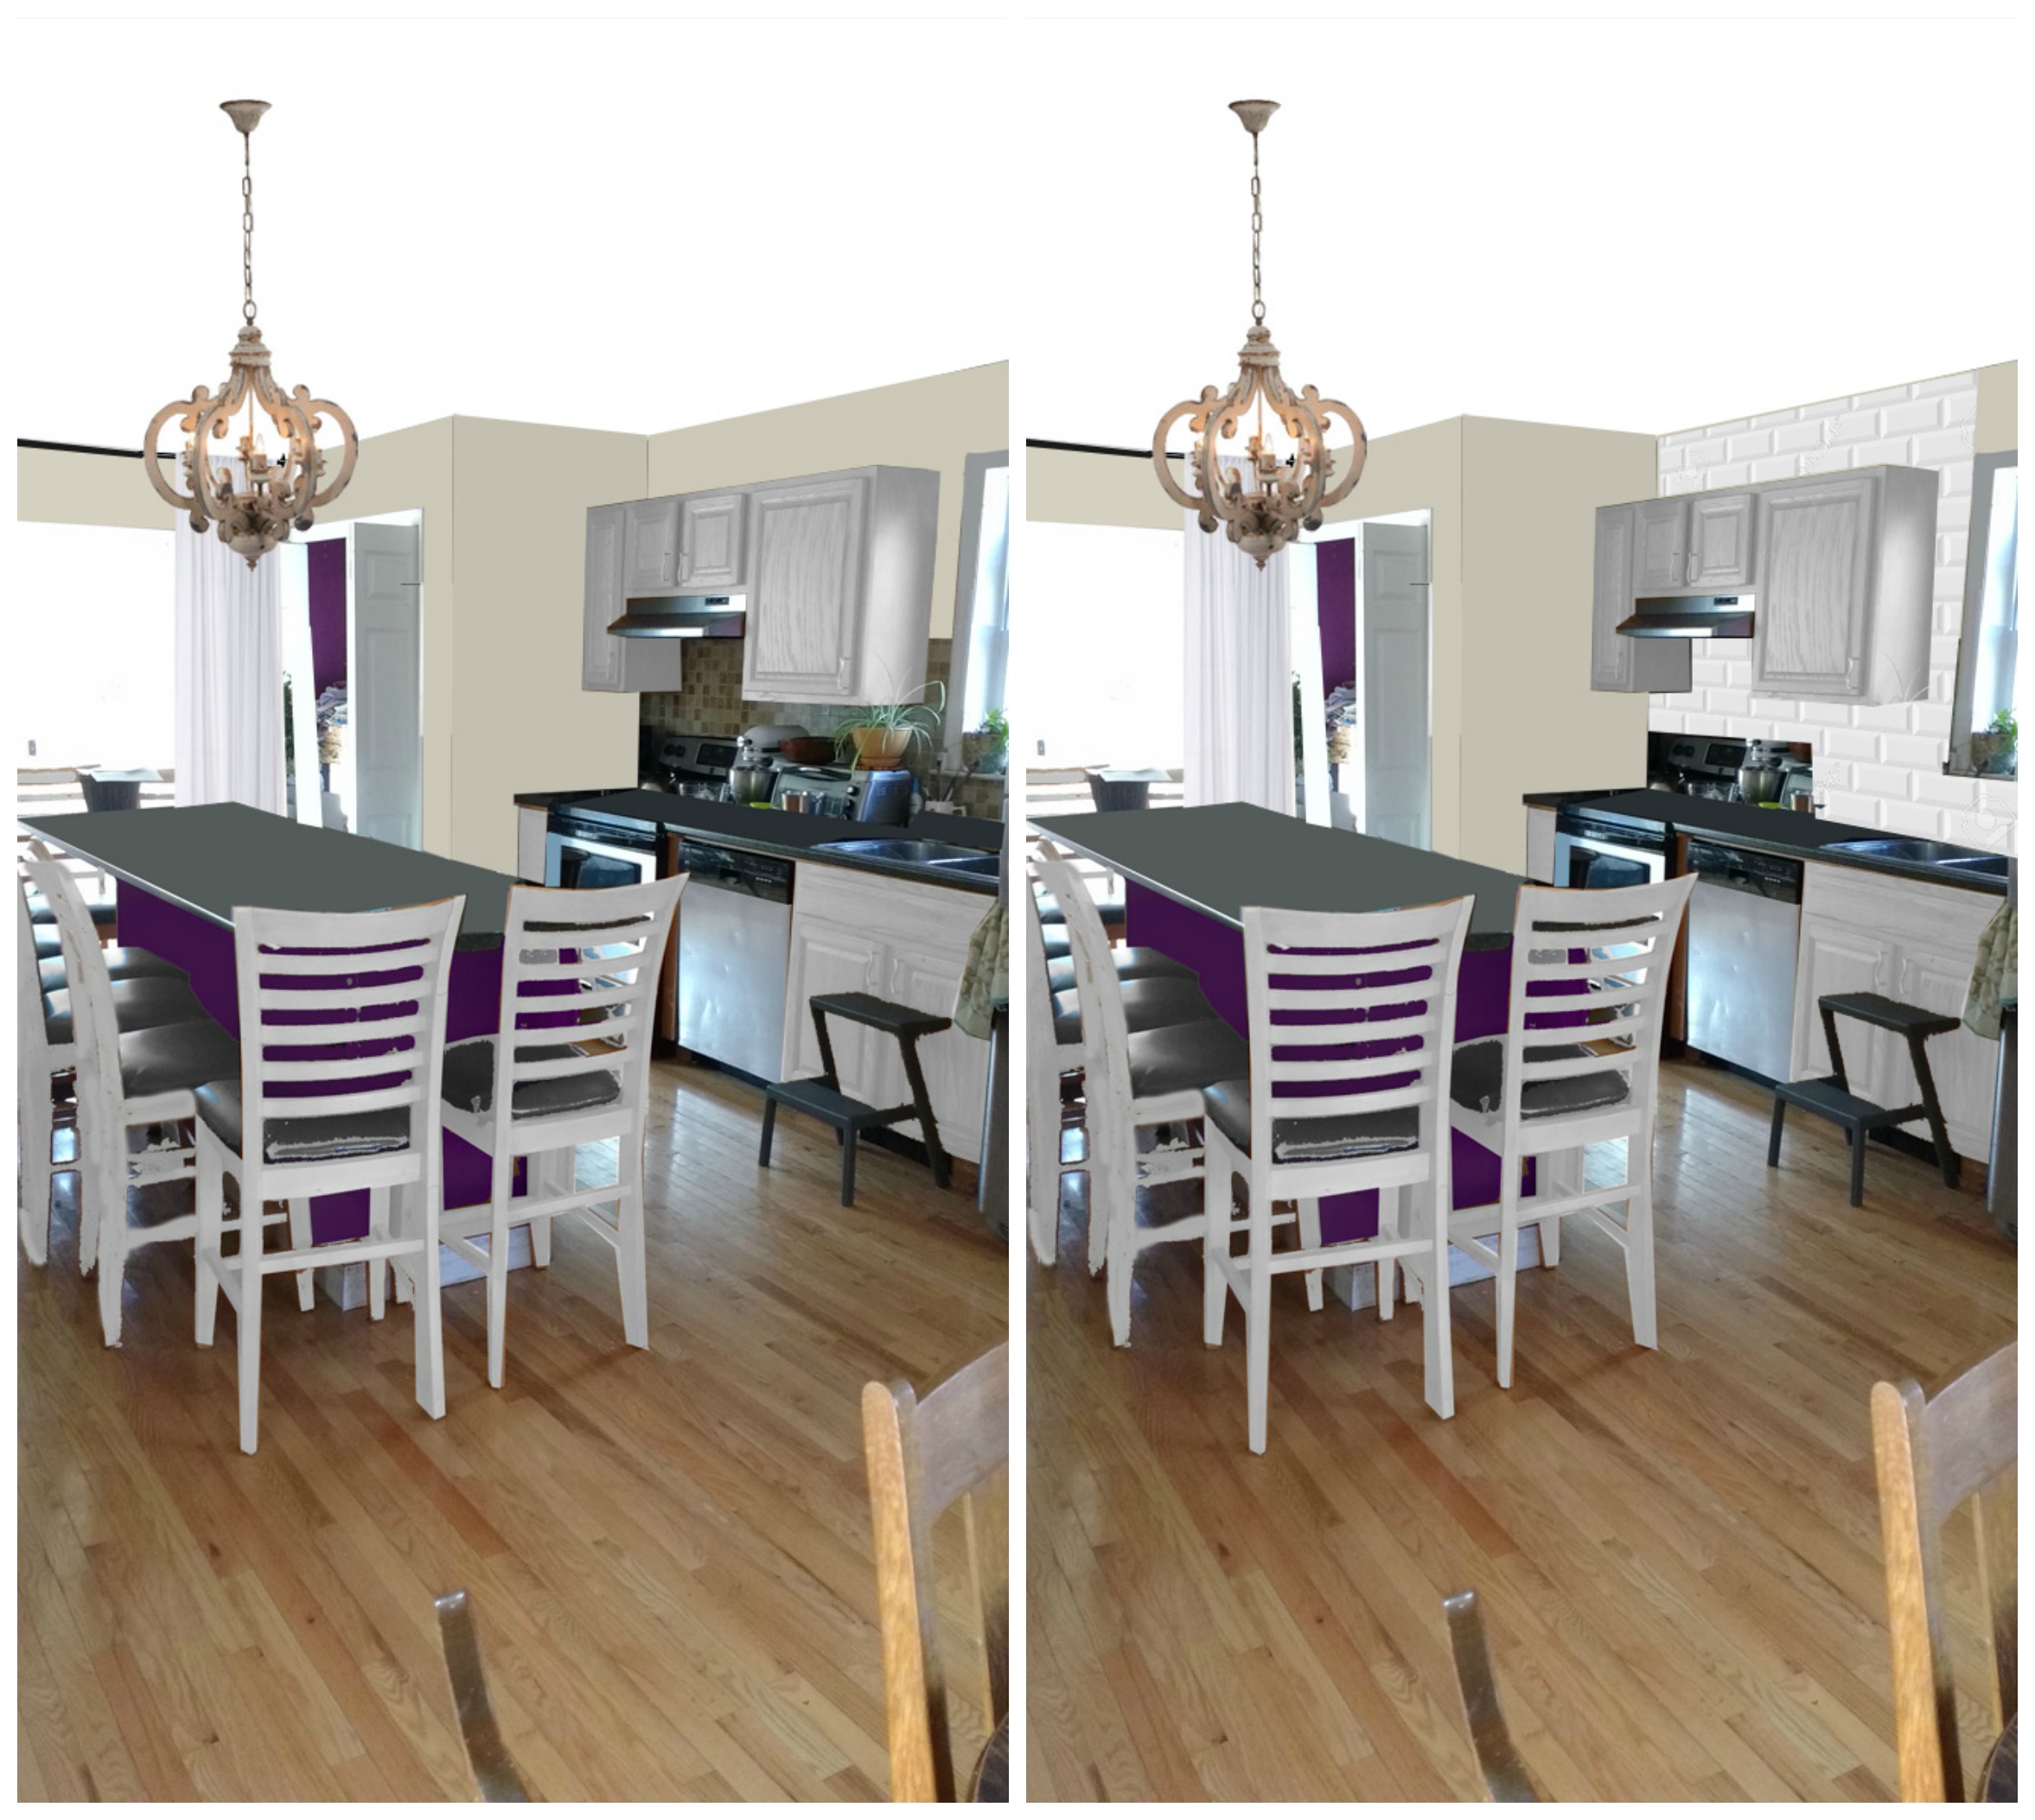
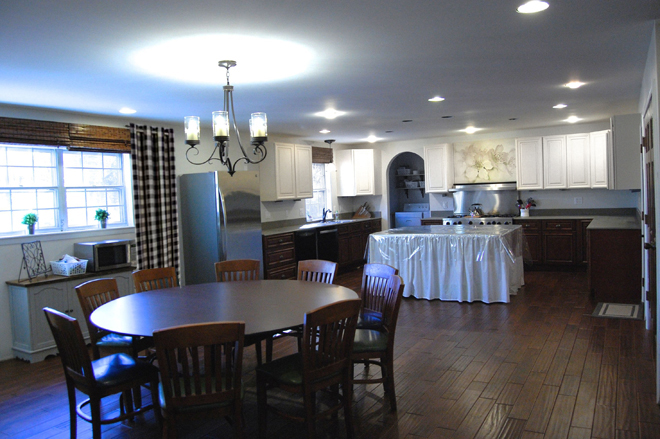
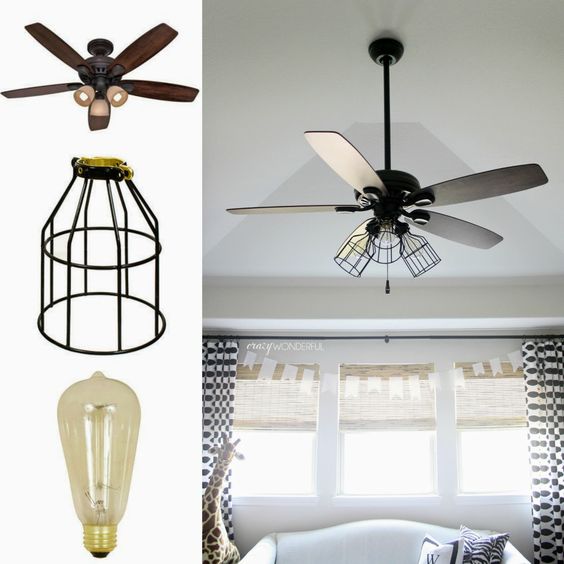
There are so many more details we talked about, like updating her dining room ceiling fan like this.

farmhouse ceiling fan

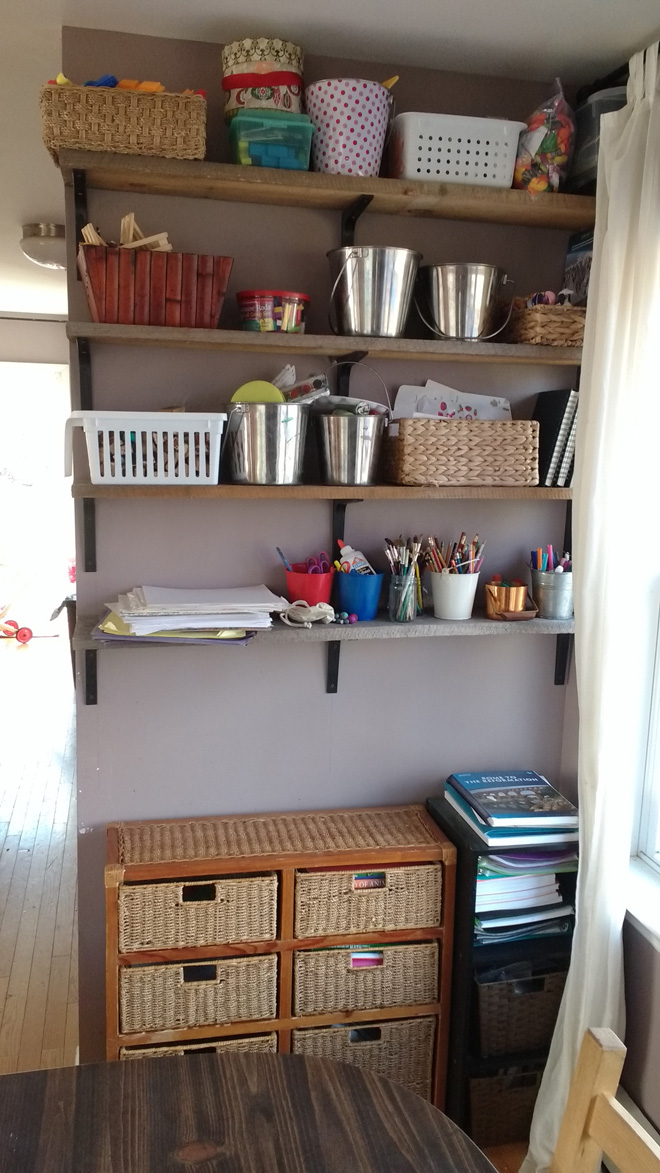
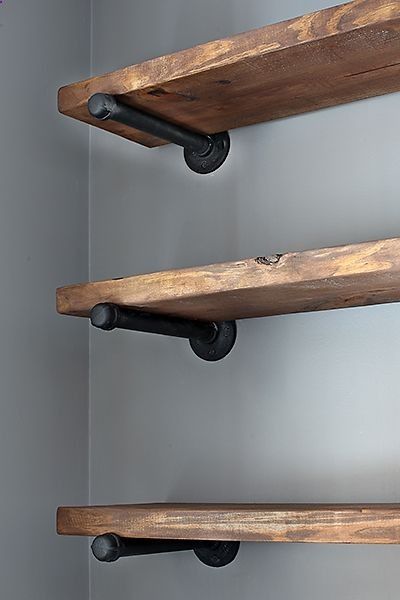
and building rustic shelves like these behind her sofa so hold her projector so it would not longer be hanging from the ceiling with cords everywhere.  It would be close enough to the window curtains that she could hide the cords behind them.

rustic-shelves

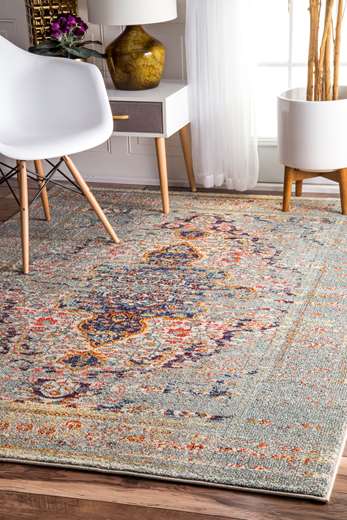
At first she was opposed to an area rug because of her pets, but as the room started to come together she could totally see how a rug would bring everything together.  These are two of my favorites:

4062b21828990b0f895a8fd1a0b6cddf 24588a01805f8496d031914eace77b64

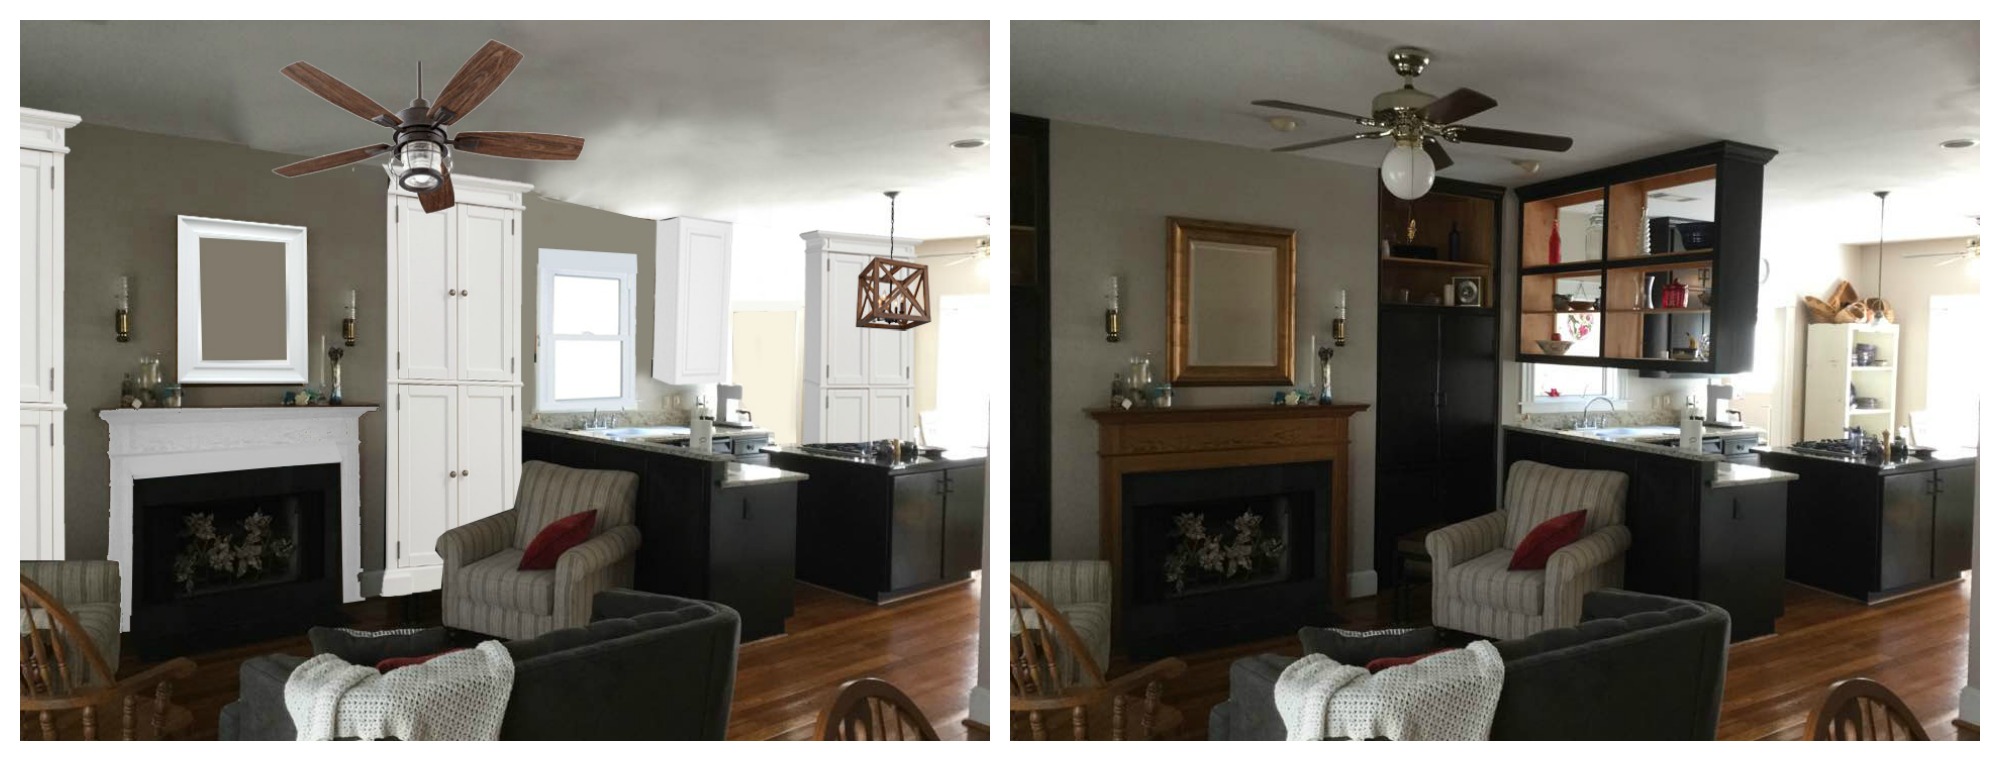
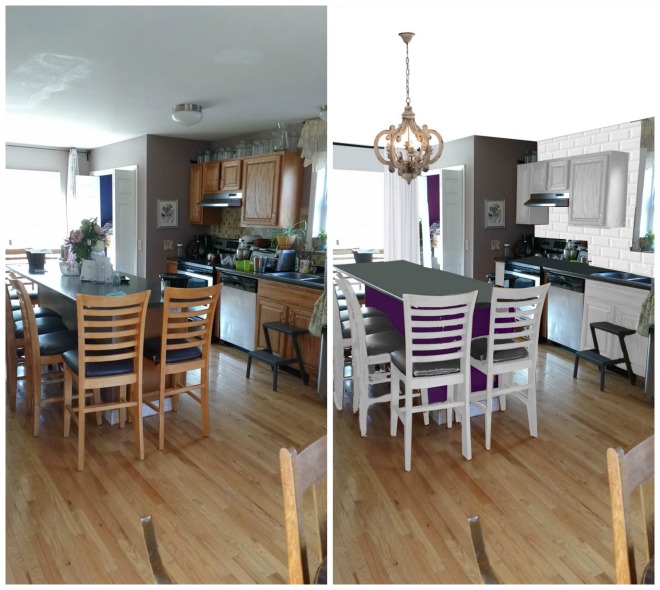
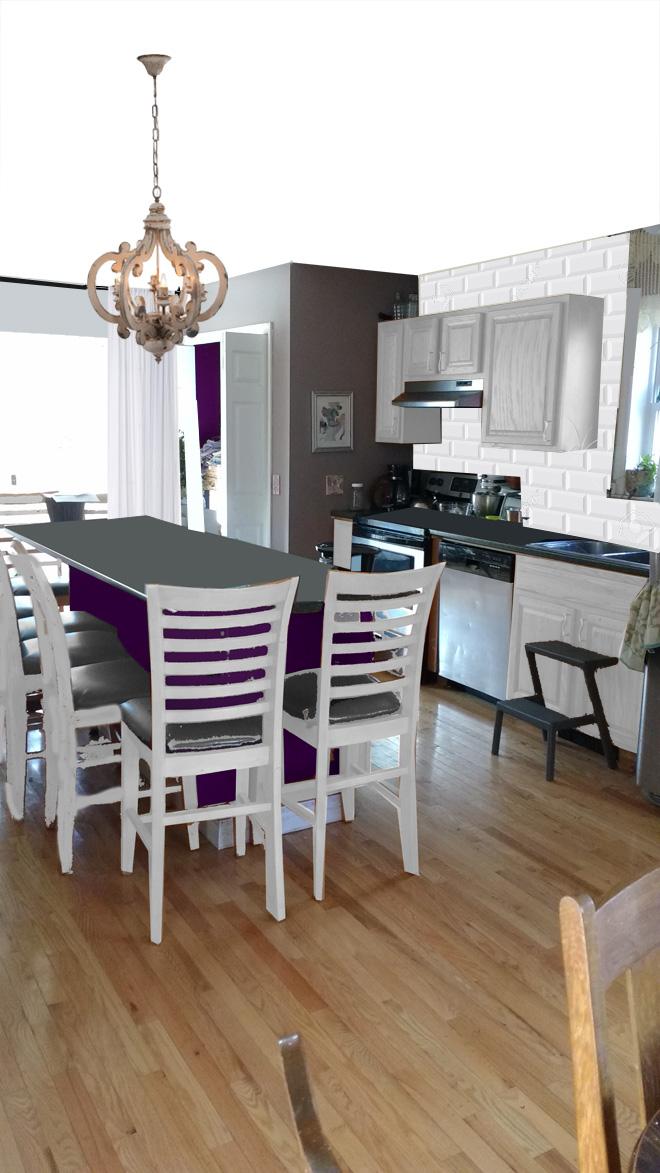
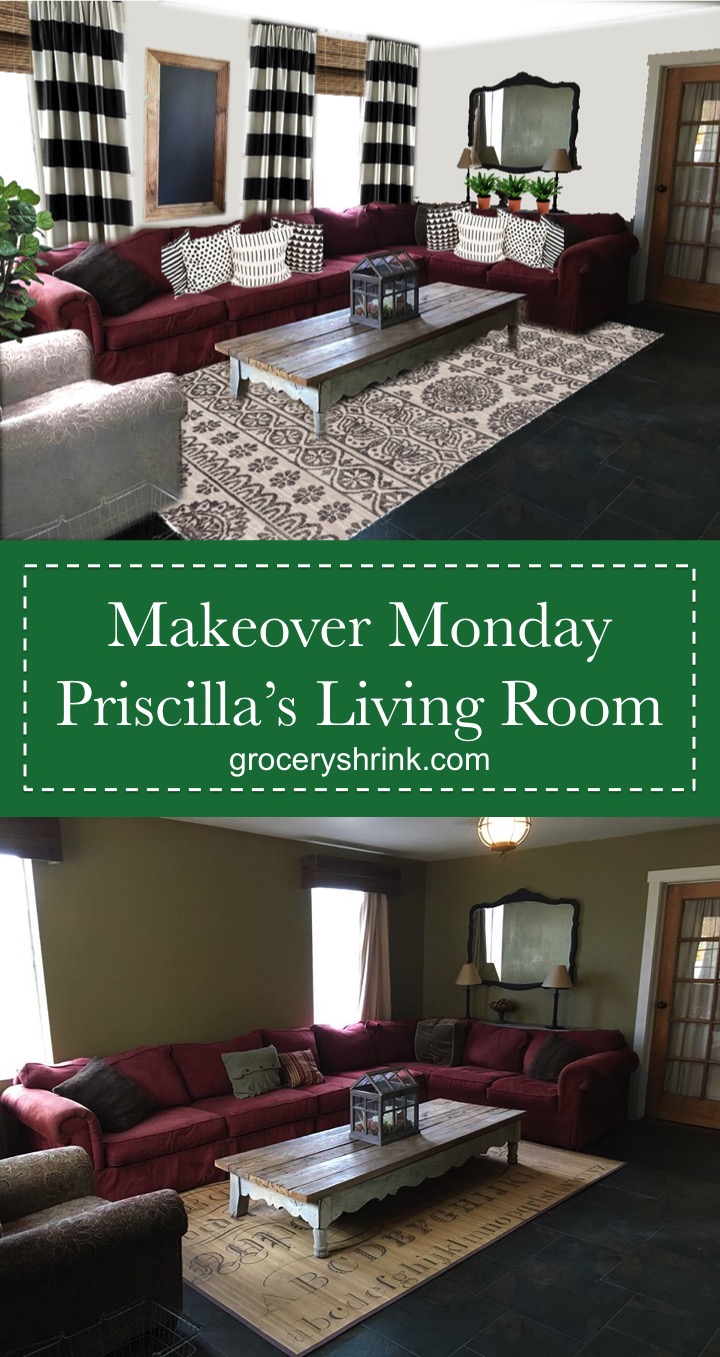
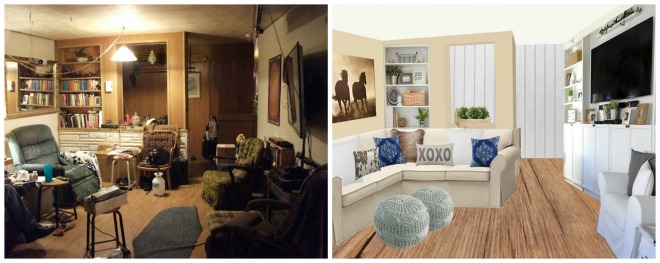
Here’s a final side by side before and after.

shelleys-living-room-before-and-after

Would you like your room photoshopped and featured on Makeover Monday?  Send a few photos from your space to angela@groceryshrink.com and tell me your hopes and dreams for the room.

Get a full service virtual makeover complete with 3D room layout plan, 2 photoshop views, step by step work list, and within your budget source list. Find out more.

room-makeover-short-banner

Learn how to use Photoshop for your own designs with the Room Makeover class (It’s half off today, Monday, November 28th only!)

Makeover Monday: Curtains Make all the Difference

Melinda didn’t like her sunroom.  She removed all the excess stuff she could and it was better, but still didn’t feel right.  I looked at her photo and saw her gorgeous floors and charming arched doorway.  She also has a lot of handmade SOLID wood furniture that she doesn’t want to paint.  The pieces were made by her father who passed away and they are real treasures.  She has a nice neutral wall color that looks fresh and bright.melindas-sunroom

I noticed her pillow on the sofa in the adjoining room.  It reminded me of these drapes from Target, so I popped them in.  The important step is hanging the drapes at the ceiling instead of just above the window and wide enough that they don’t actually block the glass. There should be enough fabric on the sides that it could actually cover the window even though you probably never will.  If the fabric is too narrow, it won’t look right.  Hanging drapes this way  makes everything feel taller and grander. Because the angle of the room wasn’t easy, I only did the curtains on the front window.  Can you imagine them continued onto the side?   I added woven bamboo shades to bring the warmth of her floor and furniture up. target-curtains-slip-covered-chair

Also, I popped a slipcover onto her chair, just to update it and neutralize it.  If you can sew along a line, you can make a slip cover.  Here’s my favorite video to show how.  If you can’t sew along a line but want to learn, take all the thread out of the machine and practice along the lines of notebook paper.  It won’t damage your machine to sew on paper, but you’ll want to use an old needle and then change to a fresh needle before sewing on fabric.   Melinda has a big heart and a lot of pets, so slip covers are ideal for her.  She should make 2, so she can wash one and use one and always have one at the ready.

To hang curtains at the ceiling, you need at least 95″ panels.  My favorite sources for 95+ panels are Target.com (not available in store); Homegoods; and Ikea.  BUT you don’t have to limit your selection to items labeled curtains.  Twin flat sheets are the perfect length and come in a huge variety of colors.  Walmart carries a basic flat sheet for just $4.97.  Also, tablecloths!  I wanted to get black buffalo check curtains for my dining room for the winter, but couldn’t find anything affordable.  Then my friend told me about these tablecloths.  All I have to do is sew a rod pocket across the top.   If you don’t sew, ring clips or fusible hem tape work just as well.

kitchen-buffalo-check

Here’s a photoshop idea.  I’m headed to Ikea today to get the brackets to hang them :).

You don’t have to spend a fortune on hanging hardware.  My favorite curtain rods are electrical conduit pipe from the hardware store.  They come in 5 ft or 10 ft lengths and in different thicknesses.  I can buy a 3/4″ 10 foot pipe for around $3, then spray paint it black.  They are easy to cut to length with a hacksaw, or to use threaded connectors to make a longer rod. I hang mine with these $1.49 brackets from Ikea. Since this is a really wide area, I’m going to use 3 for a center support.

Would you like your room photoshopped and featured on Makeover Monday?  Send a few photos from your space to angela@groceryshrink.com and tell me your hopes and dreams for the room.

Get a full service virtual makeover complete with 3D room layout plan, 2 photoshop views, step by step work list, and within your budget source list. Find out more.

room-makeover-short-banner

Learn how to use Photoshop for your own designs with the Room Makeover class

Weekend Links

Happy Weekend!  Here are my favorite links that made me take a longer look.

It’s the week for the one room challenge reveals!  Brittany Fleming’s room stopped me in my tracks.  Her before picture was beautiful and something I’d love in my house, but her after was so bright and cheerful it made me smile.  Her brave signature piece was a faux boxwood wall.  Imagine that?!  It’s easy to take down when she’s ready for something else.

houseplusloveorcentireroom

The other room from this series that wowed me also sported some bright kelly green.  I think it’s the color that I’m really digging right now and I don’t have it anywhere in my house….hmmm.

farmhouse-style-family-room-21

Kristi’s from Making it in the Mountains classic green chalkboard wall and barn door with a wreath combination is lovely.  The green chalkboard paint is a nice variation from the usual black.  I liked her olive leave wreath enough to click through and buy one for my house, until I saw the $80 price tag.  If you’ve been reading here long, you know I searched the internet to look for alternatives.  Amazon has one JUST like it for about half price.  It was still too pricey for me, so I put a price drop alert on camelcamelcamel and hope it comes into my budget some time.

Daybed by ZevyJoy

This daybed by Annie at Zevy Joy is gorgeous, right?  I got a bit excited when I discovered it’s just a queen mattress layered with bedding and for the back?  She got a $50 Ikea Ektorp sofa slip cover and Stuffed the back cushions with extra pillows.  I have most of this stuff lying around the house and it will be happening in my office soon.


Makeover Monday: Graphically Brave

Priscilla is drawn to the light and bright Modern Farmhouse rooms from Fixer Upper, but her furniture is full of color. Without a budget to buy new, she wasn’t sure what to do. She wrote: Need help with giant sectional. I’d like to lighten it up a bit, but so far I don’t like the contrast of light pillows. And how do you know how many pillows?  

Anyone else notice her beautiful wood and glass door?  I LOVE that color of wood. And that mirror! It’s huge and such a great shape.  Her coffee table is the perfect size and shape for her sectional. Even her light fixture has great character.

14666254_647409275465069_6941566649985718781_n

Here’s what she says about her sectional:  It’s super comfy, almost all of us fit on it, but it definitely makes a statement. My head is turned by all the lovely, neutral, pale farmhouse/cottages. But, alas, my true love is color. Trying to dip a toe in the shallow end with some cream pillows. They didn’t play nicely with the red beast. Maybe more of a burlap color?

The angle of this photo and the full view of the space was so perfect for photoshop that I couldn’t help playing a little.  She’s right that pillows can really help to lighten a dark sofa, but in this room she’d get an even bigger impact from changing the wall color.   Painting can sound like a daunting task, but all you need is a gallon or two of paint and two 2 hour sessions to do it.

14650637_10211194450440052_4592247864863681481_n

Notice the impact big TALL drapes make?  These are from Kohls, but if budget is tight you can grab $4.88 twin flat sheets from Wal-mart, and fusing on the stripes.  Hang your drapes to the floor even if your furniture is in front of them.  Just pull the sofa far enough forward that the drapes can hang freely.  P.S.  The Kohls drapes are only 84 inches and that won’t look good in ANYBODY’s house.  We need 95 inches or longer, even with 8 foot ceilings. The sheet option is looking better and better.

I created friends to the wood in her door by adding wood shades and frame around the chalkboard.  She can write whatever she wants on the board, such as laurels, or she could use washi tape to adhere feathers.

That’s still her same chair in the front left corner.  I just added a slipcover so she could enjoy different prints and patterns in the room.  Don’t be afraid of light colored slip covers.  Baby wipes and a lint roller keep them looking nice in between washings.  And guys, I only wash mine once a year or when we’ve had a big enough oopsie that a baby wipe won’t work.  I have 6 kids and 5 kittens.  We know how to get stuff dirty.

I used all her same furniture, lamps, wall art, but with lighter wall paint it looks like a completely different room.  The rug is a splurge from Joanna Gaine’s new line.   It also comes in dark black, but I thought it would be too bold against the already bold curtains.  That’s the secret to matching patterns:  Let ONE be the big bold leader of the pack, large and in charge.  Then layer in your different scales of pattern in similar color tones.  With the different scales of graphic prints in the space your eye goes to the curtains first, but has resting places on the pillows and rug too.  Also the rug is a size bigger than her old one.  Having a big enough rug really helps.  Save up until you can get one where all the furniture can at least have their front legs on the rug.

Her reaction: That is great. I would have to redo the whole house, and that lovely cream chair would last about five minutes. I’m just gonna enjoy the fantasy for a moment. I do think I will add those three ferns to the sofa table. 

Would you like your room photoshopped and featured on Makeover Monday?  Send a few photos from your space to angela@groceryshrink.com and tell me your hopes and dreams for the room.

Get a full service virtual makeover complete with 3D room layout plan, 2 photoshop views, step by step work list, and within your budget source list. Find out more.

room-makeover-short-banner

Learn how to use Photoshop for your own designs with the Room Makeover class.

Makeover Monday: Don’t Let Fear Decide

I started on my built ins for my living room in August.  They have been half finished for 3 months, because I made a few little mistakes. I attached something crooked, and drilled a few holes too deep. Darren had to fix it.  Now I’m paralyzed by the fear that I’m not skilled enough to finish it without him. It will be a long time before he can carve out a few hours to help me again.

If I kept building alone what’s the worse that could happen? I might mess up and need to buy more wood.  It might, gasp, cost $20 or something.  When I really looked at the risks, I felt a little silly. I’ve decided not to let $20 frighten me.

The Cozy Minimalist course opened up a few weeks ago, and while it’s closed again :'( you can get on the waiting list so you don’t miss it next time.  There are 1,000+ ladies in the group and it’s so much fun.  It’s a private place where we can share our questions and get feedback on our spaces.  When I saw a few of the rooms, they inspired me to open up photoshop and play.

Here’s Pam’s living room after she rearranged the furniture for a cozy seating area that makes her fireplace the star. The best part of her arrangement is that her furniture isn’t all shoved against the walls.  My eyes were immediately drawn to the roses.  What a great color!  Plus, check out her crown molding and how the curved sofas make her rug look like a giant sheepskin.  There’s so much good going on here.

pam-living-room-4

Then I thought, what if she had more of the rose color in her room?  I found some inexpensive fuschia drapes and pillow at Amazon and photoshopped them in.

pam-living-room-2

What if there were just a touch more pink in some art?   I found these watercolor paintings from Etsy that were super affordable and popped them in.

pam-living-room-3

Then the internet reacted.  Here’s a smidge of what people said:

screen-shot-2016-10-29-at-4-20-35-pm

screen-shot-2016-10-29-at-3-55-22-pm

Hot pink is super scary and not to everyone’s taste. I knew Pam loved pink, because it was the only color that she kept in the room.  If she did decide to try such a bold color, what’s the worst that could happen?  She might decide to take it back and find something different.  She might have to watch her husband react when he saw it for the first time.  She might have to find a different place to display the art that used to live in this room.  She might change her mind in a couple of years.  Whatever she decides, I hope she doesn’t decide out of fear.

Would you like your room photoshopped and featured on Makeover Monday?  Send a few photos from your space to angela@groceryshrink.com and tell me your hopes and dreams for the room.

Get a full service virtual makeover complete with 3D room layout plan, 2 photoshop views, step by step work list, and within your budget source list. Find out more.

room-makeover-short-banner

Learn how to use Photoshop for your own designs with the Room Makeover class.