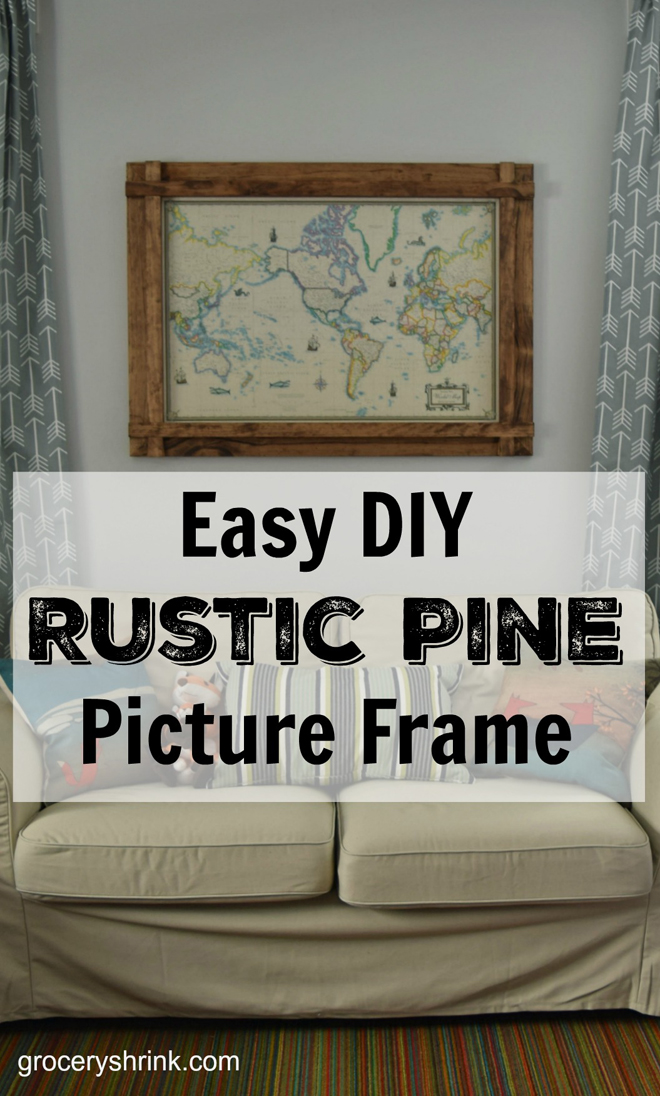
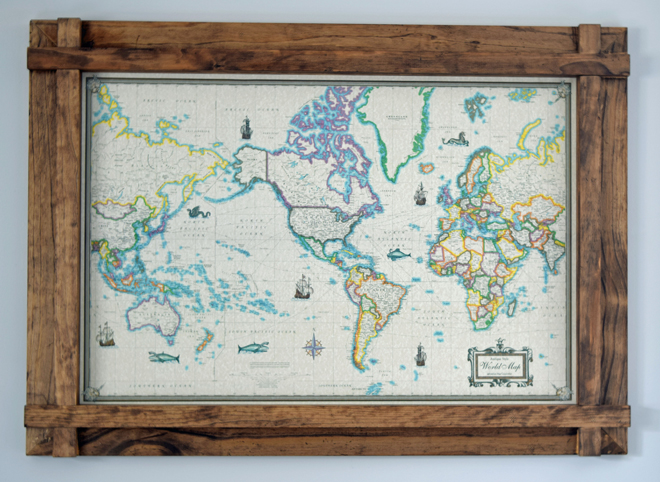
 When I was searching for inspiration for our shared boy room, I found a photo of this rustic frame and loved it instantly. I needed a custom size to fit the canvas map I ordered from Amazon.com and to save money, I built it myself. The map price fluctuates, I paid $29.
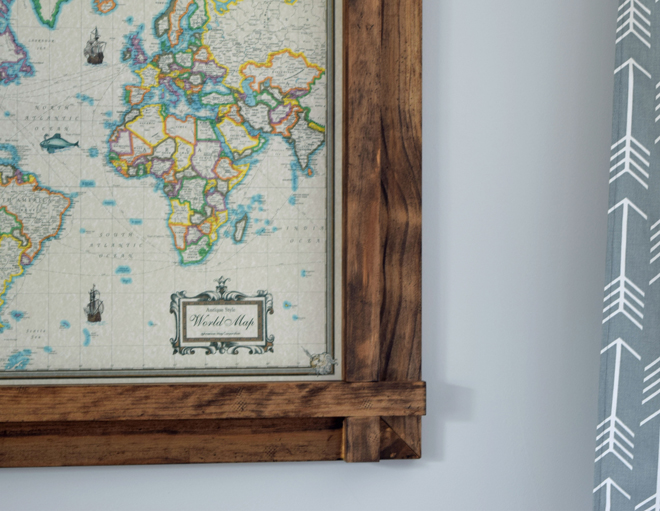
Here’s a close-up of the corner detail:
Materials:
2 boards of 1x2x6 select pine $2.57 each
2 boards of 1x4x6 select pine $4.24 each
sliding compound miter saw (but a mitre box would work)
electric drill
Wood glue
Distressing tools (a bag of screws and a rough in hammer)
Wood Stain I used minwax provincial
I had everything but the pine on hand, so this project cost me $13.62
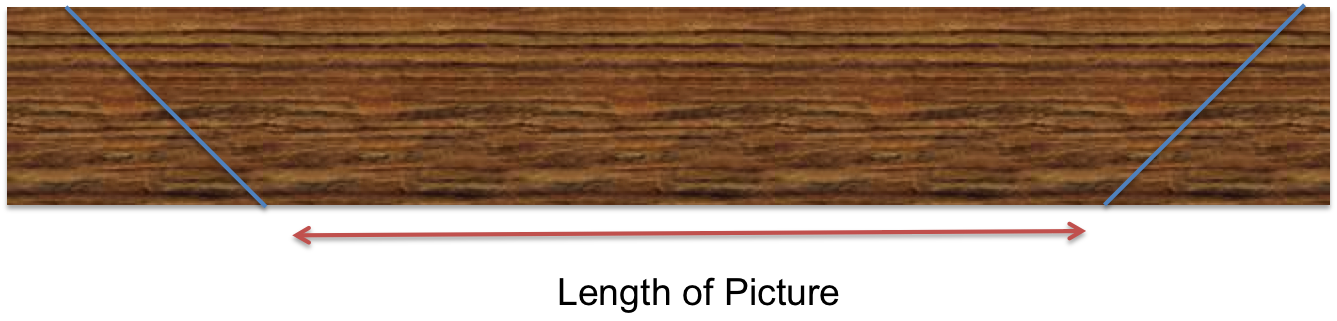
- Measure your picture, leaving some room for the picture to overhang the frame on the back and decide in the INSIDE measurements of your frame. Then cut 2 lengths of wood with 45 degree angles like this:
Cut 2 more in a similar fashion to match the measurement of the height of the frame.
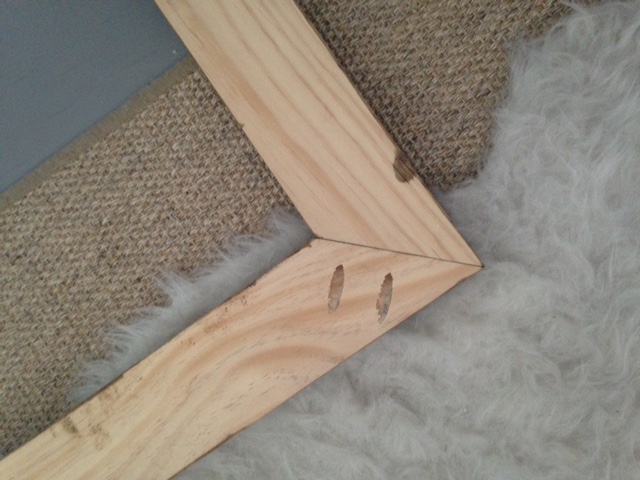
2. Drill pocket holes onto the back side of your wood. Take your time with this. On my last piece I drilled holes on the front of one side and the back of the other. There was no way to fix it without buying new wood. Since it was a rustic frame and I’m cheap, I assembled it with the holes on the front and filled it with a plug. You’ll never see it unless you look for it….but it happened. If you don’t want to use a pocket hole jig, you can glue and staple it together. Tutorial here.
3. Clamp the 45 degree edges together to a piece of scrap board and use your self-tapping screws to assemble the frame. I didn’t use glue here. It’s up to you.
Here’s a video that was helpful to me:
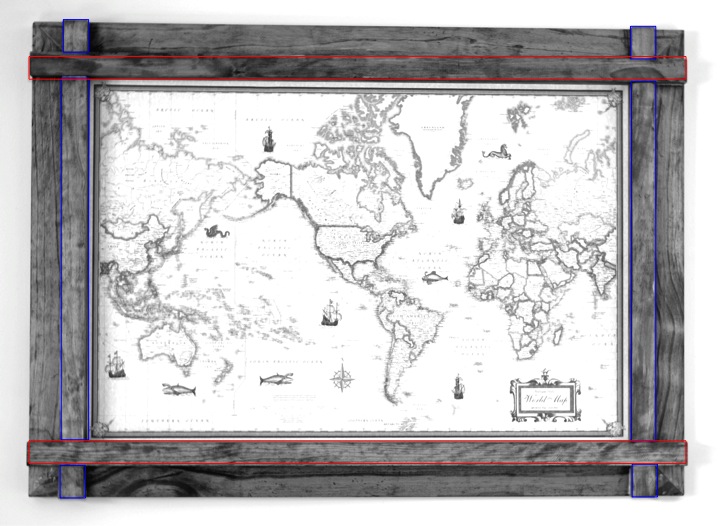
4. The top pieces are going to be glued and clamped into place. Cut 2 pieces of 1×2 the length of your frame (red), then cut 2 pieces the inside width and 2 tiny pieces for the outside corners (blue). I’ve outlined the wood pieces here to make it easier to understand.
5. At this point, I recommend stopping and distressing and staining your wood now. If during the gluing process any glue squeezes out onto the face of the wood (it always does), the wood won’t take stain there. Even if you wipe it off before the glue dries. I didn’t do this and have some naked spots on my frame.
To distress the wood I whacked it with a rough edge hammer and a bag of screws a few times. Here’s a more detailed tutorial on distressing wood.
6. Now it’s time to glue your trim wood to the face of the frame. Add a wavy bead of glue then clamp the first trim piece in place. After 30 minutes you can remove the clamps and glue the next section. I only had 2 clamps so this part took the longest. The trim hid one of my mistake pocket holes completely and partially covered the other one. Whew.

7. Typical frames have a rabbet to give an inset space to hold glass and a backing (instructions here.) Since I wasn’t using glass or a backing, I didn’t mess with a rabbet and just duct taped my picture to the frame.
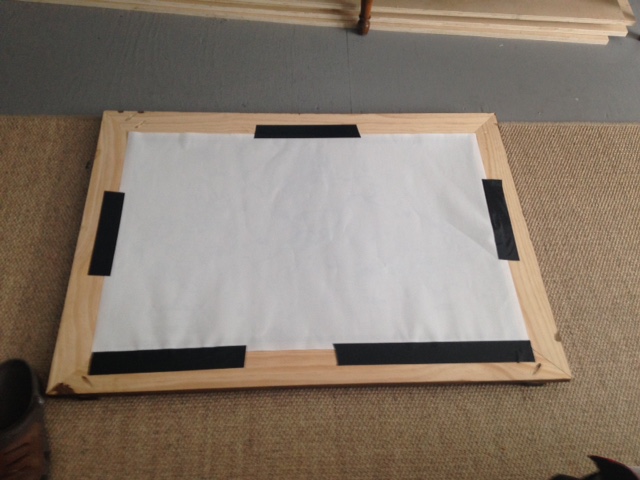
I used small pieces to get it stretched into place, then taped the rest of the way around for security before hanging.
8. Nail in the picture hangers and hang it up :).
I’m pretty proud of how it turned out, considering my first try at building something turned out like this:
It took me a few years to get the nerve to try building again. I’m so glad I didn’t give up completely. I built 4 more things from wood for the shared boy room and saved a BUNDLE in the process. I’ll show you about them soon.
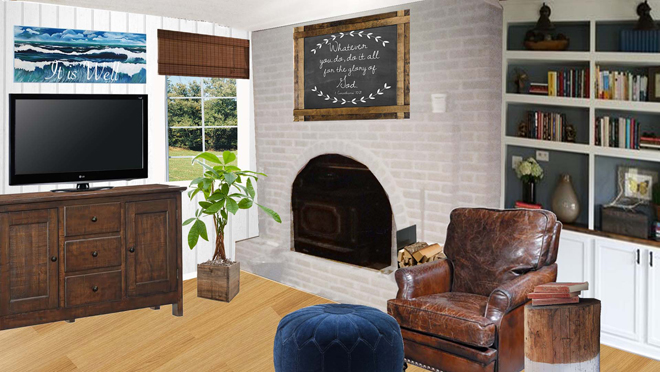
I love the frame so much I’m thinking of other places I could use one. Like over the fireplace in Darren’s new office with a chalkboard and inspirational scripture: “Whatsoever you do, do it all for the glory of God.” I’ll have to figure out rabbets for this one.
How about you? Would you ever consider building a picture frame?