High Fiber Coconut Flour Biscuits

This is not a gluten free recipe, but it’s a nice treat for people looking for reduced carb recipes.  The extra fiber from the coconut flour promotes colon health too!

1 cup unbleached flour (I haven’t tried this with fresh ground 100% whole wheat yet)

1/2 cup coconut flour

4 teaspoons baking powder

1 teaspoon salt

1 packet purevia stevia blend (optional)

1/4 cup plus 1 Tablespoon coconut oil, or butter

1 1/4 cups skim milk

Preheat oven to 400 degrees.  Set a large cast iron skillet in the oven to heat up with it.  In a mixing bowl combine flours, baking powder, salt and stevia.  Useing a fork or pastry blender, cut in 1/4 cup of coconut oil or butter.  Stir in milk and set aside for 3 minutes.  This allows the coconut flour to absorb the moisture.  Turn mixture out onto a silicone baking mat, or pastry cloth.  Pat 1 inch thick and cut with a 2 inch cutter.  Place the remaining tablespoon of coconut oil or butter into the hot skillet and allow it to melt.  Place the biscuits in the skillet and bake for 15 minutes.  Makes 11-12 biscuits

1 biscuit has 134 calories, 7 grams of fat, 3.5 grams of protein, 11 net grams of carbohydrates; 4 grams of insoluble fiber

Cold Suppers: Chicken Ceasar Salad

This refreshing meal is low calorie and  full of protein and veggies.  Serve wtih fresh fruit.

In a pretty bowl combine the first 5 ingredients.  Serve with dressing on the side and fresh parmesan.

1 head Romaine Lettuce, chopped

1 small red onion, thinly sliced

1 small can of black olives (whole or sliced), drained

1 tomato sliced, or a handful of grape tomatoes

2 cups lowfat garlic and onion croutons (see recipe below)

2 cups of roughly chopped chicken (use the leftovers from a roasted chicken dinner or grill 1 lb of chicken breast sprinkled with lemon pepper)

Reduced Calorie Ceasar Dressing Mix:

1/3 cup grated parmesan cheese

1 teaspoon lemon zest

1/2 teaspoon black pepper

1 teaspoon garlic powder

Combine all and store in a snack size baggie in the fridge.  When ready to make dressing, mix 1/2 cup mayonnaise with 1/2 cup plain yogurt and contents of mix.  Blend well.  If dressing is too thick, add a little skim milk or lemon juice until it reaches desired consistency.

Bread Machine Lowfat Garlic and Onion croutons:

The secret to these croutons is baking the flavors into the bread!  This reduces the need for the oil to stick the flavors to the bread.  Bake this flavorful bread in the bread machine overnight.  Then in the morning, slice and toast in the oven before the house heats up.

1.5 cups water

2 Tablespoons olive oil

2 teaspoons salt

1 teaspoon onion powder

1 teaspoon garlic powder

2 teaspoons dried parsley

1/4 cup honey

4.25 cups whole wheat flour (fresh ground hard white wheat is my favorite)

2 Tablespoons vital wheat gluten

2 teaspoons active dry yeast

Place all ingredients in the bread machine in the order listed.  Bake on the whole wheat cycle.  Preheat oven to 350 degrees. When bread is cool, slice the bread into cubes and place in a single layer on a lightly greased cookie sheet.  Spritz with olive oil, or non-stick cooking spray.  Sprinkle lightly with salt if desired.  Toast for 12-15 minutes or until bread is golden brown.  Place on a cooling rack.  Bread will crisp as it cools.

The Solar Oven

We’ve all heard the phrase, “It’s so hot you could cook an egg on the sidewalk.”  But cooking with the heat from the sun is not a cliche.  With about $5 in materials you can create a solar powered oven that will bake bread, cook a casserole, or even boil water.  For 3rd world areas where cooking fuel is scarce, solar ovens can give natives a way to purify their water.  For the rest of us, solar ovens offer a cost effective way to cook our summer meals without heating up the kitchen.

Solar Oven cooking times resemble those of an electric crock pot, but will vary based on the cloud coverage and time of day.  If your box is well insulated, the outside temperature is not as crucial as how direct are the sun’s rays. It helps to invest in an inexpensive oven thermometer positioned so you can read the temperature without lifting the lid.  Also helpful are black or dark pans that aren’t reflective. 

I’ve searched the web for the best online instructions for building yoru own solar cooker.  Try it with cardboard and plastic first and if you like it, you can build a more permanent model from wood, metal hinges, and glass.  Click the photos to go to the instructions.

Also See:  http://www.backwoodshome.com/articles/radabaugh30.html and http://articles.cnn.com/2009-04-09/tech/solar.oven.global.warming_1_cardboard-solar-box-cookers-international-simple/2?_s=PM:TECH

Solar Cooking fascinates me, and tomorrow I’ll show you some other types of solar cookers, plus show you the most affordable places to buy your own if crafting isn’t your thing.

The Summer Grill

Cooking outdoors on a grill gives great flavor to food, reduces fat, and prevents heating up the kitchen.  If you have a covered porch to grill on, a summer shower doesn’t have to stop your cooking plans.  We enjoy our gas grill but the most economical way to grill is in a traditional fire grill (Like a Weber), with coals made from fallen wood that has been allowed to cook down into coals.

When you think about a grill, what foods do you think of most?  The first thing that popped into my mind was BBQ chicken, then hot dogs and hamburgers.  But there’s even more that can be cooked on a grill, including stew and pizza!

To make the most of your grilled foods, consider marinating them.  There are lots of commercial marinaids available for sale, but homemade ones are easy, cost effective and delicious.  Marinades typically have oil, an acid ingredient like vinegar, pineapple or lemon juice, and herbs and spices.    I’ve found that I can replace the oil with water which saves money and calories.  We didn’t notice a difference in flavor. 

You can marinate meat or vegetables, just don’t marinate them together.  To marinate, mix all ingredients, pour over the food in a zipper seal bag and store in the refrigerator overnight.  Flip the bag over and continue to marinate until time to grill.  Discard raw meat marinades after use.  If you’d like to brush the meat with marinade as it cooks, save some separately before you marinate the food to keep it from getting contaminated.

Here’s my favorite chicken marinade recipe:

3/4 cup water or oil

1/2 cup soy sauce

1/4 cup vinegar (red wine or rice vinegars are nice)

1 teaspoon fresh thyme

Favorite Fajita Marinade

2 Tablespoons oil

2 Tablespoons lemon or lime juice

1 1/2 teaspoons seasoned salt

1 1/2 teaspoons oregano

1 1/2 teapspoons cumin

1 teaspoon garlic powder

1/2 teaspoon chili powder

1/2 teaspoon paprika

************************************

Zucchini is one of my favorite vegetables to grill.  We like to slice it thick (about 3/8″) and marinate it in low calorie Italian dressing before grilling.

We’ve also grilled corn on the cob:  http://whatscookingamerica.net/Vegetables/GrillingCorn.htm

http://www.backyardandbbq.com/easy-grilled-pizza/186

Here are some links for grilled pizza instructions:  http://slice.seriouseats.com/archives/2008/05/how-to-make-grilled-pizza-tips.html and http://pizzatherapy.com/grilling.htm

)

Photo Source: Food Network

Or try making your own individual meal packets in foil and grilling them.  We love hamburger patties with carrots, potatoes, green beans, garlic and salt.  Or fish with carrots, zucchini, onions and lemon pepper.

Liquid Laundry Soap

Yesterday, Stacy, our guest from Stacy Makes Cents, shared with us her favorite Powdered Laundry Soap Recipe.  This is the one she uses most becuase it is so easy and mess free to store.  But I know many of you interested in liquid laundry soap since it is already dissolved completely.  Stacy is back with us today to share her favorite Liquid Laundry Soap recipe.

Homemade Liquid Laundry Detergent

Meet Ruth and Rebecca. They’re expert laundry soap makers. Why are you seeing their photo? Well, because I tried making some laundry soap at home and it was a total dud. I mean, it was the duddiest of the duds. I got mad. This should be something I can do, right? Well, my soap chunked up and became almost un-stirrable. It was sad. I was sad. I was mostly mad though. I hate when I mess something up. So, I contacted Rebecca because I knew she made her own laundry detergent with her mom. I asked if I could come over and take photos to find out what I was doing wrong. Well, I wasn’t adding the same amounts of stuff that they were. Turns out that not everything you read on the internet is true. GASP! Sorry Al Gore. So, here is the story of the soap – the right way.
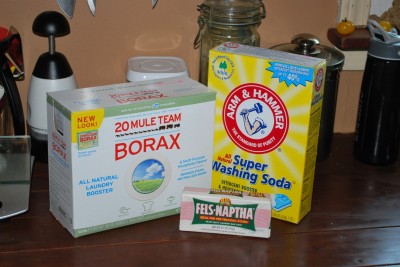
You need the same things to make this stuff as for the dry version, but you’ll add water…..lots and lots of water. You’re going to boil water like you’re having a baby folks. The amounts that I’m going to give you here are for half of a 5 gallon bucket – or 2 ½ gallons. Yes, I  graduated college with a math degree – not.
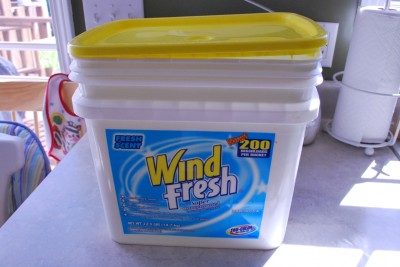
Where does one get a 5 gallon bucket? I’m sure you can buy one at Lowe’s, but maybe you have one just collecting dust somewhere in your garage – or maybe you in-laws have one gathering dust in their garage. Don’t go out and buy one until you ask around for a free one. You can even call restaurants and ask them if you can have their empty pickle bucket…..or maybe you can ask them to donate a few pickles too. I love pickles. Ruth used a big, white bucket with a nice handle – I use this jobber. I got it from Sam’s when I was buying this laundry detergent. That was before mom and I both determined that it was making our washer smell funny. Guess there was  a reason it was so cheap.
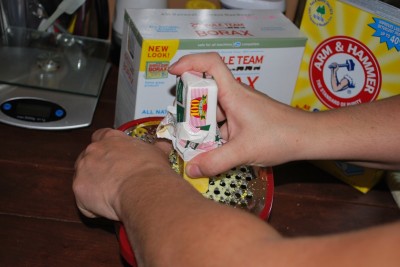
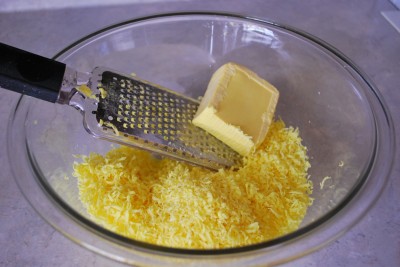
So, you need to grate your soap. About half a bar. It’s going to make your house smell really pretty. I feel pretty, oh so pretty! Oh, and try not to grate your knuckles like me. We don’t want bloody laundry detergent.  Doesn’t Rebecca have nice hands? She should be a hand model.
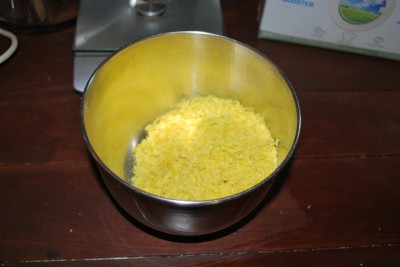
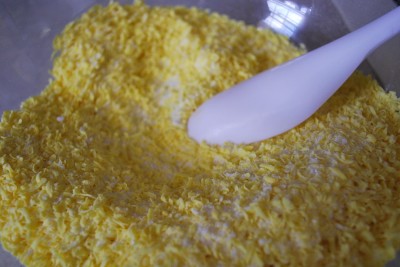
Here it is all done. It looks like yellow snow. Yikes. You know what they say about that. Don’t eat it!!!!
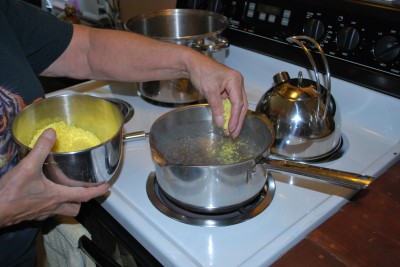
Now, you should have some hot water almost boiling on the stove. I guess I should have told you that earlier. Oops! Add your grated soap to the water a little at a time and stir well.
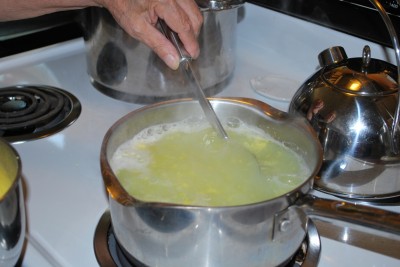
Now, this is important….listen up! Bring the mixture to a boil and stir until the soap is all melted. I didn’t do this part, so maybe that was part of my issue. You need the soap totally melted. Mine never got that way because I didn’t boil it. I just let it warm over low heat. Thanks for the tip, Ruth!
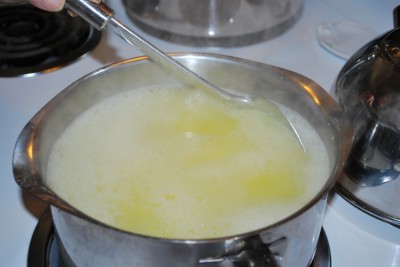
Here is it melted. It will look like yellow Kool-Aid. But please don’t drink it – unless you have a dirty mouth. Keep stirring and boiling until it’s all melted and no little clumps remain.
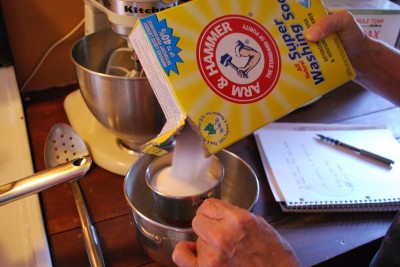
Grab a smallish bowl and add one cup of Washing Soda. Like I said yesterday, you can find this stuff at Food City and Kroger. If you know of somewhere else to find it, please let us know!
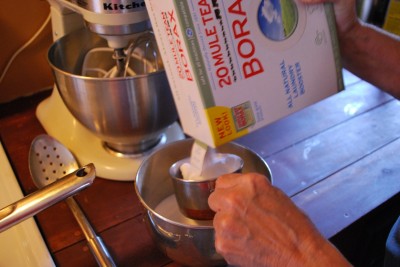
Now, add a cup of Borax to the Washing Soda. Mix well. If you have clumps of Borax, just use your hand to break them up. For some reason my Borax always clumps….but Ruth says her’s does too so I’m in good company.
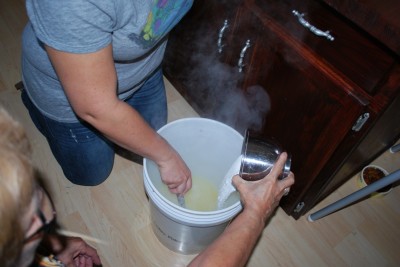
Pour your soap mixture into your big bucket. Add the dry mixture to the soap water and stir well until it starts to dissolve.
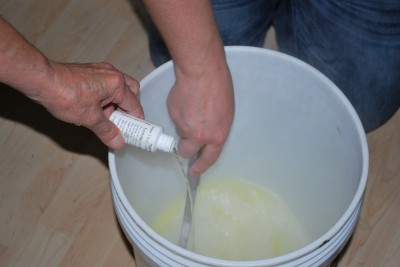
If you want your soap to smell all pretty and nice, then you can add ½ ounce of essential oil. They used Lemongrass Sage. It was delightful! I would love to smell like Lemongrass Sage all day……or Tootsie Rolls.
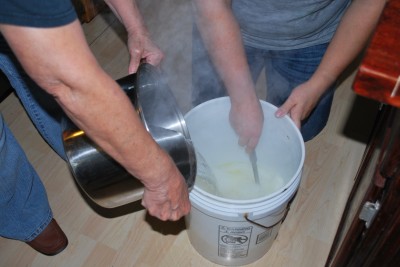
Oh, and I also should have told you to have a big pot of water simmering on the stove. When you’re done stirring your Borax and oil mixture then you can add this additional water. Stir until the dry ingredients are totally dissolved.
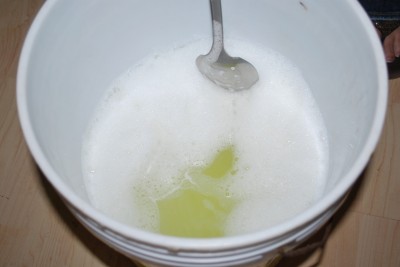

Now, top off your bucket – half full for this 5 gallon bucket – with warm water from the tap.
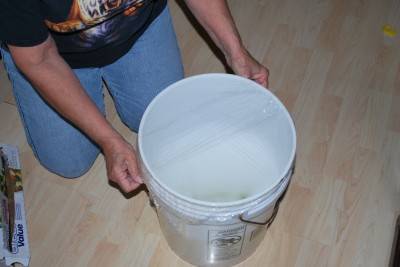
Ruth covered her bucket with Saran Wrap. But if your bucket has a lid, then you can do that. You’ll want to stir it a couple times over a 24 hour period – you won’t use it for 24 hours anyway.
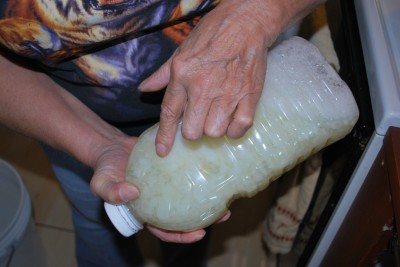
Now, Ruth says that this detergent is like soup – no two batches are the same. It could be that your detergent is really thick and chunky, like goop. Or it could be thick on top and thin on the bottom. That’s ok, because you’ll need to stir it each time before you use it. So, if you look at your detergent and think “this isn’t right” then congratulations! It’s right. Mine was terribly wrong because it had large chunks of soap that hadn’t dissolved and a large, LARGE layer of foam on top. I didn’t let my soap all melt. Don’t make my mistake. Don’t be stupid. Ruth says her detergent looks like snot. Yep, I’d agree with her. But guess what? It’s really pretty smelling snot!
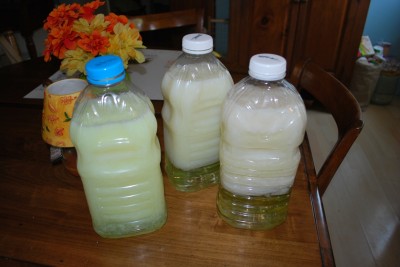
Now, after Ruth and Rebecca let their detergent sit for 24 hours, they divide it into smaller containers like this. That allows them to shake the bottle to incorporate it all together instead of stirring like I’ll do in my large bucket. You could also use an old, empty laundry bottle….but Ruth said that didn’t really work for them. See how it separates? That’s why you have to shake/stir before each load of laundry.  You’ll use 1/3 to ½ cup per load.

The cost difference for the liquid is about the same as for the dry version, about $.02-.05 per load….versus $.20+ for the store variations.

Like the dry version, this is also compatible with high-efficiency washers, easy on sensitive skin, and reportedly safe for cloth diapers.

Guess what? When I tried it the second time, it worked. Thanks Lord! I really didn’t want to make a million batches to get it right…….but I’ll probably use the dry version most of the time because of space issues.

Thank you Ruth and Rebecca for sharing your time with us and showing us how to be better home economists!

½ bar Fels Naptha, grated

1 cup Washing Soda

1 cup Borax

Homemade Powdered Laundry Soap

One of the most popular parts of my blog are the free homemade cleaning recipes.  And the #1 asked question is for a recipe for homemade laundry soap?  I used to make my own, but after a few months, it no longer satisfied me. I now buy Arm and Hammer brand powdered detergent from Wal-mart which is $.13 a load.   I’d feel bad giving you the recipe I didn’t like when I won’t use it myself.  So I found someone that loves to use homemade laundry soap and asked her to write about it here.    Stacy’s recipe is about $.05 a load–a little less than half of what I spend.

I’d like to introduce you to Stacy from Stacy Makes Cents.  She’s a wife and mom and she loves to save money!  Here’s her recipe for powedered laundry soap:

Homemade Powder Laundry Detergent

I had been wanting to make my own laundry detergent for a while….but being busy with Annie and other things kept me from it. However, when a reader asked me to write about the process, it was the shove that I needed – but in a good way, not like a shove off a cliff. The verdict? I really, really like it. It gets everything super clean and at a fraction of the cost of store-bought detergent. My mom and I have been using it and we’re both fans. I think when I empty out the last of my stash, I’ll only be using homemade detergent.  From what I can tell with my mad math skills and reading on the internet, this soap costs about $.05 per load, give or take. Most laundry detergents from the store cost around $.20+ per load. That’s a winner for me! Let’s get clean, y’all.

To make this powder detergent, you’ll need Washing Soda, Fels Naptha Bar Soap, and Borax. That’s it. (I’ve gotten a lot of feedback about the dangers of Borax;  Here’s I feel about Borax.  I personally believe it is safe for my family when used correctly, but you are free to use your own judgement on that.) All this stuff can be bought at Kroger. Strangely, the Fels Naptha Soap isn’t with the regular soap at my Kroger…..it’s with the mops. Tell me how THAT makes sense? The Arm and Hammer Washing Soda was on the top shelf near the Borax. A good source (thanks Rebecca!) tells me that these items can also be found at Food City. If you can’t find them at either store, you might be able to find them at a hardware store. Ivory soap can also be used, but Fels Naptha is really great for getting clothes clean. You can also use it as a pre-treater and just rub the soap right on the stain. Nice!

Now, you need to grate your soap. I used my microplane. Somehow when I bought it, I never thought I’d be using it to grate soap. Cheese, yes; soap, no. But it worked great! If you don’t have a microplane grater, you can use any regular type of grater. I won’t judge you because you don’t have the most awesome grater of all time in your kitchen. I’m not here to point fingers. Oh, and this soap smells really good so when you’re done grating you’ll smell like you just had a shower. You’ll need to grate the whole bar – your arms will get tired. You’ve worked out today, baby!

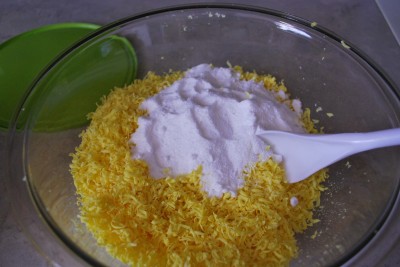
Add 1 cup Borax. Borax is going to give your detergent that little extra stain fighting power. It can be used interchangeably with Oxy-Clean but at a fraction of the cost. Have I mentioned that I just love Borax?
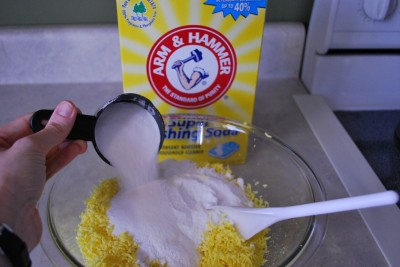
Add 1 cup of washing soda. I read on several forums that some people just use baking soda, but then I also read that it doesn’t work quite as well. We don’t want to bake our laundry. Cakes, yes; socks, no.

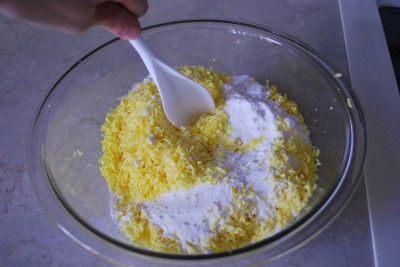
Time to mix it up. This isn’t a time to sit down on the job. Unless you want to sit down while you stir – that’s cool. You really need to stir this puppy.

You’re supposed to stir it until it’s well incorporated and looks like powder. This is what I had after what felt like an eternity of stirring – or maybe it was only like two minutes. Don’t judge me.

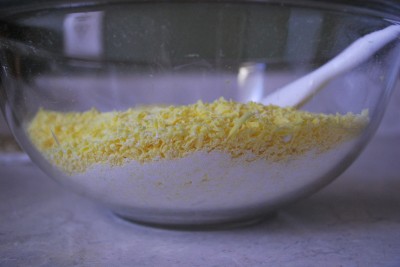
I wasn’t happy with it because you can see all the white powder on the bottom. Hmmmmmm. I’m a perfectionist. So, I broke out…….

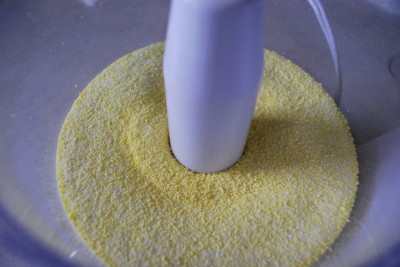
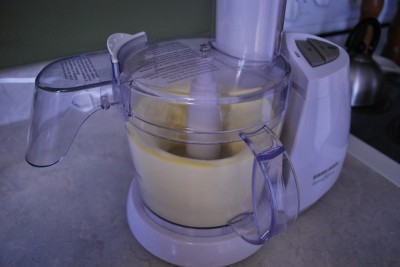
the food processor. Yes, I use mine daily. It’s up in my top five kitchen tools. I poured my soap in there and let it mix away. So much for my workout. You know, I never thought I’d use my kitchen tools to make soap – but I like to adapt. Wonder if Barry would mind if I used his workshop tools in my kitchen. Survival of the fittest.

This is more like it! Powder! Isn’t it pretty? And it smells so nice and fresh. But here’s the funny part – it won’t make your laundry smell like the soap. Your clothes will come out smelling just non-dirty. They’ll be clean, but they won’t smell like Tide. If you NEED your clothes to smell pretty, then just sock a dryer sheet in the dryer with them. Me, I can just settle for not smelling like sour milk.

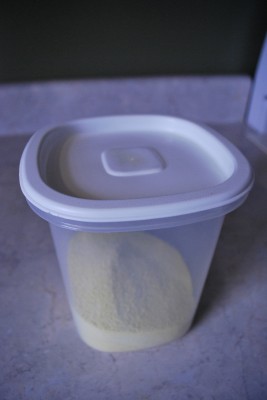
I stored mine in a Tupperware container. You’ll use two tablespoons per load. That’s it. Don’t overdo it! I actually put a tablespoon in mine to help. Next time I think I’ll just use my food processor to make the whole batch.

When you’re ready to wash, add your powdered detergent to the water before you put the clothes in. That will assure that it will dissolve. And don’t expect bubbles. This stuff doesn’t bubble, but it does clean.   So, a few handy things to know:

  1. This will also work in HE Washers
  2. I use it on Annie’s laundry without any sensitive skin problems….and I read online that other people do this successfully as well.
  3. It’s so FAST! I made my batch in like 5 minutes. I love fast, frugal things!

So, I’ve tackled that for you. If you’ve been too scared to do it now you don’t need to be! I’m a good source for trying things first to make all the mistakes. You’re welcome.

Preserving the Harvest

I save a bundle on my food budget by preserving garden or low-cost purchased produce.  Proper preservation prevents vitamin loss and spoilage.  The three basic types of food preservation are drying, canning, and freezing.  Some foods (like apples, onions, potatoes, and winter squash) can also be preserved for a few months in their fresh state in a dark, dry, cool environment (like a basement or cellar.)

Many foods can be preserved in more than one way. I keep Ball Blue Book Guide to Preserving
on hand to help me decide what to do and for the best instructions available.  This is what I try to do each year:

Can green beans, apple sauce, pears, and jam.

Freeze okra, beets, corn, peaches, blueberries, pumpkin puree, shredded zucchini (for baking), and lamb’s quarter.

Dry strawberries, apples, onions, peppers, and herbs. (I don’t dry every year–it’s more of a treat for us and is hard to do in our humid Missouri climate.)

This sounds like a lot, but I only tackle one at a time, which makes it more doable.  Each produce item harvests at a slightly different time which keeps the tasks spread out.

Here are some links to past Grocery Shrink articles about preserving:

Freezing Corn

Pumpkin Puree

Lamb’s Quarter

Freezing Peaches

Applesauce

Final Thought:  Most people think of home gardening when it comes to canning and freezing food.  But there are other ways to get quantities of food to preserve.  A friend of mine volunteers at a local food pantry.  At the end of the day, they send with her what the visitors don’t take.  She takes it home and cans and preserves it.  A dear family from church has pear and apple trees in their yard and they can’t use all the fruit.  They call me every fall after they have picked to take what they can’t use.  My mother in law has also purchased large boxes of produce from Amish food auctions for preserving.  I like to buy my pumpkins from local grocery stores and farmer’s markets after Halloween.  They have lots of life left and are great for making into puree.  You also might advertise to care for gardens during the summer as people vacation.  Ask in pay for the ripe produce you harvest during the vacation.  It keeps the plants producing and reduces pests for the owner and you get fresh food for the labor.

Really, final thought:  You can also preserve fresh produce by freezing it already prepared.  We like to freeze zucchini muffins and pumpkin bread for a quick thaw and eat breakfast or for unexpected company.  You can also freeze vegetable lasagna, veggie pancakes, marinara sauce, and veggie rich meatballs.

15 Minute Meals

Note:  This post is full of links to more information.  Try right clicking on the link and selecting “open in new tab” so you can come back to the original article easily when you are ready.

Everyone has days that are packed so full you don’t have time to cook a decent meal.  The normal solution is to grab some fast food.  I’ve done it when we could afford it, but it wasn’t the healthiest alternative.  We’ve already talked about some mixes to have on hand for viable alternatives to eating out.  And there are some easy recipes that come together in about 15 minutes if you keep the right pantry ingredients on hand. 

When I’m stressed, I can usually get a main dish on the table, but sides dishes are another story.  I found some coping strategies that help me fill our table in no time. 

It helps to have a lettuce salad always prepared and ready to put on the table.  Check out this post for how to make it last:

Other fast side dishes I keep on hand are:  frozen veggies (just warm to serve), cottage cheese, home canned unsweetened applesauce, pineapple in juice, and whole wheat day old buns kept in the freezer (butter, sprinkle with garlic salt and parmesean or mozzarella and broil for 2 minutes for fast garlic bread.)

Here are some main dish pantry meals I always have on hand for a fast meal:

Spaghetti (just whole wheat pasta and jarred sauce.  Warm and serve.)

Tacos (I keep homemade taco seasoning ready to go, shredded cheese, lettuce, tortillas (in the freezer), and salsa.)  It’s just brown and season the meat, warm the tortillas throw everything on the table and eat!.)

Grilled Burritos:  When my freezer is filled with sale priced or homemade tortillas, there are lots of options!  I also keep canned refried beans on hand for emergencies, though like to make my ownHere’s a post about how to make these yummy burritos fast.

Mackerel Patties:  Inexpensive but super healthy canned fish star in this fast dish!  There’s even a how to video at the post here.

While dinner is often the eating out monster, breakfast can be tough too.  Click here to read about how to make perpetual breakfast batters to always be ready to cook and eat on the run.

And if you are partial to Egg McMuffin Sandwiches, you’ll love the 90 second breakfast recipe here.

What to do with….

…a  whole chicken.

When working with mom’s one of the first easy changes to make is to buy a whole chicken for things like chicken soup, casseroles, and salads instead of boneless skinless chicken breasts.  Chicken breasts average $5.99 a lb but can be found at Costco in 10 lb bags for $2 each.  And occasionally go on sale for less than that at the regular store.  I buy chicken breasts at these low prices, but cook them like a steak since they are one of our more expensive meats.

Whole chickens on the other hand can be found at Aldi every day for $.79 a lb and go on sale for $.59 a lb!  When I’m going to cut up a chicken for enchiladas, casseroles, or cold chicken salad anyway, I use the most affordable meat on the market.  A whole chicken is easy to deal with, and there are 3 different ways to cook it.  The first, boiling it, is one of my favorites because it also yields 4 quarts of yummy chicken broth to use in recipes.  If you prefer you can roast it in the oven or the slow cooker, and when adding root vegetables to the pot, you end up with a one dish meal.  In the picture above, I roasted 3 chickens at once so I could freeze the meat for fast meal solutions later.

Whole chicken with Broth

16 cups of water

2 teaspoons salt

2 teaspoons garlic salt

1 teaspoon pepper

1 onion, chopped fine (Or 1 Tablespoon onion powder)

2 ribs of celery, chopped fine (Or one teaspon celery seed)

1 whole chicken (Thawed and the gible bag removed from the inside.)

Combine all in a large stock pot and bring to a boil.  Reduce heat and simmer for about 3 hours.  Use a slotted spoon to remove the chicken to a platter to cool.  Strain the broth and set in the fridge when cool.  Usually by this point quite a bit of water has cooked out of the broth, so I add more to get back to 16 cups.  Once the broth has chilled, the fat will harden on the top and you can remove it easil if you prefer to cook with fat free broth.  Then ladle the broth into freezer jars and freeze in recipe size portions for future use.

When the chicken has cooled, gather two large bowls.  Use your fingers to separate the meat from the bones.  I put the bones, skin, and other unwanted parts in one bowl, and the meat in the other.  Then coarsely chop the meat and place 2 cup portions into freezer bags and freeze.

Roast Chicken

There are lots of different herb variations for roasting a chicken. I previously shared one of my favorites here.  (There’s also a lovely lemon rub recipe in the Slow and Savory cookbook.)  In the link above, I showed how to cook 3 chickens at once, but if you prefer to do one and make it a meal.  Also add 2 peeled whole carrots, 1.5 peeled potatoes, 2 ribs of celery cut into 1 inch pieces, and a sliced onion to the roasting pan.  Follow the same cooking instructions as in the link.

Slow Cooker Chicken

Follow the preparation instructions above, then cook on high for 3-4 hours or on low for 6-8 hours. 

Update:  I boiled a chicken today that was 5.06 lbs.  I got a gallon of broth and 6 cups of cubed meat.  The meat weighed 1 lb 15 oz and the bones and skin weighed 1 lb 5 oz  which means 1 lb 12 oz of the chicken was moisture that went into the broth.  I haven’t cooked and weighed chicken breasts yet, but let’s pretend they would have the same amount of moisture loss:

5 lbs of chicken breasts at $2 a lb would cost $10 with a net result of 3 lbs 4 oz of meat and a final price of $3.08 a lb

5lb of whole chicken at $.79 a lb cost $3.95 with a net result of 1 lb 15 oz of meat and a final price of $2.03 a lb.  At $.59 a lb for the whole chicken it’s $1.52 a lb

It’s worth it to pay for the extra bones and skin (it makes a healthier broth) because the net result is still less expensive meat.  The least expensive I have seen boneless skinless chicken breasts was $1 a lb.  The price of the actual meat becomes $1.65 a lb.  It is still less expensive to buy a whole chicken at $.59 a lb, but barely so at that point.

Emergecy Meal Mixes

Life happens. There are times when just thinking about cooking a meal is stressful.  Or the non-cooking adult has to cook or resort to fast food.  Having a few of these homemade mixes on hand can help.  When you make these mixes yourself, you can use wholesome herbs, and whole grain ingredients.  You know there’s no msg or other preservatives.  You can control the sodium, fat, and sugar content.  To make it even better, these mixes are inexpensive and fast to throw together for the times when life happens.

Handi Spaghetti

8 oz broken spaghetti noodles (brown rice or whole wheat based pasta works great.)

1 1/2 teaspoons salt

1 teaspoon garlic powder

2 teaspoons parsley

1 teaspoon basil

1 teaspon ground fennel (optional)

Mix these ingredients in a quart sized baggie.  To prepare bring 4 cups of tomato sauce and 3 cups of water to a boil.  Add 1 lb of browned and drained hamburger or ground turkey and the contents of the bag.  Simmer for 20-25 minutes or until the noodles are tender.  While you wait, warm up some green beans, tear some lettuce into a salad, and set the table.  (Variation:  If you can your own tomatoes, you can puree 2 quarts of tomatoes in a blender until completely smooth and use instead of tomato sauce and water.)

Bread Machine Mix

4 cups of flour (half white and half wheat if desired, or all wheat)

1 teaspon salt

2 Tablespoons sugar

2 Tablespoons butter

1 Tablespoon of yeast

Combine flour, sugar, and salt.  Cut in butter until very fine.  Stir in yeast. Package in a quart jar or quart sized baggie. Store in the refrigerator until ready to use.  To use Place 1 3/4 cups warm water in the bread machine.  Add mix and run dough cycle.  This will make 2: 14-15 inch pizza crusts, 2 loaves of bread, one large loaf of Italian style bread, cinnamon rolls, bagels, or dinner rolls.  I like to plop this in the machine in the morning and delay the dough cycle so that the dough will be ready right at prep time for dinner.

Pizza crust:  Divide dough into 2 balls.  Roll out on prepared pans.  Let rise for 15 minutes.  Top with sauce, toppings, and cheese.  Bake at 415 degrees for 15 minutes or until cheese is golden on the top.

Bread:  divide dough into 2 balls, place into greased loaf pans.  Let rise Let rise until double 30 minutes-1 hour.  Bake at 350 for 25-30 minutes.

Dinner Rolls:  Divide dough into 24 pieces, shape into rolls.  Let rise until double 30 minutes-1 hour and Bake at 350 degrees for 15-20 minutes.  Or divide into 2 balls, roll each ball into a circle 1/4 inch thick.  Cut each circle into 12 wedges and roll up crescent roll style.  Let rise and bake at 350 degrees fro 15-20 minutes. 

Bagels:  Divide dough into 10 pieces.  Roll each piece into a ball and poke your finger through the center to create a large hole.  Set on a floured counter to rest for 1 minutes.  Boil 2 quarts of water and 1 Tablespoon of sugar in a stock pot.  Boil each bagel for 1 minute on each side.  Drain on a dish towel.  Bush with beaten egg (optional) and sprinkle with seeds (poppy or sesame, chopped sunflower seeds, or a combination).  Bake at 400 degrees for 20-25 minutes.

Cinnamon rolls:  Divide dough into 2 balls.  Roll each ball ina rectangle 8″ x 15″.   Or about 1/4 inch thick.  Spread each with 4 oz cream cheese or butter.  Sprinkle with 1/4 cup brown sugar combined with 1 teaspoon cinnamon.  Roll up making it as long as possible.  Use dental floss to cut each log into 12 pieces and place in a greased 9 x 13 pan.  Let rise for 1 hour and bake at 350 for 45 minutes or until golden brown on the top.  Frost with a powdered sugar and milk drizzle if desired.

(Non-sour) French style bread:  Turn the whole piece of dough onto a well-floured (or use cornmeal) pizza slide.  Without punching it down, gently stretch it into a long loaf, tucking the edges to the underside so that the top is smooth.  Let rest for 30 minutes while the oven preheats.  Place a bakers stone on the top rack of your oven and a broiler pan on the bottom rack.  Preheat the oven to 350 degrees.  When the oven is preheated, brush the top of the loaf with water, then sprinkle with parmesan cheese or seeds if desired.  Use a serrated knife to cut 5 slits across the top of the loaf.  Slide the loaf onto the preheated stone and quickly pour one cup of water into the broiler pan.  Shut the door immediately to trap the steam.  Bake for 30-35 minutes or until a nice dark crust has formed.  Transfer to a cooling rack and cool before slicing.

Skillet Lasagna

This is the recipe that started the Grocery Shrink Blog!  And you can get it here.

Fettucini Alfredo Mix

8 oz Fettucini, broken into pieces (whole grain pasta works fine)

2 T flour 
2 T powdered instant skim milk
1/2 t basil 
1 t lemon pepper
1/2 t garlic powder 
1 t salt
1/2 C parmesean cheese

Mix all in a quart bag.  To prepare.  Pour mix into a skillet with 2 cups of water and 2 cups of milk.  Stir well until all the powders are blended and noodles are well moistened.  Bring just to a boil and reduce heat to a simmer.  Simmer for 15-20 minutes or until noodles are tender.  Remove from heat and allow to cool for 3-5 minutes.  Sauce will thicken as it cools.  If you like, stir in sauteed vegtables, cooked chicken cubes, turkey sausage, or shrimp.

Taco Seasoning

1 teaspoon cornstarch

1 teaspoon sugar (optional)
2 teaspoons garlic salt and pepper (or 1 teaspoon salt, 1/2 teaspoon dried minced garlic, 1/4 teastpoon pepper, and 1/4 teaspoon parsley)
2 teaspoons cumin 
1 Tablespoons chili powder
1 Tablespoon dried onion flakes
1/2 teaspoon Mexican oregano

Mix together 1 pound browned and drained ground beef, 1/4 cup water and mix. Cook and stirr until hot and bubbly.

Leftover Stew Mix

 When we have leftover bits of beef, gravy, or vegetables (with cooking liquid) I put them in a large container in the freezer  and add to it as the leftovers appear.  Our container is a washed 4 lb yogurt container from Costco, but use what you have.  When 2 containers are full, I thaw out the contents put it in the slow cooker with 2 cups of tomato sauce and enough water to make it soupy and cook it all day.  The last 20-25 minutes, I add the contents of this mix for a wholesome barley beef stew.

2 Tablespoons dried mince onion

1 teaspoon garlic salt

1 teaspoon dried parsley

1 teaspoon black pepper

2 bay leaves

1 cup pearl barley

(Note:  pull out the bay leaves and put them in the slow cooker at the beginning.  Wait to add the rest until the end or the barley will absorb all the liquid and flavor and make a mess of your stew.)