A Woman’s Guide to FrontSight Take 2

We just got back from our second trip out to Frontsight, Nevada for 4 day defensive handgun training.  If you’re not a gun person, I totally understand.  I was pretty opposed to guns before my first trip, but took my first course at the insistence of my Dad and my husband. I was shocked that I  enjoyed learning to shoot and even more that I wanted to go back! Imagine a world where most citizens were trained with firearms and conceal carried.  What a huge deterrent to criminals that would be!


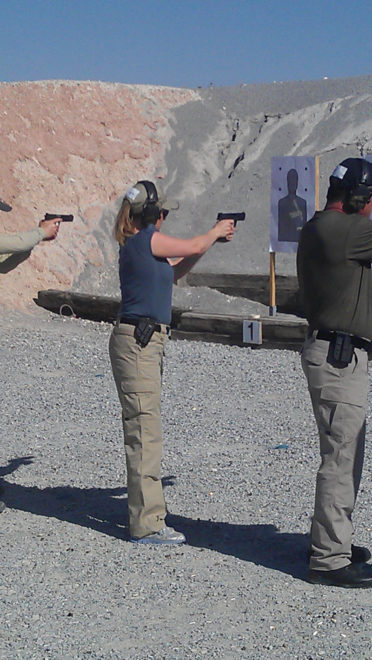
What it is:  4 days of intensive training that is as friendly as possible while still being safe.  It is not a boot camp.  Almost anyone can come, even children aged 11-15 can go with a parent. It’s okay if you’ve never fired a weapon before Frontsight.  It’s better to not have any habits, than to have bad habits to overcome.  But if you have shot before they will show you how to take your existing skills and get even better. The classes are more than just how to shoot, but also when to shoot, how to stay within the law and what the likely consequences are even if your shots were completely justified.  There is a background check required for all students.  And because everyone is armed, it is one of the safest places on earth. No one would dream of committing a crime there unless they were suicidal.

One of my favorite students was Lori.  She is 77 years young and not even 5 feet tall!  She carries 4 magazines on her left side and with 15 rounds each.  This was her second year at Frontsight.  4 years ago she decided to take martial arts classes and achieved her black belt in the second degree at age 75.  She was throwing large men on the mat and doing it well.  But threw out her back in the process.  She decided to take up shooting instead. I asked her what her son and grandchildren thought about grandma shooting.  She said they didn’t know about it!  She also said she really didn’t need either martial arts or guns, because she had Jesus.  I just adore her.  Isn’t she the cutest thing?

On the line next to us, a twelve year old boy was taking classes with his dad.  The boy was likely the best shot on the property that day (at least among the students.)  It was impressive to watch him!  The instructor told his dad if they were ever in need of tactically clearing a house to send the boy in first.  He was that good.  But I think that would be a hard decision for any parent to make.

The climate is unique in Nevada.  Hot and Dry during the day, cold at night.  Dehydration is a real risk as is sunburn, heat exhaustion, or heat stroke.  We found it is cooler to wear long lightweight layers than to have skin exposed to the sun.  Here’s the outfit I recommend:


A Woman’s Guide to What to wear at Frontsight Nevada

511 tactical gear pants in light khaki (the pockets in these are invaluable) (Try LApolicegear.com for the best price–around $29.00) Be sure to get the new fit or you will end up with mom pants–yuck. Also tuck the pocket flaps into the pockets on the left side of your pants while you are on the range.  The rough velcro is rough enough to cut your hands as you reach in and out multiple times.  Tucking in the pockets will protect you.  Mine are way too long.  They come in regular and long lengths.  Regular is about 30 inches.  Long are about 34 inches.  I’ll hem mine later but for the class I just flipped up the cuffs.  (Then I took home pieces of ammo casing and gravel every night.  If you are flying right away at the end of the class be sure to check your cuffs :).

tank top

white Long sleeved button front cotton shirt to wear over the tank and use for concealment on days 3 and 4

low cut socks and breathable mesh tennis shoes (you’ll want to wash the shoes in the washer once you are back home)

Hat with brim (not optional); and wrap around protective eyewear with a dark tint (also not optional)

A wide belt with a slide fastener instead of buckle and holes.  This will help a lot when it’s time to use the restroom.  (see below :).)

A loose weave neck scarf is nice too.  I’ve never had one, but my husband and dad love theirs.  They are popular on the grounds.

Wear sunscreen under the long sleeved shirt.  You will need to take it off at times, especially the first two days when conceal carry clothing isn’t used yet.

Also, be careful your tank isn’t cut too low.  I caught a hot casing down the front of my shirt on the last day and it really had me dancing. Those things can burn you, so it’s best to protect for that.

My Ammo Box. Looks too messy to me, but I move so fast normally that I don’t take time to stay organized. My SIL snapped this picture because my sparkly lip gloss tickled her funny bone. I was the queen of sparkly lip gloss on the range. Just in case, I felt like I was losing my girly edge during a fast draw. And we were in the desert–can’t have too much sparkly lip gloss in the desert.

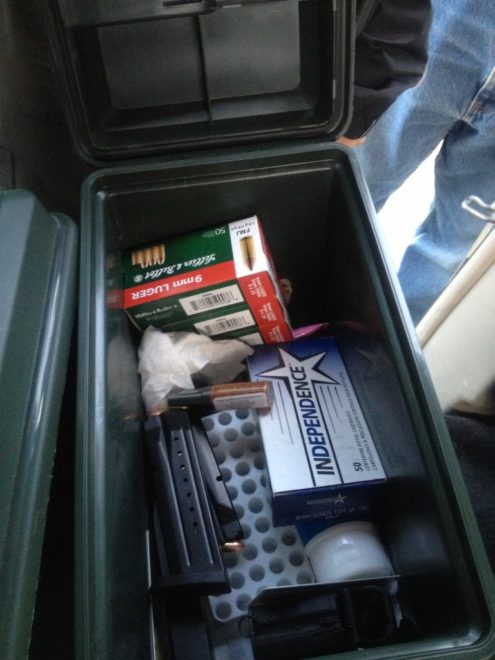
What to Pack in Your Ammo Can

An ammo can is a plastic box with lid and latches for holding ammo, some people use a range duffle or tackle box instead.  You will need 600 rounds of ammo for a 4 day course, but only keep 200 rounds at a time in your can.  This will keep the can from getting too heavy and save room for the other essentials:

1.  A fingernail file.  Bring something heavy duty–your nails will break.  In preparation for the class, trim them just slightly longer than your fingertips and file them with flat ends.  Then reinforce your nails with 3 coats of clear polish or hardening top coat.  Still bring the file.  Guns are hard on fingernails.

2. Pocket tissues:  the range is dusty

3.  Beef jerky, nuts, and fruit or other snacks (that won’t melt.) Lunch is late 12:30 and if you have a time zone issue (we were delayed 2 hours) it can be really hard to make it to lunch or dinner.

4. Lip balm and lip gloss.  If you have one with sunscreen in it, all the better.  My lips got burned this time, ouch!

5. Sunscreen.  The higher the SPF the better.  And reapply often.

6.  Electronic hearing protection–this is required.  Just ear foamies won’t do.

7.  Ponytail holders (if your hair is long enough)  I like to wear a ponytail and pull it through the back of my hat.

8. Waterproof bandaids.  Frontsight has first aid kits there with a plethora of bandaids but I had a hard time getting any of them to stick after I started sweating.  I wished I had brought the sport ones that stick through anything.

9.  Frozen gatorade.  I don’t generally drink gatorade but make an exception in this case.  It can be hard to see the signs of dehydration or heat exhaustion in yourself, but others will see it–especially if you start doing stupid stuff or missing easy targets. It’s dangerous, so stay hydrated. They have deli trucks that come around with gatorade for $2 a bottle, but you can get it for 1/4th the cost if you plan ahead and bring your own.  Pop it in the freezer the night before.  Then as it thaws you can give it a good shake and it’s like a slushie.  Yum!

10.  Your photo ID.  You will need this to check in on the first day, and if any of your equipment breaks you will need to leave it as a deposit when you rent equipment to replace it from Frontsight.

11.  Caribiners.  The best price on these are from Wal-mart.  A huge one for $3 is handy to hang your electronic ear muffs from when you are doing dry practice.  And the small ones are good for clipping things like your loader to your belt loop.  I wish I had taped a small one to each of the front courners of my conceal carry shirt too.  The wind was making it hard to clear and draw for the exam and I know I lost points from wind delays that the weight of the beaners would have fixed.


Travel and Where to Stay

If you live close enough to Pahrump, NV to drive, I’m jealous.  If you need to fly, watch airline prices carefully. They will dip between $100 and $140 one way; book your flight on the low end.  We found the best prices on Southwest. Sunday is the most expensive day to fly and Wednesday is generally the cheapest.  We like to fly out Wednesday night for our classes that start Friday morning.  This gives us a day to rest, grocery shop, and get used to the time change before the crazy schedule begins.

Plan extra time when flying with guns.  You can check them in your bags but will have to fill out a declaration card at the counter.  Also you’ll need to pack ammo in a separate container from your gun (still inside the same suitcase though) and it must be in original packaging, not floating around loose.  You will be limited to 11 lbs of ammo.  Our friend’s ammo was weighed at the counter, ours was not–so you never know when they are going to check.  Your gun case will need to be securely locked for flying and a TSA lock for the outside of your suitcase is a good idea too.  Once everything is cleared at the counter you will be asked to wait 10-15 minutes for your bag to clear the 2nd level of security before finding your gate.

When flying home, book your flight for the day after your class ends.  You will be too exhausted to travel and if your flight is too early, you will miss the closing class activities (and the test.)  You definitely don’t want to miss those things. When you do fly home, check your pockets carefully for stray ammo.  During the class you’ll be shoving loose rounds into every available pocket so you can load on the line. TSA doesn’t find it funny if you forget and leave a round in your pocket.

Also, TSA doesn’t allow coconut oil, peanut butter, mayo or other spreadable items in your carry on bag.  I lost a big jar of coconut oil that way.  I thought it was just liquids that were restricted, but it’s not.  You can find the most recent TSA rules on their website: http://www.tsa.gov/traveler-information/prohibited-items 

If you are going alone or with just one other person, the cheapest hotel is SaddleWest in Pahrump.  It doesn’t have a great reputation, but we liked it okay.  Our room smelled of smoke, which I didn’t like, but we weren’t there much.  Most rooms do not have a fridge, so plan to buy a styrofoam cooler when you arrive to fill with ice and lunch fixing stuff.  Boxed lunches from the hotel are $10 each! but are $12 at Frontsight!  You’ll definitely be ahead to pack your own lunch.

If you are going with a group of 6, the cheapest option is to rent a vacation home.  We did that this time and loved it.  Plus the full kitchen made it super easy to make simple breakfasts and pack lunches.  I don’t recommend trying to cook supper even if you have a full kitchen.  You will be exhausted and most often won’t leave Frontsight until 6pm–with a half hour drive back to civilization and then starting meal prep–you’ll be hungry and frustrated before dinner is ready.  If you are set on saving money by cooking, it is easier to cook the 3rd and 4th nights.  We used a slow cooker for one night and grilled burgers the next.  It worked out ok. Vacationrentals.com is a good place to look for accommodations.

There is a Walmart in Pahrump with a full grocery store and an Albertsons too.  I took a few specialty items from home, like Trim Healthy Mama chocolate waffle mix, chia seeds, ground flax, and glucomannan powder.  But we bought most things when we arrived.

How to Use Facilities When Armed

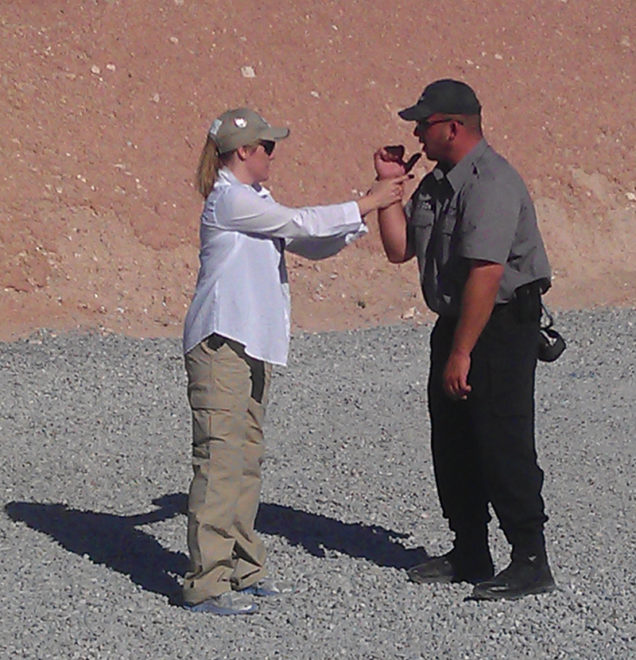
Guns are expensive, and the last thing you want to do is drop one in a toilet.  While most have safeties that prevent them from firing when dropped (and you won’t be allowed to be loaded in the John) it’s still a bad idea to drop your gun.  If you have a belt holster and loosen the belt and drop your pants, the weight of the gun will pull your belt out and drop everything on the floor. (Ask me how I know!)  To prevent this, use a slide buckle and loosen the belt almost to the end to give you plenty of room to move your pants up and down. Then lock the slide so the belt can’t come off.

Also, when using the porta-potties at the back ranges, don’t lift the lid to the toilet until your pants are down past where your gun could fall in, and close it immediately before lifting your pants back up again.  This is TMI only if you don’t need the info!

***********************************

I’m not sure how to transition from that last topic, lol.  So I’m just going to move on :).  My goal is to pass the Defensive Handgun Course with 90% or better.  And even after 2 times through, I couldn’t even graduate.  It’s the speed pressure that gets me every time.  The key to graduating is dry practicing at home.  The hardest part for me is just getting out of the holster in time to take my shots. I’m going to take a year to practice and save my pennies so next time I can take my 2 oldest kids with me.  Once I graduate at 90% I can take the advanced course and then the tactical course.  I really want to do that!

So do any of you shoot?  I’m always pleasantly surprised to find out how many women do and don’t talk about it much.

3 More Quart Size Spice Mixes

Fajita Mix:

3/4 c seasoned salt

3/4 cup oregano

3/4 cup cumin

1/2 c garlic powder

1/2 c chili powder

1/4 cup paprika

Yield:  3 1/2 c

To use mix 2 Tbs oil; 2 Tbs fresh lime juice with zest; and 2 Tbs fajita mix to marinade 4 chicken breasts overnight.

Spaghetti Sauce Mix #1:

1 1/4 cup onion powder

1/2 cup garlic powder

3 Tbs dry mustard

2/3 cup brown sugar or stevia

10 Tbs salt

3 Tbs celery seed

1 cup bay leaves, crushed (or leave these out and add 4 bay leaves to each batch)

2 tsp cayenne pepper

1/2 cup basil, dried

1/4 cup oregano, dried

To Make: Simmer together 2 lbs browned ground beef; 8 ounces chopped mushrooms; 12 oz tomato paste; 2 pounds (canned) chopped tomatoes; 2 tsp of Worcestershire sauce and 2 1/2 Tbs of mix. (This is an untraditional spaghetti sauce that is delicious!)  See below for a more traditional one.

Spaghetti Sauce Mix #2

2 1/4 cups stevia in the raw

3/4 cup parsley flakes

6 Tbs celery seed

3/4 cup salt

6 Tbs garlic powder

6 Tbs  onion powder

6 Tbs oregano

6 Tbs  basil

12 crushed bay leaves (or leave out and add 1 bay leaf to each batch)

To Make: Combine 5 1/3 Tbs to 18 oz of tomato sauce; 1 lb browned ground beef or Italian sausage and 6 cups of water.  Simmer for 45 minutes or until thick.


3: Quart Jar Spice Mixes

Update:  For even more mix recipes check out my new post here.

I’ve been out of town and there’s so much to catch up about.  But first I’d like to give you a post that’s actually useful :).

Our large family uses a lot of spice mixes especially ranch dressing mix; taco seasoning; and onion soup mix.  I’ve never purchased a packet of seasoning from the store–it’s too expensive for my sensitivities :).  But I have gotten tired of running out of seasoning and having to make it on the fly.  Life is much easier since I’ve put together a whole quart of stuff at a time.

Quart Spice Mixes

Read more

Which floor?

While we are waiting for bids back from the contractors for our massive kitchen/bath remodel, we have a huge decision left to make. What flooring to put in this 700 square foot space? (Just typing that is crazy….my kitchen and dining room are 700 square feet. My first house wasn’t much bigger than that.

image

We were going to do porcelain wood look tile and found a great option, but tile is sooo expensive! The store offered us a sale price of $3.50 a square foot and on the surface it sounded doable. Then we realized that didn’t include backing, adhesive, grout and a professional to make sure we didn’t mess up.

image

So I suggested we consider real hard wood in prefinished planks. Darren’s done that before and it looked amazing.

We took a field trip out to lumber liquidators and looked at all the options. I was personally partial to the strand bamboo idea, but in person none of the options were right for our space.

image

We found 2 wide plank handscraped floors that were still fairly smooth (grooves and texture look cool, but grab and collect dirt–yuck.). Darren votes for the dark floor above.

Darren is right. In a perfect world the dark floor looks awesome. But in our world of 6 kids and a wife who would rather make stuff than clean, a dark floor would look dirty all the time. So I vote for the same floor in a more mid tone.

image

We walked on the sample boards with our dusty shoes just to see if I was right, and I was. But I could tell Darren still wanted the dark floor.

The lower cabinets are the cherry wood color the upper cabinets are white. How do you vote? Dark or Light? I think it will be on sale tomorrow and I need to decide ASAP.

image

(an old photo of the green carpet)

Also, I want to tear out our green carpet in the living room and put the same floor into that space (they are connected.) Darren thinks it’s too much to think about at once, but I think it would be smart to buy it all at once, on sale, even if the living room floor installation has to wait until the kitchen project is finished.

I’m feeling overwhelmed at the big decision and would love your input. (Oh and I’m pretending it hasn’t been ages since I blogged last. )

Laundry Room Plans

Laundry Room Before

This is my current laundry room.  I do 3-4 loads of laundry every day.  (Actually Darren and the kids do most of the laundry.)  It is always a mess.  The ugly floor, dark walls, poor lighting and tight work space make it kind of miserable.

Laundry Room

To make the room better, we decided to remove the left bank of cabinets, then paint the room a pale gray with bright white trim. (Look how the window is no longer partially covered!) I bought this rug for the space when it was 60% off:

Damask Trellis Navy Blue Runner from RugsUSA.com

Damask Trellis Navy Blue Runner from RugsUSA.com

Then I bought these:

Hanging Laundry Sorter

To make the wall across from the washer and dryer look like this:

Hanging Laundry Sorters installed
Household Essentials Hanging Cotton Canvas Laundry Hamper Bag
And then I bought some rusty metal shelf brackets half off at Hobby Lobby, similar to these:

Iron shelf brackets(This are also from Amazon) 

To go above the washer for an open shelf for my laundry powders which I keep in glass candy jars.

Instead of all these plans, we are bumping that left wall out 2 feet–the window will look almost centered!  The new doorway will be right across from the washer where Caleb is standing in the first picture.  I need to make the laundry side of things pretty since the door way won’t have a physical door to close on it.  I want it open since I’m in and out of there all the time.

To the left of the new doorway my carpenter is building me laundry basket drawers, 3 baskets wide and 3 deep with folding space on top.  Similar to these but one stack shorter:

From anawhite.comI <3 Ana's blog!

From anawhite.com
I <3 Ana’s blog

Then the other half of the room will be my pantry.  I’m dreaming of the perfect pantry and am not sure what that will look like.  But here are some pantries that are similar in shape and space:

From periodextensions.com.au

From periodextensions.com.au

I like the idea of counter space in my pantry 🙂

Pantry 2I’m not sure of the original source:  Pinterest just said Flickr.  If you own this let me know and I’ll give you credit

I love the baskets and antique feel in this one, but think I would like shelves on all 3 sides.

Pantry 3

This pantry just used google as it’s source on pinterest, so I’m not sure who to give credit to. It uses the space the best of all 3 pantries, but not as cute as the wooden shelf brackets in the image right above.

I think I’ll still use the rug and the gray wall color idea.  And am excited for new light fixtures too.  Thankfully the old ones aren’t working properly so I can justify buying new ones :).

Kitchen Plan

I’ve been stressing out lately–all broken out in hives just thinking about the massive remodel that we are planning for late spring.  We will be rearranging all the plumbing in our master bathroom; replacing the fixtures; tiling the floor; removing 3 walls in the kitchen; dining; and family room areas; moving a 4th wall over 2 feet and moving the doorway;  switching the kitchen with the dining area; gutting the space to the studs and starting over!  I’ll be without a kitchen and main floor bathrooms for quite awhile.

Kitchen Before (Current)

Kitchen Before (Current) The little wall with the 2 windows is leaving.  It’s only job was to hide the sink (now in the island) from the living room.  This space will be the new dining room.

Current view from the living room

Current view from the living room.  Old kitchen; new dining room.

Kitchen before (current) view 2

We will remove the island, the cabinets and walls between the dining room and the kitchen making this one huge space. The wooden door you see here leads to a walk in pantry.  This is all leaving too.

DSC_0242

View from the doorway beside the current refrigerator. Old dining room, will be the new kitchen.

Coffman 032713 5

The plan–After removing the center wall separating the kitchen from the dining room and making it all one big room. For reference the new refrigerator will sit approximately the same place the old freezer is (the one right next to the doorway.

We actually have a budget this time from the sale of our other house, but it is about 1/3 of what a normal person would plan to spend on such a project.  That means we will have to do a lot of it ourselves; shop used; and decide which parts we can cut back on.

http://camilleroskelley.typepad.com/simplify/2012/04/the-house-house.htmlWood-look porcelain tile--trying to make this fit into our budget to floor the whole space

http://camilleroskelley.typepad.com/simplify/2012/04/the-house-house.html
Wood-look porcelain tile–trying to make this fit into our budget to floor the whole space

We started by having Lowe’s bid the kitchen with their lowest cost cabinets.  They were still plenty nice and the bid came back $29,000 including their discounts and uninstalled!!!! Um, that’s almost our ENTIRE budget for the bathroom and kitchen.  Not going to work.  Next week went to Cabinet Giant and had them build in their TOP QUALITY cabinets.  That bid came out $12,000 with their discounts. Still a little high, but much better.  By switching the dark wood to a slightly lower grade cabinets, we were able to lower the bid to $7100, that’s more like it!

Our upper cabinets

Our upper cabinets

Our lower cabinets

Our lower cabinets

It turns out the color is even better for what we had in mind. We are planning a two toned kitchen with light upper cabinets (to keep the kitchen bright) with dark lower cabinets (for sturdiness and to add richness to the space.  We used these pins for our inspiration:

from: http://theenchantedhome.blogspot.com/2011/05/ultimate-kitchens-round-ii-and-better.htmlTwo-toned kitchen inspiration from Pinterest

from: http://theenchantedhome.blogspot.com/2011/05/ultimate-kitchens-round-ii-and-better.html
Two-toned kitchen inspiration from Pinterest

Another two toned kitchen found on pinterest

Another two toned kitchen found on pinterest

I’ve lived without a kitchen during our remodel at our previous home for about 6 months.  I washed dishes in the bathtub, cooked in the living room on a folding table with an electric griddle; microwave; and crock pot.  And blew a fuse (in the house, lol) almost every day.  Our current eating out budget is $35 a month, which doesn’t go far for the 8 of us. I’ll have to figure out how to continue to make all our meals at home.  I did it before and was pregnant for part of that time.  I know it’s possible, but it was horrible. Just the memory is enough to give me hives, lol.  I would have made a terrible pioneer.

Here's a current view of our dining room window.  (The only part of this remodel that makes me sad is I just painted this room and added molding.  This was before we knew that tearing down walls was possible.

Here’s a current view of our dining room window wall. (The only part of this remodel that makes me sad is I just painted this room and added molding. This was before we knew that tearing down walls was possible. The white balance is all off in this picture–the upper is light turquoise and the bottom is gray.


Here's a drawing of what it will look like after the remodel.

Here’s a drawing of what it will look like after the remodel.

Dining wall before

Dining wall before

Dining Wall After

Dining Wall After

We are moving this wall forward 2 feet from where it stands now. My laundry room is behind this wall and is 17 feet long but only 6 feet wide. (Another post on what it looks like will come later.) By moving forward the wall, I can divide the room into a laundry room and pantry. The new door will be across from my washing machine and will leave the pantry side completely available for shelving. I’d love the move the wall even more, but the dining room window is in the way. I’m hoping to make the doorway arched like this:

Arched Doorway (almost the same floor plan as ours, but a different style--and our ceilings are only 8 foot.)   Picture from Southern Living

Arched Doorway (almost the same floor plan as ours, but a different style–and our ceilings are only 8 foot.)
Picture from Southern Living

This one has the doorway on the opposite side, but the colors and style are more like what I'm hoping for our space. From Traditional Home: http://www.traditionalhome.com/design_decorating/kitchens/kitchen-update-pay-back_ss16.html

This one has the doorway on the opposite side, but the colors and style are more like what I’m hoping for our space.
From Traditional Home: http://www.traditionalhome.com/design_decorating/kitchens/kitchen-update-pay-back_ss16.html

Garage Side Wall Current

Garage Side Wall Current

Garage Wall After

Garage Wall After

Since I will have a huge pantry on the other side of the wall, the cabinet pantry will become my new command center. People like me should not have a desk in the kitchen–it will always be covered with an unsightly pile. I’m imagining cork boards and chalkboards on the back of the cabinet doors, with mail sorters, pencil cups; and file boxes inside. I’ll keep track of our schedules, important papers; appliance instruction books; and items to return to others in there.

Chalkboards inside cabinets from 11magnolialane.com

Chalkboards inside cabinets from 11magnolialane.com

Cork Boards Inside Cabinets From Younghouselove.com

Cork Boards Inside Cabinets From Younghouselove.com

There’s more to tell, but I’ll save it for another post :).

Thrift Store Finds

I took a short break one day last week and ran to the thrift store by my home.  I took with me a trash bag of donations.  There wasn’t a lot–a king duvet cover; a nice woman’s shirt that was too small; a curtain rod and a pillow.  They gave me a 30% off your entire purchase coupon to use that day and a 20% off coupon for another time.  Woo Hoo!

I was looking for a new purse in a spring color.  A pair of jeans that didn’t scream, “I’m a mom of 6.”  And anything I might be able to wear for Easter–also Easter things for Heidi.

I found:

DSC_0127

A tankini top that fit wonderfully.  It was $2.99 regular priced.  I have a whole bolt of black swimsuit fabric that I got at a garage sale that is begging to become matching bottoms.

DSC_0122

A bag of plastic fruit.  This is the realistic kind that mature ladies use in bowls on their counters–not really meant for toys.   But I bought it for toys since it looks so real :).  Regular price $1.99.

DSC_0121

This one is hard to show without modeling, but it’s an amazing tank top with a draped neck and ruching and studs on one shoulder.  It still had the brand new tags on it.  Regularly $7.99.

DSC_0119

I found both these bags.  One will be the perfect spring purse ($4.99) and the other holds my scriptures for church ($1.99).  So fun that they are the same color but one is printed.  I haven’t had a new scripture bag since I was 12. Turns out they also match my diaper bag–it was meant to be.

DSC_0120

Then I found this adorable top that will be perfect for work. $7.99–seems brand new.

DSC_0118

And not sure what happened to the picture, but I also found a pair of jeans (Maurices) in low rise boot cut ($7.99).  It’s hard for me to wear skinny jeans when boot cut does such amazing things for my figure.  But I did get a lighter wash this time (mainly because it was my only choice, lol.) But it does look nice and Springy–although the darker wash was more slimming.

I did search for Heidi but came up dry.  She’s a hard one to buy for.  I found her Easter dress at Target (see previous post for pictures :).)

Easter Sunday

I’m not very good at taking pictures and don’t have a shot of their Easter baskets.  I bought plastic bucket style baskets at Walmart for $.97 each. They look just like ice cream tubs but say Happy Easter and have spring things on them.  I intended to sew covers for ice cream tubs I already had on hand, but I decided it was better to be cheerful and sane and have dinner on the table.  (My 10 year younger self would have made a different choice, lol.)

DSC_0172

The tubs were all the same so I bought a different color of plastic grass for each one.  They will turn these items in in the morning and I will stack everything into my spring bin for next year so I don’t have to spend the money on it again.

Heather Easter 2013

I filled their tubs with:  silly string; bubbles; assorted chocolates from Dollar tree; Easter theme pencils; matchbox cars for the boys; and hair stuff for the girls.  They had choir practice early this morning so instead of hiding them, I stuck them right in front of their faces so when they woke up it was the first thing they saw.  It was very effective–almost more fun than a hunt.

Heather and Heidi Easter 2013

The Easter photos are on the porch at Mom’s house.  Heather’s dress came from Costco ($16.99) and Heidi’s came from Target ($20.00 on sale.)  We also bought Heidi a skinny belt to got with the dress and she wore her shoes from last year.  We would have all been happier if Heidi’s dress was about 3 inches longer.  Hello, Designers.  Are you listening? It was 3 inches longer than the other dresses being shown.

Angela and Darren

I wore a skirt I ordered from Kohl’s when they had 20% off their sale prices plus free shipping.  If I had shopped for it in store I wouldn’t have purchased it because the fabric is so thin that it shows every lump.  I had to iron my slip because the wrinkles from being in my drawer showed through! I love the stripes though.

The tank has lace at the top and bottom and was from my maternity pile (though I don’t think it is a maternity tank.)  The sweater came from Target last week ($15 on sale.) And the shoes I’ve had for years but rarely wear them since they are linen and I’m afraid to get them dirty.  I wore these footbed sock liners with them instead of hose and they were very comfortable all day and not at all sweaty.

Heidi and Heather

It’s hard to see but I found a huge coral stone necklace at Forever 21 that was the inspiration behind the sweater and them some white stone earrings in a similar style at Target.  Anyway, this is probably the most I’ve purchased for Easter–we usually sew and don’t go for jewelry much, but it was a nice change of pace this year.

Grant Hunting Eggs

The boys weren’t into dressing up and since I’ll being buying Brandon (5) a black suit in June to be a ring bearer, we held off on the new stuff right now.

We had a lovely service at church with the children’s choir and adult choir providing ministry.  Darren was an advanced greeter (code name for the security team) so spent the service standing outside wearing an ear wig to make sure that everyone inside was safe.  That left me juggling the children and I’m glad I sat in front of my brother who could grab Brandon by the neck when he got squirrely after I left to take Grant out.

Dub and Grant

After that we headed to my mom’s with my brother and his family for a roasted chicken dinner with scalloped potatoes; homemade rolls; fruit salad; lettuce salad; cheesy broccoli; green beans; and 3 kinds of dessert.  Plus all the chocolate candy we could want.  And I didn’t cook any of it, although I did set the table with my Sister in law’s help.  (Does that count for anything to keep me from total slacker status?)

DSC_0210

It rained a lot yesterday, so Mom planned an indoor egg hunt.  Each child had a unique color egg to hunt for.  That way we could hide the eggs simply for Grant and super challenging for Heidi.

Heather

After the egg hunt we sat around in the living room and took turns talking and napping until the evening was well on.  The children spent the entire time playing out in the yard leaving the house quiet and perfect for adult conversation.  Interesting that not one of them came in muddy after all the fuss of having an indoor egg hunt, lol.

Happy Easter to you and your Family.

Jesus is Alive and is preparing a place for you and me, our loving advocate with the Father who has won the victory!

The Cookie of all Cookies?

I found this pin:

Source: vintagerevivals.com viaAgnes onPinterest

And the description said: Swig Sugar Cookie Recipe. This is the cookie that all other cookies for the rest of your life will be compared to.
So I had to bake it and find out. I tell you, it was hard not to change anything about the recipe. It’s completely out of character for me. I’m not sure I have ever followed a recipe exactly before, ever.  I even went to the store to buy real full fat sour cream, just so it would be perfect.


The dough came out super fluffy and so easy to work with.  Not sticky at all.  And my cookies ended up just like the ones in the picture above (except that the photographer was not nearly as gifted :).).  I put them in the freezer, so they would be cold (like the recipe insists–and yes that was a great idea!)  Then mixed up the frosting and set out for folks to DIY on their cold cookies.

DSC_0129

Next was to round up a house full of taste testers.

DSC_0135 DSC_0140 DSC_0141 DSC_0134 DSC_0132 DSC_0131


DSC_0136

DSC_0137

The verdict:  These were really hard to stop eating.  Maybe because I told them they were the cookies to compare all cookies to, and no one could decide if that were true after just one cookie.  While everyone decided the cookies were excellent, it was hard to say they were better than a really good chocolate chip cookie.

We had lots of frosting left over and  I wondered if the recipe could be improved on.  So Sunday afternoon we made a new version of the cookies in a smaller batch:

1/2 cup softened butter

1/2 cup Greek yogurt

2/3 cup white sugar

1/3 cup powdered sugar

1 egg

1 Tbs vanilla extract

1/2 tsp baking soda

1/2 tsp salt

1/2 tsp cream of tartar

2 1/2 cups flour

Cream the butter, yogurt, sugars, vanilla  and egg until light and fluffy.  Add remaining ingredients until a soft dough forms.  Drop by Tbs onto a greased cookie sheet and press flat with a glass dipped in sugar.  Bake at 350 degrees for 10 minutes.  Cool on a rack then freeze until cold.  Frost as desired.

The verdict:  The finished cookies looked almost exactly like the original.  The flavor was much better (and they had half the fat of the original cookie),  but the warm cookie texture was not quite as good.  The texture improved a lot after cooling and then again after freezing.  They ended up with a nice crisp edge with a soft interior. The vanilla was an excellent addition.  The dough was not as easy to work with–it was a lot more sticky.  Chilling a bit would have helped this.  If we bake them again, we will use our second recipe–they went over smashingly with the family who wished I had baked a bigger batch :). And I STILL have frosting–so looks like more baking in our future.  Look out kid’s at school–we need a place to share all these cookies :).

Bountiful String Quartet Winner and Sponsor Love

We have a winner!  Chosen completely randomly by rafflecopter, Heidi Wiskur won a digital copy of Bountiful String Quartet‘s New CD.  I know she will enjoy that!

We are swamped with schoolwork at the Grocery Shrink house.  And I’m having too good a time cleaning, doing laundry, and catching up on my mending basket to blog.  Oooooh, and I got a new laptop! Darren accidentally dropped my old one and while we got it to come back on, it wasn’t working quite right.  He came home with a mac instead.  It’s quite an adjustment but I’m already in love.  I told him, “once you go mac, you’ll never go back, lol.”  Now I’m trying to figure out how to buy him one too.  But until then I’m figuring out how to use this thing :).

I’d also like to give a shout out to my Sponsor’s:

First is Sandi Sullivan at MomCEO.com If you are looking a way to earn money from home while using natural cleaning, beauty, and nutrition products, you should see what she has to offer!

Next up is Your Jamberry Nails Consultant, Heidi Perkins.  She can hook you up with fashionable and long lasting nail decals.  I tried them out personally at Christmas time and loved them.  The company has since improved them to make them even easier to apply!  And the designs are buy 3 get 1 free.  Think how popular you would be at the next slumber party!

fityummumummy 2'

Of course, there’s our favorite personal trainer, Holly Rigsby from Fit Yummy Mummy. Holly’s program is designed especially for the busy mother who’s willing to trade in hours of cardio for 90 minutes of her specially designed workouts a week.  I took the plunge 18 months ago and will never look back!  Goodbye belly.  Hello muscle.   I write more details about my Fit Yummy Mummy journey over at my second blog:  Centsablyfit.com

breadclass.com 2If you are a beginner and want to bake light, tender 100% whole wheat loaves of bread. Then Breadclass.com is the place for you. Lori Viets will teach you in her easy video lessons how to save money and bake your family delicious and healthy bread.

GSP Button2Don’t forget about Grocery Shrink Plus.  Where members download weekly meal plans that include 7 days of breakfast, lunch, dinner and snacks; gluten free and dairy free modifications.  Helps for the Fit Mama; a shopping list; a meal plan at a glance and an action plan at a glance.  You won’t believe your eyes when you see how affordable it is!

And then there’s Swagbucks.  Swagbucks is a search engine similar to Google, except they pay you in swag bucks for using it.  You can trade your bucks in for gift certificates to places like Amazon and Target.  There’s no adware and they don’t sell your email address either.  It’s the real deal.

Then there’s Zulily.  Zulily is a bulk buying coop for baby, maternity, lady and kids stuff.  Since it’s a limited time bulk deal, they can offer reduced prices.  Just recently I bought 2 spring jackets for $15 each and a stretched canvas wall art for Heather’s room remodel.  I’m just in the planning and gathering stage for this so far :).

One kings lane button

One King’s Lane is like the zulily for home decor.  I haven’t actually ordered from them yet, but I love to get their emails and look for ideas.