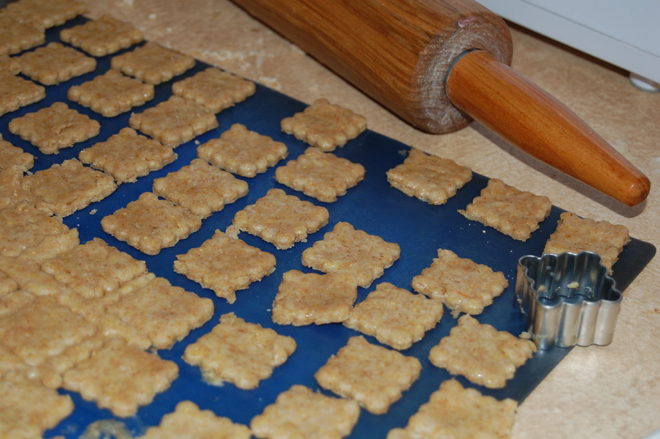
(This recipe was originally published in June 2009) I love Wheat Thin crackers. I’ve tried lots of recipes on the web, but never found one quite like the store bought kind. Last night, in the wee moments before falling asleep, I realized the box has the recipe practically on it! I took the ingredients off the box, which are in order of amount, and then typed them into the nutrition calculator at www.sparkrecipe.com. By multiplying the nutrition amount by 10, I was able to build a recipe for serving 10 people.
I made a few changes in the recipe, substituting sugar for high fructose corn syrup and malt syrup. I also decreased the amount of all purpose flour and increased the amount of whole wheat flour. I left out the corn starch and increased the amount of wheat germ, using raw wheat germ for the defatted germ on the label. We baked them today and they tasted very close to the original, only healthier. Next time I’ll roll the dough thinner and they’ll be perfect!
3/4 cup all purpose flour
3/4 cup whole wheat flour
1/2 cup wheat germ
1/4 cup sugar
3/4 plus 1/4 teaspoon salt, divided
2 teaspoons baking powder
1 tablespoon soy lecithin (optional)
1/4 cup vegetable oil
1/2 cup water
Combine the first & ingredients (saving 1/4 teaspoon of salt). In a separate bowl, combine the oil and water. Make a well in the center of the flour mixture and pour in the oil mixture. Lightly mix until a dough forms. Divide into 2 balls, wrap each ball in plastic wrap and chill for an hour.
Roll one ball 1/8″ thick. Cut with cracker cutters or a knife. Poke holes with a toothpick or kabob skewer. Sprinkle with the reserved salt. Bake on a silicone baking sheet (or greased cookie sheet) at 375 for 12 minutes. Cool completely. Bake again at 375 for 7 minutes or until crackers are crisp.
Happy Monday! Here’s a quick and healthy recipe. It’s so easy a 6 year old can do it. The obvious choice is to have these for breakfast, but the waffles sometakes make an appearance around here for lunch or dinner. This is the first recipe I have my children cook when they are learning. Flipping food on the griddle can be tricky to find just the right length of time to cook on each side, but the waffle iron cooks both sides at the same time and is self-timing. It’s instant success with a smaller risk of getting burned. After that my kids have the confidence to try something a little harder.
French Toast Waffles
Plug in your waffle iron to warm up, and coat with non-stick spray or butter.
Mix 2 eggs and 1/2 cup milk in a shallow bowl, mix well with a fork
Dip 100% whole grain sliced bread in the egg mixture on both sides. Place the bread in the waffle iron, close the lid and wait for the ready light to come on. Enjoy!
This works with almond milk if you are dairy free, and gluten free or sprouted bread works too.
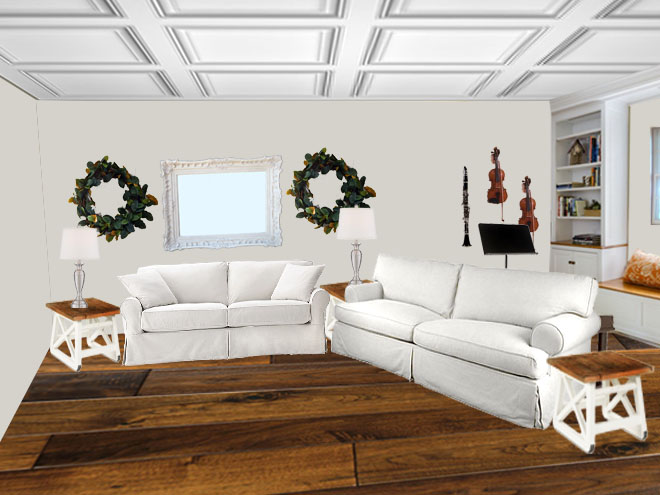
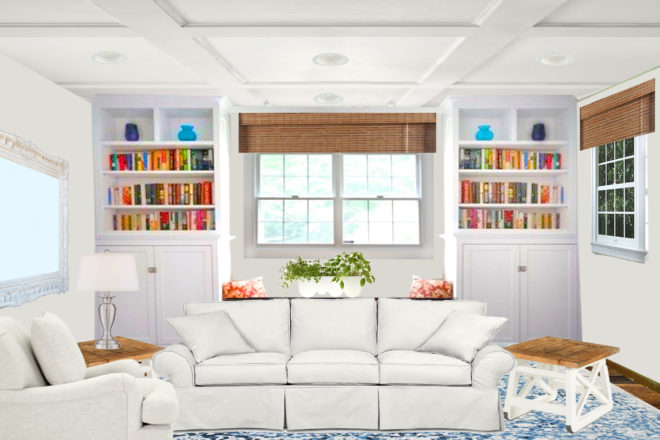
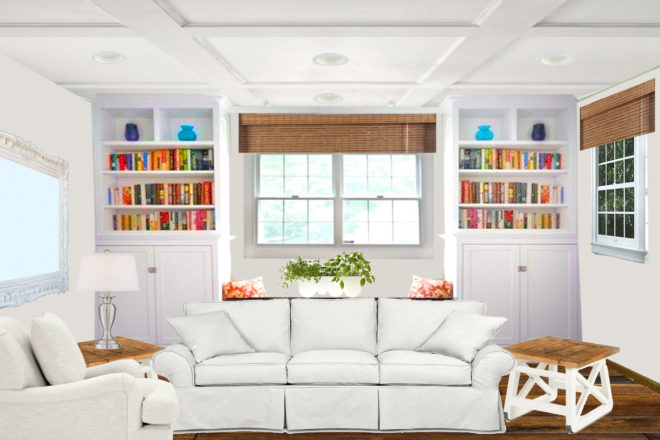
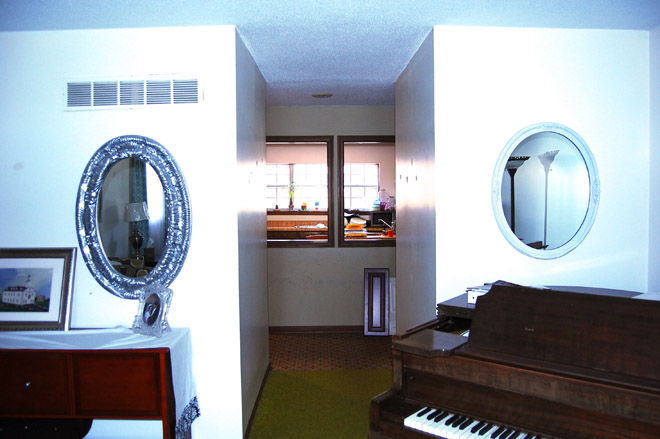
The electrician will be here in just a few hours. While we wait, my living room is in the virtual fitting room of internet rugs. For the before picture, I used a wide angle lens clipped onto my iphone to try to capture more of the space. It worked, but the lines are off, curved and wonky, giving the room a lopsided, tipsy appearance.
The room is 20 feet long AFTER the built ins are in place so there will be more enpty space to the left than the pictures show (I blame the angle of the sofa.) I’m not aiming for perfection though, just a hint of reality so I can choose a rug with confidence. It reminds me a bit of trying on clothes when I didn’t take time to put on my makeup, fix my hair, or wear enough spanx. It takes more imgaination :).
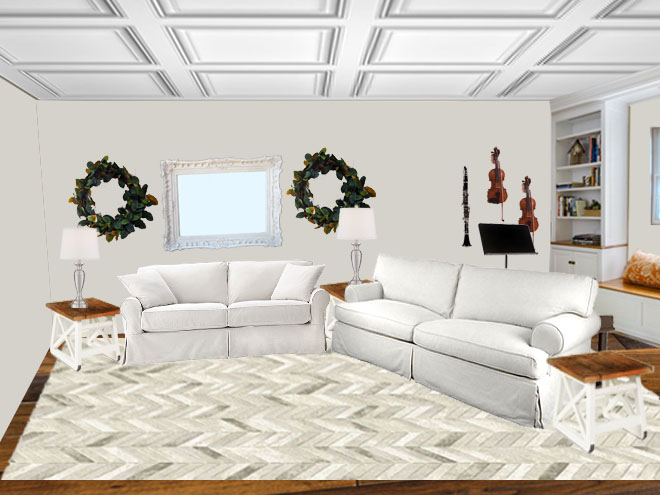
The room doesn’t have proper pillows or art and feels rather stark. I mounted some of our instruments on the wall to fill in blank space. I think we would play more often if they were easy to just pick up and play, and amazon offers wall mounts for almost any type of musician. While I wait inspiration to strike on the cozy details, I’m going to ignore the mess and see if a rug strikes my fancy. First no rug. This view works best with my budget, ha ha.
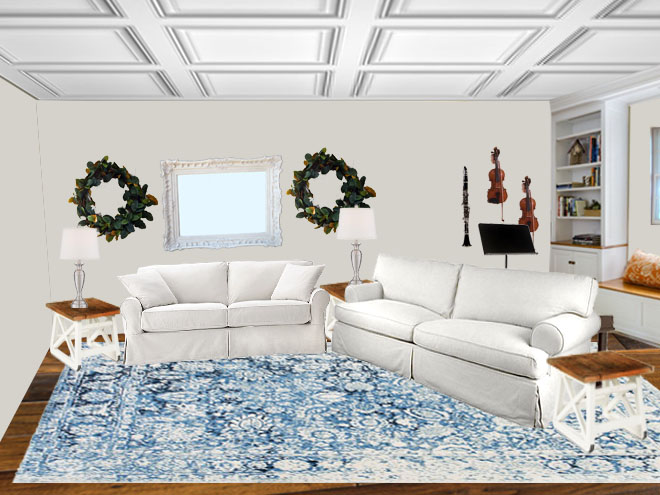
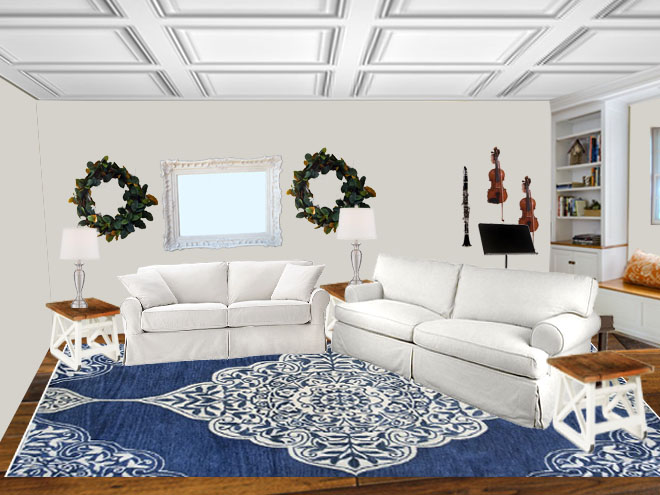
Then the blue rug that was overwhelmingly the favorite in the last poll.
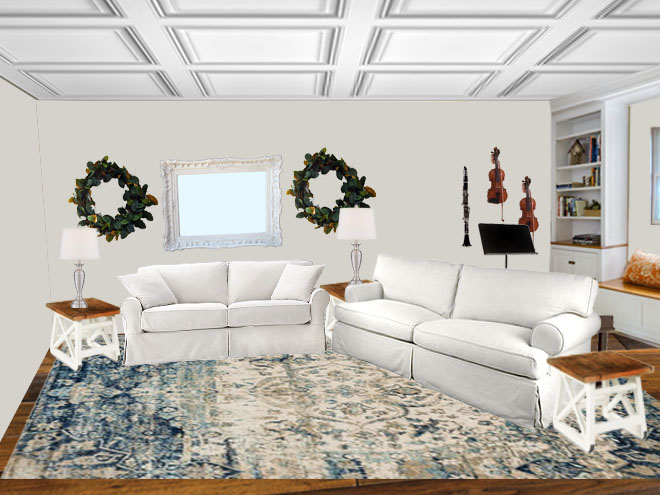
Here’s a new one that missed my search before because it’s WOOL. It’s loops instead of tufts which sheds a little less, but still stains with food coloring.
When I see the right area rug, it grabs me and I know. Sometimes it’s the 10th time I look at it, and sometimes it happens AFTER I’ve seen all the other options to be sure. While the expense of an area rug isn’t a trifle to us, I know if I make a big mistake, I can sell it on Craigslist, or trade it with a rug ina different room. I’m still waiting for that feeling to come. The Memorial Day sale is a really good one, but there will be a good one on the 4th of July too. I don’t mind waiting if that means I’ll make a better choice.
I made a little video for you, showing all the rugs in succession. Sometimes looking it at it like that makes it easier for me to choose!
A gigantic white canvas scares me. It is full of possiblities but begs me to choose just one.
I’ve been dreaming for years of what I would do when I got the nerve to buy a big blank canvas. I have a pinboard full of ideas simply for a big blank canvas, but I didn’t have the courage to act on any of them. Then my neighbor put a 30×40 canvas out at his garage sale. For just $10 I could own it, still in shrink wrap. So I bought it. Step one, Dream. Here I come.
I leaned it against the wall in my room and refused to hear it mocking me. I wouldn’t make eye contact. I wouldn’t let it see my fear. Dust came.
Cutting Edge Stencils invited me to look through their website and pick something to share with you. I chose the Feathers All Over pattern. Step two, Dream. Here I come.
I set a deadline. I told myself that if I hated it I could paint over it as many times as I wanted. The stencil arrived gently rolled in a triangle tube. The stencil was huge and sturdy. The packaged also included a high quality stencil level, brush and foam roller. I had everything I needed to begin. 1…2….3…jump….maybe tomorrow.
The deadline loomed and so did a fever. I took to my bed and slept amid sweat. My oldest daughter asked if there were anything she could do. I offered her the canvas. She and her friend mixed and striped the base with just one blue. Black made it darker and white took it the other way. I didn’t watch, I just let them do. “Don’t worry, Kids,” I reassured. “It wasn’t expensive. It’s just paint. If it’s awful we can paint over it.” I gave them the courage I didn’t have.
They laughed and chatted while they painted and timidly invited me to inspect their work. I ignored the splotches of paint on the sheet draped carpet. It was perfect. No longer white, the canvas didn’t mock. It invited and encouraged. I taped up the stencil and poured shimmery gold paint into a tray. It was runny and old and separated. I stirred it with the end of the foam roller until it looked uniform in the pan. Then I paused. This was too easy. I took down the stencil and measured and centered. I had it right the first time. With new confidence, I filled the roller, then matted it off on a clean part of the tray. Rolling over the stencil, the paint refused to cover the rich blue ombre. I rolled again, covered again. It twinkled and winked. I overlapped the stencil beside the pattern and rolled again.
Then it was done. A few minutes of labor and the dream stood before me in it’s flawed glory. The too thin paint, gone over too many times, stood in the gaps where blue should have been. My 8 year old son stood beside me and breathed, “It’s beautiful.” I pointed out the ooze and he said, “That’s why it’s beautiful. The flaws tell you a human being did this. It adds value.”
While my teenage son was away at Scouts, I snuck in his room to make ready the surprise. Armfuls of smelly socks and dirty dishes moved to appropriate wash stations. New sheets, fluffed up feather pillows, dusting spray and a vacuum cleaner, removed the stress of the school year. Two nails, measured with one eye, made a resting place for original human art. The canvas asked for one thing more, a ribbon or strip of wood to hide it’s stapled edge. I promised I would, but not yet. The boy would be home too soon….and then he was behind me, gasping his delight and approval. 100 plans came to his mind to tidy up more and decorate more.
The painting teens made a little video of the ombre backdrop. I tried to film the stencil rolling, but apparantly I turned off the camera when I thought I was turning it on. It really was just like rolling paint on a wall. I only wish I had used less paint, or thicker paint and let it dry between coats.
I have a really special art project for you tomorrow, that anyone can do, even without artistic flair. I’m partnering with Cutting Edge Stencils for the project and my kids helped make it. It’s not perfect, but we love it and can’t wait to show you…tomorrow ;).
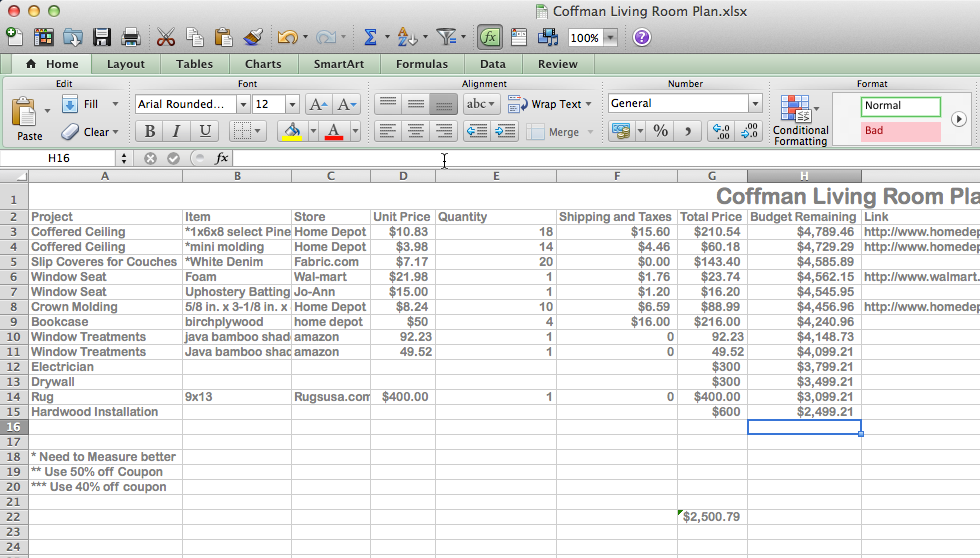
Over the weekend I started using Excel to write up a source list and budget for my living room project and reality hit me full in the face. I have enough money saved right now to pay my workmen, and not much more. That means the coffered ceiling and my rug will have to wait. I’m listing some stuff on ebay and craigslist to see if I can earn enough for the wood for the built-ins.
I made a little video for you to show my process of setting a budget for a room:
The lack of cash doesn’t stop me from dreaming though! I like to have the ideas decided on, so when the cash comes available and the DEALS roll in, I’m prepared to take advantage of them. There’s nothing worse than a panic of “It’s on sale, but I don’t know which one I want!” I don’t like to be pressured into a too quick decision on something I might have to live with for years.
I’m looking for a new area rug for the living room since the old one has found a new home in my office. My first area rug was 100% wool. I chose wool, because it was natural and thick and plush. Plus my husband’s grandmother bought wool carpet for her home 60 years ago and it still doesn’t have paths worn in it like synthetic carpeting would. What I didn’t count on, was the SHEDDING. It’s like we have 5 cats and the fibers make dust bunnies all over the house. On top of that food coloring is permanent wool dye. So when the toddler came wandering in the room with an orange popsicle dripping behind him, there wasn’t anything I could do about the stain it left behind.
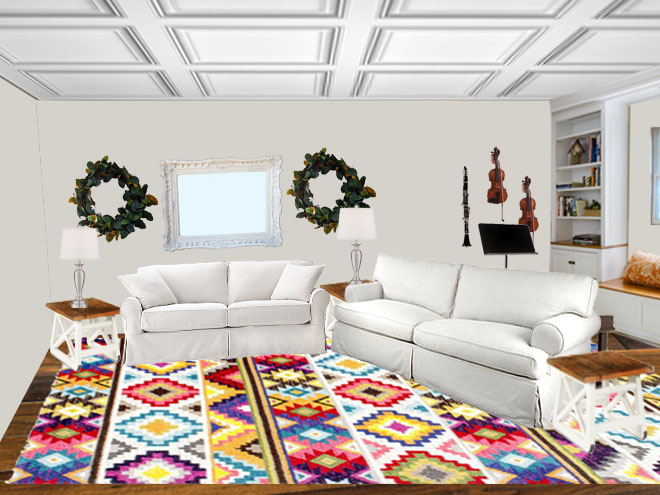
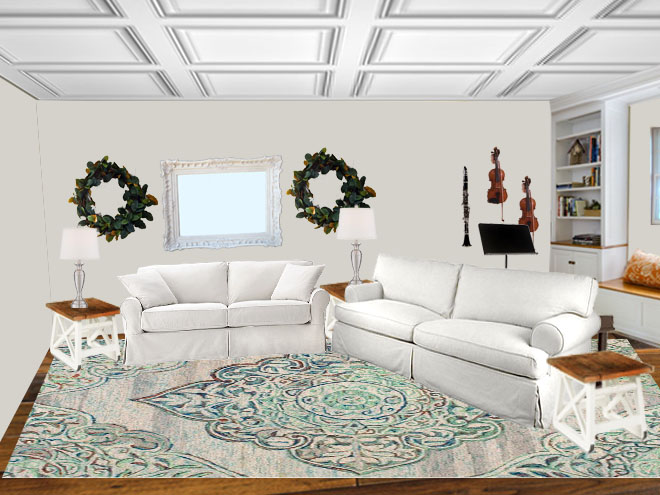
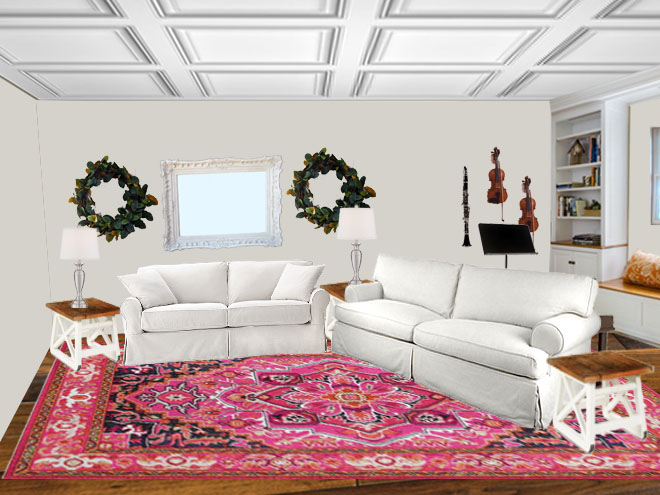
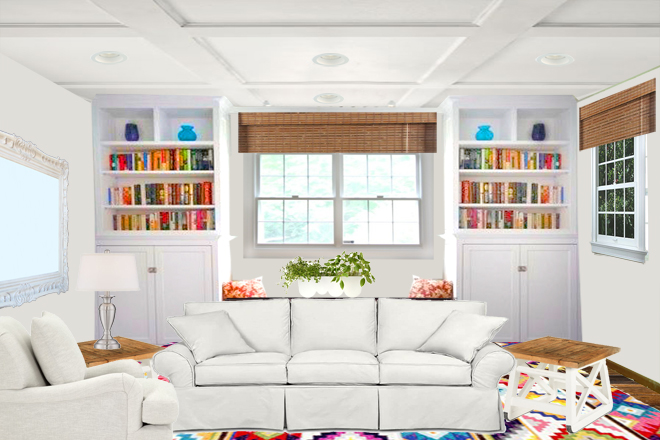
I’m shopping for a syntheic rug this time. I love the bold colors in the Albina Ritzy Retro Rug, but am not sure how long I will love it. I tend to get tired of bold patterns really quickly, but this one is tempting. It’s on sale for Memoral Day for just $245 for a 9×13. That’s a really great price for a huge rug.
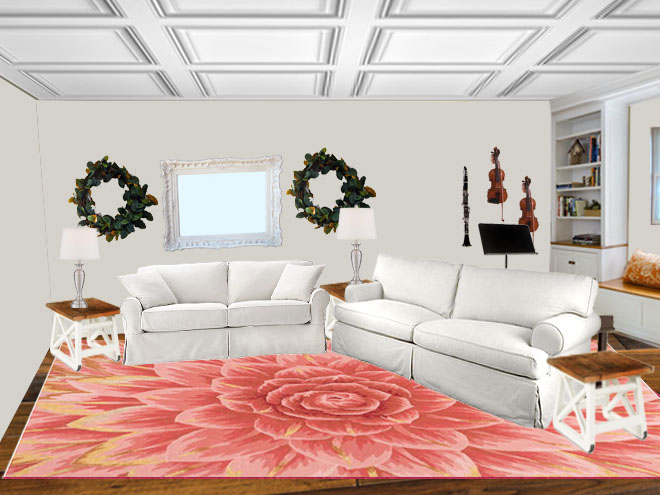
My other favorite is the Aerial Decorative Plumes Rug. It’s a little pricier at $320 for a 9×12. But the more subdued color pattern might be a longer lasting favorite for me. There’s not much rug to show in this view of the living room, but here it is with the blue rug:
and with the colorful one:
I’ll see about making a different view of the room where more of the rug shows. I don’t think there’s enough here to make a decision about. BUT I love how the multi-colors work with the books on the shelves. And I equally love how calm the blue rug is in the room.
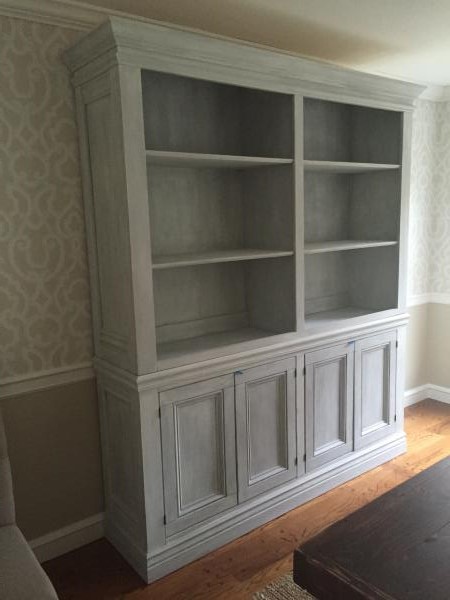
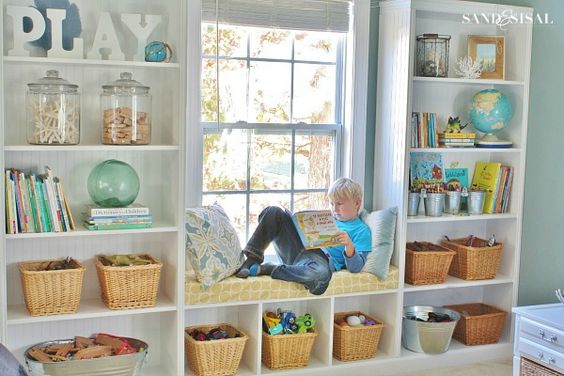
I found a tutorial at ana-white.com for bulding my built-ins! The original is 73 inches wide, and I need each of my units to be 48″ wide. I’ll only need to adjust the lengths of the horizonal boards and will use 2 doors instead of 4. Also, I’ll construct the cabinets as stand alone furniture like the plans suggest, but I’ll wait to add any trim or crown molding until it’s in place in the room. That way the baseboards and crown for the room can continue seamless around.
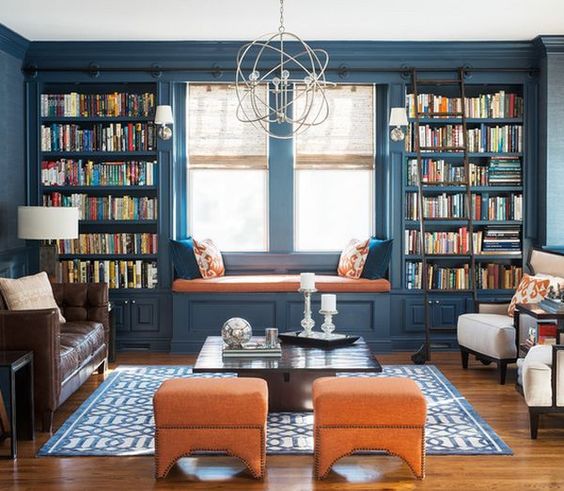
Here’s another version painted white with gray glaze. I plan to do mine crisp white.
Do you have a preference for which rug I choose? Is there another Rug that you think might work even better?
This week’s frugal Friday has been pre-empted by the need to finalize a room plan before the electrician comes next week!
I need to commit to a design so I know where to place the lights, and I’m hoping you’ll look at this and help me see the flaws before it is too late.
Here’s a 36 second video showing the changes.
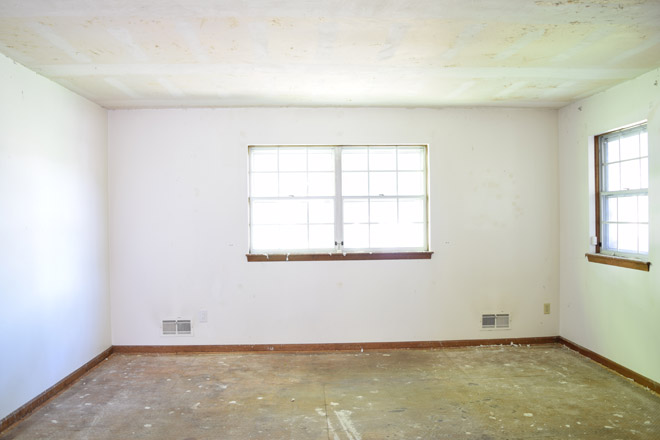
For those who don’t like video, here’s the before photo again. You’ll notice there are vents and electrical to work with. I plan to use this tutorial.
and here’s what it would look like with the flooring paint, coffered ceiling and built ins:
For those who prefer video, I made a little longer one with verbal explanations. The piece behind the sofa is our little piano . It’s about 3 feet in front of the window seat to soak up all the light from the window and make a little sitting area on that side of the room. That should center the larger seating area across from the wide entrance into the room from the foyer. The few here is as if we were standing in the dining room/kitchen looking in.
Darren said if I go with the built ins, I need to make them so they will be removeable with minimal damage and be useful as furniture in another area. My research told me to place recessed lights 3 feet from the corners and then 4-5 feet apart after that…..so would that be from the room corner so if I remove the built ins it still looks ok, or from the corner of the built ins after they are finished? What would you do with the lights?
My electrician is coming early next week to install recessed lighting in the room. Before he comes I need to make some decisions about the direction the room will go, so I know where to put the lights. Currently this is our music room/formal living room. It’s where I take grown up company when we want to be able to hear each other over the noise of the children. It’s also where my children practice the violin and piano, and where I teach voice lessons. I could see it turned into a formal dining room at some point.
The room is approximately 20 x 15 with 8 foot ceilings and 2 small windows. The smallest window looks out onto the covered front porch and never gets direct sunlight.
The only architechtural interest in the house is a beautiful curved staircase. There isn’t any crown molding, or interesting wood in the rest of the house. I’d like to fix that.
Here’s what I’m starting with. It looks nice and bright because I used a tripod and a really slow shutter speed to grab as much light as possible.
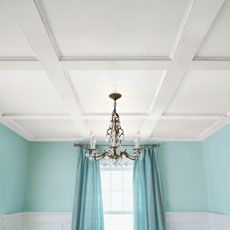
I’m definitely putting crown modling in the room, but am wondering if I should add a little more interest with a faux coffered ceiling? I can use 1x4s to add texture without lowering the ceiling very far. I’ve seen tutorials that just use the 1x4s but I like how This Old House adds small molding to the inside edges for a really finished look.
Here are my 2 delimmas with the built ins….I have ducting and electrical on the wall (but I think I could pop those out to the front of the built ins pretty easily with a solid platform) AND they would limit my tall and wide dramatic curtain options. I think I would have to go with a simple bamboo shade hung just under the crown molding….I’m ok with that right now. But will I be ok with it long term? Built ins are not a temporary whim.
So why even consider the built ins? Here’s my reasons for them:
1. Storage (most of our books are still in the attic from when we moved 4 years ago)
2. Architectural interest
3. Cozy up the room (it’s really big and I think this would make it seem more welcome) It would also give me a reason to pull the sofa away from that wall to bring the conversation area closer together.
What do you think? Would you do the faux coffered ceiling? Would you put in built ins?
Hello! April and May have been some crazy months at the Coffman house. Today is the official last day of school for the public school Coffmans. Homeschooled Coffman will be done in another week, and private school Coffman has 1 1/2 more weeks. The next day I will lead my choir one last time for Graduation, and then I’ll be a FULL TIME blogger. It’s hard to wrap my mind around. I swing between being ecstatic about the possibilities for the future and crying about the loss in the transition.
Last week, we had a garage sale which raised almost $400 towards our living room project. We have so many projects on the list that I didn’t know which one to do first. Then the grand piano we were babysitting found a forever home, and it the living room it used to live in looked possible! We already have the flooring for that space, so the cost of doing the room will be less than any other space we could tackle. It was an easy choice.
This room is attached to our kitchen/dining area through a short hallway.
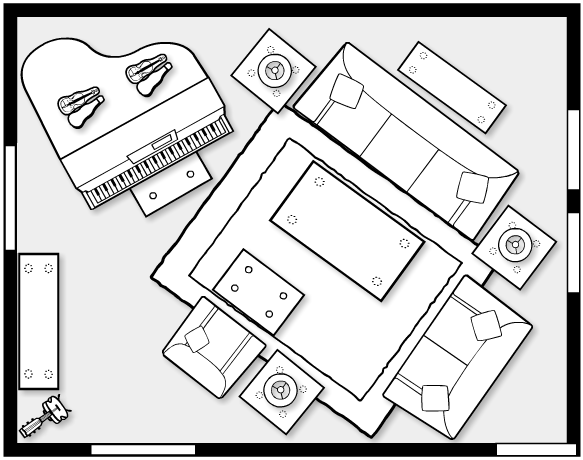
This was the original plan for the room 4 years ago, made on the Nebraska Furniture Mart website.
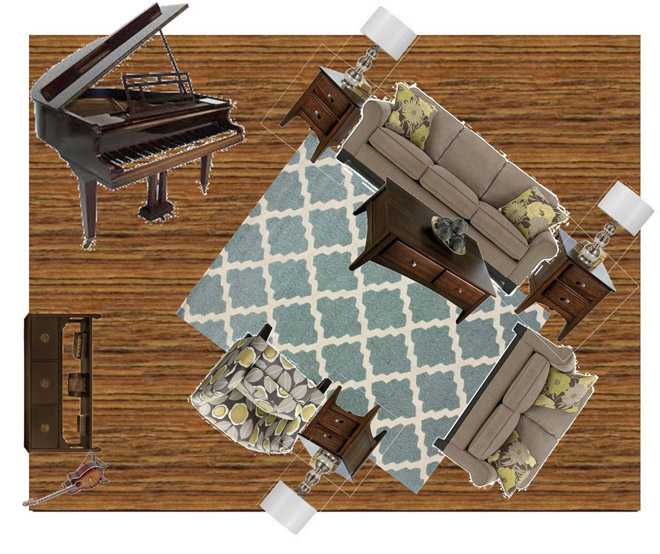
Then filled in with color via powerpoint. I was able to buy the rug and furniture back then and live in the space along with the 1971 avocado green sculpted carpet.
Before that the room was our bedroom! We had no doors for privacy and the front door opened up right beside us. There are no light fixtures in the space. That plus tiny windows and a low ceiling, made it feel very cave like.
I’m making a brand new plan for the space and I hope you’ll share your opinions. Our rug is now in my office and our furniture has scentsy wax on it and is full of nicks and dings. Even the “new” stuff needs some sprucing.
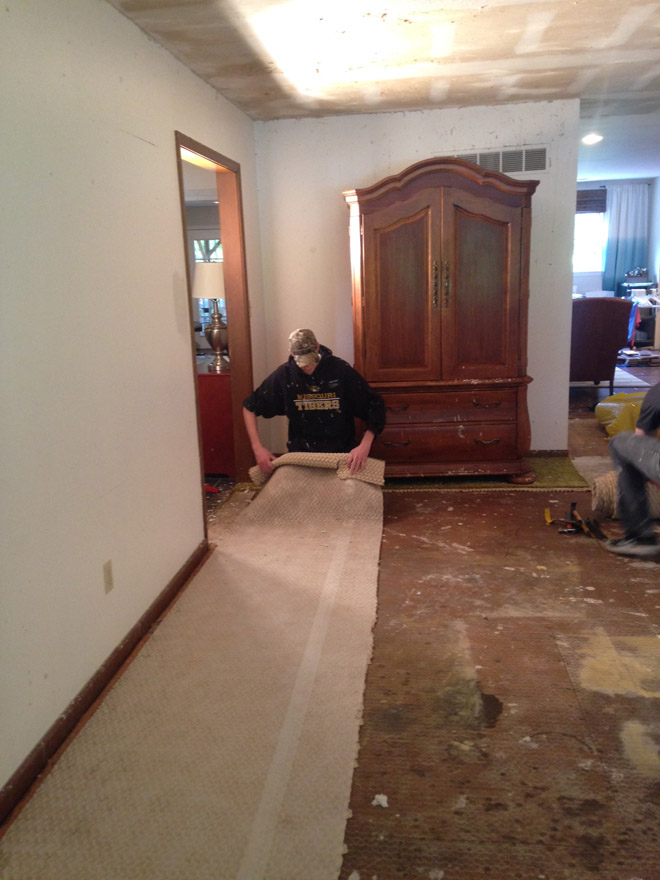
For now it’s demo day!
Our missionary friends came over and helped us remove the popcorn texture. It was REALLY messy! I took photos and texted them to their Moms. They don’t get to call home whenever they want, and I wanted their moms to know what hard workers they are.
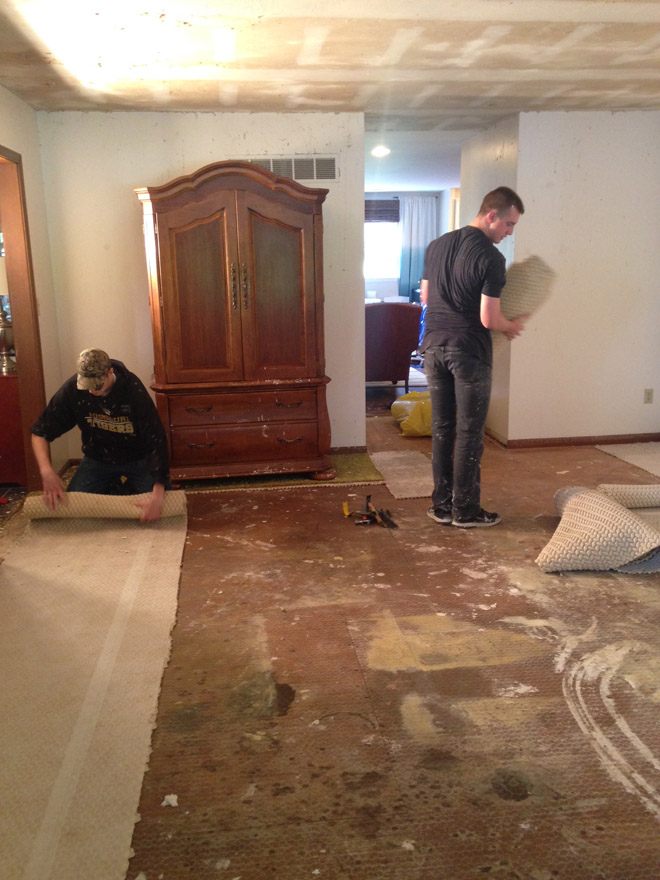
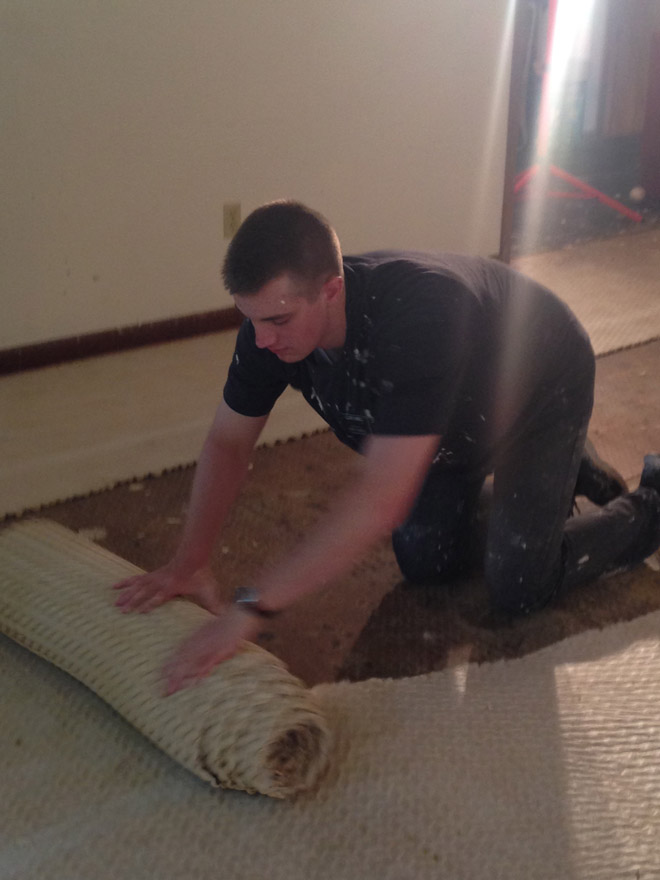
Then I fed them a really big lunch. By using the slow cooker to make the southwest chicken, the rice cooker for the brown rice, and the pressure cooker to make the dry beans, I could work beside them the entire time and still give them a home cooked meal for lunch. We had burrito stacks with chips, rice, beans, chicken, lettuce, cheese and condiments. After lunch, they helped me remove the carpet.
The trash service will take the carpet if it’s bagged. So we cut it into small enough pieces that it would fit in trash bags and stacked it in the garage to wait for trash day. I don’t know about them, but I’m exhausted. It’s a good thing I can make design plans from bed :).
This super simple recipe is so delicious you’ll need to invite friends over to prevent eating the entire batch by yourself! Avocado replaces the traditional cream cheese in these crab rangoon and enhances the flavor. That’s delicious news for dairy free freinds.
Prep time 5 minutes. Cook time 2-3 minutes per batch.
3/4 cup avocado mashed with 2 teaspoons of lemon juice and 1/2 teaspoon salt
Pour the vegetable oil in an electric skillet and heat to 350 degrees.
Meanwhile, In a medium bowl, mix the mashed avocado, crab, green onion, garlic, sugar, and soy sauce. Place a teaspoon of crab mixture on each won ton. Moisten the edges of the wrapper with a wet finger (keep a water bowl handy.) Press the edges together to seal in little bundles.
Deep Fry for 2-3 minutes or until golden brown, turning once. Drain on paper towels. Serve with sweet and sour sauce.
Prefer to bake yours? Place on a greased baking sheet. Spritz with non-stick cooking spray and bake at 350 degrees for 20 minutes.
I just got back from taking my High School choir to Silver Dollar City for a music festival. It was such a great trip! The kids behaved really well, and the parents that went along were a huge support. After singing in Silver Dollar City (and earning top honors…cough cough) we got to experience the ShowBoat Branson Belle dinner cruise. They had a magician comedian, tap dancers/cloggers, and a men’s vocal group that made the evening a delight.


 A gigantic white canvas scares me. It is full of possiblities but begs me to choose just one.
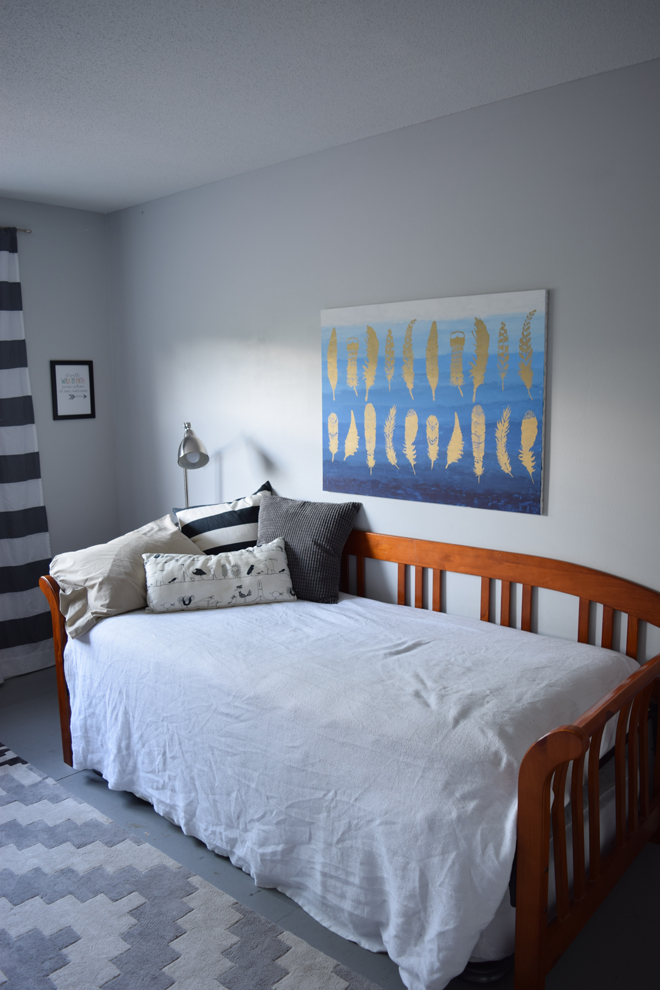


 I’m shopping for a syntheic rug this time. I love the bold colors in the


