The Good Girl’s Guide to Impulse Shopping

This post has some alternate titles, including:  Well, That Escalated Quickly and That Time I Went to Ikea

It can happen at any store. Target is especially troubling, but even the grocery store can be a culprit.  I’m there with my list, but I see something I need that isn’t on the list.  It would have been if I had known about it, but I didn’t know until I saw it just now.  I can leave it there and hope I forget about it, but I know I won’t.  I’d just have to make another trip back for it.  That would cost gas money and time, so I put it in your cart.

bullseyesplayground-hero

Photo Credit, Target Corporate 

It’s only a few dollars.

It would make a great teacher’s gift. I should get 2 more.

It’s adorable and would cost more to make it myself.  Besides, my time is worth something!

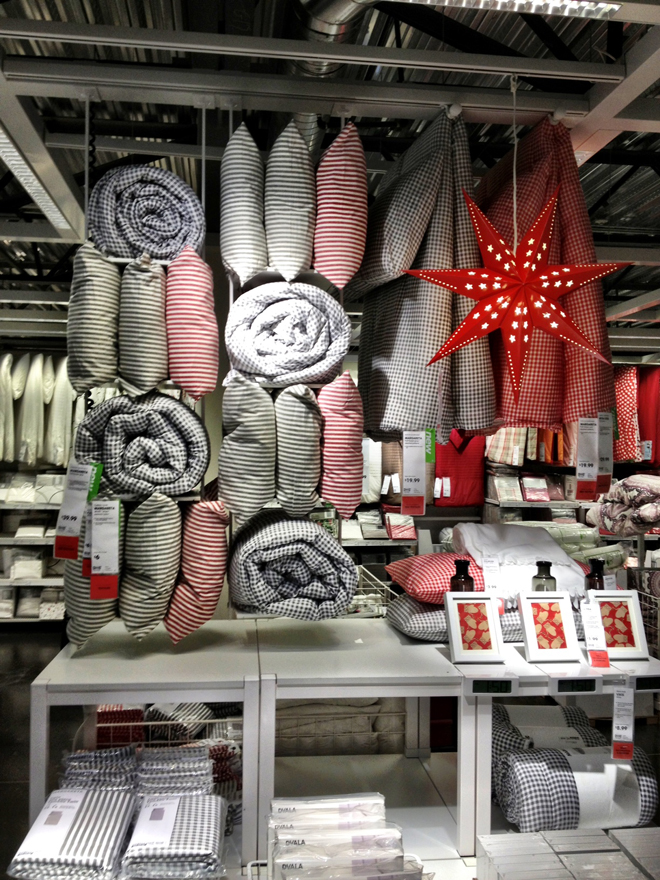
I’m especially susceptible when I’m shopping at a store that’s a long drive from home, like yesterday when I was at Ikea. If I change my mind, I can’t easily go back and buy something I left behind. Enter shopping anxiety. To make matters worse I had a save $25 off a $150 purchase coupon.  That was a genius move by their promotions department.  In my mind I was already willing to part with $125, and it didn’t take many impulse items to boost my total even higher.

ikea-christmas-bedding

Not all impulse buys are bad decisions. In fact, they can work in your favor if done properly. It’s not possible to plan any shopping trip perfectly from home.  You can’t know what the available options will be when you actually get in the store, so it only makes sense to make some buying decisions on the spot.  

When the cashier gave me my total I blurted out, “Well, that escalated quickly!”  How can a few $5-10 items add up to that much?  As I drove the long drive home, I second guessed my buying decisions, thought about what went wrong, and remembered how I usually avoided “total shock” at the register. I came up with these guidelines:

  1.  The money you have available at any given moment is FINITE.  Decide the most that you are willing to spend and have the cash on hand.
  2. Plan ahead the best you can.  Ikea has a great app that allows you to add items to a shopping list and it keeps a running total for you.  (It also lets you know which items are out of stock so you don’t waste a trip.)
  3. As you’re shopping keep your own running total on your calculator app of every item that makes it in your basket.  (Ikea’s app will work for this too, you can even barcode scan items in store and add them to your list.)
  4. Don’t forget to add room for tax.  Our tax rate is almost 9% but to keep it simple, I estimate an extra 10% of the bill.
  5. As you see items that should have made the list, decide what is already in your cart that you aren’t going to purchase.  Your total has to stay the same, so as you impulse shop, subtract something else from your list.  Some items are easier to wait on than others.  Some items are on clearance or are likely to sell out and not be restocked.  Use your best wisdom to choose between the buy nows and buy laters (with next months budget—after that paycheck comes.)  If I don’t need it immediately and it isn’t on special, it’s usually fair game for the chopping block.
  6. Keep the tags/packaging and your receipts!  If you get home away from the glittery atmosphere, have a snack and start thinking clearly only to realize you’ve made a terrible mistake, you can take it back.
  7. Remind yourself of the truth.  “Ikea feels far, but it only costs $4 round trip to go there.” “Before I saw this item, I never missed it from my life.” “If I can’t have this item, something even better will come along later.”

What do you think?  Do you ever struggle with impulse shopping or am I the only one?

Makeover Monday: Hide the Cords

Shelley contacted me two weeks ago wanting to spruce up her living room before her 9 children and all their grandchildren descended for Thanksgiving.  If that sounds daunting, it gets even more so.  After their children grew up, Shelley and her husband downsized their 5400 square foot home into a 2 bedroom double wide trailer in the country.  Then her good friend became terminally ill with cancer. Shelley spent the last few months staying with her friend to care for her until she passed away.  When Shelley got home and saw how everything fared while she was away, she was overwhelmed.

After I heard her story, I couldn’t help but love her heart.  I offered her smaller design packages to save her money, and she wouldn’t dream of it.  “I want the whole package–all of it.  And I want to pay.”  She also agreed to let me share her before and after pictures, even though privacy (along with speed) is part of the privilege of being a paid client. Heart of gold.

This is a good opportunity for me to share the details of what comes in a full package.

1. 2 pictures showing the new design
2. Shopping List with prices and sources within your specified budget
3. Step by step work list
4. 3-D furniture placement plan (video)

5. A Shared Custom Pinterest Board
6. One revision

At first Shelley was sure she wanted to keep all her original furniture.  I worked with her on that and showed her some slip cover options etc.  After rearranging everything according to the furniture layout plan, her husband sat on their old love seat and said “no way am I sitting on that!” and he bought her a new full size sofa and started talking about chairs. I love this so much because they were sticking to tiny pieces of furniture thinking that their home was small and they needed to conserve space.  Compared to what they had before, it is small, BUT the living space is much bigger than an average home.
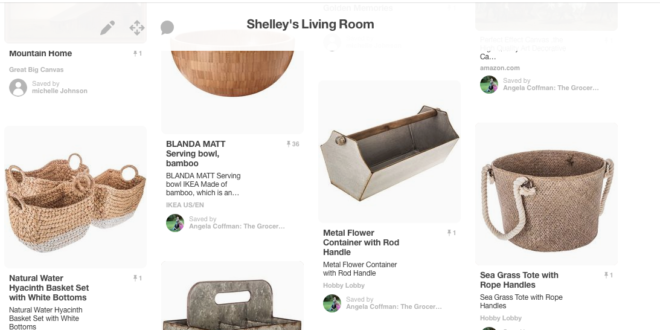
Shelley's living room private Pinterest

The first thing we did was set up a shared private Pinterest board where I could pin sources to all the things I was putting on her shopping list and get her feedback.  She started window shopping and pinning things that she would like me to include in the design, especially new paintings that I might take a color scheme from.  I searched her Pinterest and Houzz pages she had previously made to get a feel for her style and color preferences.

I discovered through her boards that she loved horses and farmhouse style.  I found this original art piece on etsy that was beautiful and affordable:

horse-painting-on-etsy

The painting helped me choose her colors: Benjamin Moore Simply White (for Trim and shelves); Edgecomb Gray (for walls); Wedgewood Gray (Curtains and Accessories); and Hale Navy (for bottom of the hutch and accessories.)

shelleys-paint-schemeI chose her neutrals specifically for their yellow undertones.  They had just laid new country pine wood floors and if she used neutrals with pink undertones, or even a true white, they might look orange.

Here’s her before:
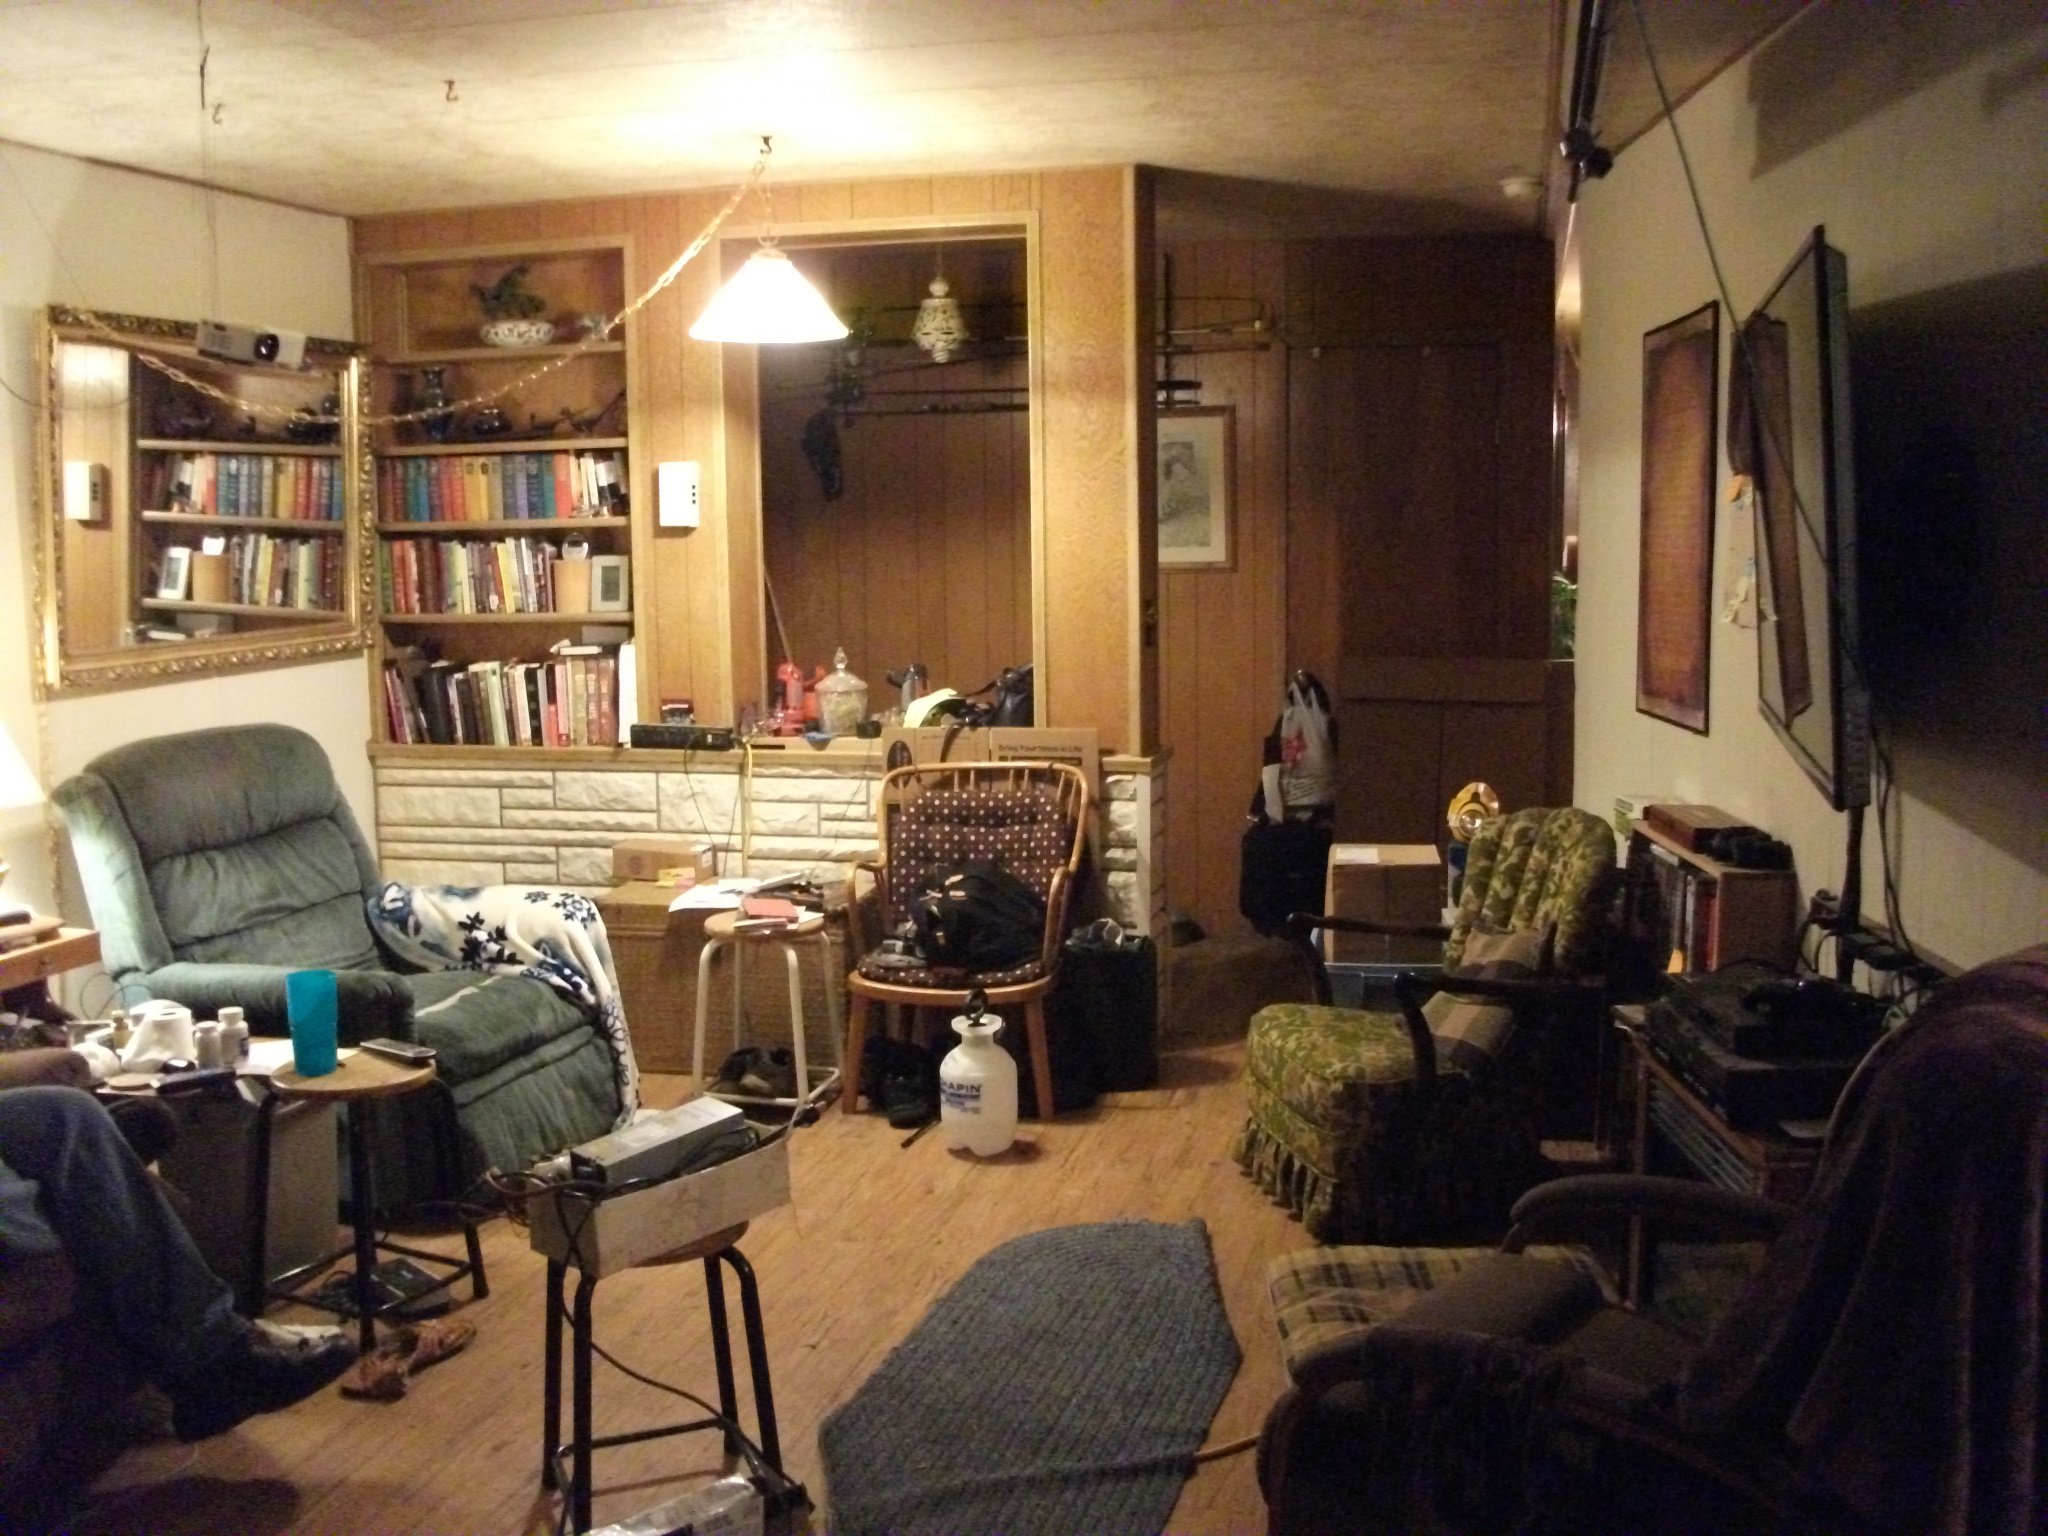
Shelley before 1

The first thing I noticed was her little green chair on the right.  So cute! Imagine it with a slip cover to look like this, except with a floor length skirt.
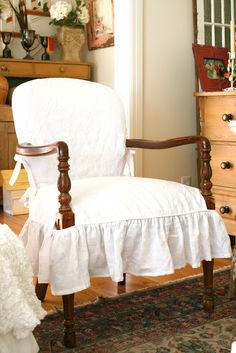
slipcovers-by-shelley

via Slipcovers by Shelley

I also noticed that all the wood in her home was the same tone of pine.  While it seems logical to match woods for a cohesive look, it ends up making a space look flat.  I suggested she paint the pine on the walls Edgecomb gray and the pine trim and entry paneling Simply white.  Then to mix in darker tones of wood in picture frames, coffee table and other furniture pieces.

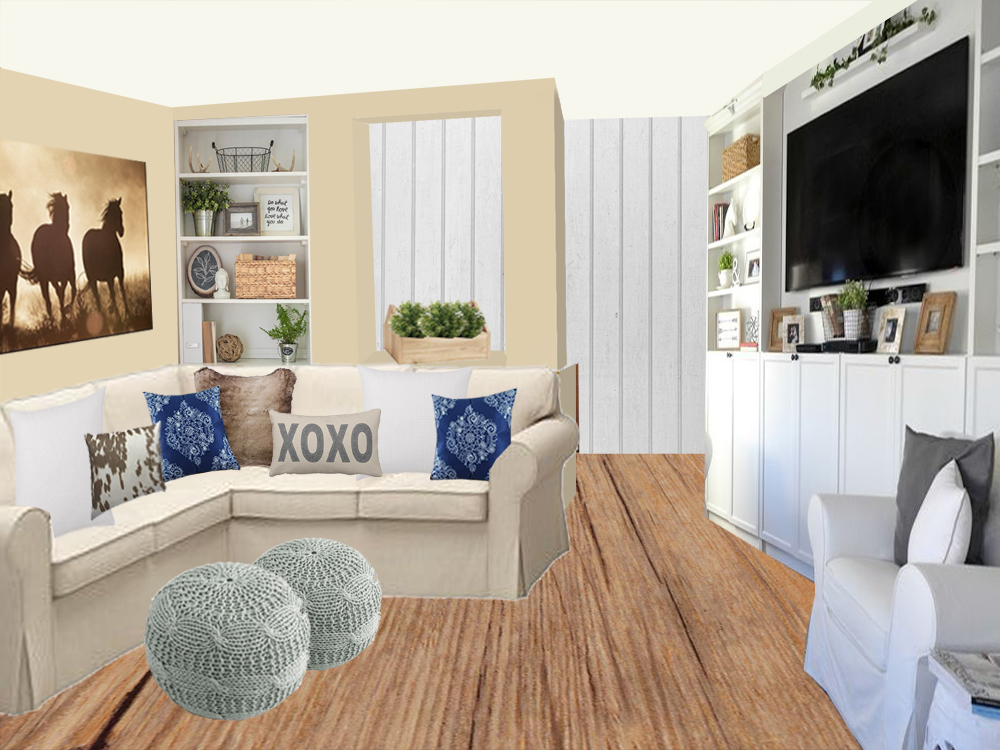
I made 2 different concept photos for her of this view, because I really wanted her to get an Ektorp sectional.  Sectionals seat the most people in the least amount of space and it fits perfectly in her corner. You’ll notice in this picture, the walls are a different shade of tan, one she requested because they already had the paint and I switched out the painting from the blue horses to one similar to one her husband found in their shed that she wanted to use.
shelleys-living-room-sectional-view_edited-1

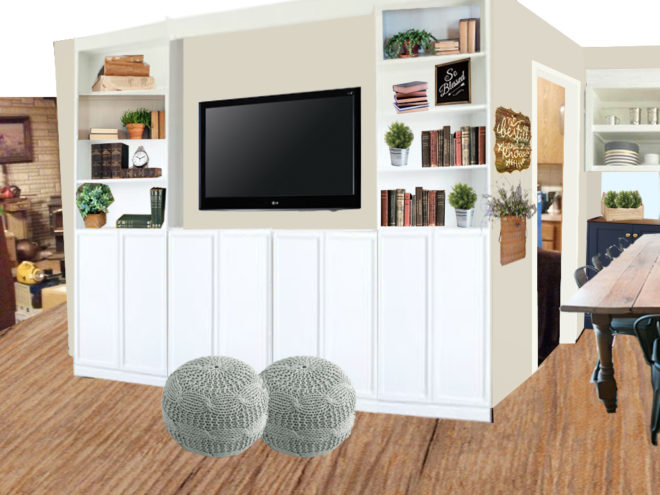
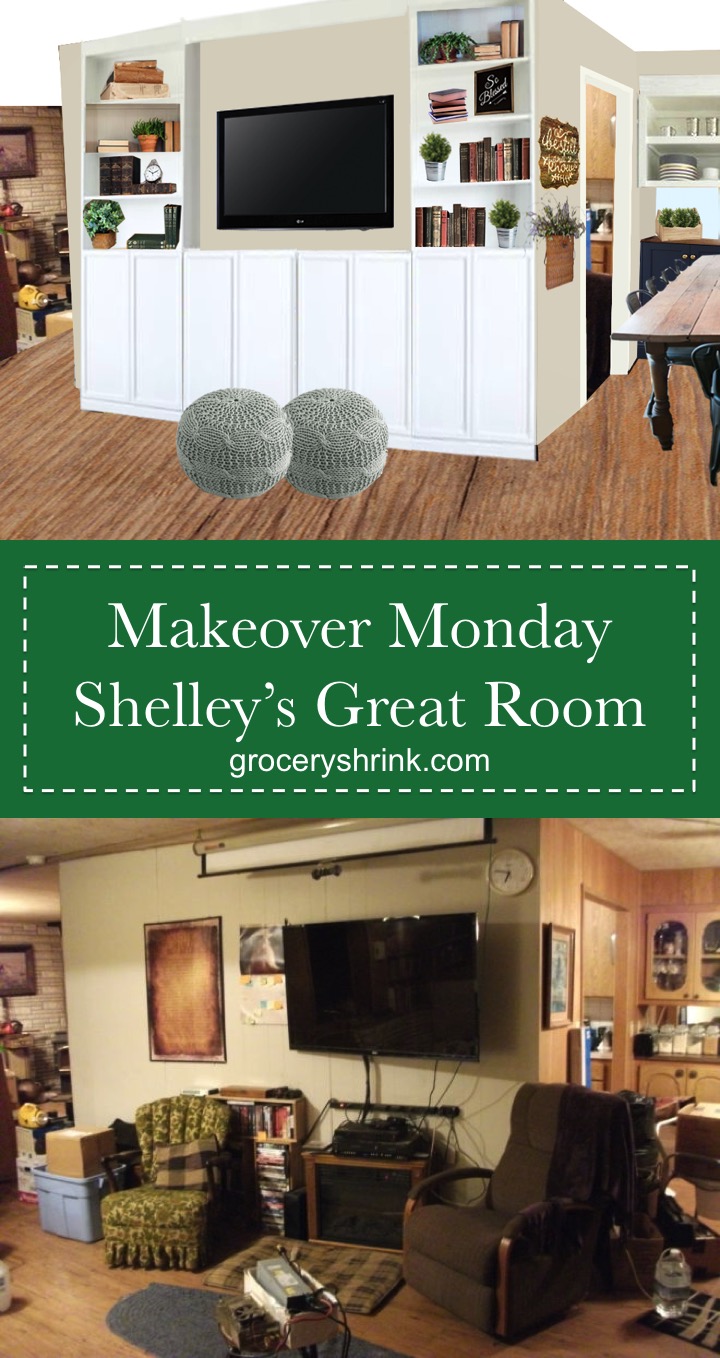
I created a built in media center for her to house her giant TV, with tons of storage below for dvds and toys for the grandkids.  It’s all built affordably and easily from Ikea Billy bookcases, with the extensions and optional doors.  They also have a giant pull down movie screen that they use a lot and I hid it behind a cornice and crown molding.  It’s easy to reach up and grab when they want it but hides away invisibly when not in use. The main goal here was to hide all the cords.  They are such tiny things, but give a sense of visual stress. I gave her choices of coffee tables to use over the poufs, but none were in the right format for the photo without hiding the sectional.
shelleys-living-room-sofa-view_edited-1

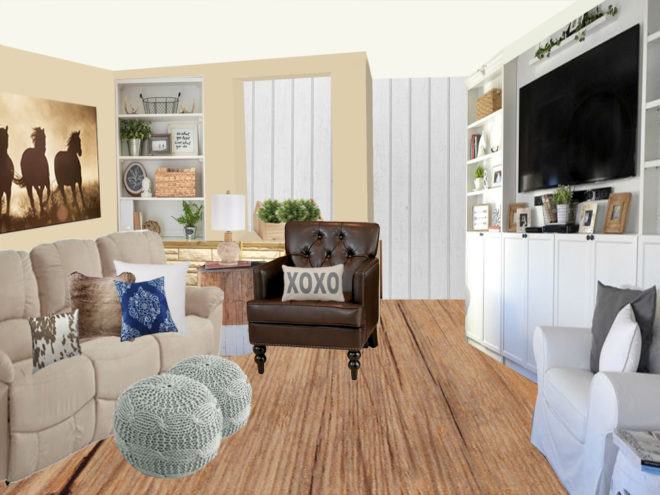
Here’s another concept with the sofa they were considering.  They thought it would be more comfortable than the sectional, so they bought it in a dark navy similar to the hale navy we will use in their dining room.
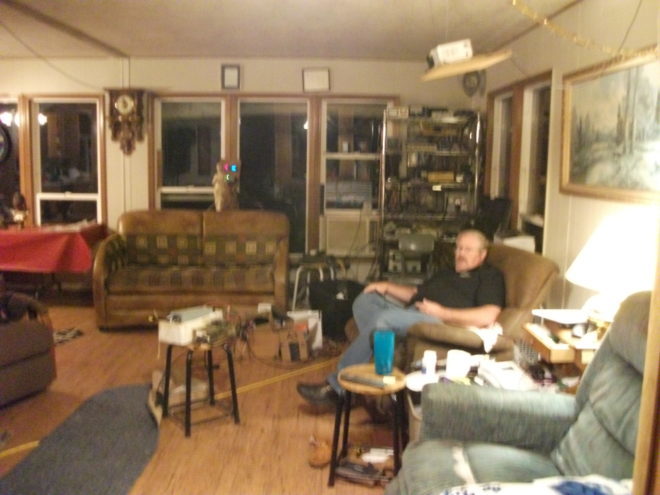
Shelley before 4

Here’s a before view of the Ham Radio corner.  I used this photo to help with the 3D floor plan rendering.  At first, Shelley’s husband made me promise not to touch the radios, but I couldn’t help myself.  I sent her this photo, and asked her to show her husband and see what he said. I told him I would create this only classier in another room if he would let us move the tower of cords and electronics blocking the window:
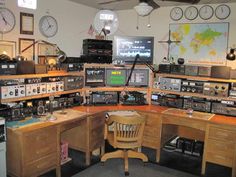
ham-radio-corner

He loved it and said, “Forget the living room.  Just build this in there instead.”  Bwa ha ha!  That whole thing really backfired.   In there?  Isn’t there another room?  I made her show me pictures of every other room, lol.  They were right, there wasn’t another room.   I wanted to chop the visual height of all the radios so the eye was sent to the beautiful windows and beyond.  In the process, I needed to set up an area so he could actually use them.  The way they were it was so inconvenient that he didn’t spend much time with them even though he loved them.
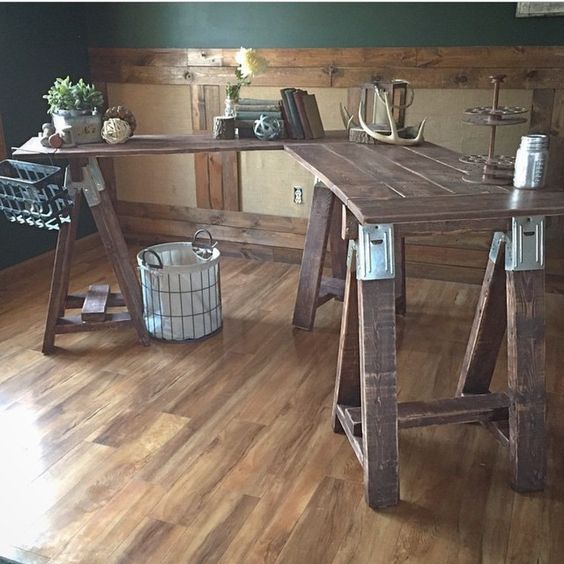
corner-sawhorse-desk

I found this picture, based on a sawhorse console table by Shanty-2-Chic.  I’ve built 3 of these in my home and they are very easy and affordable.  For this design, I replaced the pieced top with hollow core doors for more workspace.  This will give him 14 feet of workspace!  I recommend she uses clips to secure the cords to the wall behind the window curtains.  (Hide all the cords!)

Here’s a 3d layout of the room showing how the desk fits in.

Here’s a 2nd 3d view with a sectional
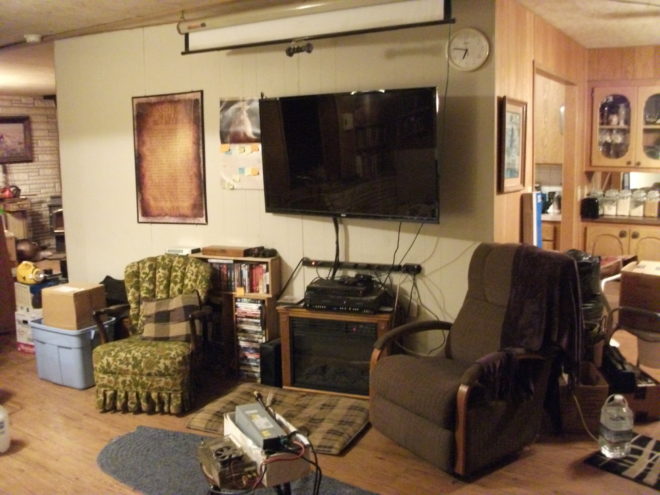
Shelley before 3

shelleys-living-room-entertainment-view_edited-2

There are so many more details we talked about, like updating her dining room ceiling fan like this.
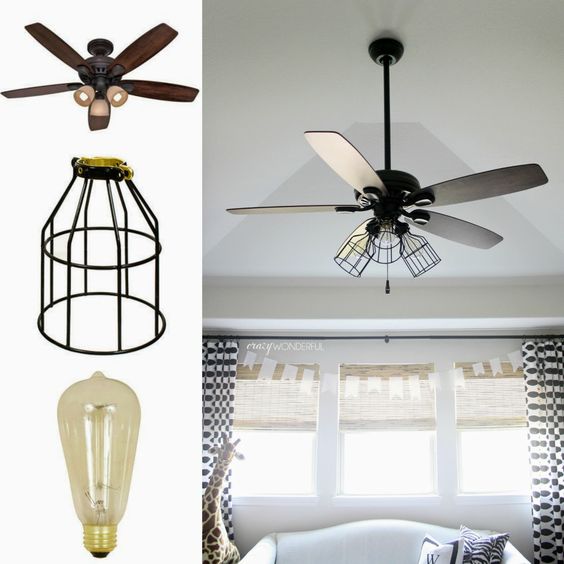
farmhouse ceiling fan

and building rustic shelves like these behind her sofa so hold her projector so it would not longer be hanging from the ceiling with cords everywhere.  It would be close enough to the window curtains that she could hide the cords behind them.

rustic-shelves

At first she was opposed to an area rug because of her pets, but as the room started to come together she could totally see how a rug would bring everything together.  These are two of my favorites:
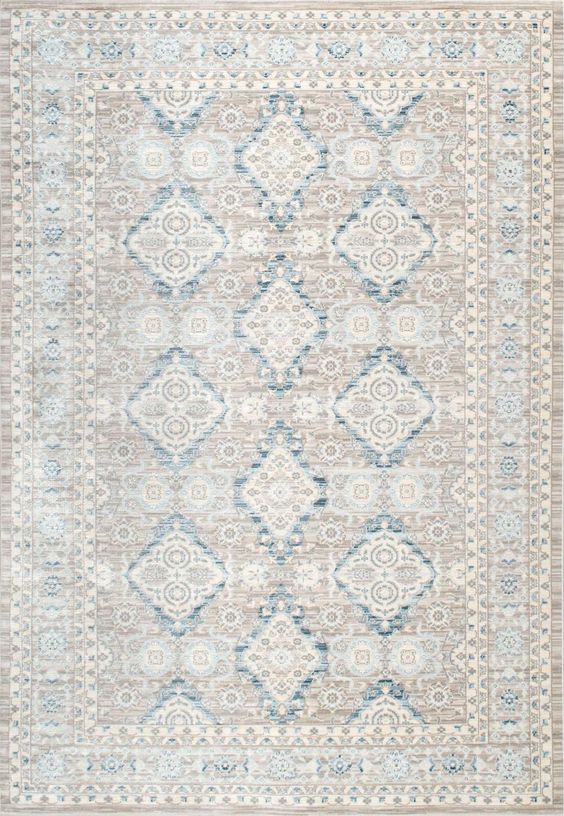
4062b21828990b0f895a8fd1a0b6cddf 24588a01805f8496d031914eace77b64

Here’s a final side by side before and after.
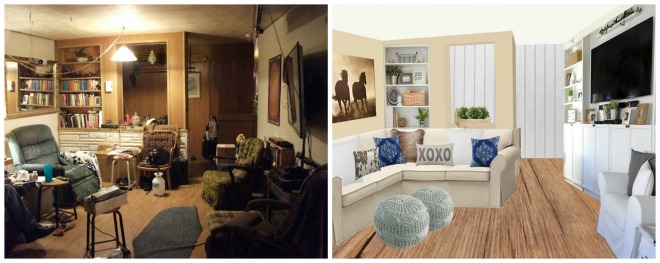
shelleys-living-room-before-and-after

Would you like your room photoshopped and featured on Makeover Monday?  Send a few photos from your space to angela@groceryshrink.com and tell me your hopes and dreams for the room.

Get a full service virtual makeover complete with 3D room layout plan, 2 photoshop views, step by step work list, and within your budget source list. Find out more.

room-makeover-short-banner

Learn how to use Photoshop for your own designs with the Room Makeover class (It’s half off today, Monday, November 28th only!)
How to Make Something not a Big Deal

When I was growing up, my mama did a lot of things around the house.  She used power tools, repaired furniture, skim coated drywall, decorated cakes, sewed clothes, baked fresh bread, gardened and preserved the harvest, had a family dinner every night, and taught Sunday School.

bread

As I grew up, all these activities were normal to me.  It wasn’t a big deal for me to bake bread or sew clothes, it was just something that mamas do.  Having a nightly family dinner was just something you DO, it never occurred to me to skip it.  When we were done, we cleared the table, washed the dishes and wiped down the counters.  We didn’t even think about it, we just did it.

hands-in-dough

We walked away from stuff when it cost too much even though my dad made good money. Mom’s willingness to walk away and do without, or wait for the right deal made sure they had savings.  They paid off their house when I was 9 and never borrowed another dime after that.  It built character in me to not have the latest trends and to wait for things. I didn’t appreciate it at the time, but the skill of waiting has served me well as an adult.

hand-tape-measure-sewing

We went to church.  Every time the doors were open.  I never had to ask if we were going.  We just did.

My babies came so soon after I married and so close together that I lost some of my good habits—like going to bed early, getting up early, working out consistently, and daily Bible study.  Now that life has settled down a little (knock on wood) I’m figuring out how to build these habits back into my day.  My first thought was to get up early and do them before my kids are up.  That way I can have uninterrupted quiet time (sounds so good!)  If I did that, they would never see me do them.  And those are the important things that I want them to think are just part of being a mama.  Mamas read their Bibles.  Mama’s take care of their bodies. Mamas pray.

mama-reads-the-bible

The habits that I want to be second nature for my kids, the ones I don’t want to be a big deal, just something they DO, those are the things I need to model for them now.  They need to see it consistently, day in and day out.  Not stressful, not a big deal, just accomplished.

I wonder what my kids will just do and not think about, because it was a normal part of their childhood.  I hope using cash is one of them, along with saving up to pay for stuff, being ok with roughing it to pave the way for a bigger goal, and giving to people who are in need.

Makeover Monday: Curtains Make all the Difference

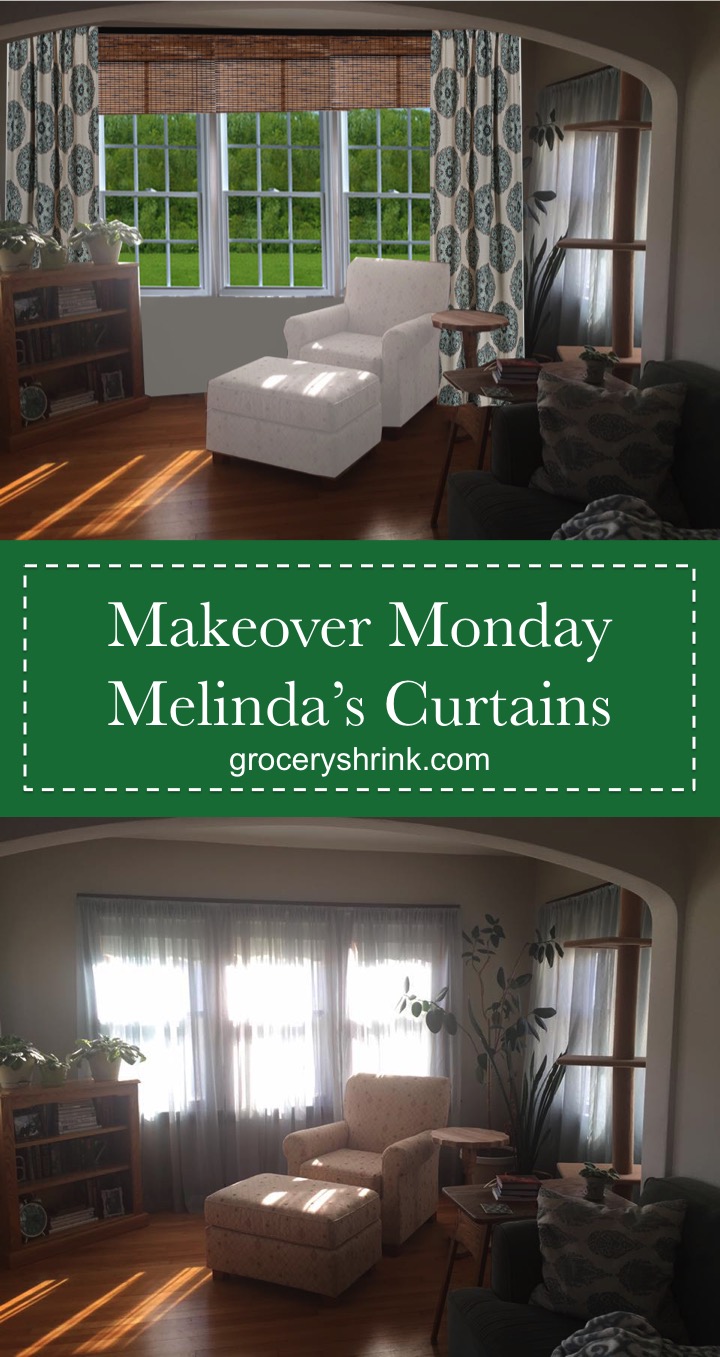
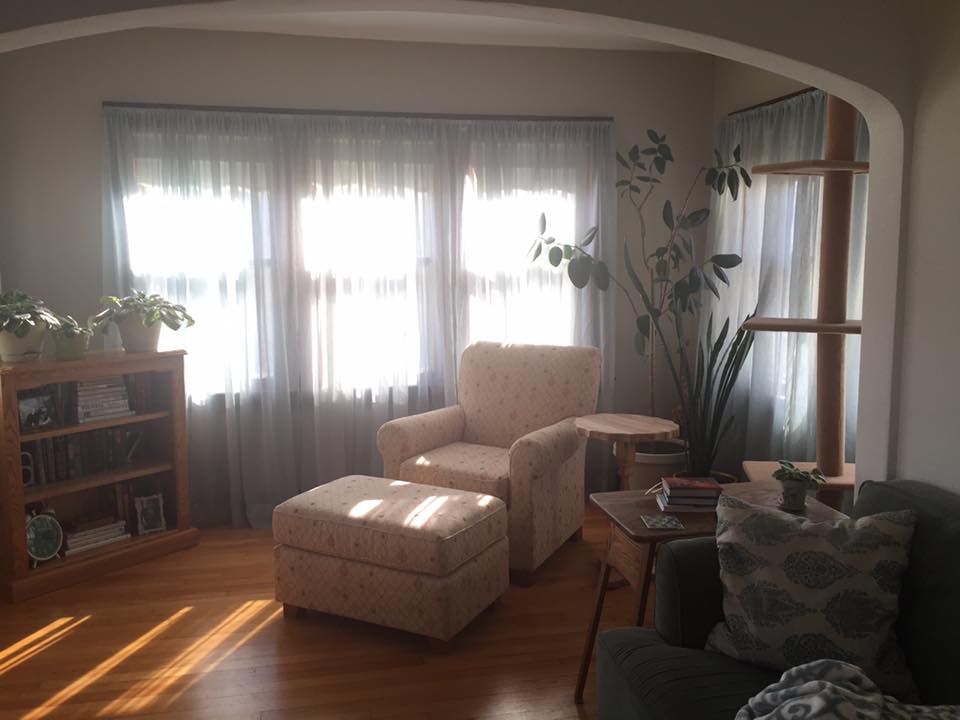
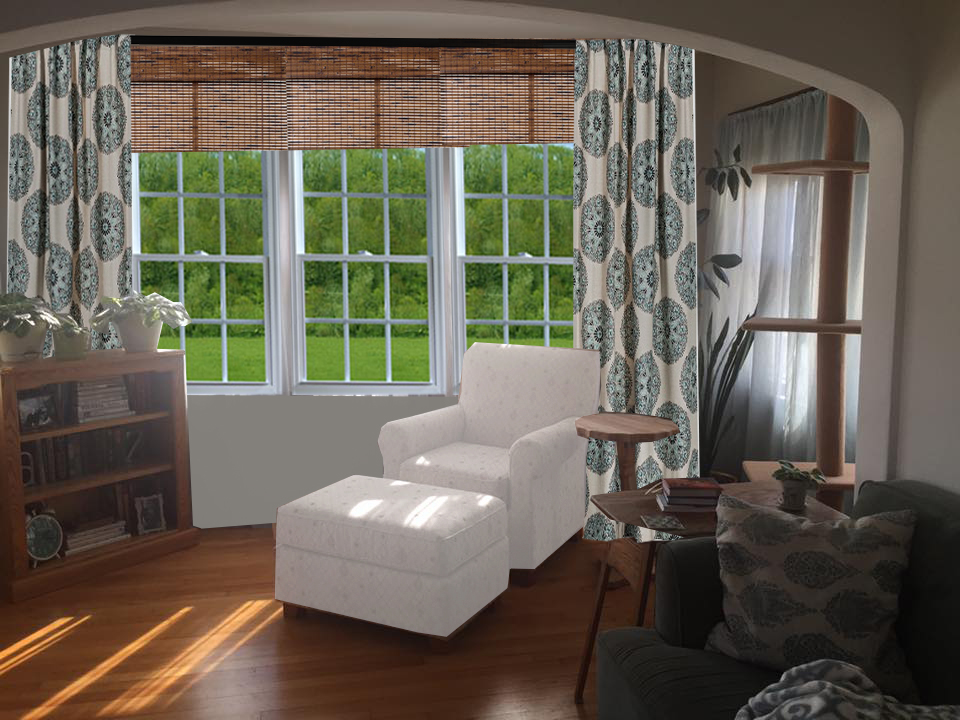
Melinda didn’t like her sunroom.  She removed all the excess stuff she could and it was better, but still didn’t feel right.  I looked at her photo and saw her gorgeous floors and charming arched doorway.  She also has a lot of handmade SOLID wood furniture that she doesn’t want to paint.  The pieces were made by her father who passed away and they are real treasures.  She has a nice neutral wall color that looks fresh and bright.melindas-sunroom

I noticed her pillow on the sofa in the adjoining room.  It reminded me of these drapes from Target, so I popped them in.  The important step is hanging the drapes at the ceiling instead of just above the window and wide enough that they don’t actually block the glass. There should be enough fabric on the sides that it could actually cover the window even though you probably never will.  If the fabric is too narrow, it won’t look right.  Hanging drapes this way  makes everything feel taller and grander. Because the angle of the room wasn’t easy, I only did the curtains on the front window.  Can you imagine them continued onto the side?   I added woven bamboo shades to bring the warmth of her floor and furniture up. target-curtains-slip-covered-chair

Also, I popped a slipcover onto her chair, just to update it and neutralize it.  If you can sew along a line, you can make a slip cover.  Here’s my favorite video to show how.  If you can’t sew along a line but want to learn, take all the thread out of the machine and practice along the lines of notebook paper.  It won’t damage your machine to sew on paper, but you’ll want to use an old needle and then change to a fresh needle before sewing on fabric.   Melinda has a big heart and a lot of pets, so slip covers are ideal for her.  She should make 2, so she can wash one and use one and always have one at the ready.

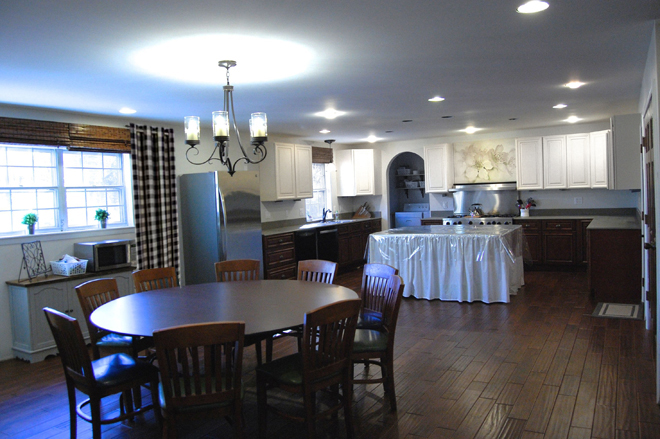
To hang curtains at the ceiling, you need at least 95″ panels.  My favorite sources for 95+ panels are Target.com (not available in store); Homegoods; and Ikea.  BUT you don’t have to limit your selection to items labeled curtains.  Twin flat sheets are the perfect length and come in a huge variety of colors.  Walmart carries a basic flat sheet for just $4.97.  Also, tablecloths!  I wanted to get black buffalo check curtains for my dining room for the winter, but couldn’t find anything affordable.  Then my friend told me about these tablecloths.  All I have to do is sew a rod pocket across the top.   If you don’t sew, ring clips or fusible hem tape work just as well.

kitchen-buffalo-check

Here’s a photoshop idea.  I’m headed to Ikea today to get the brackets to hang them :).

You don’t have to spend a fortune on hanging hardware.  My favorite curtain rods are electrical conduit pipe from the hardware store.  They come in 5 ft or 10 ft lengths and in different thicknesses.  I can buy a 3/4″ 10 foot pipe for around $3, then spray paint it black.  They are easy to cut to length with a hacksaw, or to use threaded connectors to make a longer rod. I hang mine with these $1.49 brackets from Ikea. Since this is a really wide area, I’m going to use 3 for a center support.

Would you like your room photoshopped and featured on Makeover Monday?  Send a few photos from your space to angela@groceryshrink.com and tell me your hopes and dreams for the room.

Get a full service virtual makeover complete with 3D room layout plan, 2 photoshop views, step by step work list, and within your budget source list. Find out more.

room-makeover-short-banner

Learn how to use Photoshop for your own designs with the Room Makeover class

Weekend Links

Happy Weekend!  Here are my favorite links that made me take a longer look.

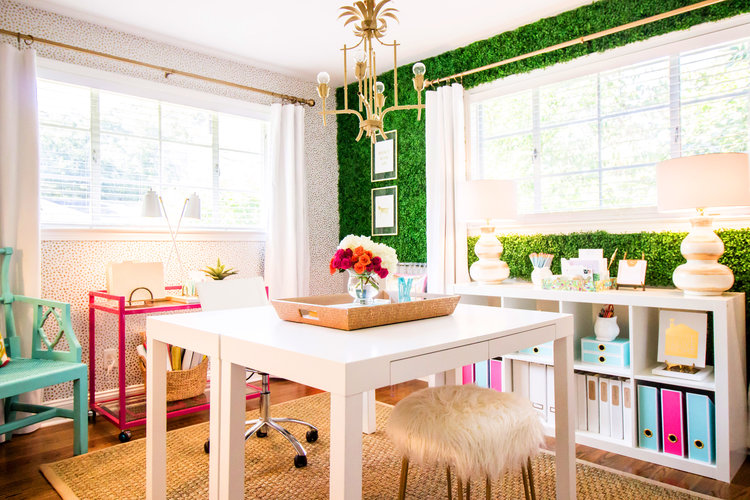
It’s the week for the one room challenge reveals!  Brittany Fleming’s room stopped me in my tracks.  Her before picture was beautiful and something I’d love in my house, but her after was so bright and cheerful it made me smile.  Her brave signature piece was a faux boxwood wall.  Imagine that?!  It’s easy to take down when she’s ready for something else.

houseplusloveorcentireroom

The other room from this series that wowed me also sported some bright kelly green.  I think it’s the color that I’m really digging right now and I don’t have it anywhere in my house….hmmm.

farmhouse-style-family-room-21

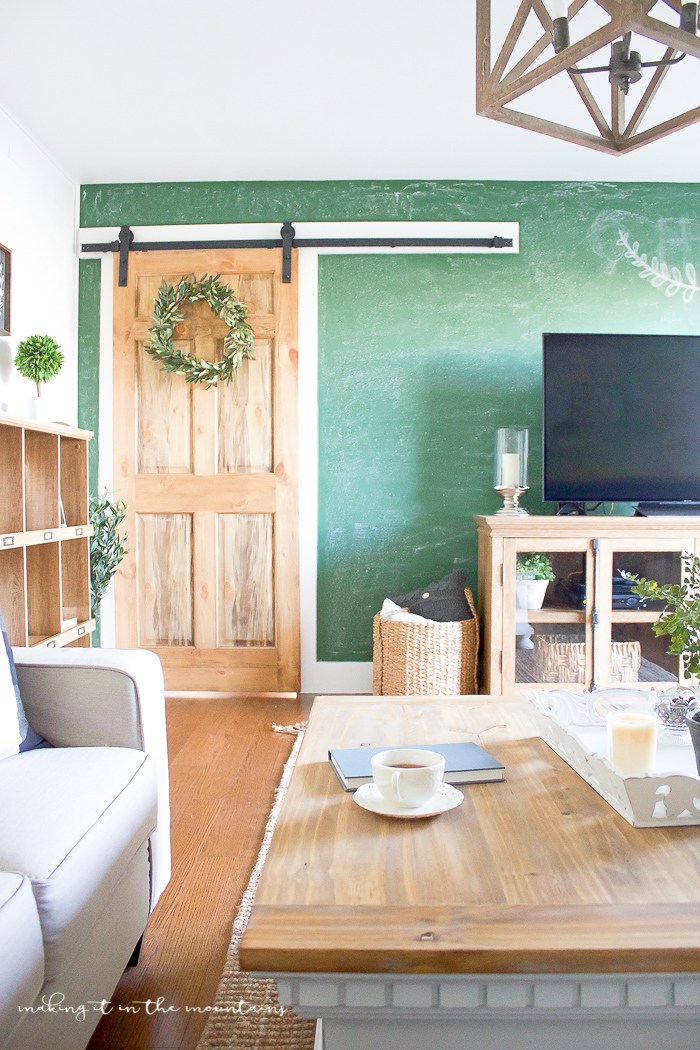
Kristi’s from Making it in the Mountains classic green chalkboard wall and barn door with a wreath combination is lovely.  The green chalkboard paint is a nice variation from the usual black.  I liked her olive leave wreath enough to click through and buy one for my house, until I saw the $80 price tag.  If you’ve been reading here long, you know I searched the internet to look for alternatives.  Amazon has one JUST like it for about half price.  It was still too pricey for me, so I put a price drop alert on camelcamelcamel and hope it comes into my budget some time.

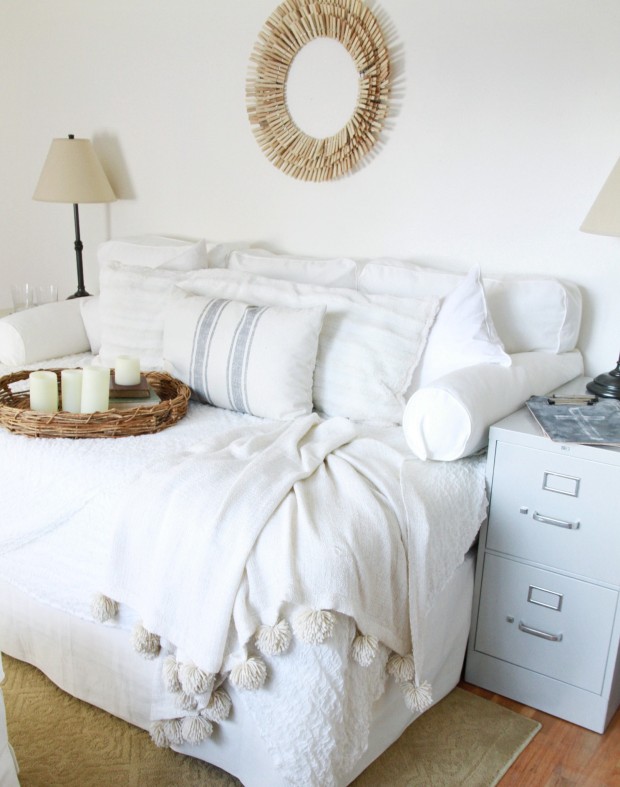
Daybed by ZevyJoy

This daybed by Annie at Zevy Joy is gorgeous, right?  I got a bit excited when I discovered it’s just a queen mattress layered with bedding and for the back?  She got a $50 Ikea Ektorp sofa slip cover and Stuffed the back cushions with extra pillows.  I have most of this stuff lying around the house and it will be happening in my office soon.


Makeover Monday: Graphically Brave

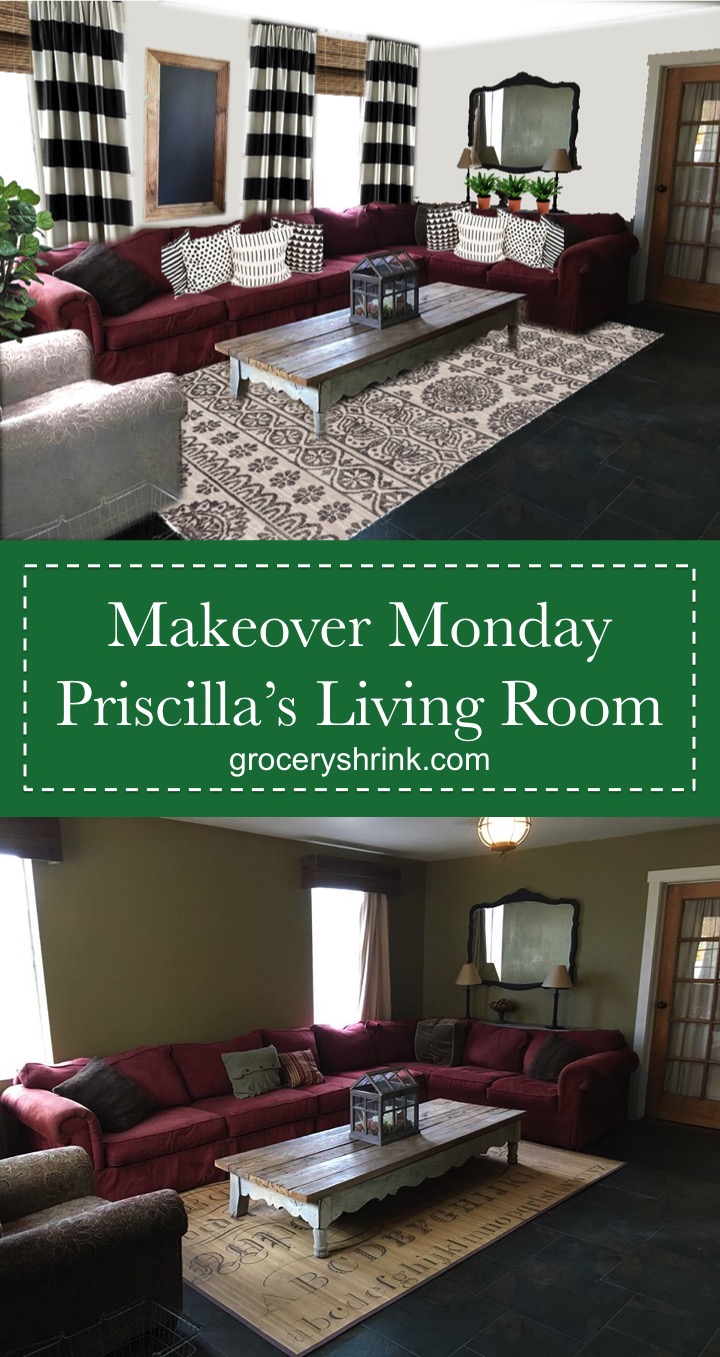
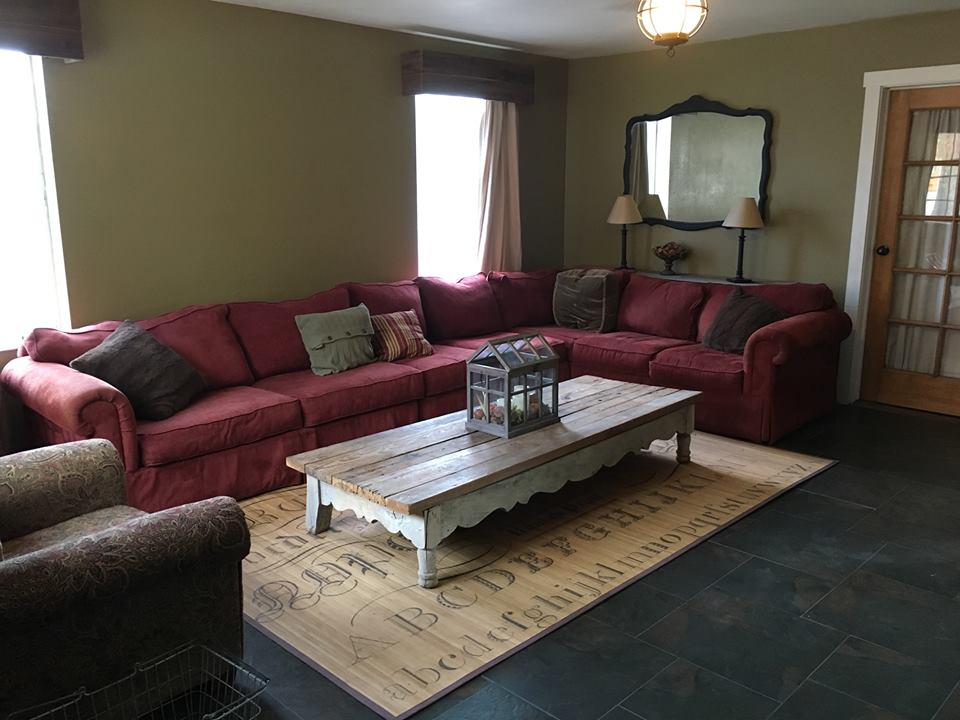
Priscilla is drawn to the light and bright Modern Farmhouse rooms from Fixer Upper, but her furniture is full of color. Without a budget to buy new, she wasn’t sure what to do. She wrote: Need help with giant sectional. I’d like to lighten it up a bit, but so far I don’t like the contrast of light pillows. And how do you know how many pillows?  

Anyone else notice her beautiful wood and glass door?  I LOVE that color of wood. And that mirror! It’s huge and such a great shape.  Her coffee table is the perfect size and shape for her sectional. Even her light fixture has great character.

14666254_647409275465069_6941566649985718781_n

Here’s what she says about her sectional:  It’s super comfy, almost all of us fit on it, but it definitely makes a statement. My head is turned by all the lovely, neutral, pale farmhouse/cottages. But, alas, my true love is color. Trying to dip a toe in the shallow end with some cream pillows. They didn’t play nicely with the red beast. Maybe more of a burlap color?

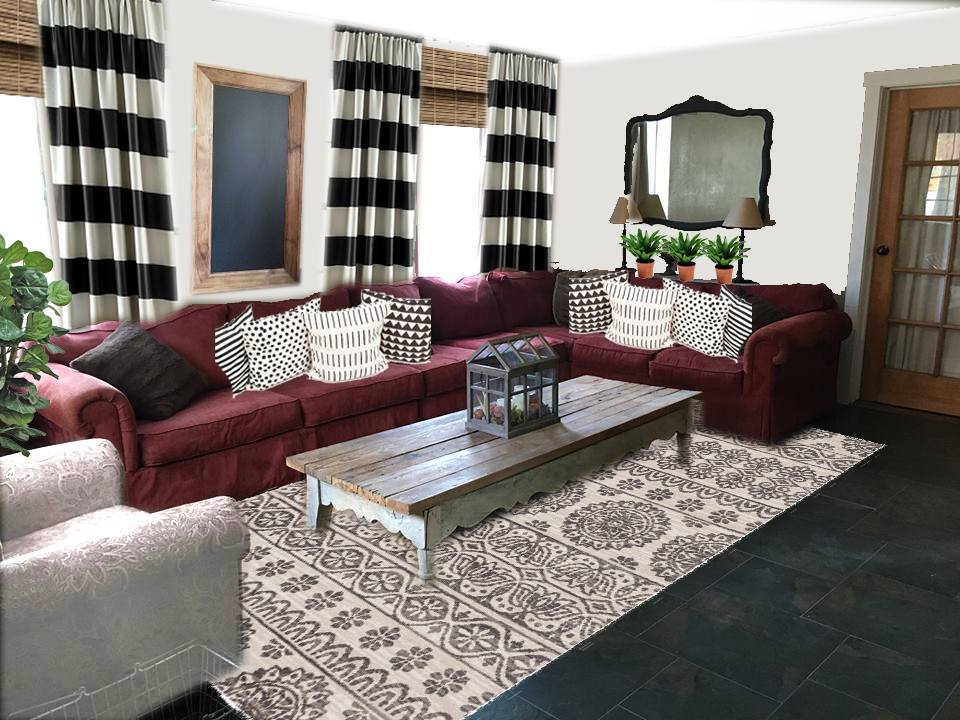
The angle of this photo and the full view of the space was so perfect for photoshop that I couldn’t help playing a little.  She’s right that pillows can really help to lighten a dark sofa, but in this room she’d get an even bigger impact from changing the wall color.   Painting can sound like a daunting task, but all you need is a gallon or two of paint and two 2 hour sessions to do it.

14650637_10211194450440052_4592247864863681481_n

Notice the impact big TALL drapes make?  These are from Kohls, but if budget is tight you can grab $4.88 twin flat sheets from Wal-mart, and fusing on the stripes.  Hang your drapes to the floor even if your furniture is in front of them.  Just pull the sofa far enough forward that the drapes can hang freely.  P.S.  The Kohls drapes are only 84 inches and that won’t look good in ANYBODY’s house.  We need 95 inches or longer, even with 8 foot ceilings. The sheet option is looking better and better.

I created friends to the wood in her door by adding wood shades and frame around the chalkboard.  She can write whatever she wants on the board, such as laurels, or she could use washi tape to adhere feathers.

That’s still her same chair in the front left corner.  I just added a slipcover so she could enjoy different prints and patterns in the room.  Don’t be afraid of light colored slip covers.  Baby wipes and a lint roller keep them looking nice in between washings.  And guys, I only wash mine once a year or when we’ve had a big enough oopsie that a baby wipe won’t work.  I have 6 kids and 5 kittens.  We know how to get stuff dirty.

I used all her same furniture, lamps, wall art, but with lighter wall paint it looks like a completely different room.  The rug is a splurge from Joanna Gaine’s new line.   It also comes in dark black, but I thought it would be too bold against the already bold curtains.  That’s the secret to matching patterns:  Let ONE be the big bold leader of the pack, large and in charge.  Then layer in your different scales of pattern in similar color tones.  With the different scales of graphic prints in the space your eye goes to the curtains first, but has resting places on the pillows and rug too.  Also the rug is a size bigger than her old one.  Having a big enough rug really helps.  Save up until you can get one where all the furniture can at least have their front legs on the rug.

Her reaction: That is great. I would have to redo the whole house, and that lovely cream chair would last about five minutes. I’m just gonna enjoy the fantasy for a moment. I do think I will add those three ferns to the sofa table. 

Would you like your room photoshopped and featured on Makeover Monday?  Send a few photos from your space to angela@groceryshrink.com and tell me your hopes and dreams for the room.

Get a full service virtual makeover complete with 3D room layout plan, 2 photoshop views, step by step work list, and within your budget source list. Find out more.

room-makeover-short-banner

Learn how to use Photoshop for your own designs with the Room Makeover class.