5 Ideas for Frugal Decorating

Decorating is a lot of fun, but it can also be expensive.  With a creative twist you can have a house that looks great without spending a fortune.  Here are 5 ideas to think about:

1.  Repurposing:  The most frugal way to repurpose is to use something you already have, but it’s also possible to snag a deal at a garage sale or craigslist and change it a bit for your purposes.  Sometimes all the item needs is some sanding and a fresh coat of paint.  Or perhaps the flower pot would make a better umbrella stand.  Instead of window planters, maybe they are perfect towel holders.  Could removing the mirror from the dresser create the perfect sofa table?

Love the scallop on the drawer

After

2.  Trade up:  I like to sell the items that I no longer need and use the money to buy what I really want.  The net result is less clutter, and no new money spent.

3.  Use inexpensive materials.  I (with the help of friends, family and my kids) just finished making a beautiful wreath from a $1 straw frame and 3 packages of coffee filters.  Including all the hot glue it required, the project cost about $6, but the effect is very impressive.  I got the idea from the Nester here.  I used an 18 inch form and about 500 coffee filters.  It took me way more than an hour, but was worth it.   

Another inexpensive project was the IQ hanging lamps made from 2 sheets of drafting vellum and a Hemma lamp cord from Ikea.

Other inexpensive materials that pack a punch in decorating:  canvas drop cloths; beadboard wallpaper; Baer Paint; muslin fabric; twine; felt

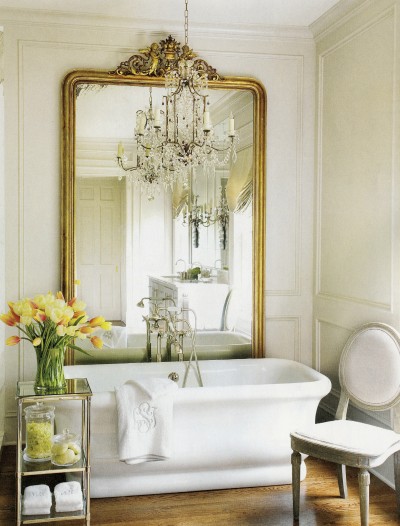
4.  Rearrange:  Changing the arrangement of the pieces you already have can make everything feel new and fresh.  Perhaps the flower arrangement in the living room would look great in the kitchen or the mirror in the hall would make the bathroom pop.  What if all the furniture in your living room was set on an angle?  None of these changes have to be permanent, so if you decide you don’t like it, you can always change it back. 

5.  Cover:  Do your sofa pillows feel dated and worn.  New pillows are really expensive, but you can stitch new covers for very little money and slip the old pillows inside.  You’ve saved the hassle of getting rid of the old and the expensive of new pillow forms (priced those things lately?)  I don’t even take off the old pillow cover (which is often permanent) to do this trick.  Other types of covers might include:  tablecloths (not just for eating areas, they work for end tables too); duvet covers (just slip the tired quilt or comforter inside); curtains; and chair cushions or quilt pads.  These are simple ways to add a pop of color and change of pace.  I like keeping my walls and furniture neutral so I can make these little changes whenever I feel like it.

Green and yellow pillows with ruffles and pleats.Brown pillow with brown belt cinched around the middleGreen pillow with band of patterned fabricbrown and blue pillow with buttons

Click here for the instructions and even more ideas for pillow covers.

Getting Your Children to Keep their Rooms Clean

I know the struggle of keeping children’s rooms clean!  Here’s a picture to prove it–that’s me trying to hold my cool while we dig out—again.

Before

This is a mild mess for what our every day norm was.  I was constantly frustrated with the children and had a sick feeling just passing by their door.  Every few months, I’d help them dig out and then make them promise to keep it clean.  But in just a few days we were right back to the mess. 

Once Darren and I sent the kids to Grandma’s for the weekend and we boxed up every toy and put it in the garage. They were able to choose one toy each and that was it.  Oh, there was crying and wailing, but things were better for awhile.  Then birthdays and Christmas came and a mountain of toys from well meaning friends and family.  It didn’t feel right taking away their new things and after awhile, it was a huge mess again.

I started to notice the mess just wasn’t just toys, it was candy wrappers, kleenex balls, tiny beads, broken crayons, cute erasers, and bits of things. Gross!  Now when I see things like this just lef t on the ground, I take care of it for them and bury it deep in the trash.  They aren’t emotionally mature enough to recognize trash and hold on to each bit of fluff as a memory.  They don’t notice when it’s gone.

After

I also noticed it wasn’t fair for me to expect them to keep their rooms clean, because there was so much stuff, there wasn’t a place to put it.  I sat down with the girls and asked them what was most important to them.  I gave them each 3 toy drawers and a basket for dolls and let them choose their favorite things to keep.  I paid them cash for the items they were willing to part with and marked them for the garage sale with  my initials on them.  That way if they sold or didn’t, the kids still got the money for it.  Sometimes they needed help parting with things and I was very discreet and sensitive about when and how I took care of it.

Then we labeled the drawers very carefully:  Polly Pockets, 18 inch dolls, Only Hearts Club, Stuffed Animals Etc.  And we set up some ground rules:  Any toy in a bin or drawer not labeled for that toy, would end up in toy jail for tresspassing!  Any toy in jail can be bailed out for $.10 each, but toys not redeemed after a month go to the thrift store.  Toys left in living spaces after bed also end up in toy jail.

Not only did we purge toys, but we purged clothes too.  I only let them keep what fit, they loved to wear, and what fit in their drawers and closet without crowding.  It’s so much easier to put clean things away now and keep the drawers clean.

The secret to keeping it clean is time with mama.  Now that there is a place for everything and simple rules, I can go in to their rooms several times a day and remind them of what to pick up.  So if I check on their school and see their pajamas on the floor, I ask them to fix it right then.  And before bed we do a thorough pick up.  I check under their dressing table and in the floor of the closet.  I make sure the bins only have in them what’s on the label and if the children refuse to cooperate, I take the offending toys off to jail.  Mostly it’s a cheerful time, and only takes about 15 minutes.  After it’s done I lay on the bed with them and tell stories about childhood or answer their questions about the coming baby.  The rooms are alwasy ready for an unexpected guest now and once a week, it’s easy to go in and vacuum and dust a bit.

One more inspriation:  The kids never know when the House Fairy will show up!  Have you heard of her?  If not, click here.

What to do with the stuff?

If you are serious about purging, stuff can start to pile up all around you.  It’s stuff you don’t want, but how do you get rid of it in a reasonable fashion without filling up your trash bin?  I do 4 things with my unwanted stuff:

1.  Garage Sale it–Most of my items end up here *(See the star at the end of the post to find out why I don’t just donate it.)

2.  Donate it–this is for items that I can’t put in a garage sale or I might hurt someone’s feelings, or for what’s left after our sale

3.  Consign it–This is for clothing and accessory items that are name brand, like new, and still in high style.  (I don’t have a lot of these types of things, but I’d like to try to consign some of my newer maternity clothes this year.)

4.  List it online–I sell online in 4 different venues:

Craigslist–for furniture and other things too big to ship

 Ebay–For collectibles and high value merchandise that is shipable

 Homeschool Classifieds–curriculum or other teaching aids

Etsy–Sewing patterns, craft items, handmade items, and fabric and notions stash

When you are purging things, have 4 boxes labeled:  Garage Sale; Thrift Store; Consign; and Sell Online.  Then place each item in the appropriate box.  Before you place the items in the garage sale box, have price tags ready to go. 

Price the item before it hits the box, then stack the boxes labeled garage sale in a corner of the garage.  I don’t know about you, but garage sale set up day always sneaks up on me and I’m rarely ready with my items priced.  Now that I have neat boxes of ready priced items, the only garage sale prep. I have to do is to lay out the items on the tables.

Now mark on your calendar:  When is your garage sale?  What day will you devote to listing your items online?  When will you visit the consignment store?  When will you drop off your items at the thrift store?

My new favorite way to make a lot of price tags quickly is to print them on Avery style address labels.  You can make templates at Avery.com and save them as PDF files to your hard drive so printing another page is fast and easy. I print entire sheets of $.10, $.25, $.50, and $1 tags with my initials on them.  It’s always a great idea to include a 2 letter initial code on your address labels, because the most effective (and fun) way to have a sale is with a friend.  When your tags are labeled with your code, it’s easy to tell who earned the sale at check out time.

*We have several garage sales a year and I usually make around $400 at each one.  When the sale is over, I donate what’s left to the thrift store.  It’s a lot of work to have a sale, but the cost benefits are worth it for my family.  I also view having a sale as a ministry.  Thrift stores tend to mark prices up so high that a person in need can’t afford it.  I like to give people a chance to buy the things at a reasonable price, and still have plenty to donate when it’s all done.  Plus I get to meet lots of neighbors and build connections with people in our area.

Set Personal Organization Boundaries

I do better when there are rules.  They don’t have to apply to anyone else, but if I know they are there, it makes a difference.  Here are some that I’ve been tossing around:

1.  Only keep on the kitchen counters what I use every day.

2.  Put an item away when it leaves my hands, not just down.

3.  Clear counters of personal papers before dinner.


4.  When a new item comes in the house a similar one leaves.

5.  Clean up completely after each project.

6.  Clean up a spill when it happens.

7.  Spotless room before sleep.

Do you have any rule ideas to help keep me clutter free?

How Much Should I Keep?

This is a very personal question and only you can answer it completely, but I’d like to write down what makes me and my family most happy. Sometimes I forget and hold on to too much and it makes us miserable.  I’m so excited to have a permanent record to come back and read to remind myself it’s okay to let go.

Anti-Hoarding Rule:  Keep only what I can use within a reasonable amount of time, and what I have a place for.

A reasonable amount of time depends on the item.  For food, it’s about 6 months worth.  For gifts and cards, I keep what I will use in a year.  For clothing that I’m saving for the next child–I allow a wait time of about 3 years.  I no longer have any baby girl clothes, even though I hope more babies are in my future.  My youngest girl is 7 years old and if I saved her clothing for a future baby, it would be collecting dust.  I feel better passing the clothing on to someone who can use it now and trust the Lord for the good deal to come along when I need it. 

I used to save maternity clothes too.  The first time I was expecting was through the winter.   The next 4 babies came during the summer and my winter clothes were worthless, but I saved them anyway.  With this 6th baby, I was pregnant through the winter again and the 11 year old clothes that I had saved were out of style and way too big.  How sad that someone else couldn’t have used them while they were still in fashion. 

A place for everything has new meaning for me.  The place needs to be attractive, easy to access, and not overstuffed.  If I don’t have a place for the item, I have to ask myself how much I want it or need it.  Just because it has value or is a useful thing, doesn’t mean I have to keep it.  Instead of imagining how I would use it, I imagine how I would feel if it were gone.  Would I think about it or miss it?  Would I need to go out and buy a replacement?  If not, then I feel okay with letting it go. 

This has been so freeing!  I have let go of an entire bookshelf of books, knowing if I changed my mind I could get them at the library.  I can’t even tell you what they were and I’ve never gone to look for one of them since.  I paired down my homeschool materials to only what I am using right now.  I had so many helps and extra activities, that I felt guilty that I wasn’t doing more with the children.  They certainly weren’t asking for more work!  I’m also going through my old letters and papers.  I haven’t thought about them since I received them and went from a huge bag full to just 3 very special pieces.

I’ve discovered the only holiday I decorate for is Christmas.  So I let all of my other decorations go–and I paired down my Christmas items to the ones that make me most happy.  It all fits in 2 tubs. 

The hardest part about letting go of things, is when other’s question my wisdom.  It’s already hard for me to part, and when someone else confirms my uncertainty I waver between keeping the item, and snapping back in frustration.  When I know an item will cause that response, I pack it in a cardboard box and drive it to a thrift store far far away (so I don’t accidentally shop there with that person and they find it!)  I’d never get away with putting it in a yard sale–or someone might cry out in disbelief and be hurt that I could let it go.  But when it’s gone, they just appreciate the cleanliness and never think of it again.  Even though I feel guilty on the drive home, it really is for the best.

I still have a long way to go.  Even though I’ve gotten rid of 4 huge storage tubs of fabric, I still have too much–and I have more sewing patterns than I could sew up in a life time.    Baby steps :). 

Guest Post: Decluttering Starts in Your Brain

www.jillcampbellfarris.com

Meet Jill Farris.  I don’t know where to begin to introduce this amazing woman to you.  She is a long time homeschooler, writer, and speaker and has spent much of her life working with Wycliffe in Bible translation.  There’s so much more to her than that though and you’ll be blessed if you click over to her blog (after reading this post of course–grin.)

Here’s Jill with her wisdoom on decluttering:

 De cluttering Begins in Your Brain

(and other wise and mysterious truths you didn’t know you needed to hear)

Years ago I read a Heloise’s Household Hints book that said we can hire someone to clean our houses but we can’t hire someone to make important decisions about which of our possessions we should keep, sell or give away.

Heloise was right! It’s up to you and I am here to help you face up to your responsibility!

If you are a follower of The Grocery Shrink you are a do-er (or a wannabe do-er). If you have read Angela’s incredible story of the really hard choices her family made to get out of debt and you were inspired by it, than you are just the kind of person who can learn to tackle clutter and create the kind of peaceful, orderly home you want.

De cluttering really does begin in your brain because that’s where you think about all the stuff you own.
Your brain looks at that strange looking thing that is (quite frankly) ugly to the rest of us and your brain says to your emotions, “Oh, don’t you remember? Your best friend in the eighth grade gave that to you the day you moved away and never saw her again…you can’t get rid of that.”


So you lovingly clean the ugly little whatever-it-is and cram it back into an already full box and then stuff the box back onto an overflowing shelf. Or, you may look at a brand new blouse and feel guilty every time you look at it because you paid too much for it and it wasn’t until after you got it home that you realized you didn’t look good in it. You can’t just get rid of it because (after all) you paid perfectly good money for it and you feel so bad about that…

You see how clutter starts in your brain?
We keep stuff for a reason. The reason may be as simple as being too tired to drop it off at the thrift store…but it’s still a reason.

I’m here to get your brain thinking about the why of your stuff (The why of your stuff doesn’t that sound like some odd motivational seminar?) because you can go through all the steps of clearing clutter and organizing your home but if you haven’t dealt with your emotional tie to your possessions nothing is going to change.

I’ll begin with stating a few truths that you probably already know but it helps so hear them said out loud.

1) People are more important than possessions. Value the people in your life and think less about what you wish you could buy.
2) Given the amount of stuff each of us has, it stands to reason that you will get rid of something and later regret it. I call this de clutterers remorse. It happens to the best of us. If you were meant to have that item again, you’ll get it again. If not, it wasn’t meant to be. Don’t waste time fretting about it.
3) Frugality does not mean holding onto everything. We have far more material goods than people did even 40 years ago. Even if you have a large family it may not save you money to hold onto clothes to hand down to the next child. Use your space wisely.
4) If you have a real problem with letting go of your stuff don’t have a garage sale. Planning a garage sale will postpone you releasing the stuff from your house. Get it out! It’s more important to free up time and space than trying to make money by selling it.give it away.

Another Heloise’s Household Hint said, “Never clean out a drawer or cupboard unless you are really mad….you’ll just clean it out and put all the same stuff back into a clean drawer.” Another good piece of advice!

Are you mad? Are you sick of the clutter? Or maybe (like Angela) you are nearing childbirth and feeling that last minute desperate “Am I ready?” feeling. Childbirth or frustration…whatever it takes.

Let’s start tossing! Yippee!

Guest Post: Carolyn from A Purpose Driven Home

Hello, there! I am Carolyn from A Purpose Driven Home, where you can find simple and motivating tips on how to manage all things home and family. I am excited to be sharing with you some ideas on how to create more space to organize in your home.

Finding a place for everything is the best way to get your home organized and to help keep your home organized. However, finding a place for everything can be difficult! That’s why I have laid out some helpful ways to create more places in your home for organizing all those things that need a home.

Get Height

Use all that wall space in your house! This can be done through tall bookcases, wall shelves, and hooks. Anything that either extends up or can be screwed into the wall will allow you more space for organizing. Here you can see how we utilize tall bookcases and wall shelves to create more storage for our desk/home office area and pantry area.

Utilize Doors

My favorite thing to use in creating more space is an over-the-door shoe organizer. The pockets are great for small items around your house that never have a specific place. Batteries (which can then be organized by size), clothespins, matches, measuring tape, and small flashlights are just a few of the many things that can be organized here. We have one in our playroom for erasers, pens, pencils, book rings, labels, anything artsy and creative. Then there is one on the back of the bathroom closet door for sunblock, lotions, shave gels, hair care, nail clippers and files. Finally we have one on the back of the main hall closet door that we use for everyday small things. The organizing possibilities are endless!

Baskets, Baskets, Baskets

You really can never have too many baskets. They are one of the best organizing tools. I use baskets all over our house. I especially love using them on shelves, creating little pockets of organizing space for corralling similar items together. Like in this picture below of the girls’ room. There are baskets for shoes, socks, and books. I can tell the girls (ages 1.5 and 2.5) to put away their shoes and they can do it! My other favorite area for baskets is by the door. We have one for adult shoes, one for kids shoes, and one for library books. Any way you use them, baskets are key in creating more space in your home.

Places to Scout

This is merely a list of suggestions and places I have found to be helpful in finding the above items to help me create more organizing space.

  • Ikea – A variety of bookcases, shelves, hooks, baskets… you name it. They have it. You can go either cheap or expensive. Our tall bookcases are from Ikea and I believe cost us under $30 a piece. I found this to be a great price for the amount of space it created for us!
  • Craigslist – Nice furniture at the retail price is tough to swallow. And cheap furniture brand new often doesn’t last. That’s why I love Craigslist! You can often find quality furniture at a great price. And if you have the time and patience, you can even turn a piece of worn furniture into something beautiful for your home with just a little sanding and paint.
  • Dollar Stores – My favorite place for baskets and bins! Most of my baskets are hidden behind closed doors or curtains or stuffed into small cubbies. So I really don’t need them to look super fabulous. I just need something cheap and easy.
  • Retail Stores After Holidays – I have found some gorgeous baskets at places like Target and Michaels shopping the post-holiday clearance section. And usually the “holiday” baskets don’t really look very holiday-ish anyways! Another great time to stock up on organizing items is right after the school season in September. We found some great big bins for our toys for $1 on clearance at Walmart after the school sales ended. Always check for clearance!

There are endless ways to create more space for organizing in your home. Using your wall space, doors and baskets are just a few. Sometimes you just have to think out of the box and get creative. Happy organizing!

Announcing: Giveaway Winners!

What a great response to the giveaway!  We had 302 comments and I loved reading all the tips.  I chose the winners by random number generator and they are listed below with their comments.  Kim, Moira, and Amanda won the Ebook Trio.    And Sarah and Marixa won the Etsy Shop gift card.  All the winner’s have been contacted via email.  Check your spam folder, just in case.

Kim Posted April 9, 2011 at 10:02 am

When using cloth diapers, before pinning them together, twist the front. Cross your arms and grab opposite corners and uncross them. Make sure the crossed diaper is flat and comfy. It gives baby wonderful fit and also provides extra padding for wetting!

Moira Posted April 7, 2011 at 1:26 pm | Permalink | Edit

I am so excited for this giveaway!

Amanda Posted April 6, 2011 at 10:28 pm | Permalink | Edit

this is maybe a bit silly for advice, but grab a soap dispenser that pumps your dishsoap straight to the dish, already foamed and ready to scrub (if you don’t already have one). SO helpful for quickly cleaning pacifiers, bottles, spoons, even pumping supplies.

Sarah Posted April 8, 2011 at 10:17 am | Permalink | Edit

My tip: introduce water to your babies when you introduce solids. I always made water the default baby drink. Then, only introduce juice after they have developed a taste for water. Make sure you only give juice as an occassional treat. All my kids are water-drinkers, and have been since 6 months old.

This looks like a great give away! I would love some new sewing patterns!

marixa Posted April 5, 2011 at 1:56 pm | Permalink | Edit

I’d love to win some of the sewing patterns for nursing/maternity/slings.
My tip: Do what your instincts tell you to do or don’t do.

*****************************************************

I’d like to confess a learning moment I had 11 years ago when my first baby was born. I’d been given the book Babywise during my pregnancy and drank in every word.  I knew I would be returning to work when my baby was 8 weeks old and I desperately needed her to sleep through the night.  I followed every word in the book faithfully, and my baby cried one night for 3 hours.  She didn’t do anything the book said she would and I was desperate and miserable.  I prayed that night, that God would send his angels to surround her and comfort her, since I didn’t want to go to her and spoil her.   After my prayer I felt a burning flood my whole body and the words entered my mind, “That’s why I gave her a mother.”  I immediately went to my child and comforted her. 

Later I found out that many of my friends that used the book also had difficulty.  One sweet baby had to enter the hospital and have a feeding tube because she was so used to feeling hungry (4 hours was just too long for her) that she refused to eat at all.  Another mother had an infant refuse to eat and she had to force feed her with a syringe to prevent starvation.  Many, many mothers lost their milk supply after 4 months and had to switch to formula.  The nursing schedule in the book just didn’t provide them enough stimulation to keep the milk going.  These are just my personal acquaintances, but the book was very popular in my circle of friends.  Not one family had a positive experience from it, and one boy in particular who is now a teenager, still suffers an attachment disorder from forced isolation in his playpen from the methods in the toddler book.

I’ve learned to cherish the middle of the night feedings and my babies have all chosen to eat every 2 hours give or take around the clock.  The benefit of this is my fertility is absent when nursing is this frequent, often lasting a year to 14 months.  This natural spacing has been a big blessing to our family and it ends the first night baby sleeps all night.  Much after my first child was born, I learned that God placed a special hormone in mother’s milk to help calm and put the baby to sleep.  It appears that He intended mother’s to nurse their little ones to sleep.  If a baby does nurse to sleep, mother’s milk also has beneficial bacteria that prevents cavities from forming if any milk is left in the baby’s mouth.  I do sleep with my babies until they are weaned, using a net safety rail on my bed to keep them safe.  I’ve never had a problem moving the baby to his new bed when it was time, but I know part of that is due to the baby moving into a room with an older brother or sister and not to complete isolation.

I don’t talk about this experience a lot, because I know how and when to feed a baby is a very personal decision.  But if any mother out there is feeling guilty for nursing her baby frequently, or to sleep, or for sleeping with her baby, I want to let her know that she has my full support.

6 Steps to take your room from How? to Wow!

Decorating is an art.  The truly gifted can see a room’s potential and how it will look in perfection like Mozart heard a symphony with all the instrumental voices in their harmonious parts before he wrote a note.  The rest of us can still decorate or even write music, if we come at it from a mathematical perspective instead of waiting for the “feeling” to tell us what to do.  Here are 6 easy and inexpensive things that will instantly improve the look of a room.

1.  Hide all electrical cords.  Here’s a photo of a dresser for sale on Craigslist.  Notice how the cords add to the clutter and take any wow feeling away from the piece of furniture.  In this situation, the remedy is as simple as neatly winding up the cords and holding with a rubber band or twist-tie, then tucking them behind the dresser.  Other times, the cords can be run along molding with a careful stapling job (staple around the cord not through it!)  When it’s impossible to hide the cord, decorate it with cord covers–Here’s a simple tutorial.

image 2233215871-0

2.  Paint the trim white.  If your wood trim is old, scratched, and dinged from years of life, lightly sand it, dust, tape off, prime, and paint it semi-gloss white.  If there are huge dings you can fill them with wood putty before sanding, but most of the dings will disapear from the flying horse’s glance with a fresh coat of paint.  White trim pops with any wall color and gives an instant updated brighter look to the room.

Image from Better Homes and Gardens

3.  Consider moving furniture away from the living room walls.  It makes the space feel cozier and more inviting.  Using a console table behind your couch is one way to help bring it out.  Experiment with putting furniture on an angle or just moving it a few inches closer to each other.  

100839810

4.  Use mirrors properly to enlarge a room and bounce light.  The only way to go wrong with a mirror, is to have it reflect something ugly (I’m not talking about people here), like a blank ceiling or a pile of clutter.  Simply altering the angle of the mirror with a piece of styrofoam behind it can improve the reflection.  The reflection in the mirror, should be akin to a piece of art.  Purposefully placing flowers, a painting or a crystal chandelier in the place of reflection is a good design tool.

Image Source: Amy D. Morris Interiors

 I have found lovely mirrors at garage sales for $1.  Some were disguised as dresser mirrors and I used a small screw gun to remove the dresser hardware from the back and gave the frame a fresh coat of paint.  Then I took it to Hobby Lobby where they installed a hanging wire for just $1 more.

5.  Use indirect lighting to soften the room.  When close work (such as sewing) is not required, using lamps and candles instead of an overhead light makes a room more cozy.  Indirect light is also more flattering to the people in the room.  Lamps can be expensive, but it’s amazing how a dated looking lamp looks new again with a fresh coat of paint and a shade treatment.  Or consider creating your own hanging lamp from an Ikea Hemma unit and a paper shade. Click the photo to go to more lamp ideas.

Wicker base lamp with floral shade

6.  Use slip covers to unify the furniture in a room.  Most of us on a budget have mismatched furniture.  I have two sofas in my house and one we drug out of the neighbor’s trash in the dark of night.   We have been married for 12 years and are just now scraping enough money together to buy a few pieces of furniture.  The rest of what we have has been hand me downs, trash picks, garage sale finds and Craigslist snags.  If your furniture is not upholstered, a paint job can make it all look cohesive.  Otherwise, slip covers transform a room for very little money.  They don’t all have to be the same color if they are a similar style.

Help Children Help

My mom had the brilliant idea a few years back to personalize dish tubs for all of the children.  We wash all of our clothes together and as we fold, we can place each child’s clothes in his or her own tub.   It is small and lightweight so even our toddlers can carry it to his room and put it away.  My tubs could use a facelift so I searched the web for another mother that used the same system.  I found one!  Click the picture to see what  Phoebe from Getting Freedom from Debt has to say about it.

Teaching children to help with laundry can require a lot of patience.  I start by giving the little ones washcloths, toilet wipes, napkins and small towels to fold.  They also learn to take the laundry out of the dryer, put it in a basket and push it to the living room for folding.  We start this type of training around two and half to 3 years old depending on the maturity of the child.  A child that age can also learn to sort clothes by color. 

I also moved the clothing to the bottom drawers in the dresser for the little ones and greased the drawer runners with soap so they could easily open and put their things away.  Shoe boxes make perfect drawer dividers so they can see where their socks, underpants, and pajamas should go.

By the time the child is 5 or 6, he or she can move the laundry from the washer to the dryer.  At our house, that requires a step-stool since we have a top loader.  At age 8 or so, a child can learn to put the clothes in the washer, add detergent and start a cycle.  We are working on showing them how to spot stains and pretreat them, though ideally that is done before the item hits the laundry pile :).

Final thoughts:  A two or three year old can “help” but really neeeds a Mom, Dad or older sibling there to do the work with him.  He only does about 10% of the work , but learns while watching an adult do it too.  By the time a child is 5, he or she can do a lot more jobs that are actually helping and saving Mom time, but around this age, their desire to help can start to wain.  You can help encourage them by rewarding a job well done, working nearby on a different task so they still feel the together time, and showing a general cheerful attitude about work. 

Our children will love what we love!