Grace was a camper in my cabin many years ago when I was a counselor at Jr. High camp. She has always been tender hearted and giving, a true beauty inside and out. They recently expanded their family of 6 to a family of 8 with the addition of two foster children, and their 3 bedroom, 1 bath house felt a lot smaller.
The doorway to the left of the stove is where the old dining room door was. Now that it’s walled off, her fridge can go there.
This winter they sold their home and moved to a fixer upper just a few streets over from me. The whole family pitched in together to wall in the dining room to make another bedroom. They also added another bedroom to the one already finished in the basement.
The wall straight ahead needs to come down. It’s a load bearing wall, with ductwork and electrical in it, so it’s not a simple job.
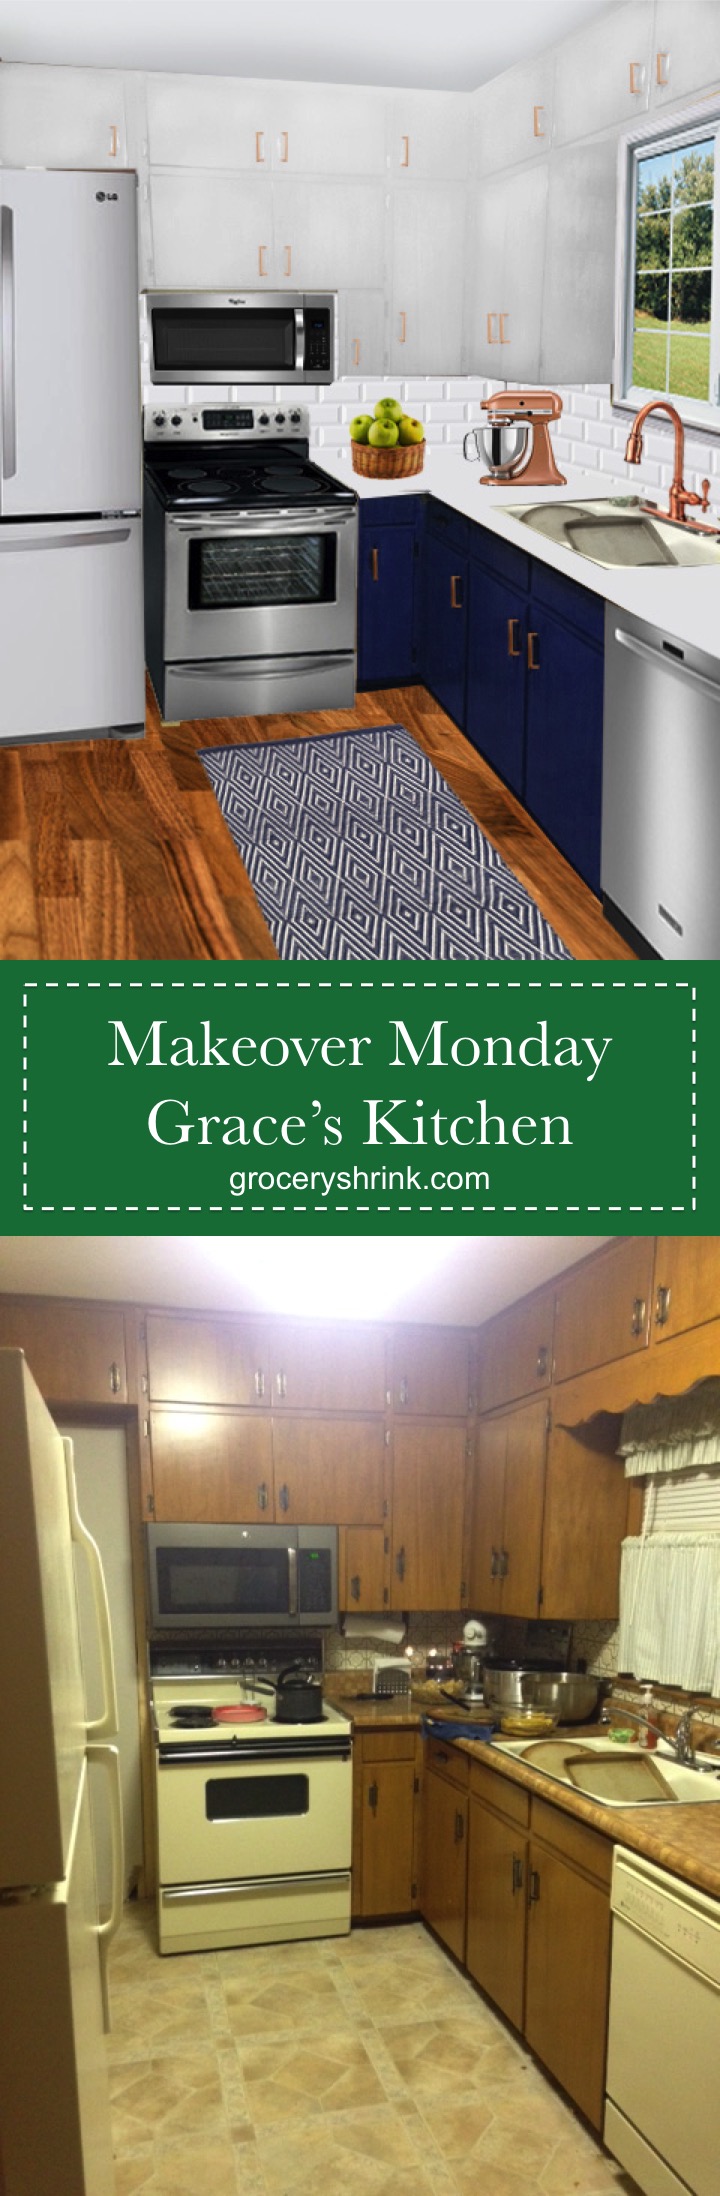
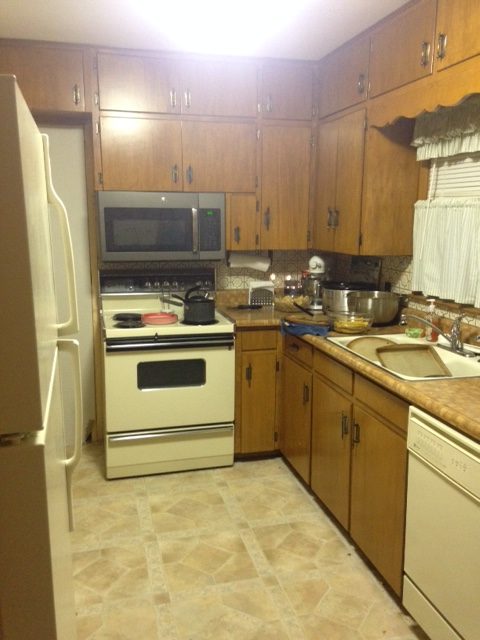
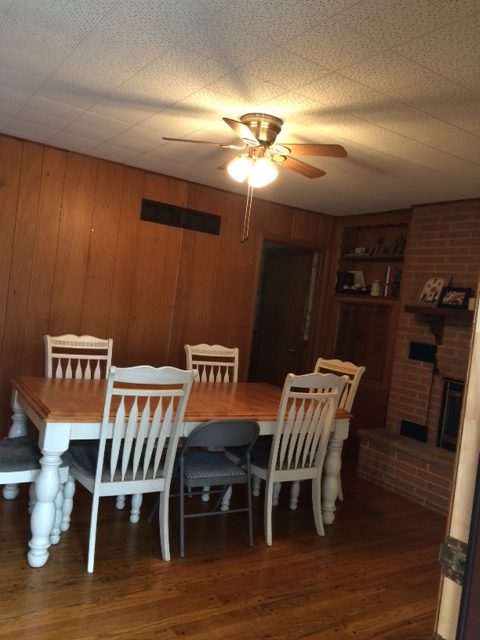
Grace hosted a youth activity at her home a few weeks ago and invited my kids to join in the fun. When I dropped them off, I was super excited to peek at the new digs. She had two living rooms side by side. They turned one into the new dining room since the existing dining room was now a bedroom. She mentioned her dream of taking down the wall between that room and the kitchen and adding an island for a more open feel and more workspace, and I offered to show her what it might look like in photoshop.
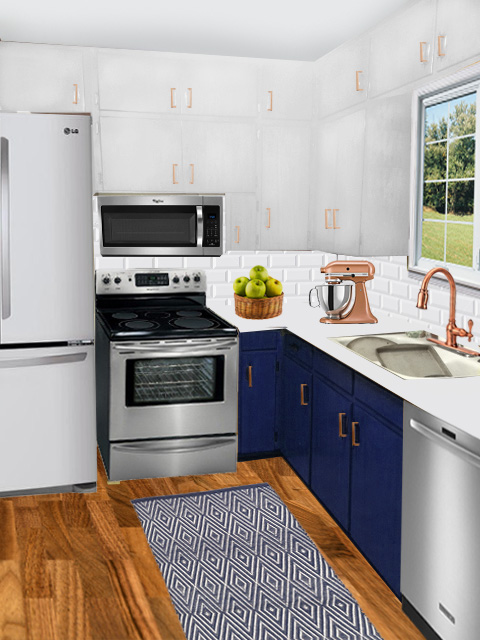
For her kitchen I removed the scalloped window trim and painted her upper cabinets white and the lowers navy blue. And gave her copper drawer pulls, faucet, and mixer to warm up the space. The navy runner is from Dash and Albert. The new fridge is tucked next to the stove, giving her room to blow the wall out to the left.
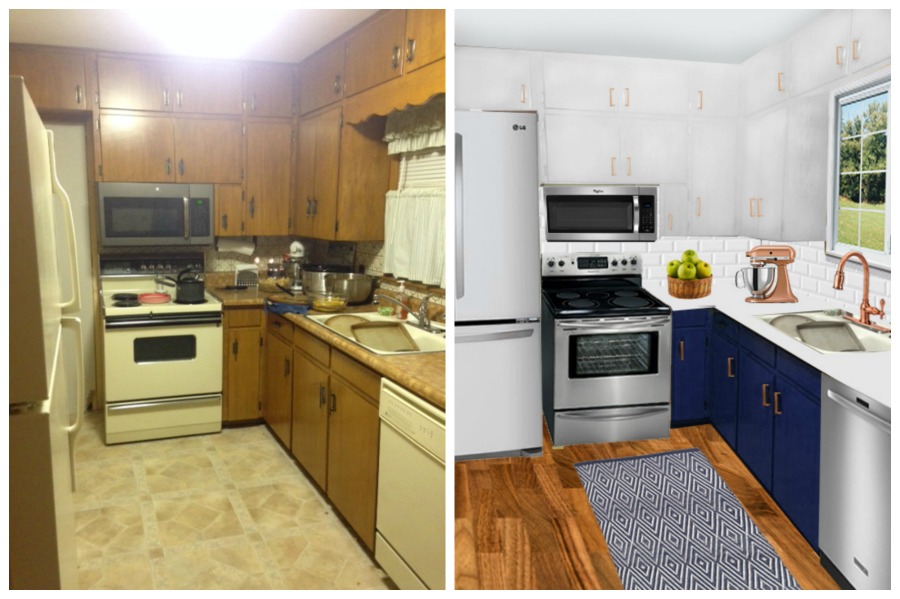
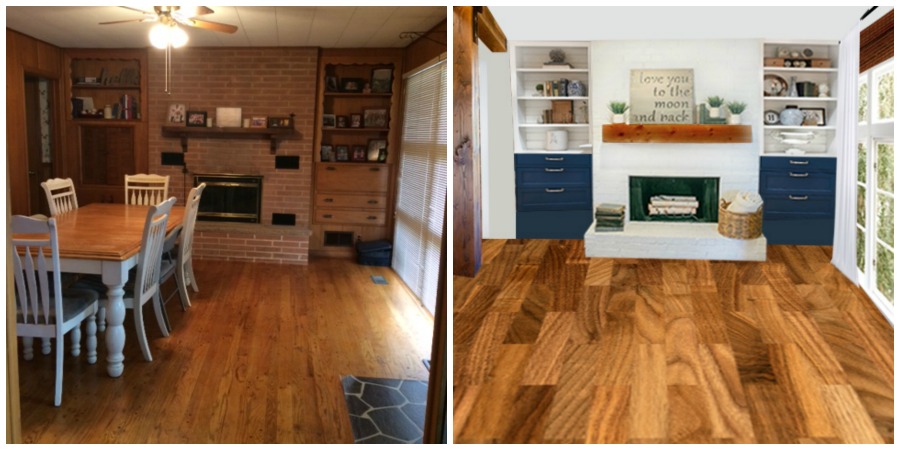
Here’s a side by side view.
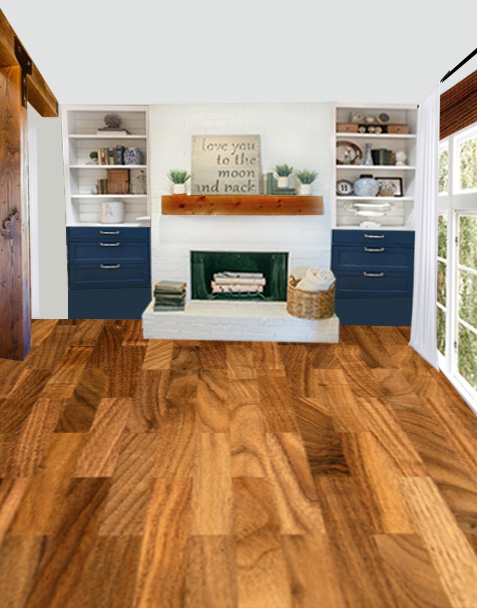
In the dining room, I rebuilt her built in cabinets to be symmetrical, then gave them the same navy/white combo as her cabinets to make it feel like one big room. I used a chunky beam to support the house with the wall gone and moved her duct work to the east wall. The electrical outlet can go right on her island between the two rooms. Her fireplace got an update with white paint and a chunkier mantle. Her original dining room table is already the perfect style and size to pop right back into the room, and with the table in place, she can put in a signature light fixture over the table.
Her original ceiling is tile, but since the wall is coming down anyway, I suggested they put drywall up instead. I replaced her mini blinds with bamboo shades and simple white Ikea curtains. I love her original floors, but with the wall down and the kitchen floor not matching, I showed them what it would look like to use vinyl click floor instead. It looks like wood but it’s 100% waterproof and less prone to scratches than wood floors. That’s a good combination with a lot of young kids around.
Would you like your room photoshopped and featured on Makeover Monday? Send a few photos from your space to angela@groceryshrink.com and tell me your hopes and dreams for the room.
Get a full service virtual makeover complete with 3D room layout plan, 2 photoshop views, step by step work list, and source list–all in your budget. Find out more.

Learn how to use Photoshop your own designs with the Room Makeover class.